Top 3 Inspirational Photographers from history
Continuing with my 'Top 3' theme for March, I'm back today to share with you, my top 3 inspirational photographers from history - those photographers who are sadly no longer with us, but whose work continues to impress and inspire.
Want to listen to this post instead of reading? Great! You have 3 options:
- Head on over to iTunes, Subscribe, Leave some feedback and a review
- Don't like Apple? Then check out the Stitcher Radio Podcast App!
- Listen right here on the blog: Click play below on the audio player.
Last week I shared my top 3 favourite / inspirational wedding photographers and in the coming weeks, I'll be sharing with you lots of my top 3's, including my top 3 favourite photography podcasts, my top 3 Adobe Lightroom processing tips and even my top 3 creative working spaces in London.
For now though, let's dive into top 3. Some of you may be asking yourselves why it is I'm talking about 'Photographers in history' and not just photographers. Well, I've already shared my favourite 3 photographers right now in a previous post from back in 2015 - and those photographers remain very much the same to this day, but I wanted to talk a little more about those photographers who are sadly no longer with us. Those who have left behind a portfolio and body of work that have no doubt had an impact on many of us at some stage.
In truth, had I written this article around 18 months ago, 2 of the 3 photographers in my list wouldn't feature, because it is in only in recent times that they have unfortunately passed away.
So, let's get started. Here are my top 3 inspirational photographers from history. Be sure to check out the links - the work and projects they've left behind are definitely deserving of your time and viewing. (be sure to drop your favourite photographers in the comments too, or send me an email at Michael@RammellPhotography.com)
1. Fan Ho. October 1931 - June 2016
Fan Ho, is perhaps less of a household name than the likes of Henri Cartier-Bresson, but for me at least, his work has left a huge impression on me and serves as a benchmark for what quality, impactful work should look like.
Without disrespecting any other accomplished Street Photographer (or at least not wanting to), it could be said that many of us have work that looks similar. After all, nothing is new these days, especially to an untrained eye. However, there is no mistaking a Fan Ho photograph for anyone else's.
His work has that unmistakable film look, it's Hong Kong during the 50's & 60's in an era less seen in photographs. His work was minimalist and clean in a way that was ahead of it's time. That shows in the way that the work still feels new today. Yes, sure the work is old now, but it has not aged. The fact it is shot on film is obvious, but the style feels ultra modern. The use of geometry, light and shadow, and black and white make every Fan Ho Image unique and identifiable as a Fan Ho Image.
I talk about making intentional images quite often, the idea that you see a scene and make the picture, rather than just taking it - ducking and weaving to look for a stronger composition or even coming back at another time when the light is more pleasing. To me, all of his images I've seen, seem to exhibit these intentional acts, perhaps more than I've ever seen in work by other photographers.
I've been admiring Fan Ho's work for as long as I've been a street photographer and was devastated to discover he had passed away in June 2016. I can't even remember exactly when it was I came across his work for the first time, but since that time a link to his website has taken firm pride of place atop my list of bookmarks and I view it more regularly than any other photographers' work from any genre or decade.
There's simply no mistaking Fan Ho for someone else.
His work, like many master photographers (and I mean to use that word in a literal sense, rather than just in a complimentary fashion), had a number of books to his name featuring his work. One of note, and one that is still widely available today, is 'Hong Kong - Yesterday'. For this book, Fan Ho revisited some old, previously un-printed negatives he had stored away to produce a great collection of work that had, before then, not seen the light of day.
It makes you wonder what other negatives he had that also didn't meet his high standards, that the rest of us would quite possibly simply marvel at!
Ted Forbes' Study and Farewell videos on YouTube
My aim with this post is to simply encourage you to take a look at Fan Ho's work in the hope that you'll find it as inspiring and captivating as I do. That said though, if you're looking for a succinct, yet thorough study of Fan Ho, then no one does it better than Ted Forbes of The Art of Photography show. Ted dedicated two episodes of his YouTube / Video Podcast. In the first episode Ted walks and talks us through his life and work.
Ted Forbes looks at the life and work of Photographer, Fan Ho. Born in Shanghai in 1931. After learning how to develop images using the family bathtub he went on to be one of the most notable street photographers and finest artists China has produced.
Then, after Fan Ho's death back in June 2016, Ted released a lovely video in homage to the talent that he was:
2. Mary Ellen Mark. March 1940 - May 2015
Whoever you are, whatever you shoot and even if you're relatively new to photography, Mary Ellen Mark should be a name you recognise at least. Given the amount of press and coverage that she and her work (rightly) received in the past few years.
She is known mostly as a photojournalist and documentary photographer, who's images told great stories (often single images were able to tell entire stories!). She had a stint as a Magnum Photographer and produced work that featured/features in galleries and museums all over the world. Mary Ellen Mark worked on documentaries, most notably 'Streetwise in Seattle'. As you would expect from such an accomplished photographer, She also has over a dozen books to her name too.
From a purely photographic perspective, Her work captured so much within a single frame, not in that there were lots of subjects or that the images were busy, but rather that each image was filled with a story. Or, rather the image perfectly accompanied the story that she was telling with a particular project. In her interview with Mark Selliger (Which I'll come to shortly), she talks about the time she photographed in a morgue. Whereas most of us would averse to doing this, Her desire to document and tell a story took over, enabling her to produce images of the bodies that are both shocking, but compelling to look at too.
despite appreciating art myself, I often 'don't get art', but I'm inclined to say that these particular images are very much art.
Many of the portraits that She made were simply haunting, in a uniquely Mary Ellen Mark style.
I myself only became aware of Mary Ellen Mark through a YouTube show called 'Capture', hosted by Mark Selliger. In one particular episode Mark Selliger interviewed Her along with Helena Christensen. Now, yes, it really is only recently that I became aware of Her compared to many. Never-the-less though, I admire her work, her words and her projects and only hope to be able to make a small percentage of the impact that Mary Ellen Mark made on the photographic world.
If you get a chance to watch this episode of Capture, you'll hear that She worked exclusively with film her entire career.
Mary Ellen Mark also gave a talk at the Photography Show in March 2015, just month's before she passed away. I was at the show that year, but unfortunately didn't get a chance to see her give her talk. It bothers me to this day that I missed that opportunity to hear such a wonderful and talented photographer.
Mary Ellen Mark makes my top 3 because of her strength as a storyteller. As someone who wanted to make an impact with her images and because she was an artist in every sense of the word.
3. Jane Bown. March 1925 - December 2014
When it comes to portraits, I'm a believer that the technical is simply unimportant. Sure, you can use 100 lights in a perfect studio and the lighting matters, but it is the relationship between the photographer and the sitter and the ability of the photographer to capture it, that comes through in the final image. I know that many portrait photographers out there at this point may either be screaming 'NO! What are you talking about you're totally wrong' whilst many others may be in total agreement with me, that the connection is more key, but, I just think that portraits are often as much a reflection of the photographer, as they are the subject.
Jane Bown, for me, is a beautiful example of this.
Bown is another superb talent who has passed away only relatively recently back in 2014. However, before she passed away we were fortunate enough that she was able to do a series of interviews and recordings to talk about her work and share some of her stories, meaning we have more of a record of what the woman behind the camera was like. To us, the public (not family members), we're often curious about what it takes to produce work like Her's and what's involved to get those opportunities. It was evident that years of hard graft and effort, as well as consistently producing her own wonderful style of images, was the key to that.
Bown worked for the Observer Newspaper (UK) for a little over 60 years, which gave her many assignments to photograph some well known people, such as Bjork, The Queen (The actual Queen, as in, The Monarch), Mick Jagger and more. Rather than me simply regurgitating those stories here on the blog however, I'd encourage you to have a look at a beautiful documentary called 'Looking for light: Jane Brown' (snippet below):
For me, there is so much more to her than is even discussed and mentioned in the documentary. For example, just the fact that she was a female photographer during a time when it was very much a male dominated industry, in a male dominated time! (50's, 60's & 70's). It's perhaps a discussion for another time, but equal rights had a long way to go back then and still aren't where they ought to be, even today.
As mentioned, I'm a lover of black and white, and with Bown's work featuring nearly exclusively mono images, this is perhaps why I'm drawn to the images she has produced.
Now, as I have said many times before, that gear doesn't matter, there is a little bias here for me when it comes to Jane Bown, as she and I are both lovers and users of Olympus cameras. Whilst she used the original Olympus OM-1 35mm film SLR (groundbreaking at the time), I entered the world of Olympus with the very modern take on that same camera with the Olympus OM-D E-M5 - the modern day incarnation of Bown's camera of choice. Although she Initially photographed using a Rolleiflex, she later moved to Olympus OM-1.
Portraits are a challenging discipline. Some find that the more time they have to think, the more paralysed they can become by the choice that becomes available to them. Whilst others thrive in limited environments, with limited time. Bown proved she was more than capable no matter what the situation. In another video I found on YouTube, Bown talks of the time she photographed Samuel Beckett, who tried to leave without having his picture taken. Ever the optimist and thinking on her feet, however, she pursued Beckett as he left the building and proceeded to make his portrait in the alleyway outside. That image is very much one of her standout Images to this day and features in many of the documentaries I've seen and bodies of work of Bown that I've managed to find. Again, I've included a snippet of this story in this YouTube video:
Books & Media
Like all of the greats, She has a few books featuring her work. All of them wonderful. Jane Bown's 'Cats' in particular is very playful. At first it may sound odd that such a legendary portrait photographer has a book filled with 100 cat portraits, but in truth, that same unique Bown style and feel comes through just as strongly with the 'portraits' of the cats, as it does with her images of John Lennon, Samuel Beckett and the other famous people she has in her portfolio. It is well worth a read. Other books include 'A Lifetime of Looking', which is perhaps could be considered her 'title' book. It features an extensive collection of her most iconic images, as well as images only published in this book too. Another Jane Bown book, although, less widely available as far as I can fine is the aptly titled 'Observer', both in that she observed life, but also in that she worked for The Observer Newspaper and that the work featured in this book is the work Bown made when on assignment for the paper.
Conclusion
So, if we're talking about photographers who have unfortunately passed away, but who's work lives on, these have been my top 3 most inspirational. Who are yours? Henri Cartier-Bresson? Saul Leiter? Drop a comment below or get in touch with me via email, at Michael@RammellPhotography.com. You can also use the contact form too.
I love discussing photography, so if you'd like to talk about it more with me why not join me in London on April 30th for my latest FREE photo walk. All of the details are available over on the events page. Be sure to check it out and sign up. It's open to everyone and there are no limits to the number who can attend. All you need to do is register your details and show up on the day.
Be sure to check me out on Social Media. Everywhere possible I go by @RammellPhoto - that's on Twitter and Instagram. All those links are below:
Street Photography Tips (Part 2) & Book Giveaway
[To listen to the audio hit play and then give it a second to buffer. The audio is high quality]
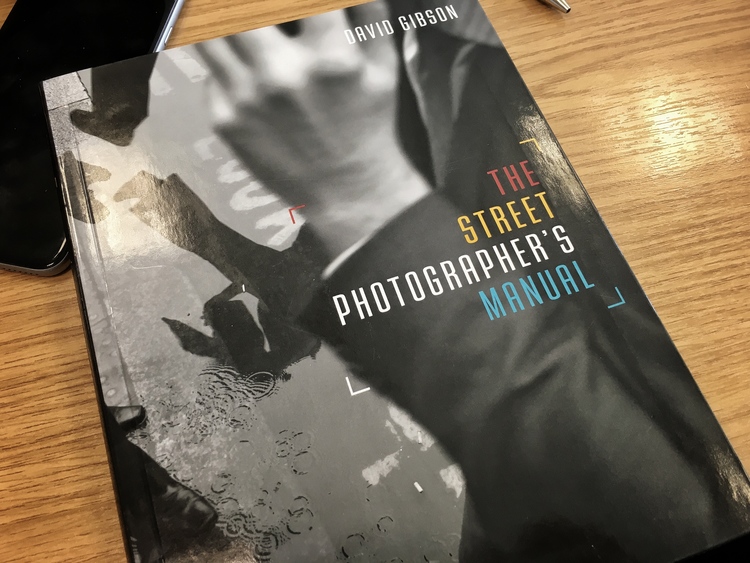
Following on from last week's post where I shared a few of my top tips for improving your street photography, today is the promised second part of this little series. In part one, I also announced the book giveaway too, where you can be in with a chance of winning my own personal copy of David Gibson's 'The Street Photographer's Manual'. The winner of that competition will be announced on January 31st, so be sure to enter today. Details on how to enter can be found at the bottom of this post.
Before we dive into the tips in this post, let's briefly recap on the first 3* tips I gave In last week's post:
- Isolate & Simplify - Keep the frame clean and make it clear what your subject is
- Tell a story - Is your photograph engaging and interesting? Does it have a point?
- Get closer to your subject and be bold and brave! Fill the frame.
- *BONUS TIP: Michael Pung - Street Portraits
If you missed that post be sure to check it out!
Improve your Street photography in 2017 with these top Tips:
1: Hunter & Fisherman approaches
I've been asked numerous times how it is I actually set about seeing and making street photographs; do I spend the entire day walking or do I sit and wait for the scene? The answer is both!
It's fair to say that these two different approaches will yield different results. They will also suit different photographers too.
Let's start by talking about the method whereby we pound the streets, walk around, cover ground and find the moments. Or, the 'Hunter' method as I like to call it...
As a hunter out on the streets, you'll find yourself spending the day walking. This can be great if you're able to physically do this, but you need to be conscious to keep your eyes open to the scenes around you, and your wits about you as you walk, especially on busy city streets. The idea of hunting for a scene and a subject offers us as photographers plenty of variety. As we move from street to street and district to district the backdrops will change dramatically.
Camera: Olympus OM-D E-M1. Lens: 25mm f/1.8 @ Aperture: f/1.8 Focal Length 25mm ISO: 400 Shutter Speed: 1/3200th
As with many larger towns and cities you'll find that the architecture changes from one area to the next. Knowing London as I do for example I can tell you that you have the white rendered buildings, people in suits and cigar shops of St James', then the tourist parts of Leicester Square and Covent Garden, the colours and smells of Soho & the uniqueness of China Town for example. Whatever city you go to, you're likely to experience that same variety. As a hunter you'll sit at your computer later that evening and be welcomed by photographs that are very different from each other owing to the fact you saw different parts of the area.
Camera: Olympus OM-D E-M1. Lens: 12-40mm f/2.8 PRO @ Aperture: f/2.8 Focal Length 25mm ISO: 200 Shutter Speed: 1/2000th
Whilst that variety can be found by clocking up miles, what I often find some people struggle with is actually seeing photographically whilst they walk. By this, I mean; the walking itself can actually prevent you from seeing things. Either because you're physically tired, aching & thirsty, or just because your mind can wander as you get lost and explore new places. If that sounds like you, then the fisherman method may be something you should start out by trying...
The fisherman method, as you may have guessed, would see a photographer finding a spot or an area in which to roam. Perhaps a park area or a junction or cross section in the city? Again, thinking about London you could perhaps consider South Bank. Whilst the fisherman approach to street photography is less likely to yield the variety that hunting offers, there are areas, such as South Bank, where the variety will come to you! In a small stretch of 100m, where the walk way is not too wide that people can't really escape your range, you can photograph people discretely as they walk past. Whether they're a commuter on the way to work, a jogger keeping fit during lunch time, tourists with cameras or street performers or skateboarders. Finding an area similar to London's South Bank can very much feel like shooting fish in a barrel (metaphorically speaking of course).
Camera: Olympus OM-D E-M1. Lens: 25mm f/1.8 @ Aperture: f/2.2 Focal Length 25mm ISO: 4000 Shutter Speed: 1/15th
The intention and idea of the fisherman method however doesn't necessarily just mean you stay in one area. In an even more intentional way with even less movement required you can instead look for a backdrop or a stage for a scene first (again, metaphorically speaking) and then wait patiently for your subjects to walk onto the set. For example, finding an archway, a set of stairs or steps or a bench, to name but a few ideas. You can position yourself and ready your composition and your settings and then just wait for something or someone interesting to happen. It could be that someone sits on the bench. It could be that a skateboarder jumps the steps or grinds down the rail. It could simply be a chef on a cigarette break in an alleyway behind a restaurant, cafe or diner. Whatever the case may be, you can start by readying the scene and waiting for the interest.
Camera: Olympus OM-D E-M5. Lens: 17mm f/1.8 @ Aperture: f/10 Focal Length 17mm ISO: 3200 Shutter Speed: 1/13th
Again, as the name suggests the fisherman method can very much be a waiting game, where the patience you invest is what will reap you those rewards.
Camera: Olympus OM-D E-M1. Lens: 17mm f/1.8 @ Aperture: f/1.8 ISO: 800 Shutter Speed: 1/640th
So, as I say: choose a method that you think sounds more appealing to you and give it a try. But you never know, some 'hunters' may find the 'fisherman' method more rewarding than they think, and some 'fishermen' may find the occasional hunt for a subject an exciting experience!
2: Choosing a cameras & lenses for Street Photography
If you're reading this post, I'd say there is a relatively high chance that you have looked online as to what equipment is best suited to street photography, or, you've already formed your own opinion as to what you think is best. My opinion is that there isn't one good answer and there isn't one camera that is necassarily better than any other. A DSLR will have advantages over a compact or a mirrorless camera, and likewise a smaller, lighter camera has its obvious advantages too.
Whilst there are cameras such as the brilliant Olympus PEN-F and accomplished Fuji X100t that are super small, lightweight and help you to look very incognito as if they're designed specifically for street photographers, I've heard some very compelling debates to suggest that having a DSLR out on the street can in fact help to convince others that you're just a tourist too! After all, it seems everyone is a photographer these days and more and more people are investing in 'big cameras'. I guess having a DSLR could in effect actually help you to blend in, in an odd sort of way.
My own belief is that you should use the camera you feel most comfortable and familiar with, whatever that may be. You don't need to wait until you have that latest mirrorless camera and you shouldn't be put off by 'only' having a Full Frame DSLR. Both will get you results - it's you that has to be ready to see the moment and capture it.
Without sitting on the fence though and with all that said, let's consider the practical advantages of a smaller, lighter camera here: you are going to find that you need a smaller bag for it all, which means you are likely to be less fatigued by the end of the day. These mirrorless cameras often offer a totally silent electronic shutter mode and, arguably, in my opinion, you are less likely to be considered a 'serious' or 'professional' owing to perceptions alone. So if you can put your ego aside for one minute, it could be that on this occasion looking like an amateur or tourist is a good thing (I would say though for the record, I don't agree with the perception, but it is a hard one to argue. I wrote about my feelings on this in my 'Why Olympus?' Post)
So, whilst this section of advice isn't necessarily me telling you exactly what to carry and use, I would loosely suggest the following things to I think aid you physically and creatively:
- travel light.
- pack one camera & one lens
- pack a spare battery
- use as small a bag as possible
Travelling with one camera and one lens, whichever lens that may be, will serve to help you focus only on the scenes and the moments happening in front of you and less on the gear you have in your bag.
3: Times, Locations & Days to shoot (Workshops)
Every time is a good time for street photography! It doesn't matter if it's a dark winter. It doesn't matter if it's raining! These elements are only going to provide an extra dimension and level of interest to your photography. Some of my own personal favourite images that I have made out on the street have come on late December and January evenings. I wrote a post back in 2015 that went on to be featured in the Olympus Magazine where I spoke about low light photography and how to tackle it (you can check that out right here on the blog).
Whilst this answer is somewhat generic, I would personally suggest that you should look to book yourself onto a local photo walk or tour with an experienced street photographer. Whilst that person doesn't necessarily need to know the area (one could argue), I'd say that a local will be able to take you to the lesser known areas, which will definitely go some way to helping you to produce more unique images.
One man that can talk about this a little better than me is Paul Griffiths and so I've invited Paul to share his thoughts on what it is a Street Photography Tour or Workshop can offer you. For those of you that don't know Paul; runs the popular Photography Live & Unct Blog Video Blog over on YouTube. Paul is an accomplished Photographer who knows London like the back of his hand having worked in the city for many many years. Today though, when not interviewing some of the world's most renowned photographers for his show, you'll find Paul leading tours & workshops on the streets of London.
Here's what Paul has to say about the value of work shops:
Setting targets, joining camera clubs and making New Years' resolutions are great. But ultimately, there’s nothing better than just getting out with your camera and ‘taking’ (or rather making) images.
Image used with permission of Paul Griffiths. Image Copyright by Paul Griffiths
For anyone that enjoys Documentary or Street Photography, you will likely be aware Photo walkabouts where a group get together and hit the streets together, but it could be argued that these are not necessarily the best means to learn when it comes to street photography. Sure, you can exchange ideas and talk about cameras all day, but invariably a walkabout typically starts off with a group sticking together and eventually disintegrating and becoming separated as attendees drop away, get lost or sometimes decide to go another route.
It's not really the type of event to gain tips & skills from!
"Practice makes perfect!" & "Your photography will improve if you practice!"; You've no doubt have heard these statements before? Well, they are true, but practice with guidance and the practice is improved!
http://www.photographyliveanduncut.com/aboutmecontact/
Rather than an unguided walkabout with a lack of intention, the ardent photographer should start to look for better options to learn and improve their craft. One such way is a structured Photography Workshop.
Whether you prefer working indoors or outdoors, these days you're very likely to find one to suit you and your style of learning. The best workshops typically host not more than 6-8 people, offer a ‘hands on’ and experienced tutor who encourages and can demonstrate camera skills and who can take you out of your comfort zone in order to expand your thinking and widen your horizons! That's the best way to learn!
This is exactly what we at ‘Photography Live and Uncut’ offer: a workshop that will teach you new skills and enable you to try different ways to make photos and to get you out of that comfort zone. You may know your settings and compositions already (great!), but we'll start by helping you to see photographically - the art of seeing a scene and a story in front of you. We offer workshops that are both studio-based and out on the streets, depending on your preferred genre. We're here to share everything we know with you to ensure you gain the most from your workshop experience. Everything we teach and do is aimed and focussed towards improving your photography
If you want to know more information about one of Paul's Workshops, made available through Photography Live & Uncut, simply check out his website. (Pssst, be sure to follow Paul on Social Media too if you want to be notified of the latest workshop dates)
4: Bonus Tip: Expectations of your own efforts
Looking at the portfolio's of some avid street photographers, who have galleries full of images from the street, it can seem that the expectation of an afternoon out on the streets is to come home with a dozen images that you think are wonderful. Whilst I don't want to suggest that your work isn't good and that you haven't got a dozen good images after a day of shooting, in reality, the chances are you'll end up with just 1 or 2...or possibly none!
As photographer's we should only be showing our absolute best work. So, when you load your images into Lightroom, or Aperture or whichever is your preferred tool be selective, conscious and give thought as to which images genuinely have content, story, an interesting subject and are of a quality you are happy with. If you are able to honestly look at an image and say that it contains elements from each of the tips from these two posts that i've written (that being part one from last week and this post too), then go ahead and share it. But if, after mulling over an image you realise it doesn't have any 'Pull' or interest, then don't be disheartened.
You've probably heard people before say 'I make my own luck' and whilst I think there is something in this phrase, really, what luck is, is where preparedness meets opportunity. I guess what I'm saying is that it is your job to be prepared and to spot the opportunity. But, that's not to say that opportunity will always present itself to you in the form of an interesting scene to photograph. Sometimes, the interest is more subtle and as such you have to try harder to spot it.
The reason I'm ending this short series on such a note is because, in reality, all you are doing by applying all of your skills and possibly even by following the advice that Michael Pung, Paul Griffiths and myself have provided in these two posts, is increasing your chances of capturing something worth sharing. It's not offering you a guarantee at all.
In the first couple of paragraphs in the first post I did say that Street Photography can appear to be easy and simplistic. But I'm sure, after having tried it yourself or even just having been through my top tips, you'll appreciate that there is far more to capturing an image on the street that you had possibly considered.
Sure, you may have days where you come back with a bunch of great work, but others, you may come back with nothing. You will soon realise that not everything you capture, despite your best efforts, is actually as good as you may initially think. Don't think of this as a reflection of your overall skills as a photographer, but remember that capturing a quality, engaging and interesting moment on the street requires a lot of things to fall into place at the right time and that everything happens in the blink of an eye; press that shutter just 1 second later and the story inside the frame you just captured could be totally different.
Street Photography can be a funny old mistress that can reward you. Other days you'll return home with nothing to show for your efforts. It's cruel, but that's street photography.
...The End!
Book Giveaway
Okay, so if you're here for the book giveaway, look no further. I'm giving away my own personal copy of The Street Photographers Manual by David Gibson.
I loved this book so much that I felt compelled to write a review here on the blog (you can read that book right here). Coupled with this post, I thought that it would be a great companion for anyone looking to improve their street photograph and so, I'm giving it away for free!
Review Excerpt:
"Whilst the book itself may be called a manual and does offer instruction to help you create more thought-out and intentional street photographs, this is also a very impressive and vast study of street photography. This book looks at both various techniques and elements that contribute towards stronger imagery and makes use of examples by the greatest street photographers of our time such as; Elliott Erwitt, Bruce Gilden, Saul Leiter, Trente Park and more. These examples give the book's instructions conviction and only serve to show that this thorough - yet concise - book is something you can not only read for inspiration, but learn from at the same time. Within each chapter we are introduced to either another master of Street Photography or another technique of shooting on the street, each accompanying a sample of that master's work or an example of that technique in action to best explain and demonstrate the case in point"
To be in with a chance of winning my own, personal copy of The Street Photographer's Manual, subscribe to the blog using the form below and share this post on social media (be sure to include a link back to this post). If you're already a subscriber, just drop a comment below. I'll canvas all new subscriptions and comments and pick the lucky winner from those.
Good luck everyone! Thanks for stopping by.
Micro Four Thirds Depth of Field Explained
Hold on to your hats folks, because this weeks' post is a long and technical post! But In recent weeks I've seen quite a lot of misinformation going around when it comes to Aperture and Depth of Field with Micro Four Thirds Cameras. So today I want to put a stake in the ground and set out in the simplest of terms exactly what impact a Micro Four Thirds Sensor (and an APS-C crop sensor for that matter) has on Aperture, Depth of Field and Effective Focal Range.
If you're in a position to listen then go ahead and hit play on the audio player below, if not, scroll down a little further and you can read through today's post in your own time. Either way, the audio is the same as the text to make sure you're not missing out. After hitting play give it about 5 - 10 seconds to start:
I spoke briefly about this in a post I wrote called 'Why Olympus' in which I looked to demystify many of the myths about the MFT format. But the subjects of Depth of Field (or, an apparent lack of according to some) and the focal lengths of lenses are debates I have seen come up again and again.
I expect many people who subscribe to my blog to already be familiar with the concepts of crop factors and the impact they have on a lens and a resulting image, but for those of you who are very new to photography; my aim is to make this as clear as I possibly can and to start with the very basics. Here I'll explain aperture and focal lengths in as basic a way I can.
If at any point you don't understand please do get in touch with me via email or message me on Facebook - I'm always happy to chat directly.
Before I start I want to make a few things clear:
- A mirrorless camera is not a worse or lesser camera than a DSLR
- The fact that a camera has no internal mirror in front of the sensor doesn't mean it is 'lacking' something. This is by design and gives the camera a series of benefits over a DSLR. It arguably also represents some challenges too, but these are mostly things of the past now.
- The inclusion or exclusion of a mirror does not affect Depth of Field.
- Depth of Field is affected by the lens and the sensor
Sensor Sizes
In recent years (in the digital age at least) the three most common sensor types found inside cameras that the masses of photographers use, are:
- Full Frame Sensors. This includes such cameras as:
- APS-C Sensors. Cameras include:
- Micro Four Thirds Sensors. Cameras include:
In order of size from largest to smallest in the list above, it is Full Frame, APS-C, MFT.
There are a series of other sensor sizes too, such as Medium Format etc, but if you're reading this post you're most likely interested in one of the three above. For the sake of this post, I will only be looking at these.
Full Frame vs APS-C vs MFT - Affects on lenses
Quite simply, a sensor size will affect all of the properties of a lens; it's aperture and it's focal range.
When you buy a lens it will have both a focal range and an aperture. These will be written on the box and also on the lens itself (most of the time). For example, let's look at the Canon 24-70mm f/2.8: with this lens, the '24-70mm' part denotes its' focal range or, if you like, its' zoom range: the smaller the number the wider the field of view. The larger the number - the longer it is able to reach. The Aperture is then reflected as 'f/2.8'. The lower aperture number is; the shallower the depth of field (again in simple terms lets say that a lower number will give you a blurrier background. For example the Canon 50mm f/1.8 will give you a really blurry background...)
Our example lens; the 24-70mm f/2.8 will fit and work on both Full Frame Canon camera bodies and also their Crop sensor bodies. BUT, these cameras have different sized sensors and so the lens will behave differently on each system. This is due to what is called the Crop Factor. IF these lenses could somehow fit an MFT camera (they won't, unless you use an adaptor), the lenses would again take on different characteristics. The different effects that these sensors cause is due to their 'Crop Factor'
Again, trying to use the simplest terms possible, the crop factor is, if you like, effectively the magnification rating. (this isn't technically entirely accurate, but, if you're new to this concept then this will help to explain).
A Full Frame has a crop factor of x1, an APS-C has a crop factor of x1.6* and a Micro Four Thirds Sensor has a crop factor of x2.
*The APS-C sensors from Canon and Nikon are actually slightly different sizes and therefore have slightly different crop factors. See the table below for more details.
How Crop Affects Focal Range
What you may already be aware of is that the differing sensor sizes and as such crop factors actually change the effective focal range of a lens. This is worked out by very simply multiplying the lens' focal range by its crop factor. For example, on a Full Frame Body, a 100mm lens is multiplied by a crop factor of 1. Therefore, the focal range remains 100mm.
On an APS-C sensor, that same 100mm lens will be multiplied by 1.6. 100 x 1.6 = 160mm
It's even easier with a Micro Four Thirds sensor as the crop factor is x2. So, without much thought at all, you could work out that a 100mm lens then takes on an effective field of view of 200mm.
This table below sets out a series of common focal ranges with their respective, inherent effective focal ranges when used on each of the different sized sensors
X2 = Micro Four Thirds
x1.6 = Canon APS-C
X1.5 = Nikon APS-C and Fuji X Series
x1 = Full Frame Cameras
Your initial thought could simply be that surely a smaller sensor is a good thing right? After all, you get more zoom from a lens! To many this certainly is an advantage of APS-C over Full Frame as it can negate the need for you to buy a longer lens. However, it isn't always the case that this extra reach is wanted; those ultra wide lenses you can buy then become slightly less ultra wide.
Secondly, the effective aperture is also affected too:
How Crop Affects Aperture
In continuation of keeping this very basic, I won't explain in full exactly what aperture is, but rather I'll explain the things it affects. Put simply it affects the blur of the background in an image (Depth of Field) AND it determines how much light is let through the lens to hit the sensor. The second part is important because the more light that comes through to the sensor will mean that an image can potentially be less noisy and grainy.
Depth of Field
Again, sticking with the idea that I am explaining this in it's simplest form; Depth of Field is basically this: From the point of sharp focus on your subject how much immediately after does the scene or subject begin to blur and how blurry is that blur. Experienced photographers may be reading this cringing with this description, but remember I'm trying to keep this is as simple as possible. You can look up a better definition of Aperture and Depth of Field on Google. I'm not here to explain that, I'm trying to explain how a lens affects this property: So, remember how the focal range was multiplied by the crop factor to give a new focal range? Well, we do the exact same thing with the aperture to give us our new values: f/1.8 will become f/3.6 on a Micro Four Thirds Sensor (1.8 x 2 = 3.6) . F/2.8 will become f/5.6 on a Micro Four Thirds Sensor (2.8 x 2 becomes 5.6) and f/4 will become f/8 (4 x 2 = 8) and so on. You can work out the APS-C Aperture difference by multiplying those same details by 1.6 too. So let's again say that f/1.8 x 1.6 = 2.88 (or 2.9 if we round up).
Now, if you know anything about aperture you will know that the lower the f number, the blurrier the background and the shallower the depth of field (the amount of your subject that is in focus). So, if you buy an f/1.8 lens you need to know that it will less shallow on an ASP-C than it would, were that same lens on a Full Frame camera.
The Martin Bailey Podcast Companion App, with DoF calculator
If you want to learn more about Depth of Field I strongly advise you look at Martin Bailey's eBook 'Sharp Shooter', available through Craft & Vision. In this book, Martin goes into great depth about aperture and it's effect on an image. Martin runs a superbly educational podcast and is an excellent photographer to boot! If you're interested in listening that podcast you can subscribe via iTunes or download Martin's Podcast Companion App from the App Store. Handily, this app also includes a Depth of Field Calculator, so when you're learning about Depth of Field you will be able to use this to help.
The relationship of Aperture & Speed
Often, when we talk about lenses with low f numbers, such as f/1.8, f/1.4 or f/1.2 you may hear photographers referring to them as 'Fast' lenses. The reason for this is that these lenses let a lot of light through them, which will afford you the use of a lower ISO or a higher shutter speed. A lower ISO will invariably give you a cleaner, less noisy image and a faster shutter speed will aid you in freezing fast moving subjects and potentially sharper images. Now you may assume at this stage, give that the focal range and depth of field properties have been impacted by the sensor size, that the amount of light a lens can gather is also affected. This is not true.
In terms of depth of field yes - an f/1.8 lens on a Full Frame sensor will give a shallower DoF than if it were mounted to a Micro Four Thirds sensor. That I think we have established now. But, the lens' aperture rating in terms of its ability to let through light remains the same regardless of the sensor it is paired with. The 'speed' remains the same.
So, now that we know that your camera (or rather its' sensor) will have an effect on the lenses you're using, this should aid you in choosing the right lenses for the right job...
DSLR Lenses - One Lens - Multiple Sensor Sizes
When it comes to DSLR's from Canon and Nikon, the best lenses are typically designed to work best with their Full Frame models. Even now you know that an f/2.8 lens is not the same on an APS-C as it is on a Full Frame sensor, they are still advertised and sold as an f/2.8. (they don't tell you that a 100mm will become a 150mm or a 160mm for example). You're left to work this out for yourself. But, this is to be expected; these companies develop lenses that can be mounted to two different sensor formats.
Fuji & MFT - Lenses designed to take crop factor into account
When it comes to Fuji and Micro Four Thirds lenses are developed to take the crop factor into account. Each lens for a Fuji Camera, for example, will only fit (natively) onto a Fuji X-Series camera, meaning at the point of designing the lens they know it will be affected by a 1.5 crop factor.
The same is true of Micro Four Thirds, hence the reason Panasonic lenses fit Olympus bodies (and vice-versa). These lenses are optimised for one size of sensor. The crop factor is embraced!
You may be more familiar with the more traditional and mature lens stables from Canon or Nikon. If that is the case then some of the focal ranges on offer from Fuji, Panasonic and Olympus may seem odd at first, and the number of f/1.2 & f/1.4 lenses on offer may seem quite 'exotic' too, but these odd focal ranges and exotic apertures (a 23mm or a 27mm for example) are intentional.
Going back to our crop factor multiplications from earlier, let's look at some of the lenses on offer from Fuji, Panasonic and Olympus to see why these lenses have literally odd numbers...
Olympus Lenses
We'll start with Olympus purely because these are the lenses I am most familiar with.
In the process of moving from Canon to Olympus, I sought out similar focal ranges in the system in an effort to more seamlessly replace my Canon System. My favourite lenses were my Canon 70-200mm f/2.8 and my 85mm f/1.8. Without being familiar with the topics in this post, it may at a glance appear that Olympus don't have their own equivalent lenses. But they do.
So, remembering that the crop factor is x2 on an Olympus camera, such as the OM-D E-M1 we know that the equivalent lens for Canon's 70-200mm f/2.8 is arguably the Olympus M.Zuiko 40-150mm f/2.8 (80-300mm equivalent field of view, remember?). (You can read my review of the 40-150mm f/2.8 right here by the way)
Here are a couple of images shot with my new favourite lens, the Olympus M.Zuiko 40-150mm f/2.8 PRO
What about my favoured Canon 85mm portrait lens? Well, Olympus offer us the M.Zuiko 45mm f/1.8 (45 x 2 = 90mm of course).
The 90mm focal range is very versatile; from close up details, to head & shoulder portraits to wider portraits too. Great focal range coupled with shallow Depth of Field.
You may at this stage be thinking that the apertures simply aren't the same. If we apply that same x2 crop factor to the 40-150mm f/2.8 we effectively have an 80-300mm f/5.6 after all). Well, this is where you now have to weigh up whether that extra reach and compact system size are of more benefit to you than the difference in aperture. Remember, though, the DoF may be equivalent to f/5.6, but it is still an f/2.8 in terms of its speed, as per our lesson earlier in this post.
Fuji Lenses
When I first dipped my toe into Mirrorless this time round it was Fuji that I looked at. Initially, found the focal ranges quite odd at a glance, but again, if we apply the 1.5 crop factor that the Fuji X-Trans APS-C offers, the focal ranges actually equate to more 'traditional' ranges that we're likely to find with a DSLR. For example:
Fuji has the 23mm f/1.4 XF lens. Whoever heard of a 23mm lens? Why not 25mm? Well, if you do the same math as before, the 23mm f/1.4 works out to be a 34.5mm f/2.1 when mounted to a Fuji X-Series camera. It's near enough a 35mm f/2 equivalent.
Another example could be the 56mm f/1.2 XF Fujinon lens. Multiply that and you now have a fast and shallow portrait lens: 56 x 1.5 = 84mm. 1.2 x 1.5 = 1.8. So, let's agree that it is, in effect, an 85mm f/1.8 lens that would suitably replace the Canon 85mm I mentioned earlier.
The difference between 84mm and 85mm is so negligible that it hardly matters really.
Additional Reading and Factors affecting Depth of Field
I mentioned a few times at the start of this post: this post is written in an attempt to keep things as simple as possible. However, one thing that can't be left out is the factor of camera-to-subject-distance and the effect that has on Depth Field and Background separation. But, rather than me explaining this I would really encourage you to go and pick up Martin Bailey's book: 'Sharp Shooter'. In this, Martin discusses focal distances and how to calculate a depth of field. His explanation and illustrations are far better than I can explain!
Has this helped? Anything to Contribute? Let me know what you think
I hope that this post has helped to explain in some detail exactly how Aperture and Depth of Field are affected by sensor size. If you were unfamiliar with the lenses on offer from any of the camera manufacturers heavily invested in the mirrorless market then I also hope that this has helped to clarify the use of their focal ranges too. If this post has been helpful in any way at all please do remember to like, share and tell your friends. Oh, and please do leave a comment below. Feedback and contributions are always welcome!
For more great content just like this direct to your inbox - don't forget to subscribe!


