


Street Photography Tips (Part 2) & Book Giveaway
[To listen to the audio hit play and then give it a second to buffer. The audio is high quality]
Following on from last week's post where I shared a few of my top tips for improving your street photography, today is the promised second part of this little series. In part one, I also announced the book giveaway too, where you can be in with a chance of winning my own personal copy of David Gibson's 'The Street Photographer's Manual'. The winner of that competition will be announced on January 31st, so be sure to enter today. Details on how to enter can be found at the bottom of this post.
Before we dive into the tips in this post, let's briefly recap on the first 3* tips I gave In last week's post:
- Isolate & Simplify - Keep the frame clean and make it clear what your subject is
- Tell a story - Is your photograph engaging and interesting? Does it have a point?
- Get closer to your subject and be bold and brave! Fill the frame.
- *BONUS TIP: Michael Pung - Street Portraits
If you missed that post be sure to check it out!
Improve your Street photography in 2017 with these top Tips:
1: Hunter & Fisherman approaches
I've been asked numerous times how it is I actually set about seeing and making street photographs; do I spend the entire day walking or do I sit and wait for the scene? The answer is both!
It's fair to say that these two different approaches will yield different results. They will also suit different photographers too.
Let's start by talking about the method whereby we pound the streets, walk around, cover ground and find the moments. Or, the 'Hunter' method as I like to call it...
As a hunter out on the streets, you'll find yourself spending the day walking. This can be great if you're able to physically do this, but you need to be conscious to keep your eyes open to the scenes around you, and your wits about you as you walk, especially on busy city streets. The idea of hunting for a scene and a subject offers us as photographers plenty of variety. As we move from street to street and district to district the backdrops will change dramatically.
Camera: Olympus OM-D E-M1. Lens: 25mm f/1.8 @ Aperture: f/1.8 Focal Length 25mm ISO: 400 Shutter Speed: 1/3200th
As with many larger towns and cities you'll find that the architecture changes from one area to the next. Knowing London as I do for example I can tell you that you have the white rendered buildings, people in suits and cigar shops of St James', then the tourist parts of Leicester Square and Covent Garden, the colours and smells of Soho & the uniqueness of China Town for example. Whatever city you go to, you're likely to experience that same variety. As a hunter you'll sit at your computer later that evening and be welcomed by photographs that are very different from each other owing to the fact you saw different parts of the area.
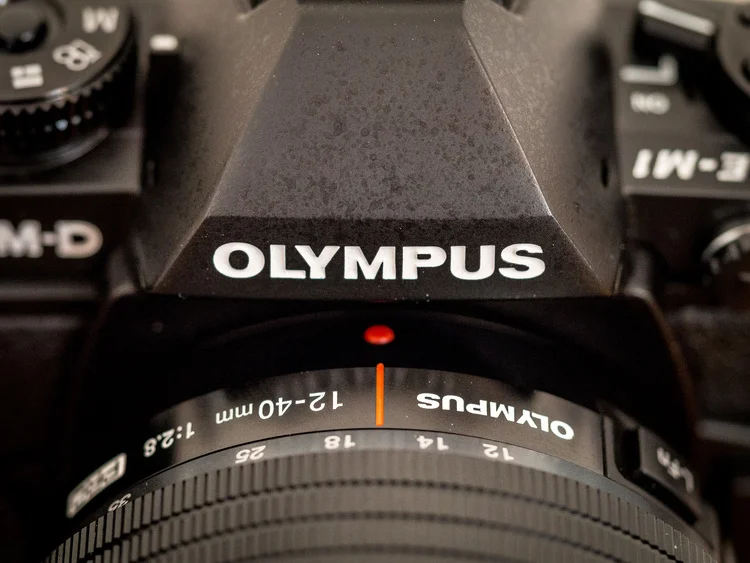
Camera: Olympus OM-D E-M1. Lens: 12-40mm f/2.8 PRO @ Aperture: f/2.8 Focal Length 25mm ISO: 200 Shutter Speed: 1/2000th
Whilst that variety can be found by clocking up miles, what I often find some people struggle with is actually seeing photographically whilst they walk. By this, I mean; the walking itself can actually prevent you from seeing things. Either because you're physically tired, aching & thirsty, or just because your mind can wander as you get lost and explore new places. If that sounds like you, then the fisherman method may be something you should start out by trying...
The fisherman method, as you may have guessed, would see a photographer finding a spot or an area in which to roam. Perhaps a park area or a junction or cross section in the city? Again, thinking about London you could perhaps consider South Bank. Whilst the fisherman approach to street photography is less likely to yield the variety that hunting offers, there are areas, such as South Bank, where the variety will come to you! In a small stretch of 100m, where the walk way is not too wide that people can't really escape your range, you can photograph people discretely as they walk past. Whether they're a commuter on the way to work, a jogger keeping fit during lunch time, tourists with cameras or street performers or skateboarders. Finding an area similar to London's South Bank can very much feel like shooting fish in a barrel (metaphorically speaking of course).
Camera: Olympus OM-D E-M1. Lens: 25mm f/1.8 @ Aperture: f/2.2 Focal Length 25mm ISO: 4000 Shutter Speed: 1/15th
The intention and idea of the fisherman method however doesn't necessarily just mean you stay in one area. In an even more intentional way with even less movement required you can instead look for a backdrop or a stage for a scene first (again, metaphorically speaking) and then wait patiently for your subjects to walk onto the set. For example, finding an archway, a set of stairs or steps or a bench, to name but a few ideas. You can position yourself and ready your composition and your settings and then just wait for something or someone interesting to happen. It could be that someone sits on the bench. It could be that a skateboarder jumps the steps or grinds down the rail. It could simply be a chef on a cigarette break in an alleyway behind a restaurant, cafe or diner. Whatever the case may be, you can start by readying the scene and waiting for the interest.
Camera: Olympus OM-D E-M5. Lens: 17mm f/1.8 @ Aperture: f/10 Focal Length 17mm ISO: 3200 Shutter Speed: 1/13th
Again, as the name suggests the fisherman method can very much be a waiting game, where the patience you invest is what will reap you those rewards.
Camera: Olympus OM-D E-M1. Lens: 17mm f/1.8 @ Aperture: f/1.8 ISO: 800 Shutter Speed: 1/640th
So, as I say: choose a method that you think sounds more appealing to you and give it a try. But you never know, some 'hunters' may find the 'fisherman' method more rewarding than they think, and some 'fishermen' may find the occasional hunt for a subject an exciting experience!
2: Choosing a cameras & lenses for Street Photography
If you're reading this post, I'd say there is a relatively high chance that you have looked online as to what equipment is best suited to street photography, or, you've already formed your own opinion as to what you think is best. My opinion is that there isn't one good answer and there isn't one camera that is necassarily better than any other. A DSLR will have advantages over a compact or a mirrorless camera, and likewise a smaller, lighter camera has its obvious advantages too.
Whilst there are cameras such as the brilliant Olympus PEN-F and accomplished Fuji X100t that are super small, lightweight and help you to look very incognito as if they're designed specifically for street photographers, I've heard some very compelling debates to suggest that having a DSLR out on the street can in fact help to convince others that you're just a tourist too! After all, it seems everyone is a photographer these days and more and more people are investing in 'big cameras'. I guess having a DSLR could in effect actually help you to blend in, in an odd sort of way.
My own belief is that you should use the camera you feel most comfortable and familiar with, whatever that may be. You don't need to wait until you have that latest mirrorless camera and you shouldn't be put off by 'only' having a Full Frame DSLR. Both will get you results - it's you that has to be ready to see the moment and capture it.
Without sitting on the fence though and with all that said, let's consider the practical advantages of a smaller, lighter camera here: you are going to find that you need a smaller bag for it all, which means you are likely to be less fatigued by the end of the day. These mirrorless cameras often offer a totally silent electronic shutter mode and, arguably, in my opinion, you are less likely to be considered a 'serious' or 'professional' owing to perceptions alone. So if you can put your ego aside for one minute, it could be that on this occasion looking like an amateur or tourist is a good thing (I would say though for the record, I don't agree with the perception, but it is a hard one to argue. I wrote about my feelings on this in my 'Why Olympus?' Post)
So, whilst this section of advice isn't necessarily me telling you exactly what to carry and use, I would loosely suggest the following things to I think aid you physically and creatively:
- travel light.
- pack one camera & one lens
- pack a spare battery
- use as small a bag as possible
Travelling with one camera and one lens, whichever lens that may be, will serve to help you focus only on the scenes and the moments happening in front of you and less on the gear you have in your bag.
3: Times, Locations & Days to shoot (Workshops)
Every time is a good time for street photography! It doesn't matter if it's a dark winter. It doesn't matter if it's raining! These elements are only going to provide an extra dimension and level of interest to your photography. Some of my own personal favourite images that I have made out on the street have come on late December and January evenings. I wrote a post back in 2015 that went on to be featured in the Olympus Magazine where I spoke about low light photography and how to tackle it (you can check that out right here on the blog).
Whilst this answer is somewhat generic, I would personally suggest that you should look to book yourself onto a local photo walk or tour with an experienced street photographer. Whilst that person doesn't necessarily need to know the area (one could argue), I'd say that a local will be able to take you to the lesser known areas, which will definitely go some way to helping you to produce more unique images.
One man that can talk about this a little better than me is Paul Griffiths and so I've invited Paul to share his thoughts on what it is a Street Photography Tour or Workshop can offer you. For those of you that don't know Paul; runs the popular Photography Live & Unct Blog Video Blog over on YouTube. Paul is an accomplished Photographer who knows London like the back of his hand having worked in the city for many many years. Today though, when not interviewing some of the world's most renowned photographers for his show, you'll find Paul leading tours & workshops on the streets of London.
Here's what Paul has to say about the value of work shops:
Setting targets, joining camera clubs and making New Years' resolutions are great. But ultimately, there’s nothing better than just getting out with your camera and ‘taking’ (or rather making) images.
Image used with permission of Paul Griffiths. Image Copyright by Paul Griffiths
For anyone that enjoys Documentary or Street Photography, you will likely be aware Photo walkabouts where a group get together and hit the streets together, but it could be argued that these are not necessarily the best means to learn when it comes to street photography. Sure, you can exchange ideas and talk about cameras all day, but invariably a walkabout typically starts off with a group sticking together and eventually disintegrating and becoming separated as attendees drop away, get lost or sometimes decide to go another route.
It's not really the type of event to gain tips & skills from!
"Practice makes perfect!" & "Your photography will improve if you practice!"; You've no doubt have heard these statements before? Well, they are true, but practice with guidance and the practice is improved!
http://www.photographyliveanduncut.com/aboutmecontact/
Rather than an unguided walkabout with a lack of intention, the ardent photographer should start to look for better options to learn and improve their craft. One such way is a structured Photography Workshop.
Whether you prefer working indoors or outdoors, these days you're very likely to find one to suit you and your style of learning. The best workshops typically host not more than 6-8 people, offer a ‘hands on’ and experienced tutor who encourages and can demonstrate camera skills and who can take you out of your comfort zone in order to expand your thinking and widen your horizons! That's the best way to learn!
This is exactly what we at ‘Photography Live and Uncut’ offer: a workshop that will teach you new skills and enable you to try different ways to make photos and to get you out of that comfort zone. You may know your settings and compositions already (great!), but we'll start by helping you to see photographically - the art of seeing a scene and a story in front of you. We offer workshops that are both studio-based and out on the streets, depending on your preferred genre. We're here to share everything we know with you to ensure you gain the most from your workshop experience. Everything we teach and do is aimed and focussed towards improving your photography
If you want to know more information about one of Paul's Workshops, made available through Photography Live & Uncut, simply check out his website. (Pssst, be sure to follow Paul on Social Media too if you want to be notified of the latest workshop dates)
4: Bonus Tip: Expectations of your own efforts
Looking at the portfolio's of some avid street photographers, who have galleries full of images from the street, it can seem that the expectation of an afternoon out on the streets is to come home with a dozen images that you think are wonderful. Whilst I don't want to suggest that your work isn't good and that you haven't got a dozen good images after a day of shooting, in reality, the chances are you'll end up with just 1 or 2...or possibly none!
As photographer's we should only be showing our absolute best work. So, when you load your images into Lightroom, or Aperture or whichever is your preferred tool be selective, conscious and give thought as to which images genuinely have content, story, an interesting subject and are of a quality you are happy with. If you are able to honestly look at an image and say that it contains elements from each of the tips from these two posts that i've written (that being part one from last week and this post too), then go ahead and share it. But if, after mulling over an image you realise it doesn't have any 'Pull' or interest, then don't be disheartened.
You've probably heard people before say 'I make my own luck' and whilst I think there is something in this phrase, really, what luck is, is where preparedness meets opportunity. I guess what I'm saying is that it is your job to be prepared and to spot the opportunity. But, that's not to say that opportunity will always present itself to you in the form of an interesting scene to photograph. Sometimes, the interest is more subtle and as such you have to try harder to spot it.
The reason I'm ending this short series on such a note is because, in reality, all you are doing by applying all of your skills and possibly even by following the advice that Michael Pung, Paul Griffiths and myself have provided in these two posts, is increasing your chances of capturing something worth sharing. It's not offering you a guarantee at all.
In the first couple of paragraphs in the first post I did say that Street Photography can appear to be easy and simplistic. But I'm sure, after having tried it yourself or even just having been through my top tips, you'll appreciate that there is far more to capturing an image on the street that you had possibly considered.
Sure, you may have days where you come back with a bunch of great work, but others, you may come back with nothing. You will soon realise that not everything you capture, despite your best efforts, is actually as good as you may initially think. Don't think of this as a reflection of your overall skills as a photographer, but remember that capturing a quality, engaging and interesting moment on the street requires a lot of things to fall into place at the right time and that everything happens in the blink of an eye; press that shutter just 1 second later and the story inside the frame you just captured could be totally different.
Street Photography can be a funny old mistress that can reward you. Other days you'll return home with nothing to show for your efforts. It's cruel, but that's street photography.
...The End!
Book Giveaway
Okay, so if you're here for the book giveaway, look no further. I'm giving away my own personal copy of The Street Photographers Manual by David Gibson.

I loved this book so much that I felt compelled to write a review here on the blog (you can read that book right here). Coupled with this post, I thought that it would be a great companion for anyone looking to improve their street photograph and so, I'm giving it away for free!
Review Excerpt:
"Whilst the book itself may be called a manual and does offer instruction to help you create more thought-out and intentional street photographs, this is also a very impressive and vast study of street photography. This book looks at both various techniques and elements that contribute towards stronger imagery and makes use of examples by the greatest street photographers of our time such as; Elliott Erwitt, Bruce Gilden, Saul Leiter, Trente Park and more. These examples give the book's instructions conviction and only serve to show that this thorough - yet concise - book is something you can not only read for inspiration, but learn from at the same time. Within each chapter we are introduced to either another master of Street Photography or another technique of shooting on the street, each accompanying a sample of that master's work or an example of that technique in action to best explain and demonstrate the case in point"
To be in with a chance of winning my own, personal copy of The Street Photographer's Manual, subscribe to the blog using the form below and share this post on social media (be sure to include a link back to this post). If you're already a subscriber, just drop a comment below. I'll canvas all new subscriptions and comments and pick the lucky winner from those.
Good luck everyone! Thanks for stopping by.
Micro Four Thirds Depth of Field Explained
Hold on to your hats folks, because this weeks' post is a long and technical post! But In recent weeks I've seen quite a lot of misinformation going around when it comes to Aperture and Depth of Field with Micro Four Thirds Cameras. So today I want to put a stake in the ground and set out in the simplest of terms exactly what impact a Micro Four Thirds Sensor (and an APS-C crop sensor for that matter) has on Aperture, Depth of Field and Effective Focal Range.
If you're in a position to listen then go ahead and hit play on the audio player below, if not, scroll down a little further and you can read through today's post in your own time. Either way, the audio is the same as the text to make sure you're not missing out. After hitting play give it about 5 - 10 seconds to start:
I spoke briefly about this in a post I wrote called 'Why Olympus' in which I looked to demystify many of the myths about the MFT format. But the subjects of Depth of Field (or, an apparent lack of according to some) and the focal lengths of lenses are debates I have seen come up again and again.
I expect many people who subscribe to my blog to already be familiar with the concepts of crop factors and the impact they have on a lens and a resulting image, but for those of you who are very new to photography; my aim is to make this as clear as I possibly can and to start with the very basics. Here I'll explain aperture and focal lengths in as basic a way I can.
If at any point you don't understand please do get in touch with me via email or message me on Facebook - I'm always happy to chat directly.
Before I start I want to make a few things clear:
- A mirrorless camera is not a worse or lesser camera than a DSLR
- The fact that a camera has no internal mirror in front of the sensor doesn't mean it is 'lacking' something. This is by design and gives the camera a series of benefits over a DSLR. It arguably also represents some challenges too, but these are mostly things of the past now.
- The inclusion or exclusion of a mirror does not affect Depth of Field.
- Depth of Field is affected by the lens and the sensor
Sensor Sizes
In recent years (in the digital age at least) the three most common sensor types found inside cameras that the masses of photographers use, are:
- Full Frame Sensors. This includes such cameras as:
- APS-C Sensors. Cameras include:
- Micro Four Thirds Sensors. Cameras include:
In order of size from largest to smallest in the list above, it is Full Frame, APS-C, MFT.
There are a series of other sensor sizes too, such as Medium Format etc, but if you're reading this post you're most likely interested in one of the three above. For the sake of this post, I will only be looking at these.
Full Frame vs APS-C vs MFT - Affects on lenses
Quite simply, a sensor size will affect all of the properties of a lens; it's aperture and it's focal range.
When you buy a lens it will have both a focal range and an aperture. These will be written on the box and also on the lens itself (most of the time). For example, let's look at the Canon 24-70mm f/2.8: with this lens, the '24-70mm' part denotes its' focal range or, if you like, its' zoom range: the smaller the number the wider the field of view. The larger the number - the longer it is able to reach. The Aperture is then reflected as 'f/2.8'. The lower aperture number is; the shallower the depth of field (again in simple terms lets say that a lower number will give you a blurrier background. For example the Canon 50mm f/1.8 will give you a really blurry background...)
Our example lens; the 24-70mm f/2.8 will fit and work on both Full Frame Canon camera bodies and also their Crop sensor bodies. BUT, these cameras have different sized sensors and so the lens will behave differently on each system. This is due to what is called the Crop Factor. IF these lenses could somehow fit an MFT camera (they won't, unless you use an adaptor), the lenses would again take on different characteristics. The different effects that these sensors cause is due to their 'Crop Factor'
Again, trying to use the simplest terms possible, the crop factor is, if you like, effectively the magnification rating. (this isn't technically entirely accurate, but, if you're new to this concept then this will help to explain).
A Full Frame has a crop factor of x1, an APS-C has a crop factor of x1.6* and a Micro Four Thirds Sensor has a crop factor of x2.
*The APS-C sensors from Canon and Nikon are actually slightly different sizes and therefore have slightly different crop factors. See the table below for more details.
How Crop Affects Focal Range
What you may already be aware of is that the differing sensor sizes and as such crop factors actually change the effective focal range of a lens. This is worked out by very simply multiplying the lens' focal range by its crop factor. For example, on a Full Frame Body, a 100mm lens is multiplied by a crop factor of 1. Therefore, the focal range remains 100mm.
On an APS-C sensor, that same 100mm lens will be multiplied by 1.6. 100 x 1.6 = 160mm
It's even easier with a Micro Four Thirds sensor as the crop factor is x2. So, without much thought at all, you could work out that a 100mm lens then takes on an effective field of view of 200mm.
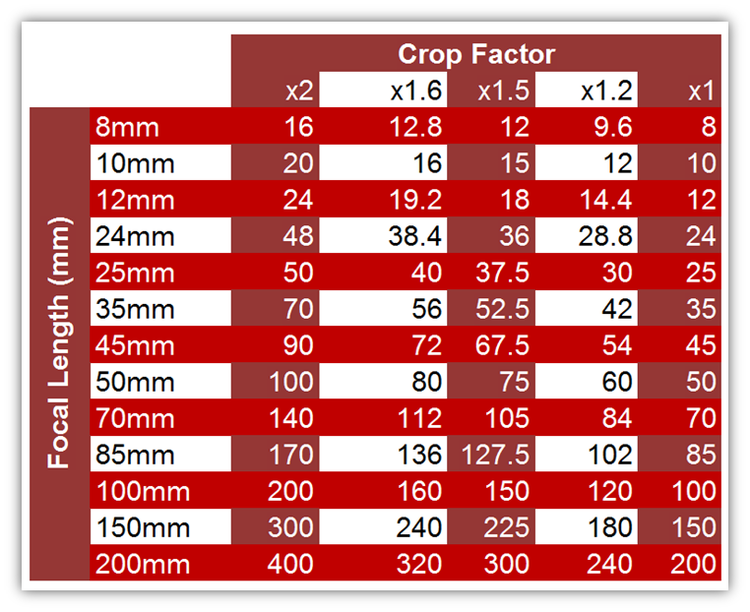
This table below sets out a series of common focal ranges with their respective, inherent effective focal ranges when used on each of the different sized sensors
X2 = Micro Four Thirds
x1.6 = Canon APS-C
X1.5 = Nikon APS-C and Fuji X Series
x1 = Full Frame Cameras
Your initial thought could simply be that surely a smaller sensor is a good thing right? After all, you get more zoom from a lens! To many this certainly is an advantage of APS-C over Full Frame as it can negate the need for you to buy a longer lens. However, it isn't always the case that this extra reach is wanted; those ultra wide lenses you can buy then become slightly less ultra wide.
Secondly, the effective aperture is also affected too:
How Crop Affects Aperture
In continuation of keeping this very basic, I won't explain in full exactly what aperture is, but rather I'll explain the things it affects. Put simply it affects the blur of the background in an image (Depth of Field) AND it determines how much light is let through the lens to hit the sensor. The second part is important because the more light that comes through to the sensor will mean that an image can potentially be less noisy and grainy.
Depth of Field
Again, sticking with the idea that I am explaining this in it's simplest form; Depth of Field is basically this: From the point of sharp focus on your subject how much immediately after does the scene or subject begin to blur and how blurry is that blur. Experienced photographers may be reading this cringing with this description, but remember I'm trying to keep this is as simple as possible. You can look up a better definition of Aperture and Depth of Field on Google. I'm not here to explain that, I'm trying to explain how a lens affects this property: So, remember how the focal range was multiplied by the crop factor to give a new focal range? Well, we do the exact same thing with the aperture to give us our new values: f/1.8 will become f/3.6 on a Micro Four Thirds Sensor (1.8 x 2 = 3.6) . F/2.8 will become f/5.6 on a Micro Four Thirds Sensor (2.8 x 2 becomes 5.6) and f/4 will become f/8 (4 x 2 = 8) and so on. You can work out the APS-C Aperture difference by multiplying those same details by 1.6 too. So let's again say that f/1.8 x 1.6 = 2.88 (or 2.9 if we round up).
Now, if you know anything about aperture you will know that the lower the f number, the blurrier the background and the shallower the depth of field (the amount of your subject that is in focus). So, if you buy an f/1.8 lens you need to know that it will less shallow on an ASP-C than it would, were that same lens on a Full Frame camera.
The Martin Bailey Podcast Companion App, with DoF calculator
If you want to learn more about Depth of Field I strongly advise you look at Martin Bailey's eBook 'Sharp Shooter', available through Craft & Vision. In this book, Martin goes into great depth about aperture and it's effect on an image. Martin runs a superbly educational podcast and is an excellent photographer to boot! If you're interested in listening that podcast you can subscribe via iTunes or download Martin's Podcast Companion App from the App Store. Handily, this app also includes a Depth of Field Calculator, so when you're learning about Depth of Field you will be able to use this to help.
The relationship of Aperture & Speed
Often, when we talk about lenses with low f numbers, such as f/1.8, f/1.4 or f/1.2 you may hear photographers referring to them as 'Fast' lenses. The reason for this is that these lenses let a lot of light through them, which will afford you the use of a lower ISO or a higher shutter speed. A lower ISO will invariably give you a cleaner, less noisy image and a faster shutter speed will aid you in freezing fast moving subjects and potentially sharper images. Now you may assume at this stage, give that the focal range and depth of field properties have been impacted by the sensor size, that the amount of light a lens can gather is also affected. This is not true.
In terms of depth of field yes - an f/1.8 lens on a Full Frame sensor will give a shallower DoF than if it were mounted to a Micro Four Thirds sensor. That I think we have established now. But, the lens' aperture rating in terms of its ability to let through light remains the same regardless of the sensor it is paired with. The 'speed' remains the same.
So, now that we know that your camera (or rather its' sensor) will have an effect on the lenses you're using, this should aid you in choosing the right lenses for the right job...
DSLR Lenses - One Lens - Multiple Sensor Sizes
When it comes to DSLR's from Canon and Nikon, the best lenses are typically designed to work best with their Full Frame models. Even now you know that an f/2.8 lens is not the same on an APS-C as it is on a Full Frame sensor, they are still advertised and sold as an f/2.8. (they don't tell you that a 100mm will become a 150mm or a 160mm for example). You're left to work this out for yourself. But, this is to be expected; these companies develop lenses that can be mounted to two different sensor formats.
Fuji & MFT - Lenses designed to take crop factor into account
When it comes to Fuji and Micro Four Thirds lenses are developed to take the crop factor into account. Each lens for a Fuji Camera, for example, will only fit (natively) onto a Fuji X-Series camera, meaning at the point of designing the lens they know it will be affected by a 1.5 crop factor.
The same is true of Micro Four Thirds, hence the reason Panasonic lenses fit Olympus bodies (and vice-versa). These lenses are optimised for one size of sensor. The crop factor is embraced!
You may be more familiar with the more traditional and mature lens stables from Canon or Nikon. If that is the case then some of the focal ranges on offer from Fuji, Panasonic and Olympus may seem odd at first, and the number of f/1.2 & f/1.4 lenses on offer may seem quite 'exotic' too, but these odd focal ranges and exotic apertures (a 23mm or a 27mm for example) are intentional.
Going back to our crop factor multiplications from earlier, let's look at some of the lenses on offer from Fuji, Panasonic and Olympus to see why these lenses have literally odd numbers...
Olympus Lenses
We'll start with Olympus purely because these are the lenses I am most familiar with.
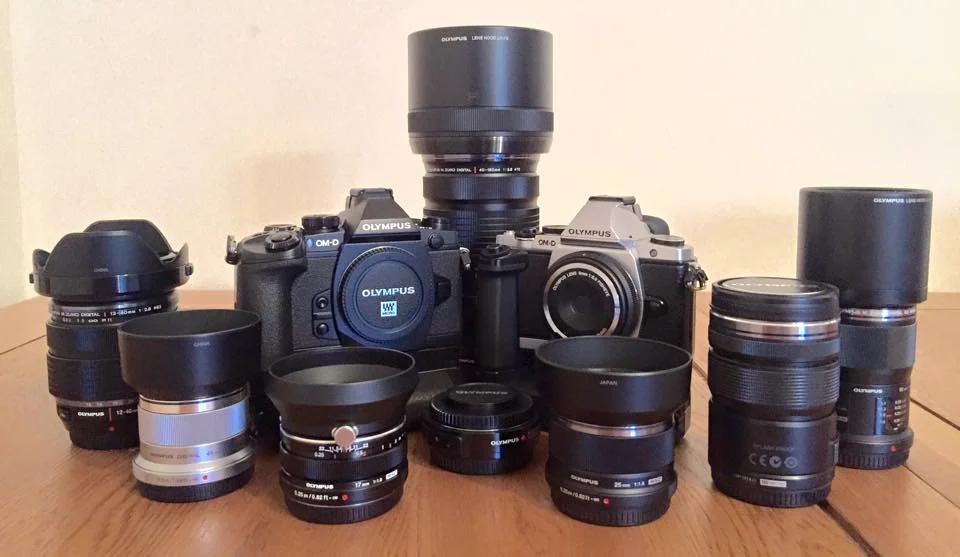
In the process of moving from Canon to Olympus, I sought out similar focal ranges in the system in an effort to more seamlessly replace my Canon System. My favourite lenses were my Canon 70-200mm f/2.8 and my 85mm f/1.8. Without being familiar with the topics in this post, it may at a glance appear that Olympus don't have their own equivalent lenses. But they do.
So, remembering that the crop factor is x2 on an Olympus camera, such as the OM-D E-M1 we know that the equivalent lens for Canon's 70-200mm f/2.8 is arguably the Olympus M.Zuiko 40-150mm f/2.8 (80-300mm equivalent field of view, remember?). (You can read my review of the 40-150mm f/2.8 right here by the way)
Here are a couple of images shot with my new favourite lens, the Olympus M.Zuiko 40-150mm f/2.8 PRO
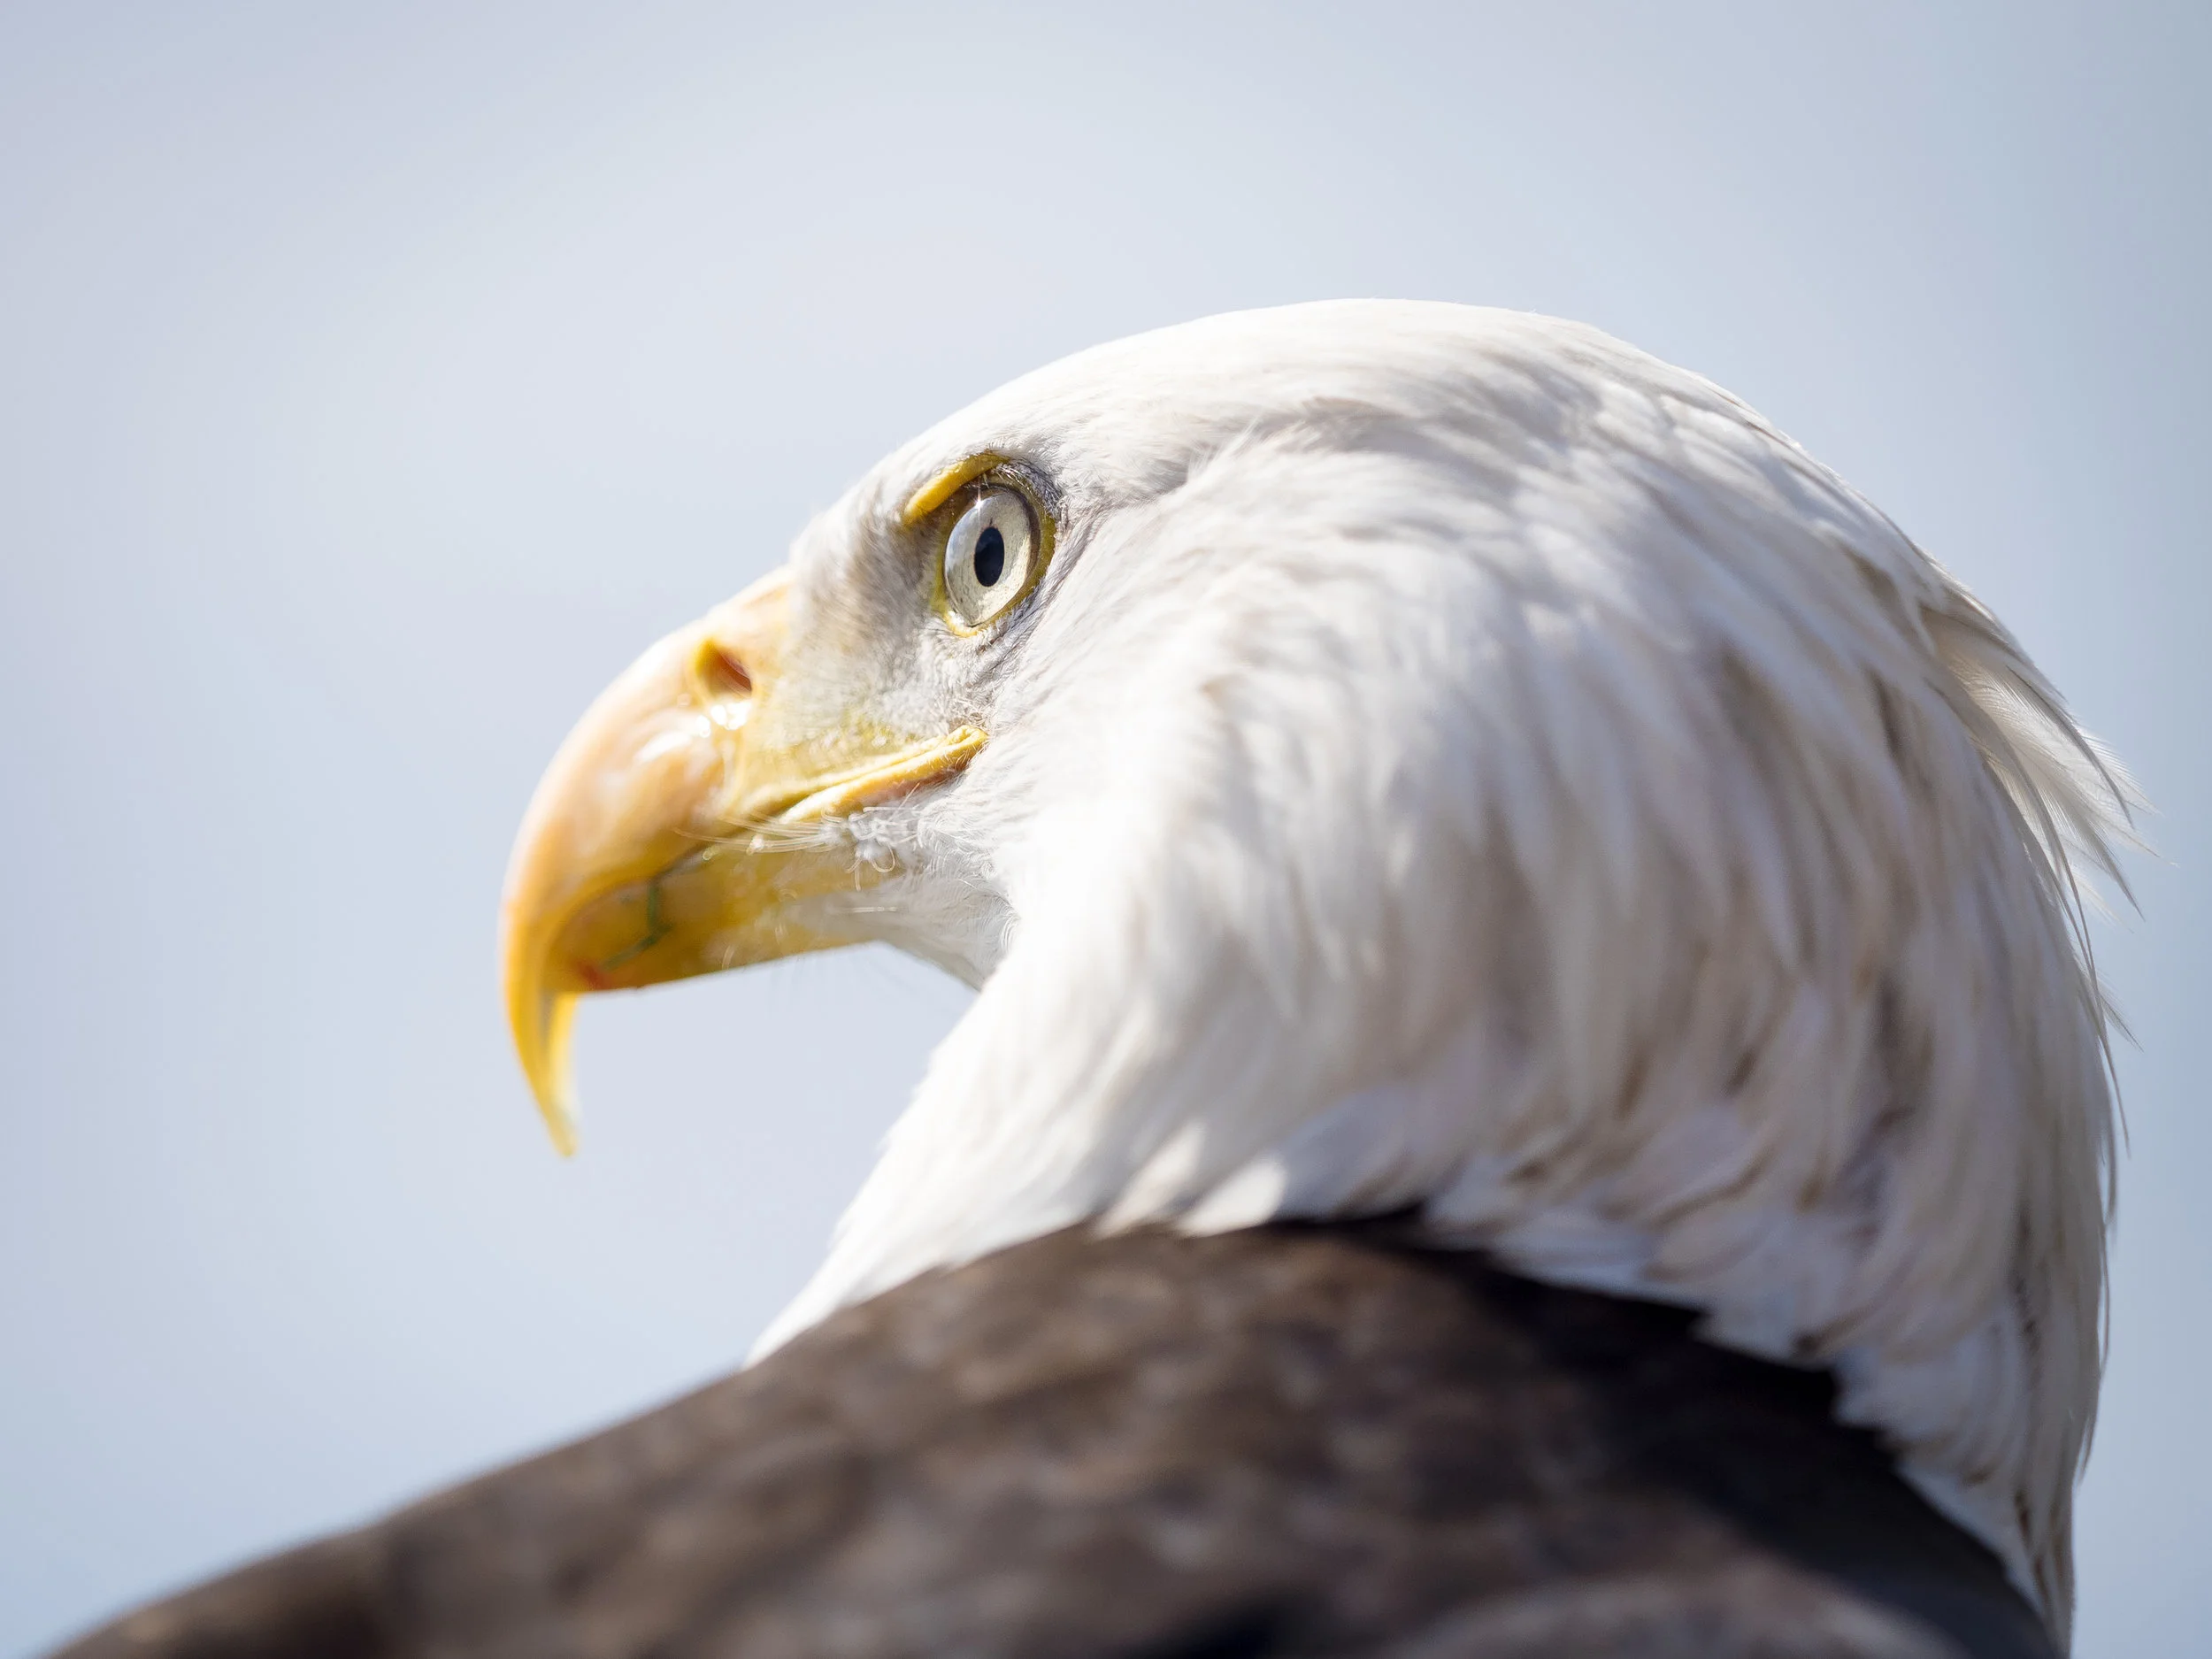

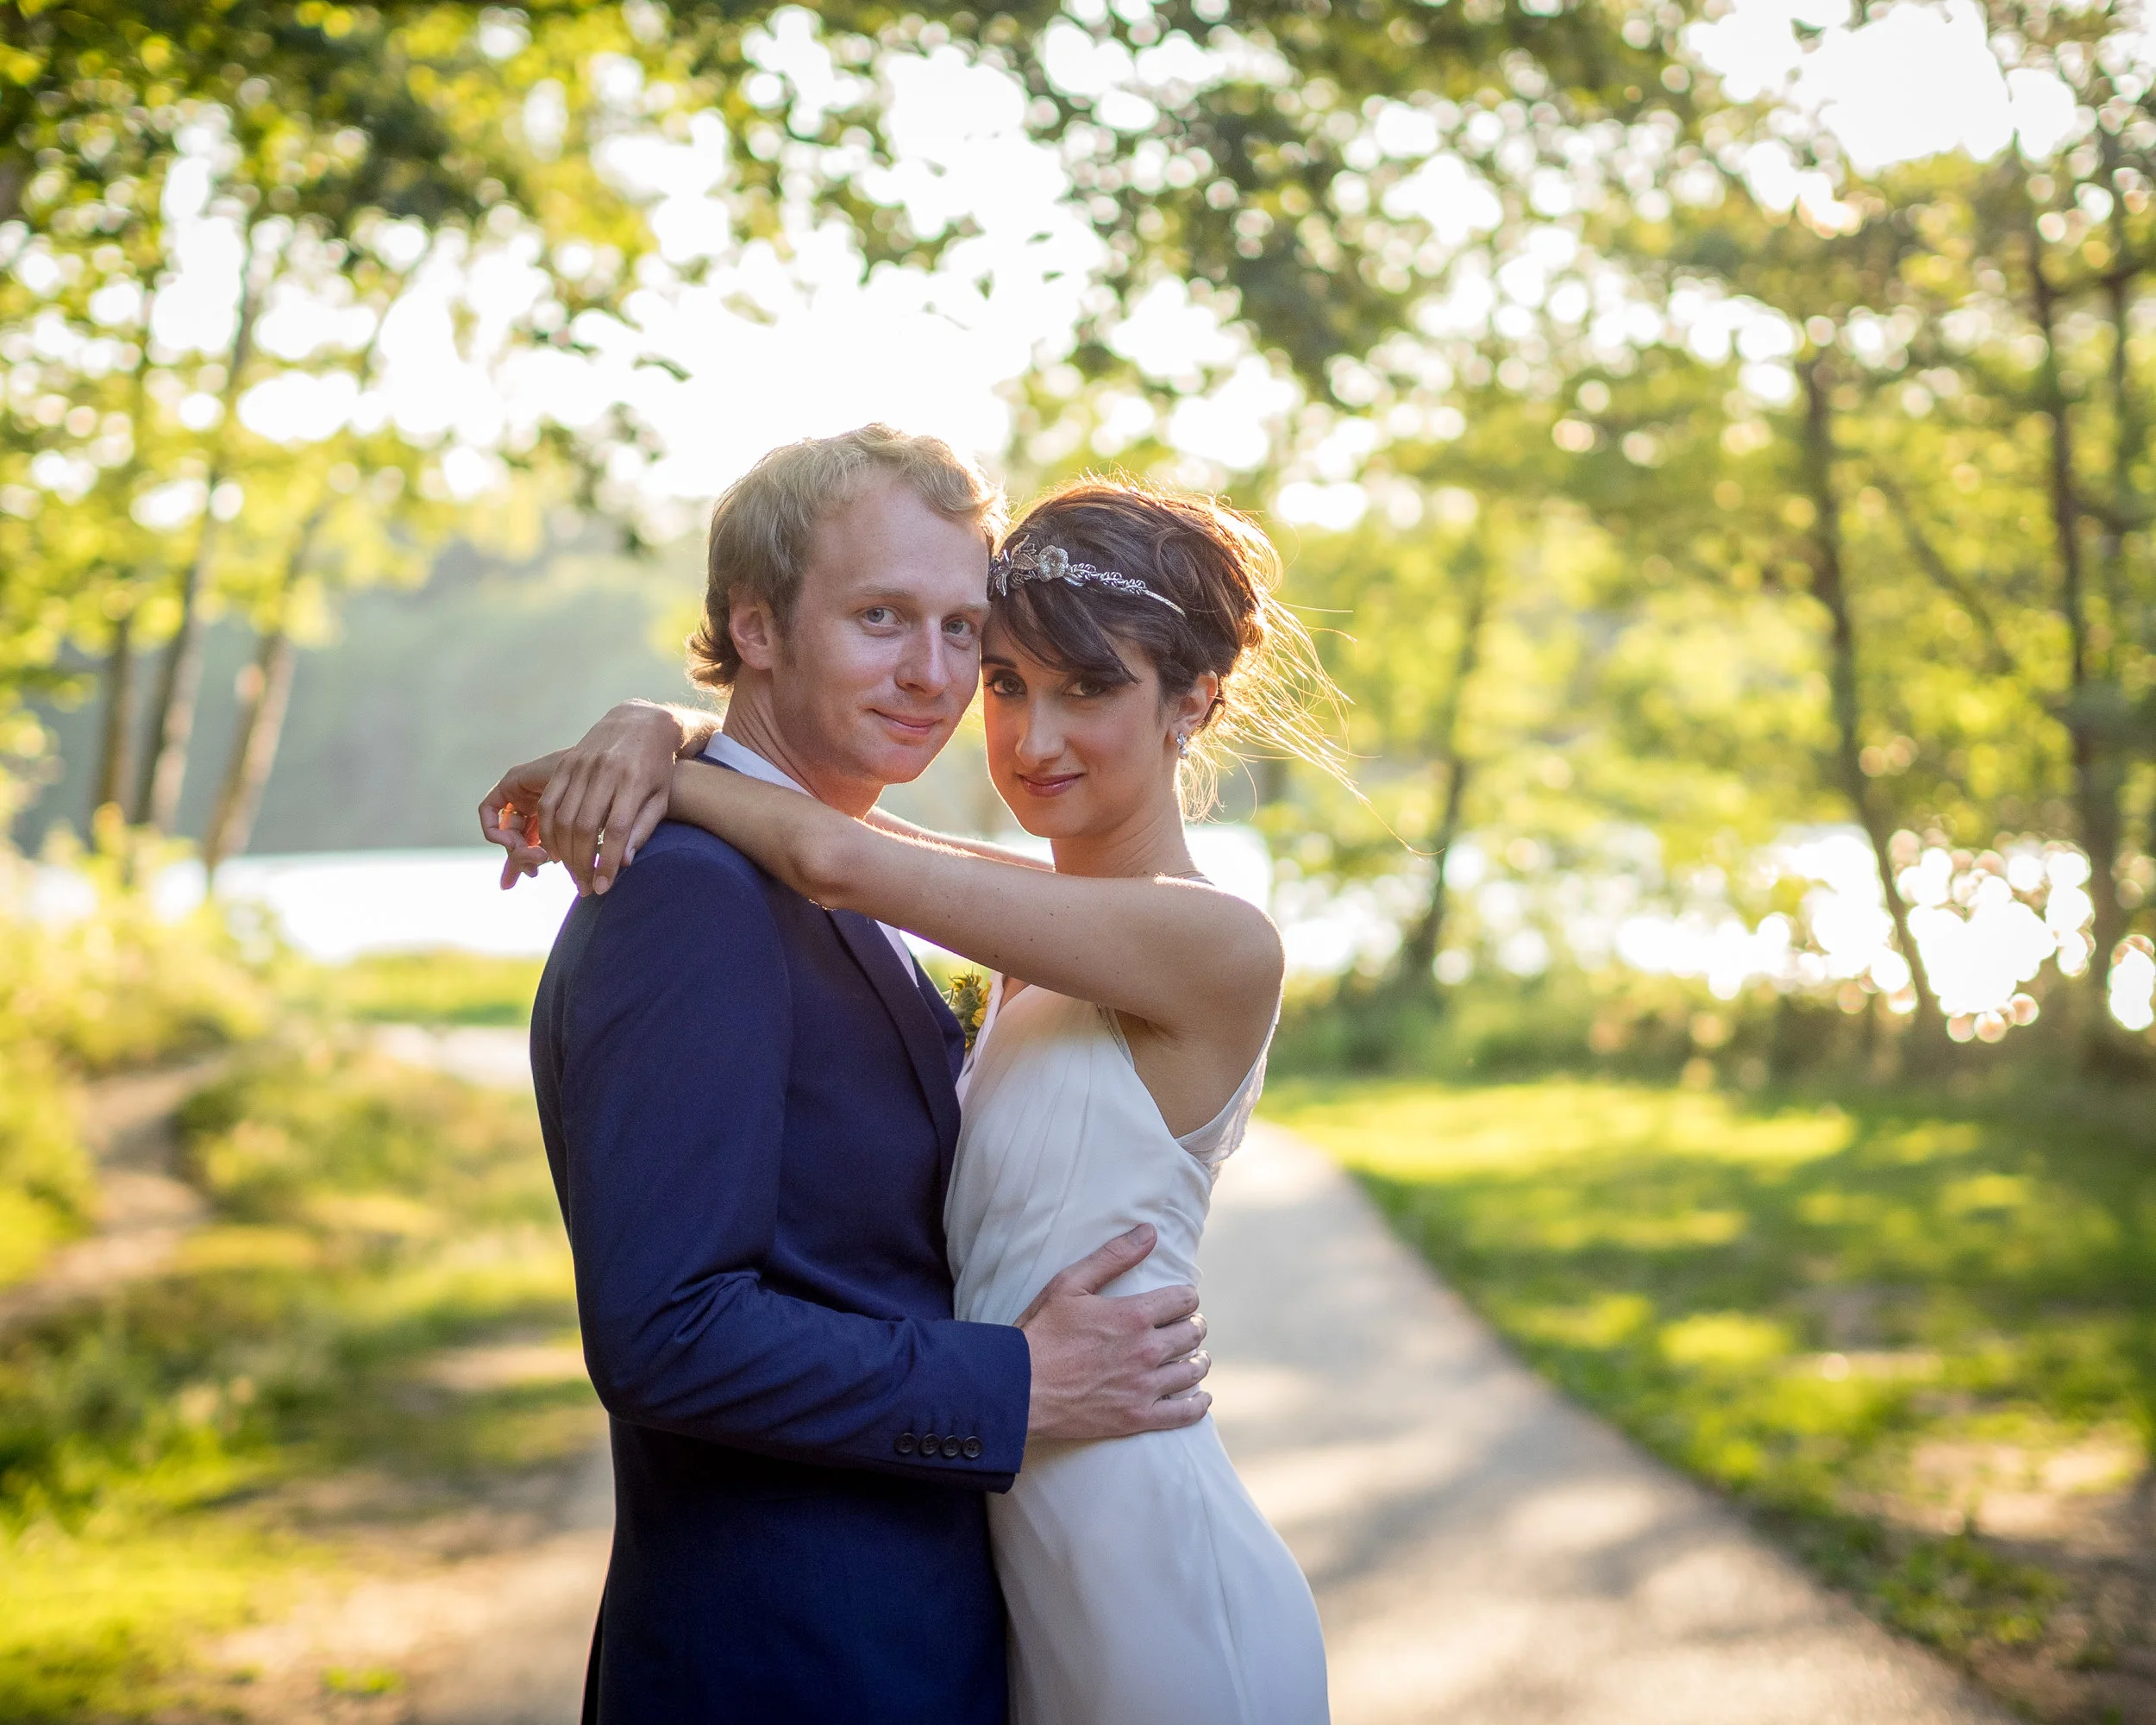
What about my favoured Canon 85mm portrait lens? Well, Olympus offer us the M.Zuiko 45mm f/1.8 (45 x 2 = 90mm of course).
The 90mm focal range is very versatile; from close up details, to head & shoulder portraits to wider portraits too. Great focal range coupled with shallow Depth of Field.


You may at this stage be thinking that the apertures simply aren't the same. If we apply that same x2 crop factor to the 40-150mm f/2.8 we effectively have an 80-300mm f/5.6 after all). Well, this is where you now have to weigh up whether that extra reach and compact system size are of more benefit to you than the difference in aperture. Remember, though, the DoF may be equivalent to f/5.6, but it is still an f/2.8 in terms of its speed, as per our lesson earlier in this post.
Fuji Lenses
When I first dipped my toe into Mirrorless this time round it was Fuji that I looked at. Initially, found the focal ranges quite odd at a glance, but again, if we apply the 1.5 crop factor that the Fuji X-Trans APS-C offers, the focal ranges actually equate to more 'traditional' ranges that we're likely to find with a DSLR. For example:
Fuji has the 23mm f/1.4 XF lens. Whoever heard of a 23mm lens? Why not 25mm? Well, if you do the same math as before, the 23mm f/1.4 works out to be a 34.5mm f/2.1 when mounted to a Fuji X-Series camera. It's near enough a 35mm f/2 equivalent.
Another example could be the 56mm f/1.2 XF Fujinon lens. Multiply that and you now have a fast and shallow portrait lens: 56 x 1.5 = 84mm. 1.2 x 1.5 = 1.8. So, let's agree that it is, in effect, an 85mm f/1.8 lens that would suitably replace the Canon 85mm I mentioned earlier.
The difference between 84mm and 85mm is so negligible that it hardly matters really.
Additional Reading and Factors affecting Depth of Field
I mentioned a few times at the start of this post: this post is written in an attempt to keep things as simple as possible. However, one thing that can't be left out is the factor of camera-to-subject-distance and the effect that has on Depth Field and Background separation. But, rather than me explaining this I would really encourage you to go and pick up Martin Bailey's book: 'Sharp Shooter'. In this, Martin discusses focal distances and how to calculate a depth of field. His explanation and illustrations are far better than I can explain!
Has this helped? Anything to Contribute? Let me know what you think
I hope that this post has helped to explain in some detail exactly how Aperture and Depth of Field are affected by sensor size. If you were unfamiliar with the lenses on offer from any of the camera manufacturers heavily invested in the mirrorless market then I also hope that this has helped to clarify the use of their focal ranges too. If this post has been helpful in any way at all please do remember to like, share and tell your friends. Oh, and please do leave a comment below. Feedback and contributions are always welcome!
For more great content just like this direct to your inbox - don't forget to subscribe!

Olympus Launch the OM-D E-M1ii
At last! On the 19th September 2016 Olympus announced the long awaited OM-D E-M1ii.
When the original OM-D E-M1 was launched it was able to quite comfortably replace (and improve upon) so much of what a traditional DSLR offered. This attracted many to make the switch (including me as I waved goodbye to over £10K worth of Canon equipment!). In the time since that camera was released though we've seen Sony and the 'Big Two' in the DSLR market continue to iterate and improve with mark 2's of their own. Us OM-D E-M1 owners were all scouring the rumour sites for possible mentions and specs of the E-M1 mark ii, but Olympus kept us waiting for the official launch to play their hand.
This latest OM-D feels long-overdue for many. But now it's finally here! And we all know what they say about good things coming to those who wait...
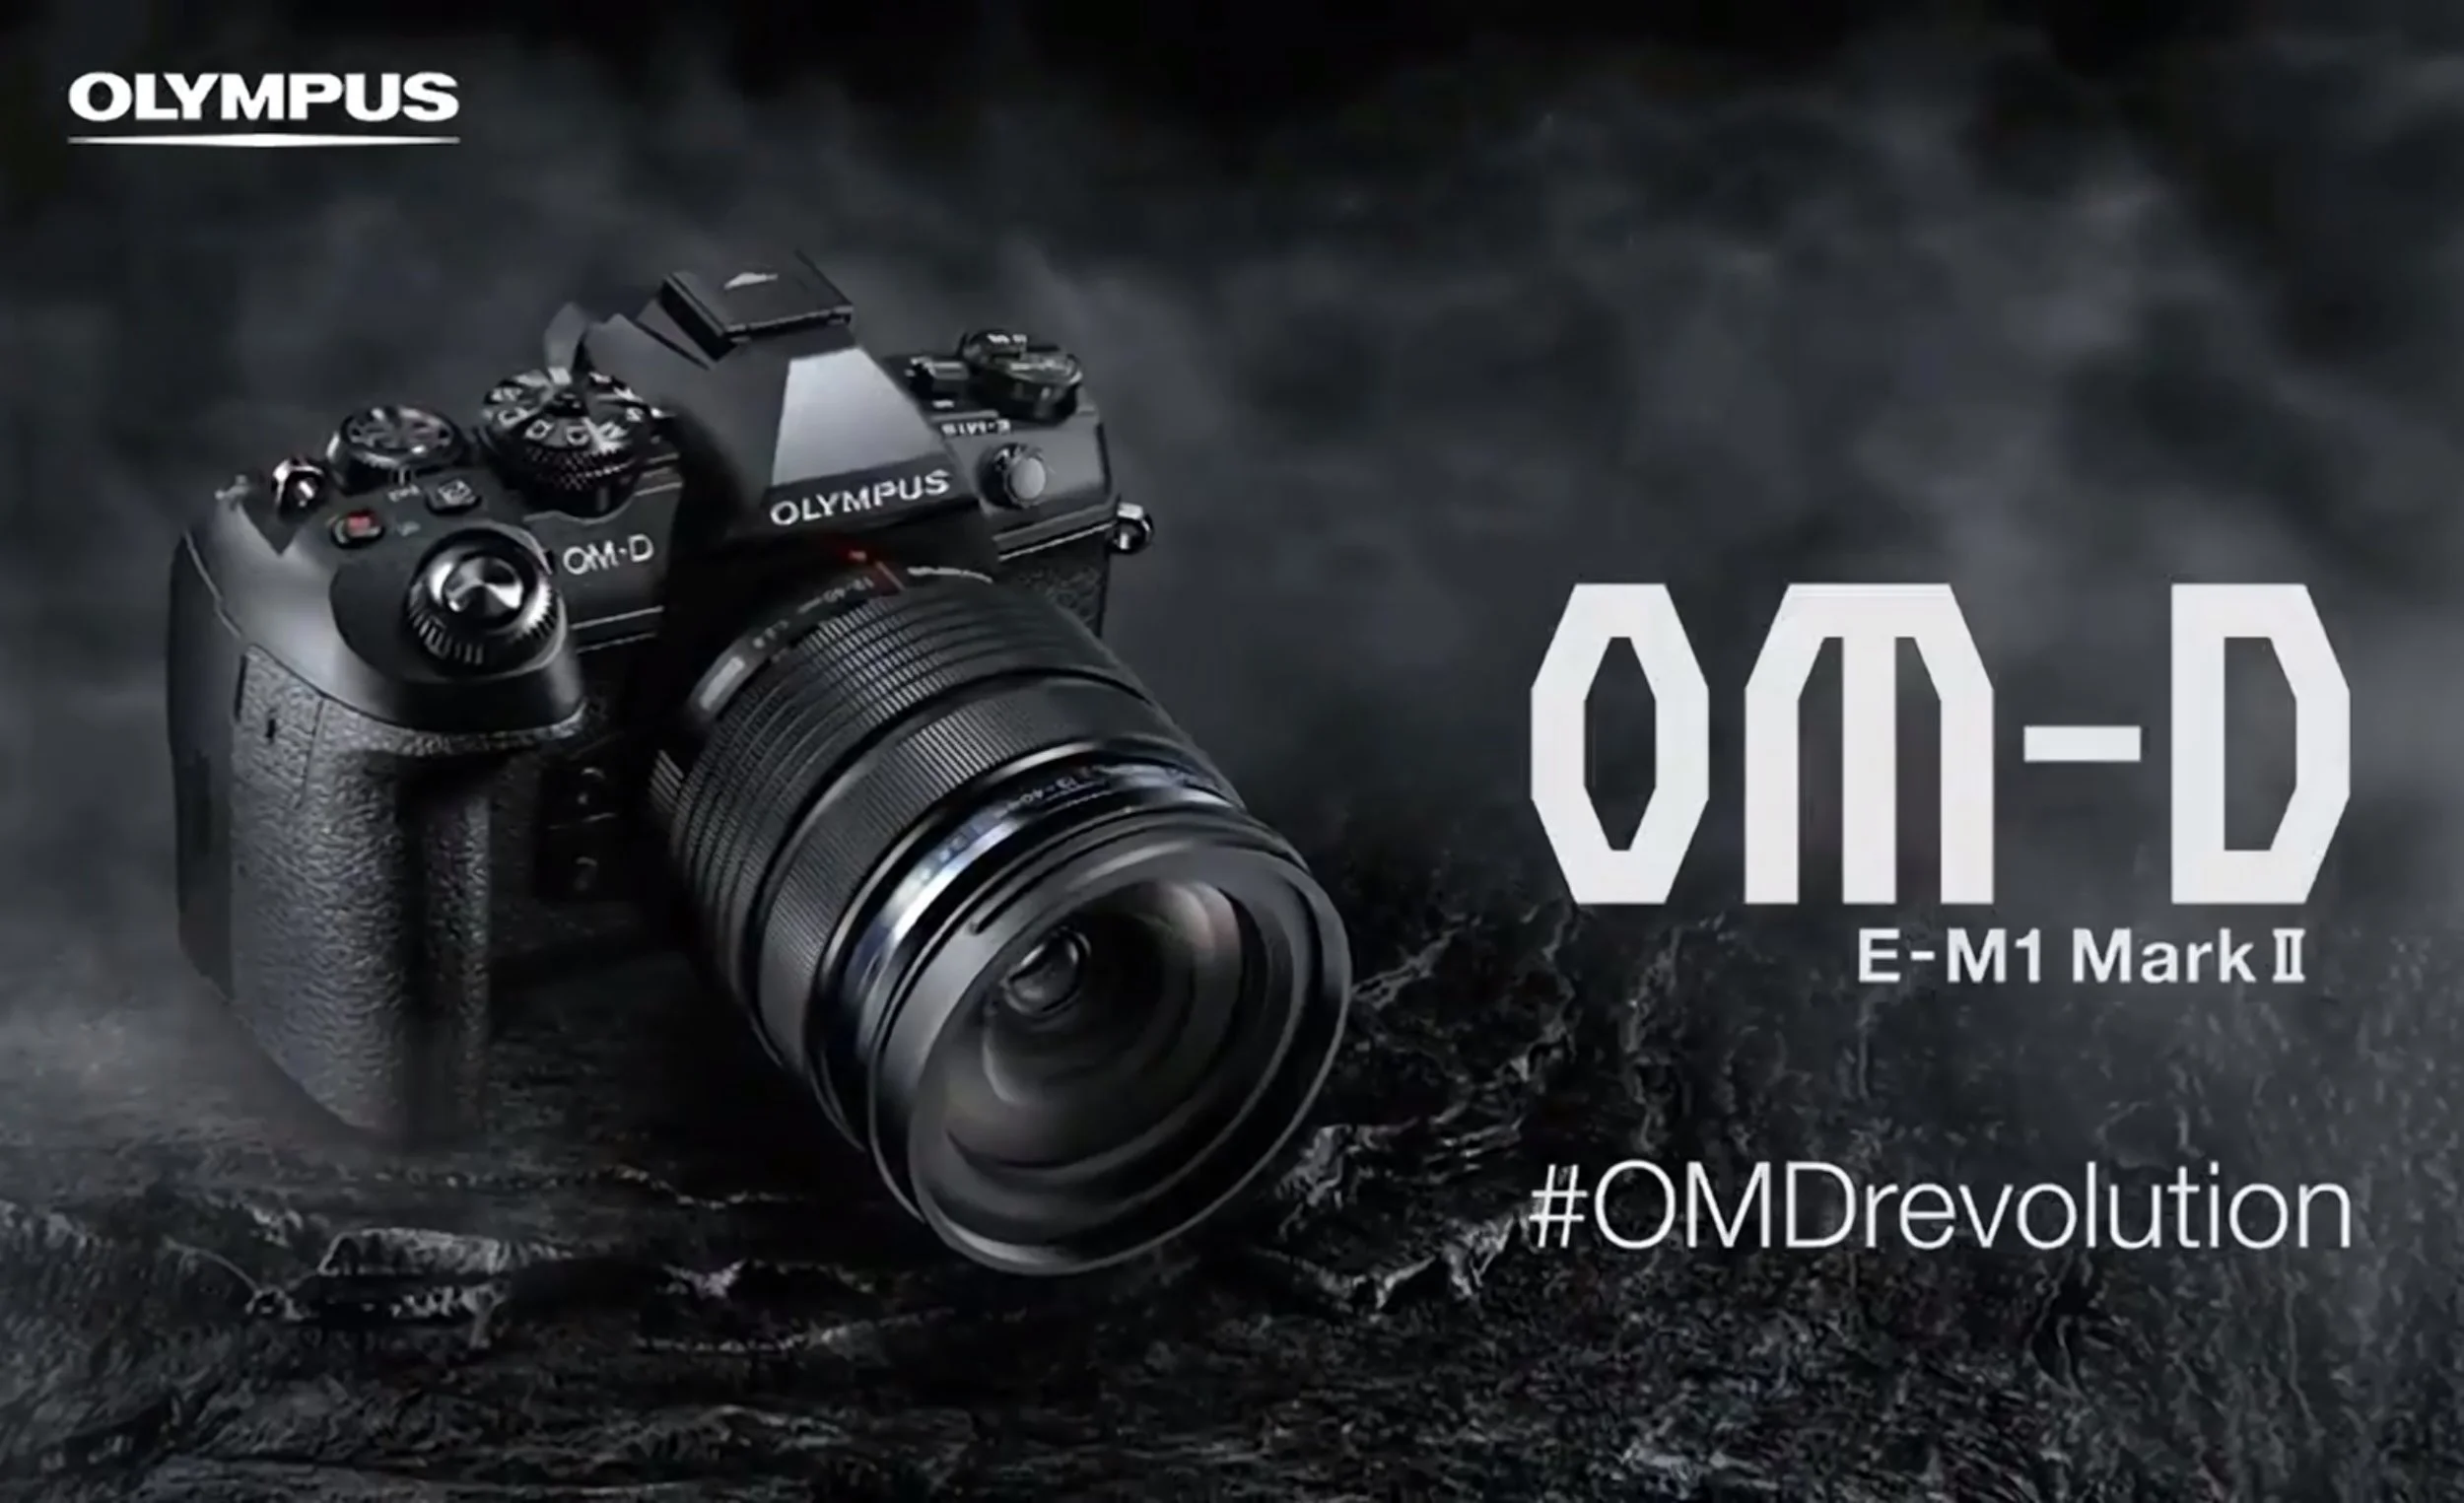
#OMDRevolution - the Olympus OM-D E-M1ii has been announced! The OM-D E-M1ii will sit firmly at the top of the OM-D range and is Olympus' new flagship Mirrorless Micro Four Thirds Camera.
Incase you missed it; Olympus streamed the entire launch in rather Apple-esque fashion by talking through each of the new features with an accompanying slide to detail the changes.
If you want to watch the entire presentation just hit play below. Or if you are just looking for a summary of the features packed into the new E-M1ii, then scroll down a little further.
Spec Summary
In the announcement presentation Olympus provided two very useful slides. The first showed the new and impressive headline specs of the E-M1ii, with the other then showing how much each area is imroved upon vs the original OM-D E-M1:
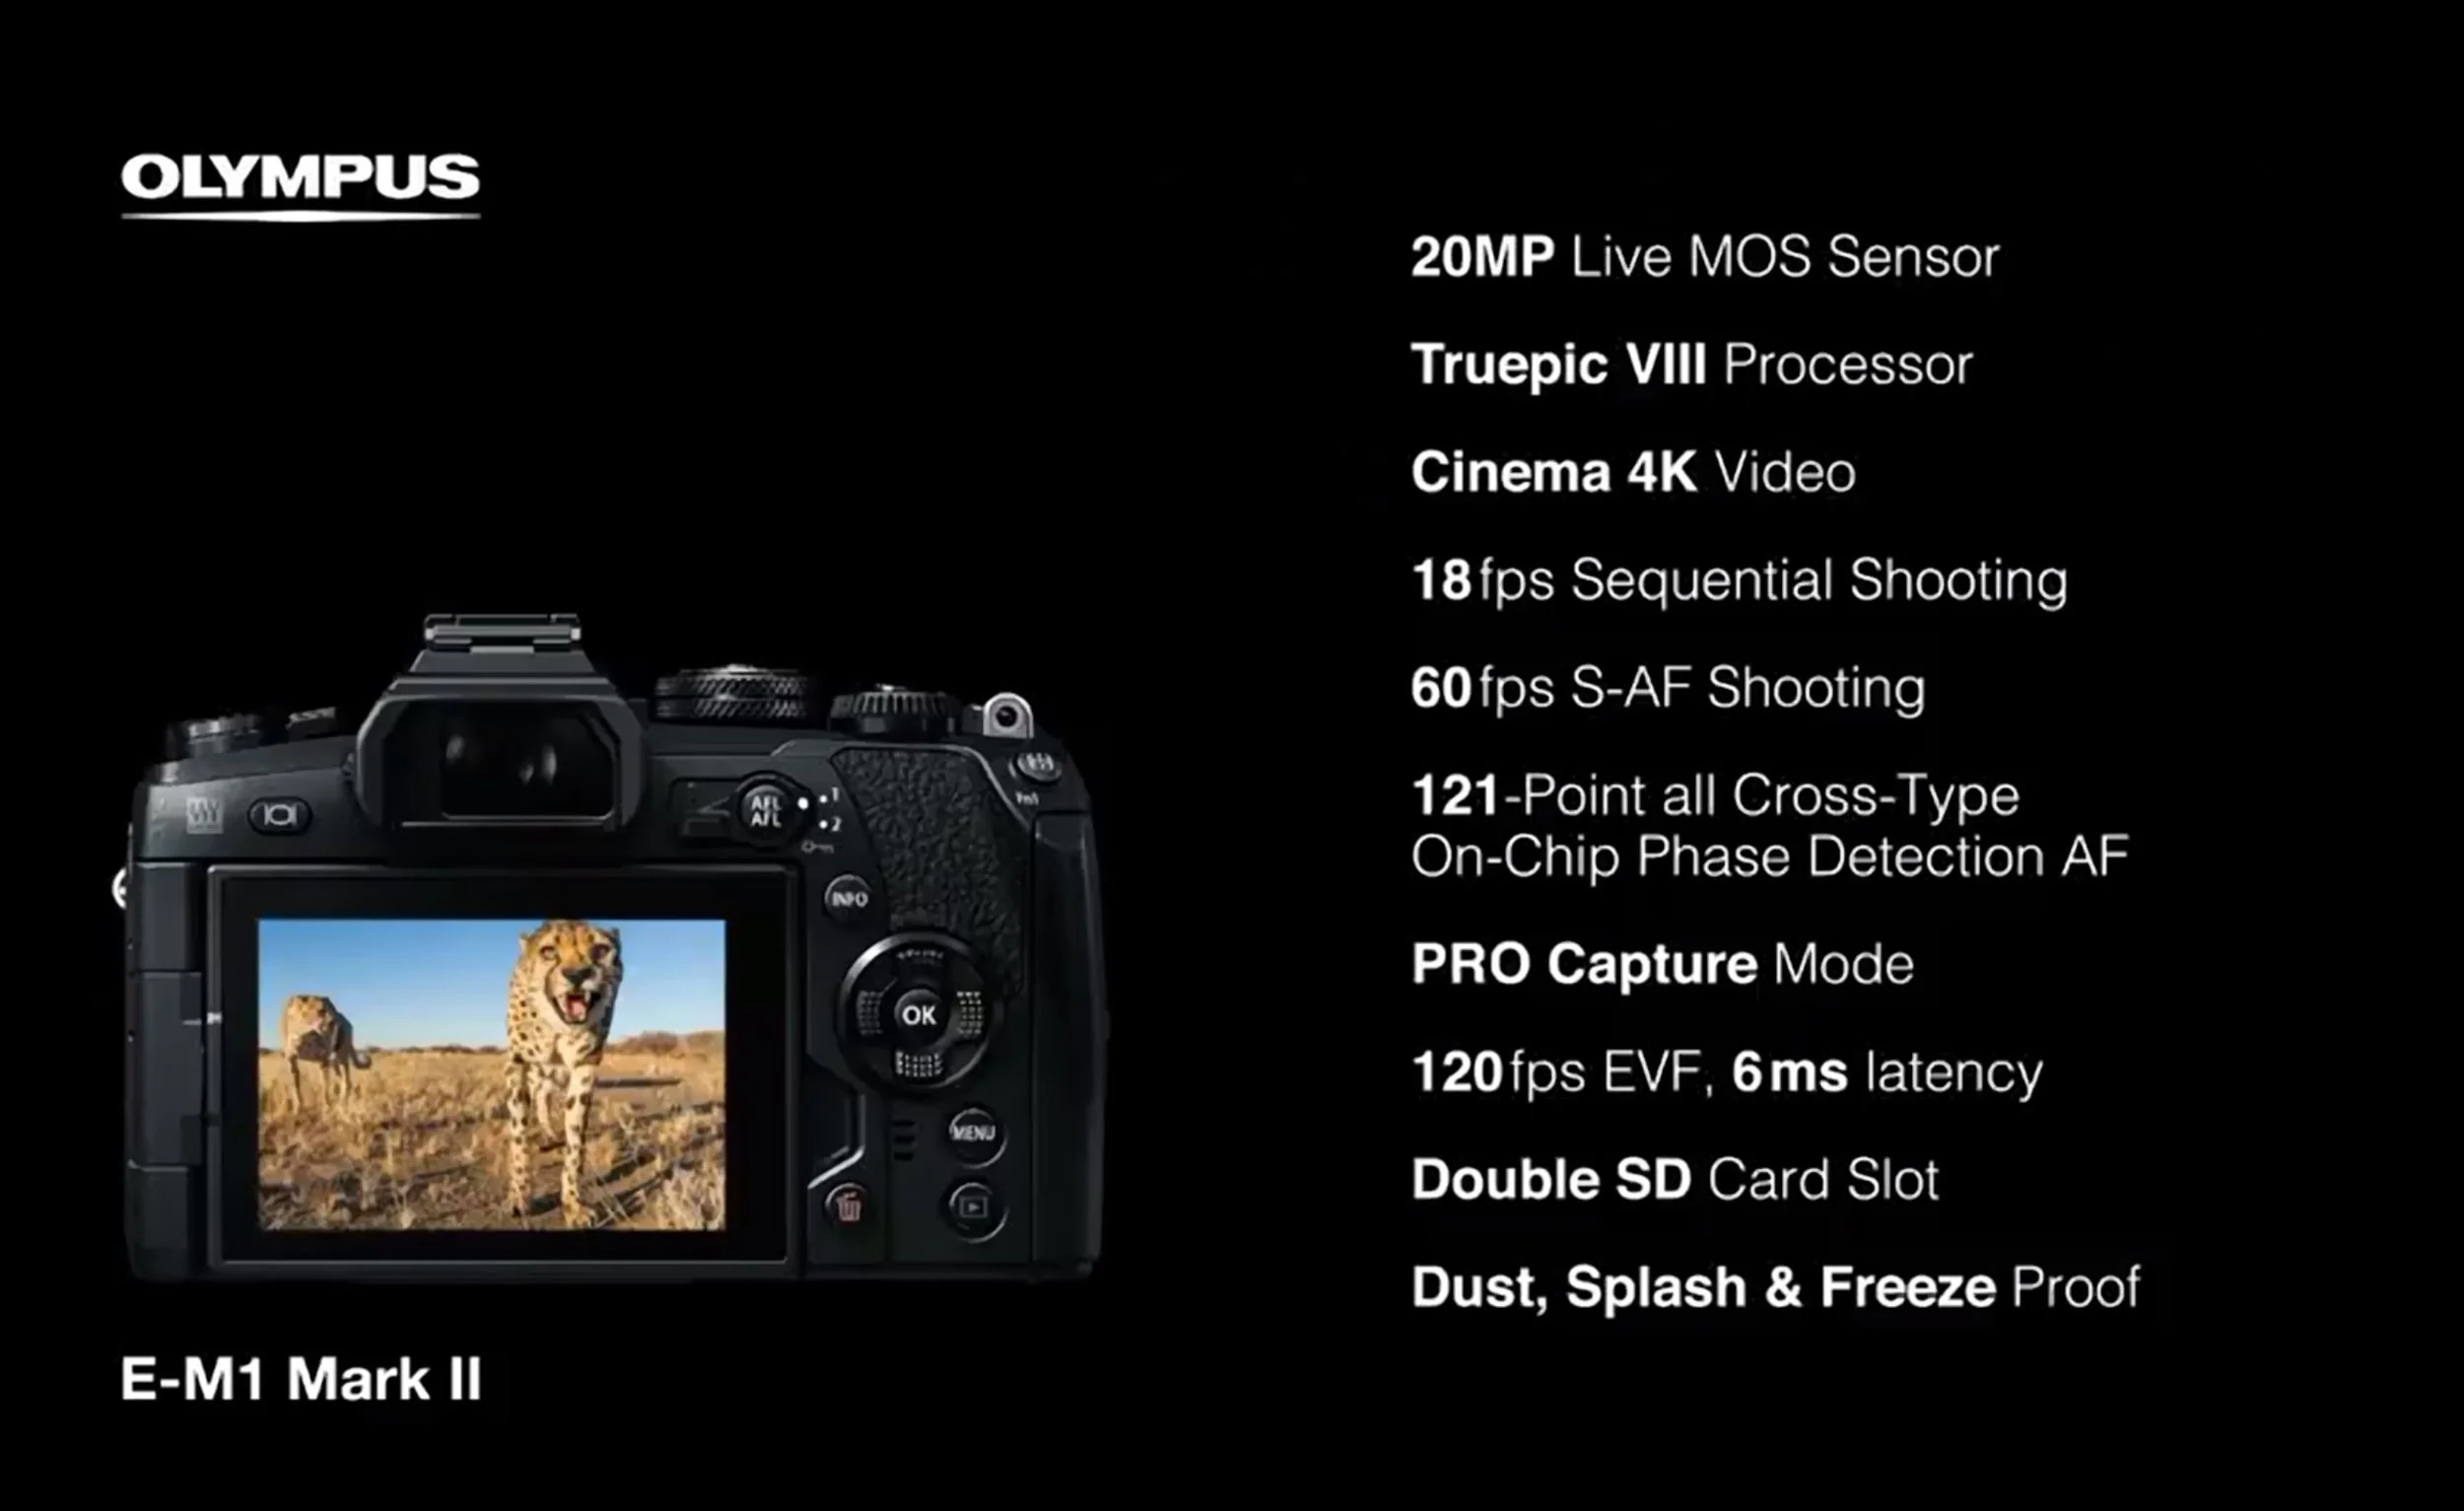
The new E-M1ii spec, including a new 20Mp sensor from Sony, capable of 4K video, 18 frames per second and 121 focus points, all of which are on-chip phase detect and ALL of which are cross type!

63% Faster EVF response rate...this new viewfinder is apparently pretty impressive!
It seems that Olympus really have listened to what photographers were asking for. Countless times in the Olympus groups I've heard photographers demanding better AF tracking, two card slots and a bigger EVF.
All of these things find their way into the mark 2 with a series of other very welcome improvements too. In the presentation Olympus of course put a lot of focus (no pun intended) on the E-M1ii's focussing abilities. It was said that as well as being faster and more accurate to focus, thanks largely to the 121 all cross-type on-chip phase detect focus points, that this new mark 2 will also be able to maintain and track focus on a moving subject far, far better than before. I rarely heard any complaints about auto focus with the E-M1, but if there ever was one, this was probably it.
Olympus Pro Service
The topic of the the E-M1ii's focusing system was discussed for quite some time and it was after this that I thought they would draw the announcement to an end. What else could there be to add?
Well, as I've discussed and written about before, it's one thing to have a camera and a system capable of helping you to make professional-grade images, but it's something else entirely to have the support of the manufacturer when it comes to warranty, support and repairs. To this end Olympus announced the launch of their new pro level support plans too:
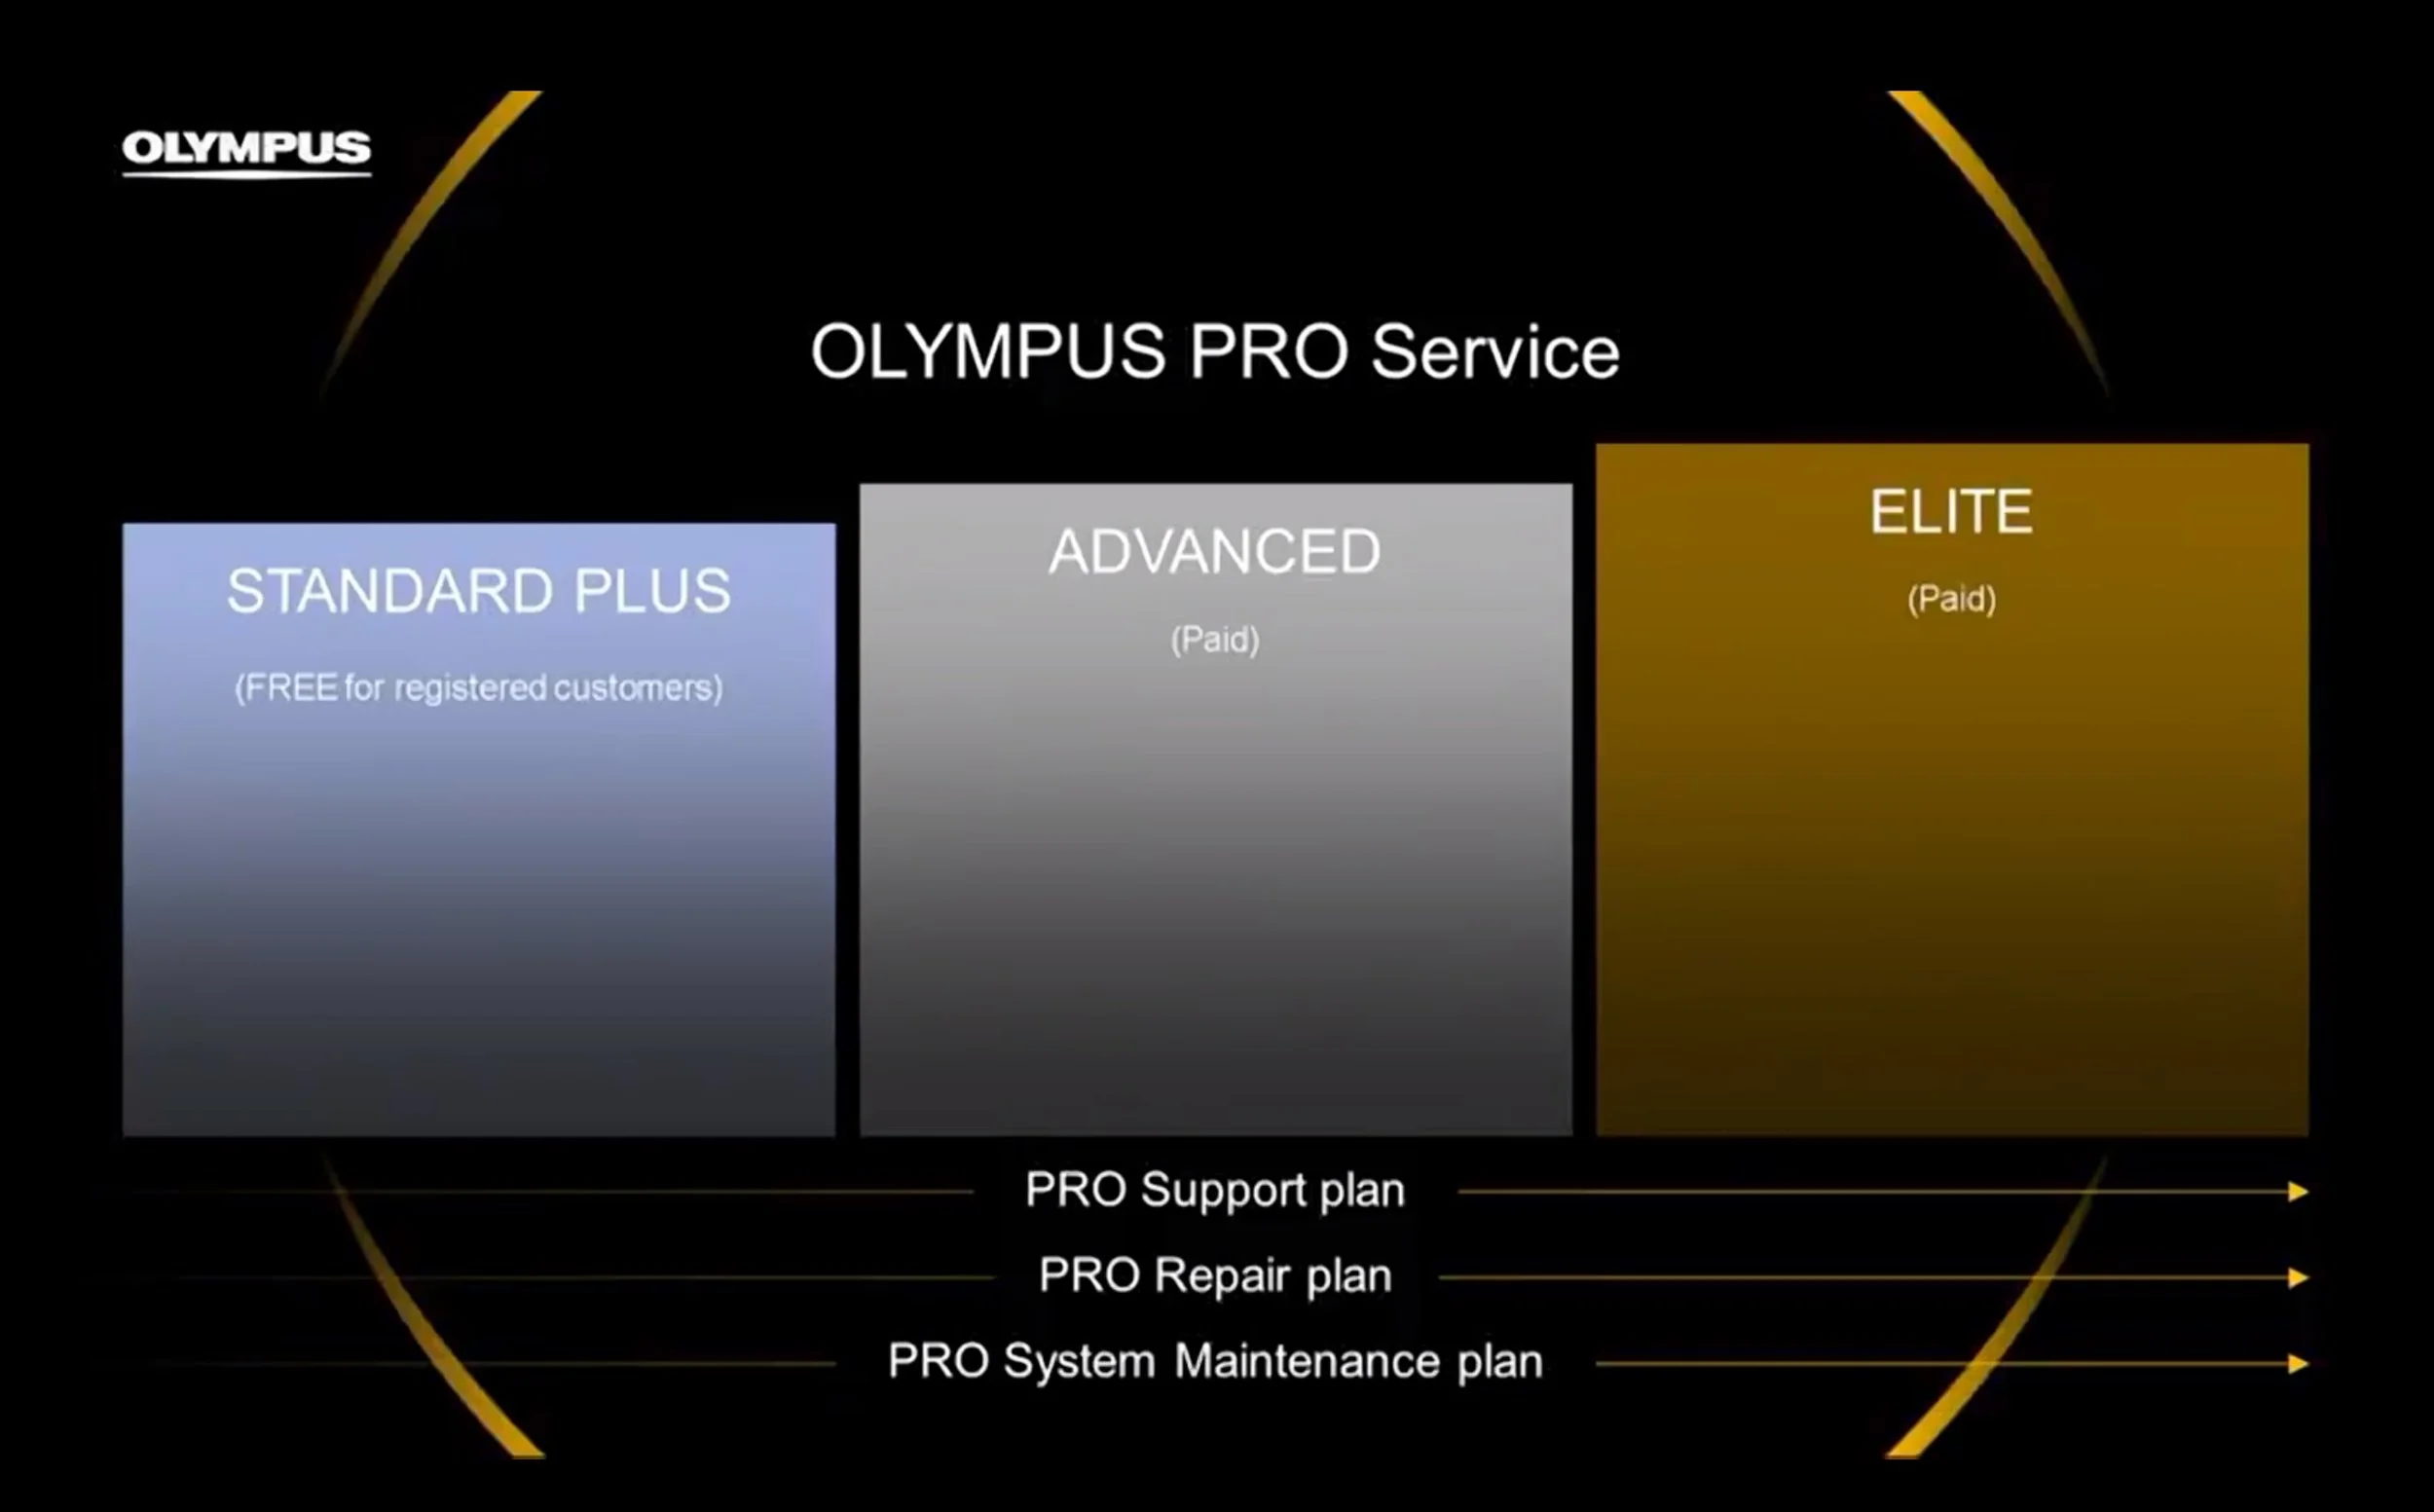
Standard, Advanced and Elite Service options will be available. Although not shown in this slide, it was mentioned in the presentation that next-day loan cameras would be available with a plan...
The E-M1ii and Pro Level Service offerings were not the only announcements today though. I've included some of the other details at the bottom of this post, such as the new battery grip and other accessories.
My Thoughts on the OM-D E-M1ii
In all honesty, in a bid to have this post released in as timely a fashion as possible I had much of it pre-written with the expectation I would just add a few images from the live stream. Much of what I had written still stands, but, the entire presentation - in combination with the E-M1ii's specs and the Pro Service plans - reveal so much more to me than just a new camera. There is a message being sent from Olympus here: Olympus are after the professional market in a big way and not just weddings, portraits, pets, landscapes and wildlife - we're talking top level sports photography too!
The original OM-D E-M1 was a camera ahead of it's time trying to muscle it's way into the world of sports and serious professional photography against a field full of mature DSLRs and big white lenses. Whilst some (myself included) felt it was good enough to seamlessly step into the arena's of wedding and portrait photography and that it was even capable of shooting motor sports with great success, it perhaps didn't ever quite cut it as a top-level sports camera for the professional sports photographer. The omission of dual card slots, limited (or at least a lack of) pro level support and it's ability to track a subject being lesser than that of a DSLR, meant that many pro sports photographers just thought of it as another fad mirrorless camera. This was all despite the original E-M1 having always been widely acknowledged to be the best of all of the mirrorless cameras when it came to auto focusing capabilities - even today! (sorry Fuji Shooters, but it's true!).
However, the E-M1, like every DSLR and mirrorless, had it's limitations. You wouldn't have any trouble convincing many wedding and portrait photographers that the E-M1 was a capable replacement for a DSLR when it came to their work. I certainly felt that it was more it was up to the task and it has proven to be great.
To me at least, as great as the E-M1 was / is, professional sports photography always felt just one step beyond its' reach. Shooting top level team sport events such as football (Soccer) or situations where the subject changed direction and distance rapidly presented the E-M1 with just a little too much to handle. As a result the E-M1 was never largely adopted by professional sports photographers and failed to garner recognition as a true replacement sports photographers' camera, which quite possibly hampered its' bid to be more widely recognised and acknowledged as a professional level camera.
The OM-D E-M1 mark ii now sets out - backed by Olympus PRO service - to take that one final step that it's predecessor arguably couldn't quite make. With it's much improved auto focus system and array of features that any professional sports photographer would demand it appears well placed to do just that! Spec-for-spec the E-M1ii aims to stand toe-to-toe with those big old DSLRs and over-sized white lenses. This is a massively bold move from Olympus. It's something that Sony and Fuji just aren't attempting (or at least they don't appear to be attempting or advertising that this is something they want to achieve). Olympus have set out their stool. Can a camera seen by many professional sports photographers as 'plucky' and 'diminutive' really move in on what has traditionally been the home of those behemoth size camera bodies and lenses?
Even if the OM-D E-M1 mark ii can't do it yet - Olympus are the only company that appear to be trying to take mirrorless cameras in the right direction by attempting to break into that market. With the announcements on offer from Canon and Nikon at Photokina I'm left feeling incredibly un-inspired by those brands and the directions in which they are heading. If we see OM-D's at the next Olympics and pitch-side at Premier League football matches, I can see the perception swinging so heavily that it may just kick start a complete sea change in what it is photographers consider a mirrorless camera capable of being: a truly professional camera suitable for everything from weddings, macro, product, portraits and, the holy-grail; sports photography.
What do you think of the E-M1ii?
Are you going to be buying the Olympus OM-D E-M1 mark 2? What do you think of the new model? Can you see this camera taking over in the field of sports photography? Let me know your thoughts in the comment section below.
Some more slides from the Olympus OM-D E-M1ii Announcement
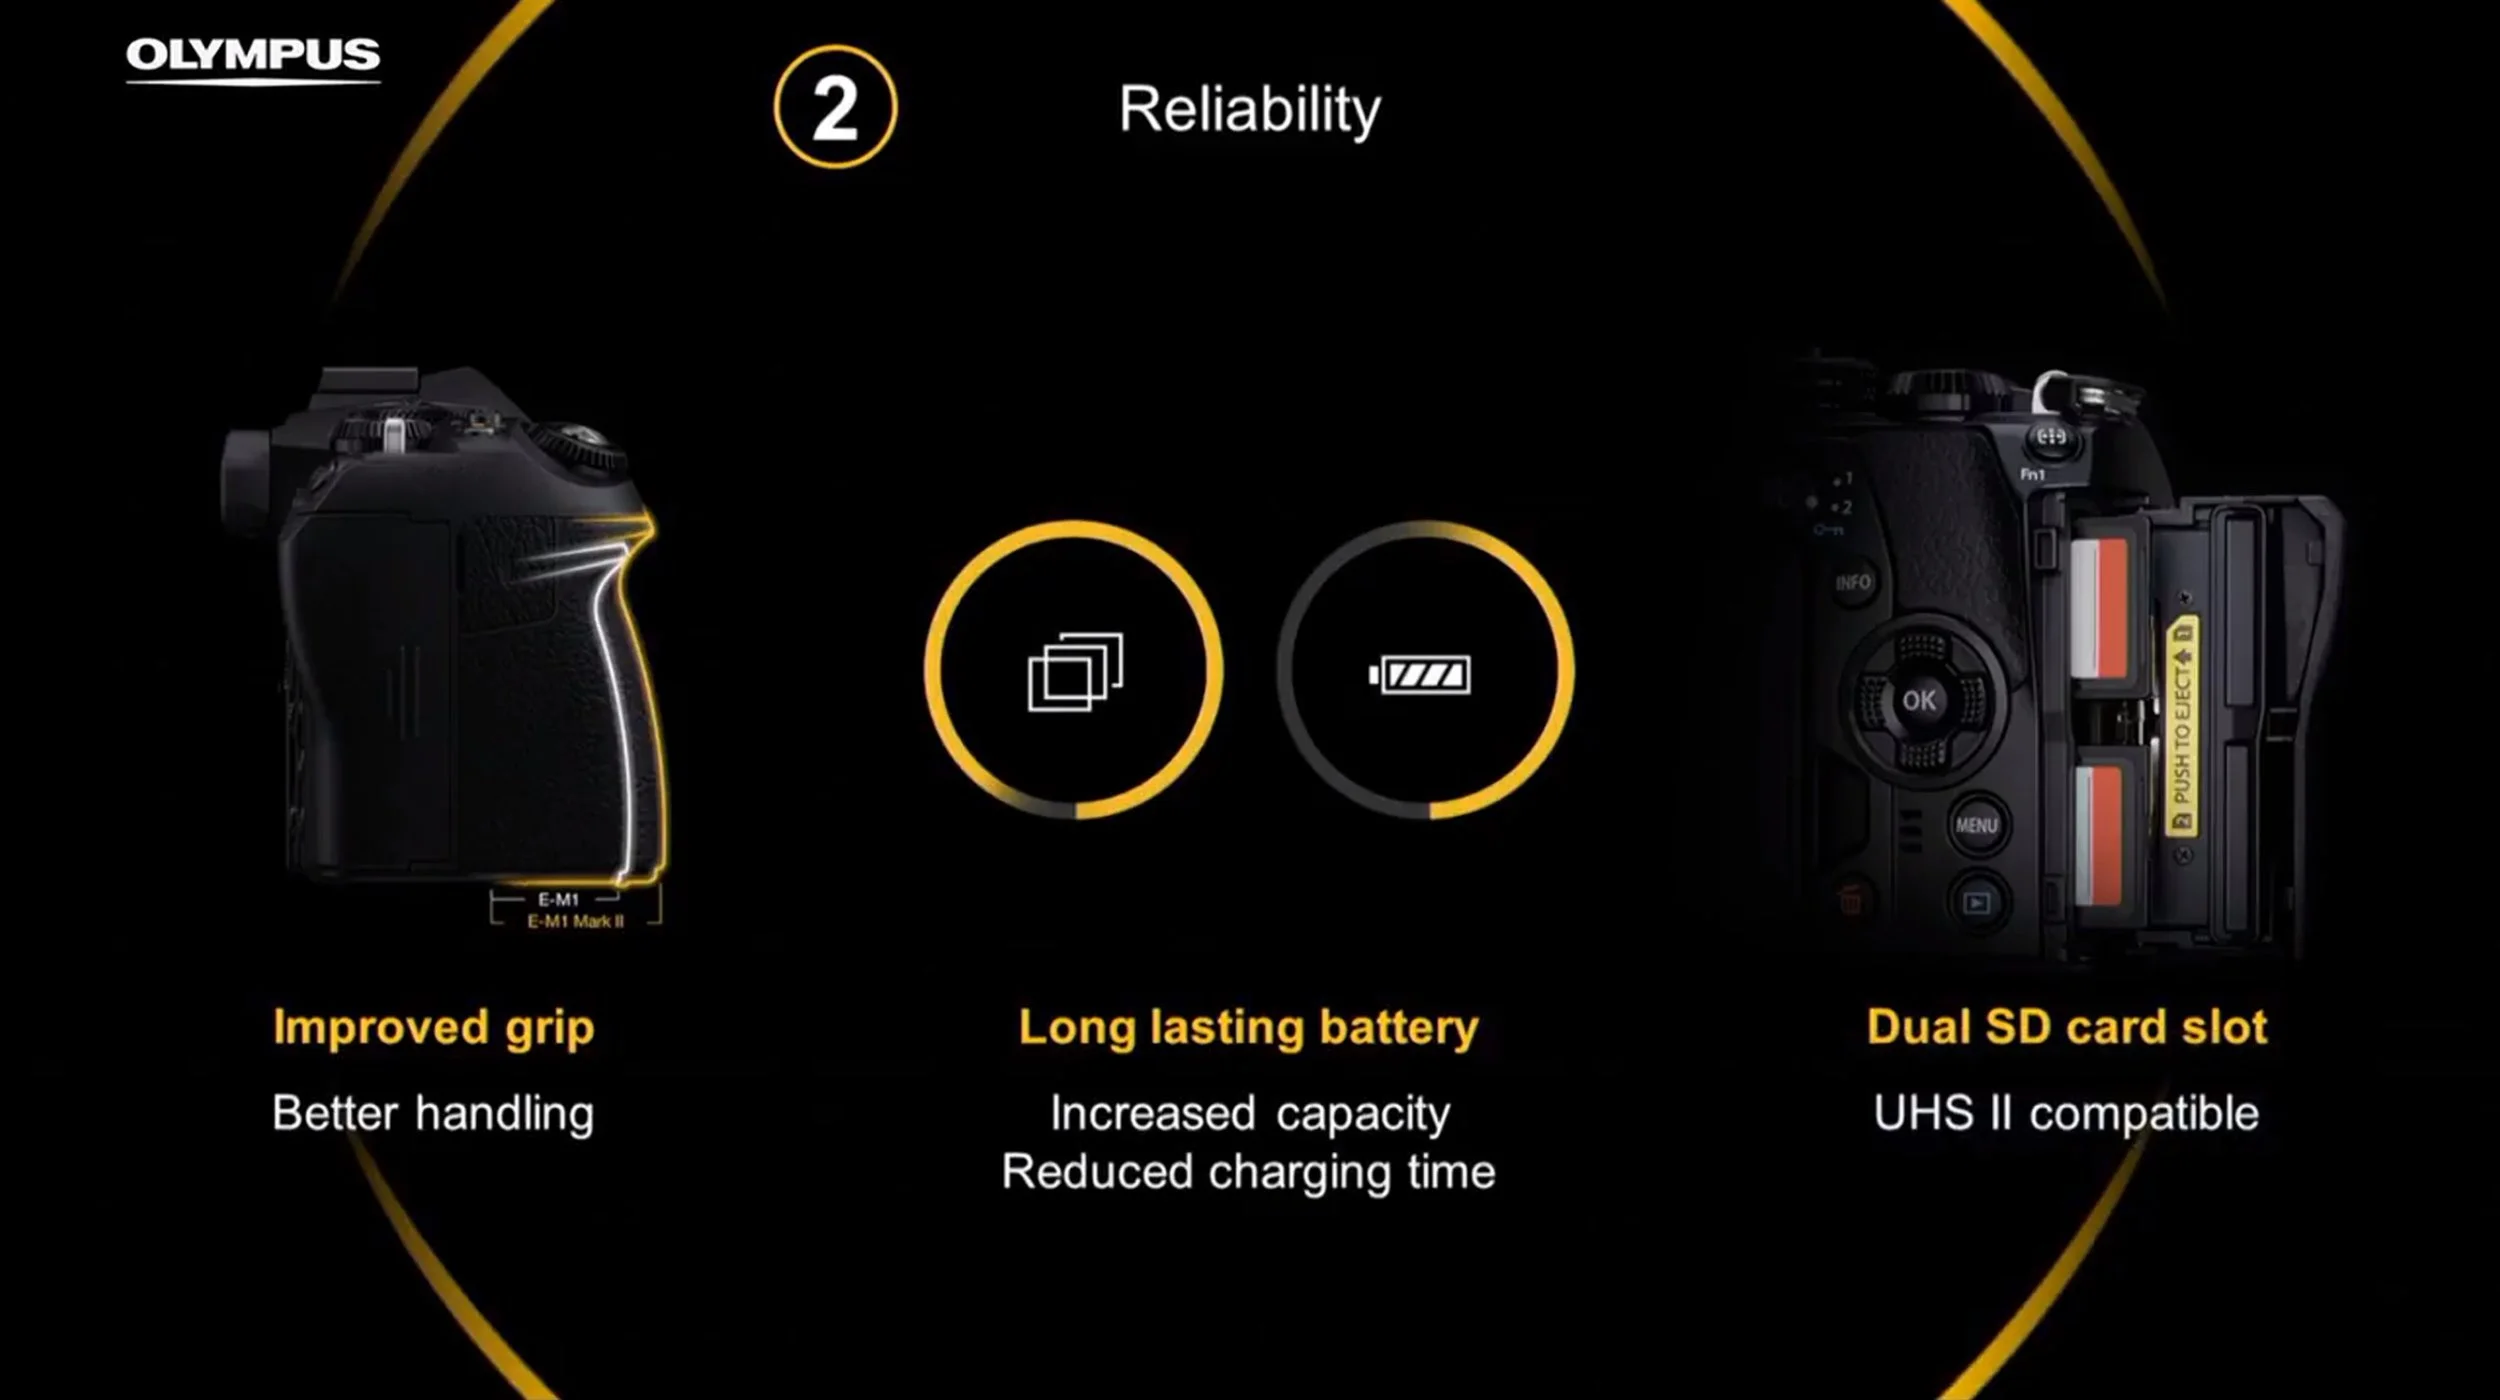
The front grip has been made larger, which makes sense considering the largest M.Zuiko lenses (the 40-150mm f/2.8 and the 300mm f/4 were released after the original E-M1 was first made. Dual card slots and improvements to battery longevity were also mentioned...hallelujah!
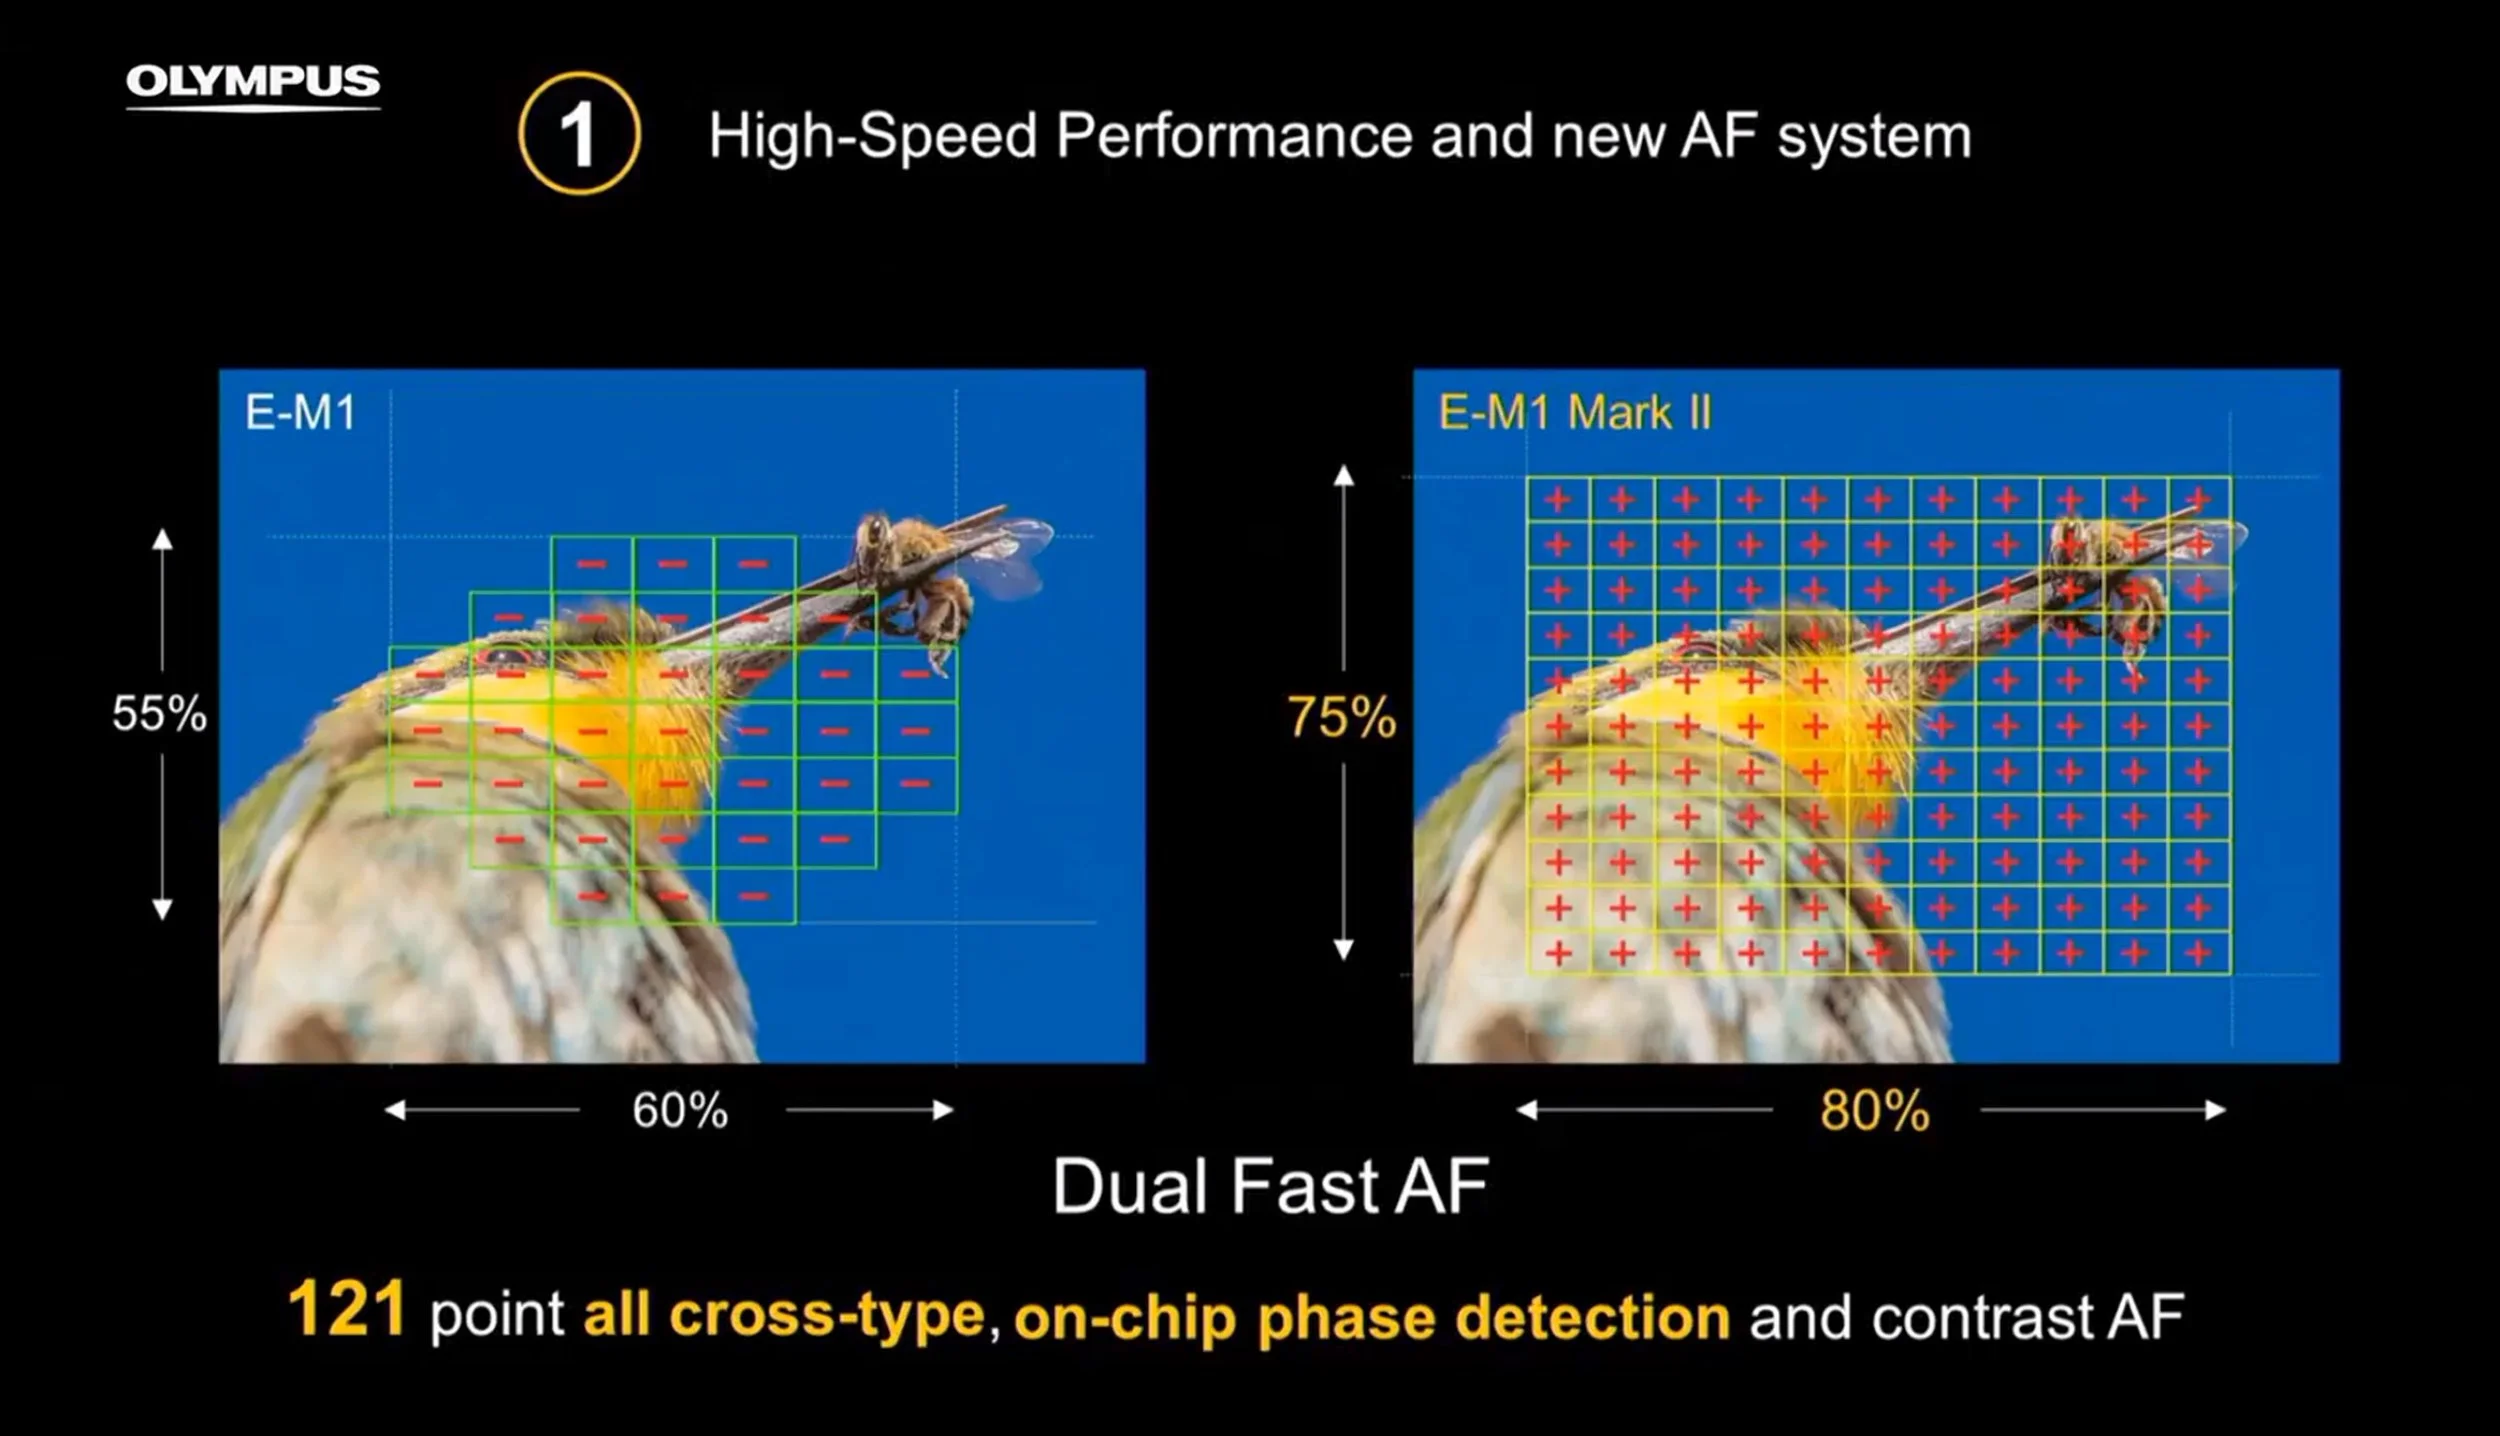
A slide showing the layout of the new auto focussing system. Impressive!
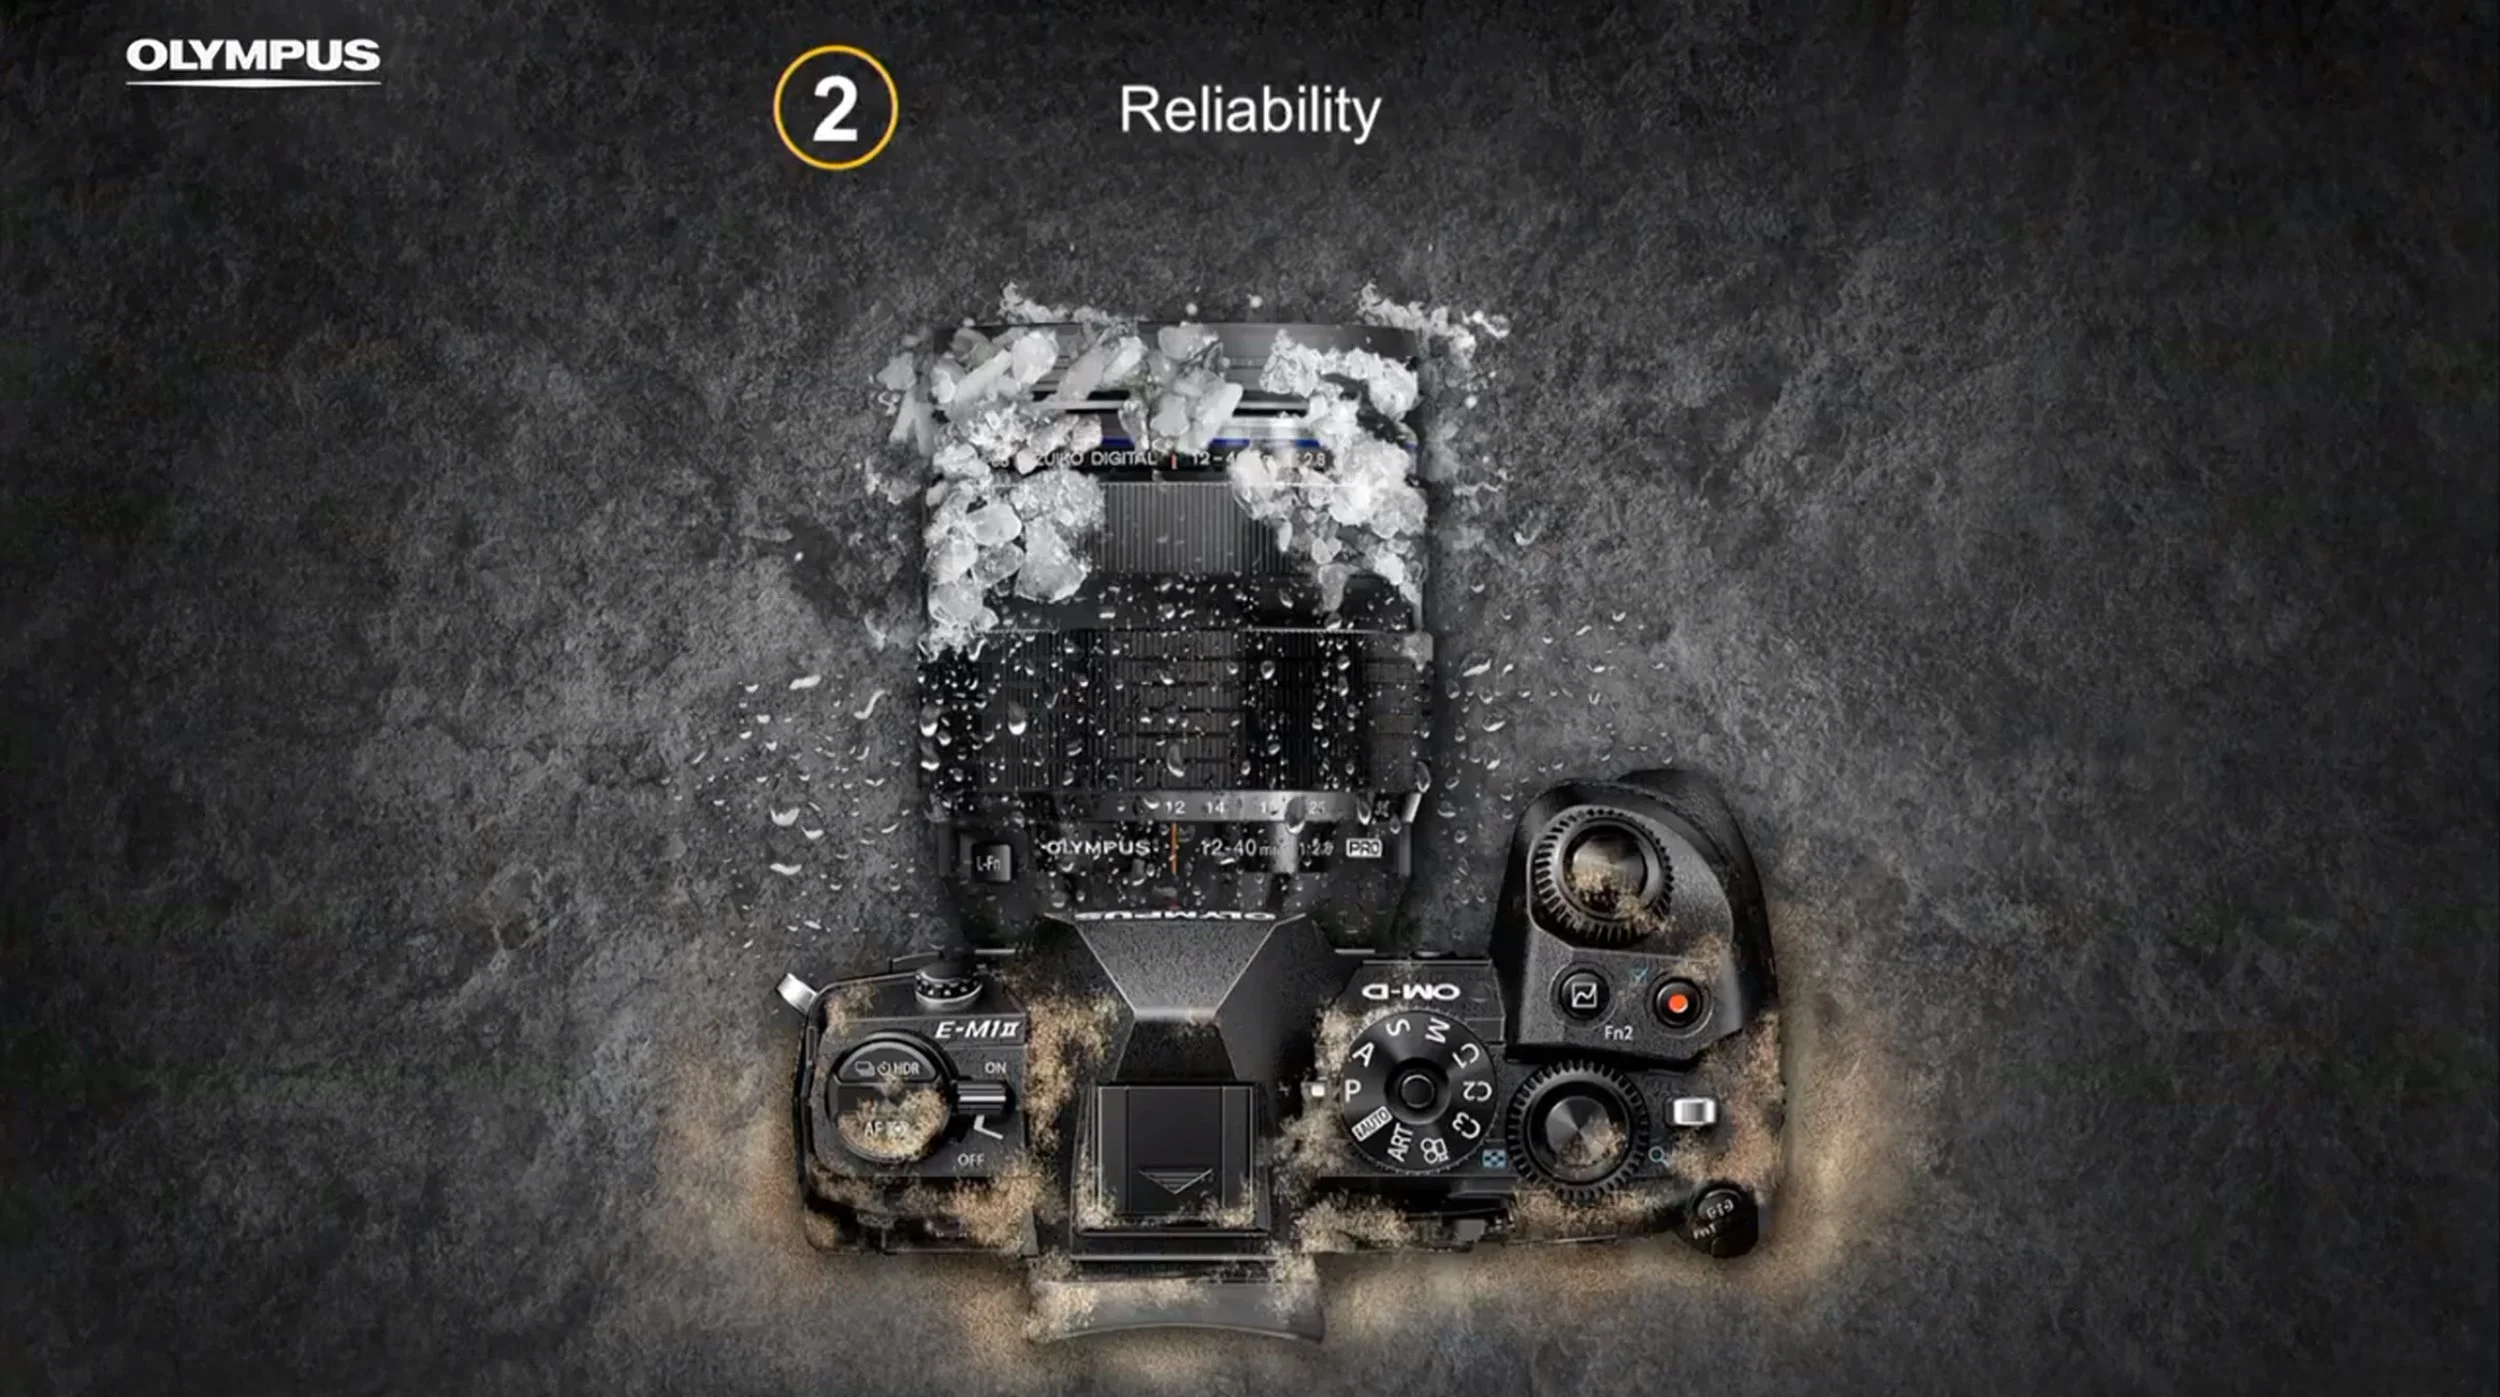
The E-M1 was ever-reliable. Olympus have recognised this and only seek to build upon that reliability. It was a staple of the success of the E-M1.
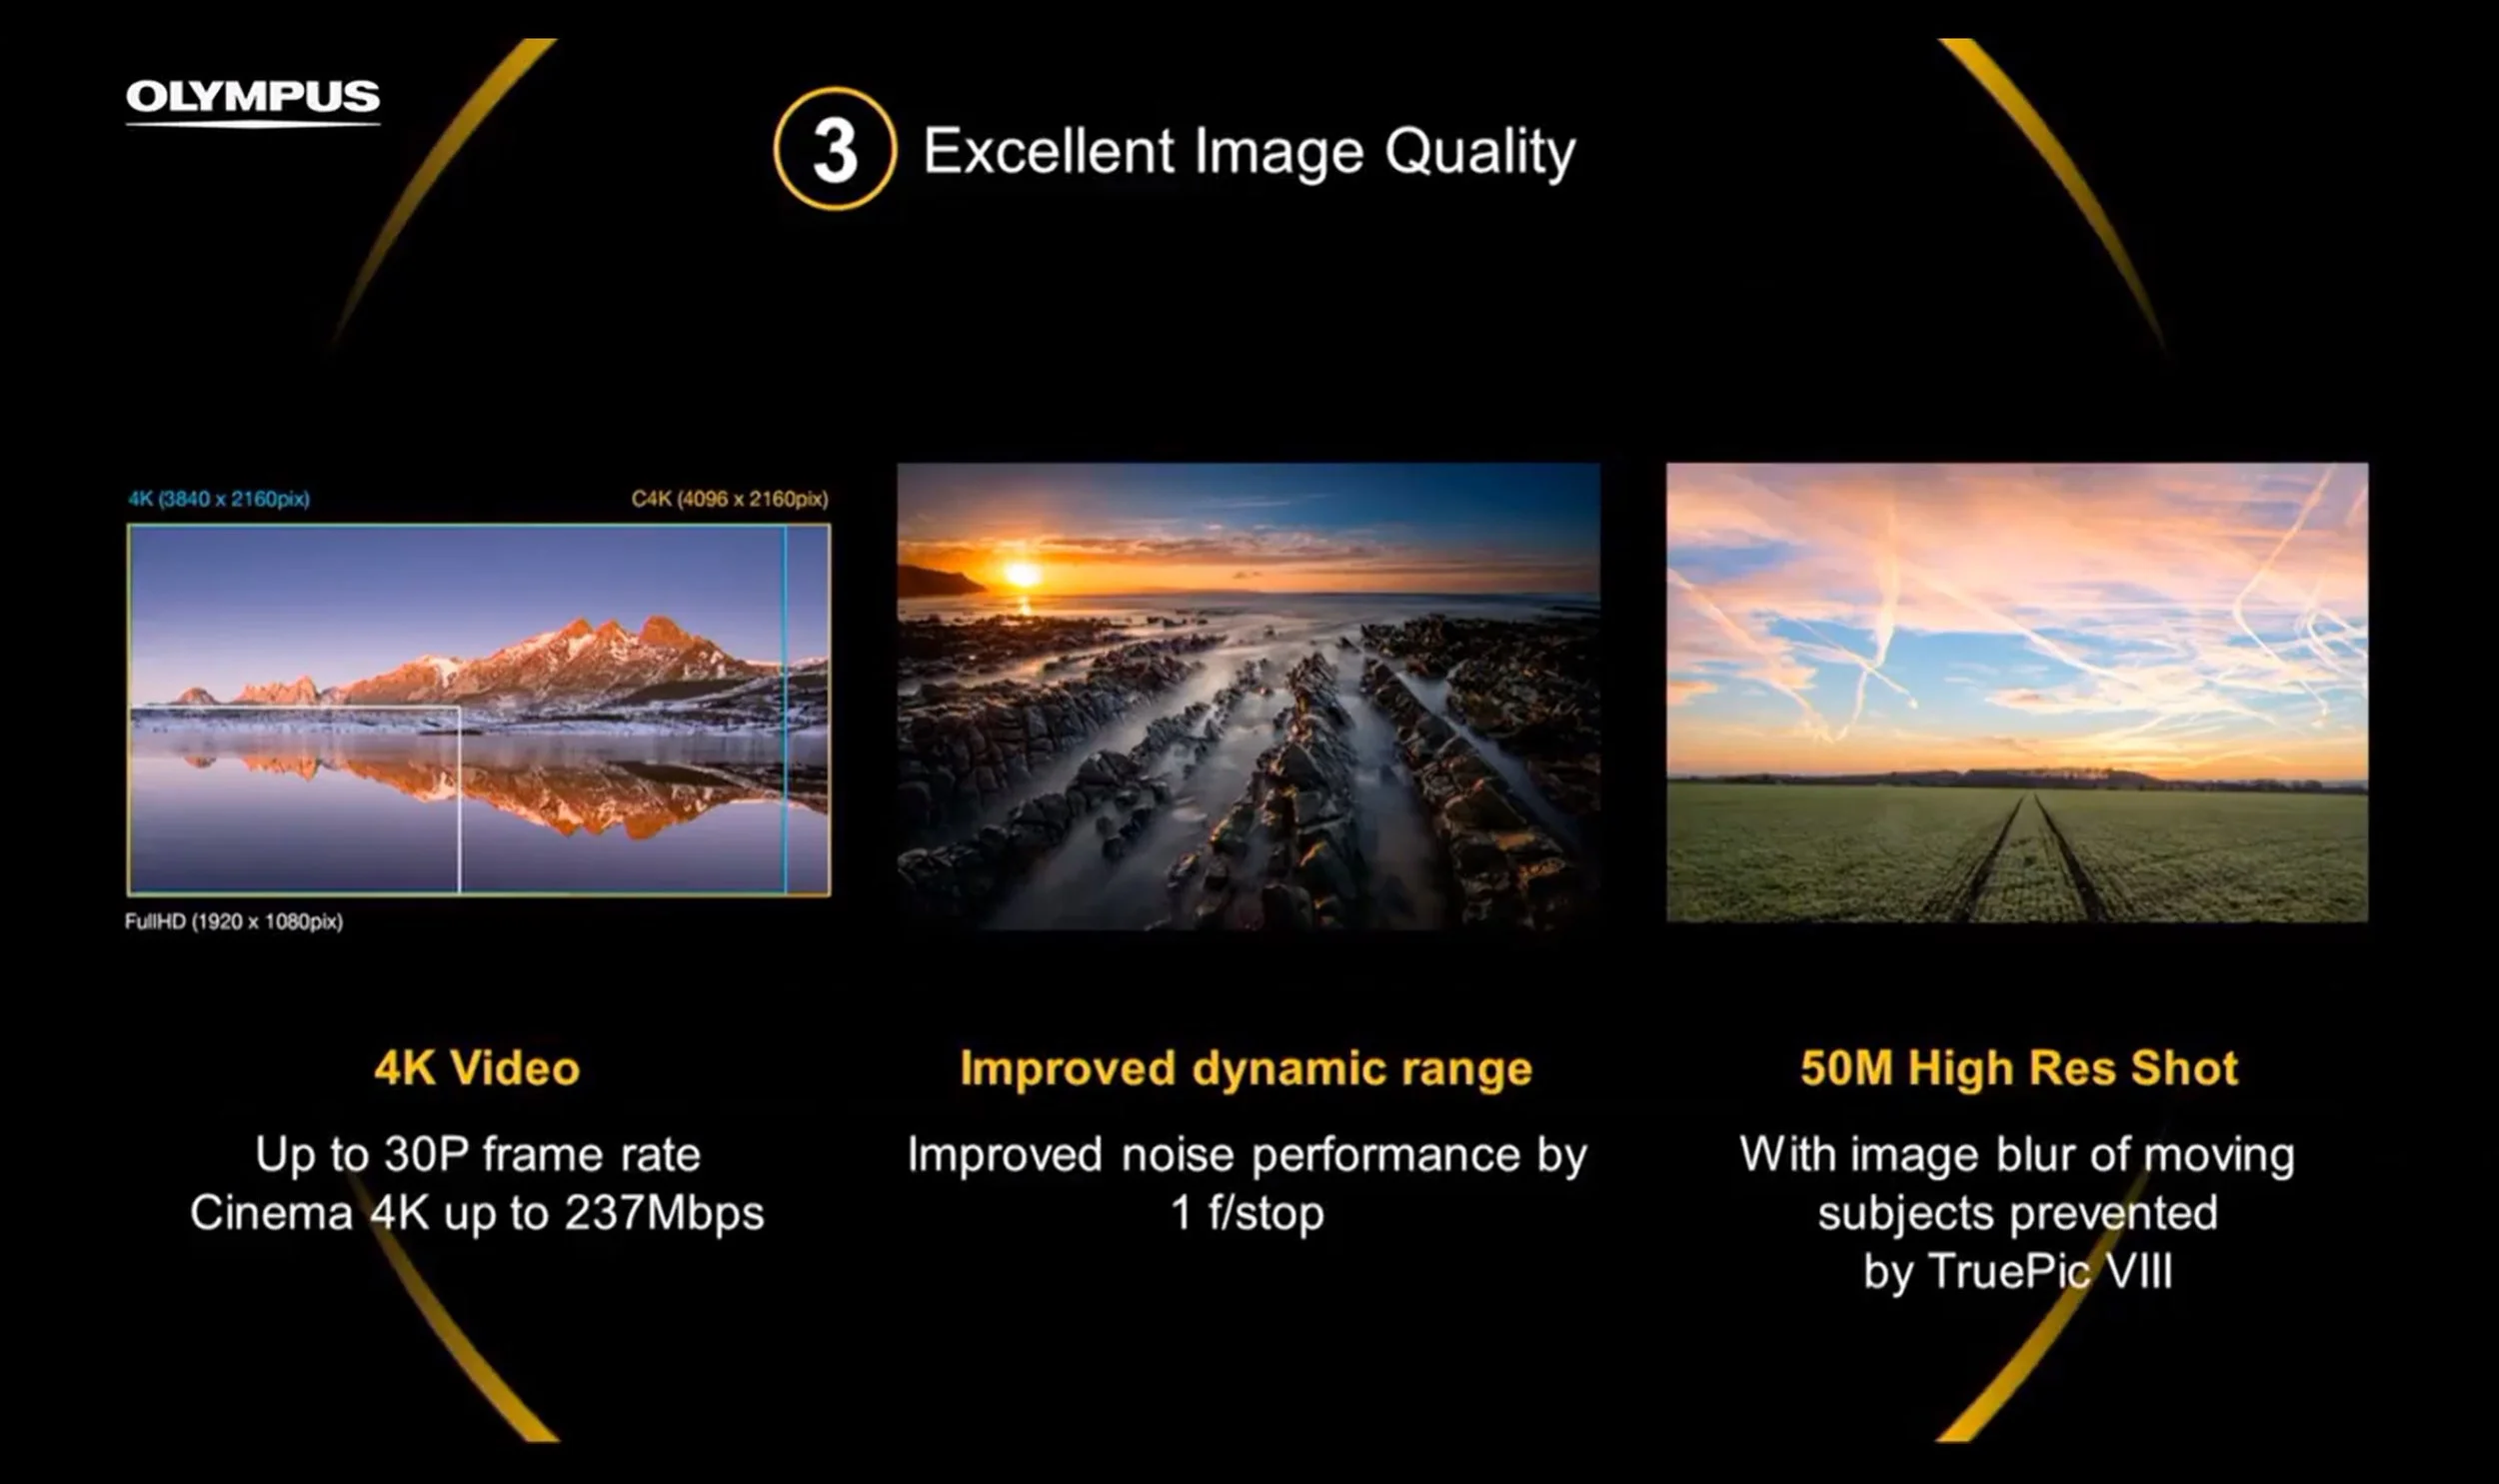
4K Video, 1 stop of noise improvement, higher dynamic range and the 50 megapixel hi res shot are all features in the E-M1ii.
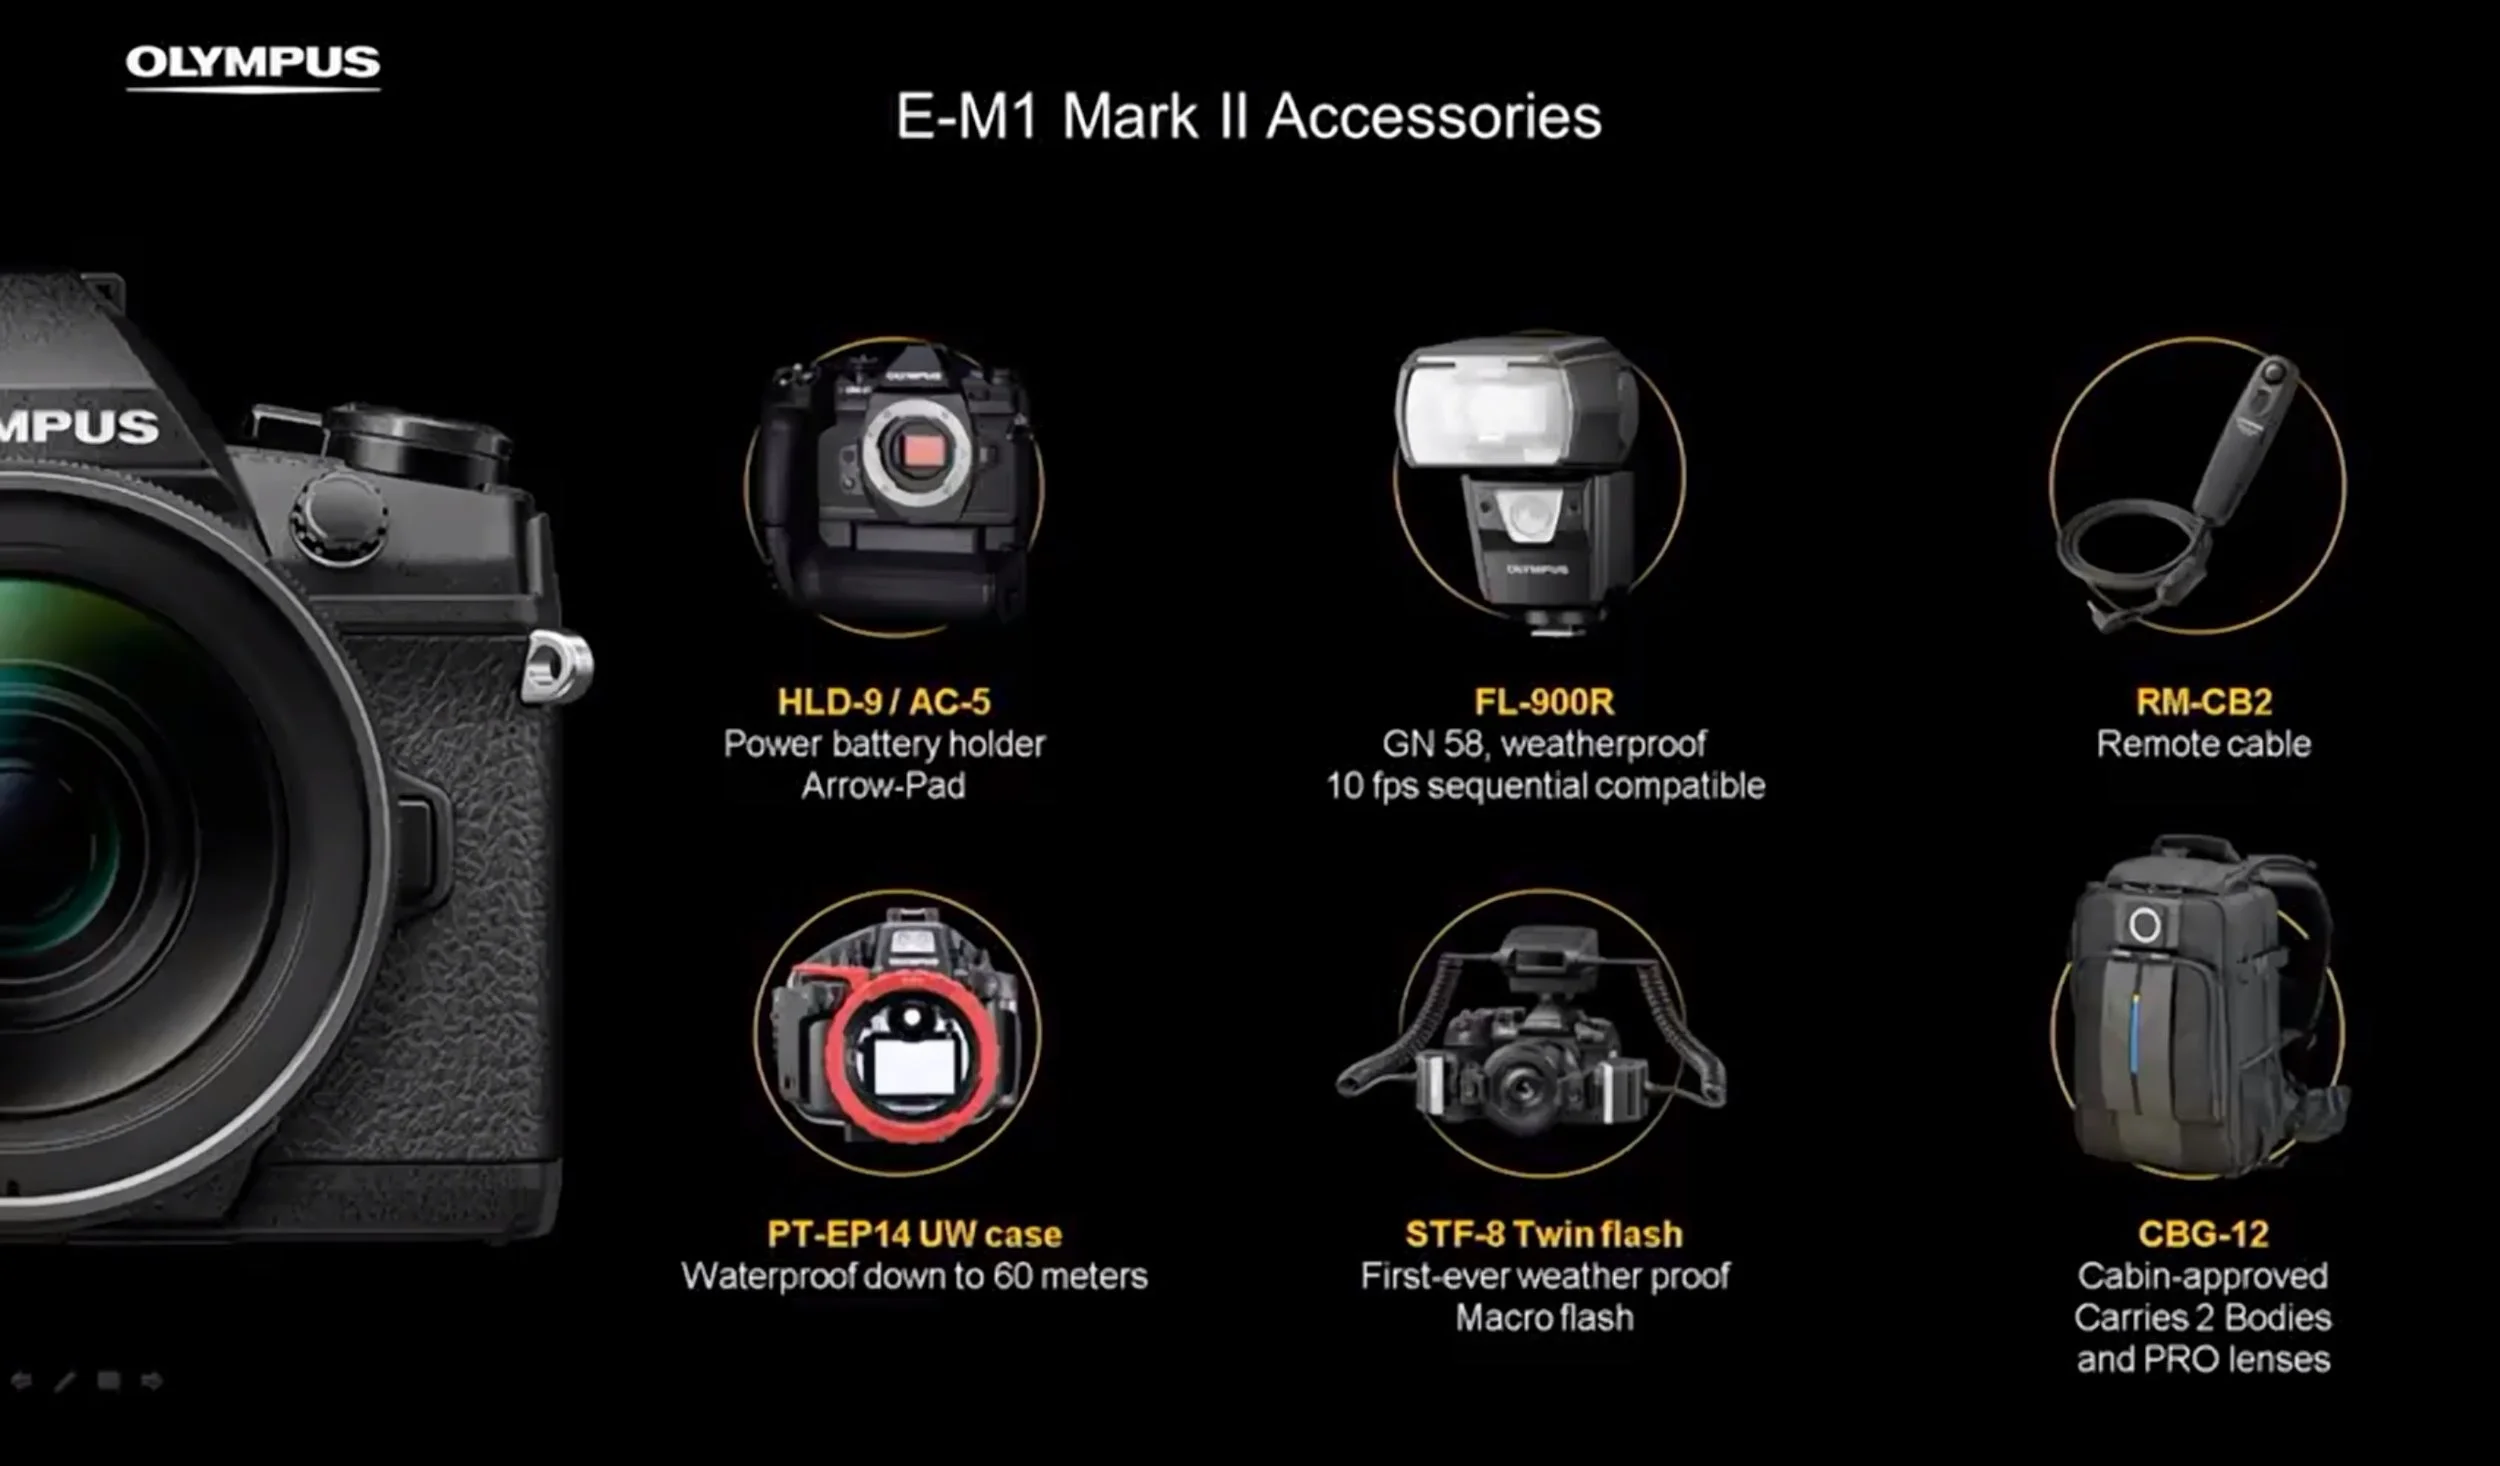
New accessories include a new vertical grip, which features a directional button pad all of it's own to mirror the same pad you would find on the camera body, making portrait-oriented shooting even easier than ever. Those who use flash will also be pleased to see news of a new FL-900R speed light as well!
Thanks for stopping by! Don't forget to subscribe!
Shooting Soccer with an OM-D: Can it do it?
This week we have a question that was sent in from Andrew Kern (or, AJ). Rather than replying to the email directly I thought it would be best to answer AJ's question right here on the blog for everyone to see.
If you're in a position to listen then go ahead and hit play on the audio player below, if not, scroll down a little further and you can read through today's question from AJ and my response. Either way the audio is the same as the text to make sure you're not missing out.
AJ is an Olympus shooter photographing High School Soccer (or, as we call it in the UK, Football :) ). AJ writes:
Hi Mike,
I'm already in the Olympus camp. I jumped in buying an E-M10 kit with the stock lens. After that I picked up a 40-150mm f/4.5-5.6 MFT lens and after that a used 4/3 50-200mm f/2.8-3.5 non-SWD with an adapter. Using Manual Focus with peaking and High sequence mode I have managed to get good results by anticipating where play is going to be and then focusing there. However, I'd like to increase my keeper rate and not feel as though I'm missing shots by anticipating play. Most of the games happen under lights near dusk so I feel that a fast lens is a must. I'd love to say that my gear puts bread on the table but that's not true. So my question is what should my next investment be to help me:
Better glass (OLY 40-150mm f/2.8)
Better body that can better use the glass I already own (E-M1 second hand prices should dip a little when the E-M1 mkII is released)
Something else?
Thanks
AJ
Thanks AJ for your question. This is rather timely. Only last week my good friend Paul Griffiths and I were discussing how each type camera has it's place as a tool. Paul, being a Fuji shooter and myself, using Olympus of course, both agree that when it comes to professional sports photography a sports-oriented DSLR is probably still the way to go. I'll dive into the reasons why in just moment as part of my answer. But, to start I'll address each of your three points separately:
1. Better Glass?
When is there a reason not to get better glass? Well, in all honesty the answer is actually that you should be using the best that you can reasonably afford, with particular emphasis on the 'that you can reasonably afford' part. AJ mentions that sports photography doesn't pay his bills, which to me says instantly that AJ should be looking for good value in his lenses and equipment. That said, when it comes to sports photography we need more than just sharp glass. We've all come to know and love Olympus lenses for their sharpness, there is no doubt about that. Even some of the entry level lenses that could be considered budget options are able to resolve fantastic sharpness.
However the difference these days between a top lens designed for a Pro and an entry level lens isn't just it's ability to resolve sharpness. That's more of a minimum requirement. The difference in fact is the quality of the components inside those lenses, specifically the motors and mechanisms that rotate and move the optics inside the barrel. Naturally more expensive lenses will use higher quality components, which, as you would expect work faster and more accurately. So yes, in effect the Olympus M.Zuiko 40-150mm f/2.8 PRO will focus faster than the lenses you've mentioned in your question and they'll stand a better chance of maintaining that focus too.
Add to that the 40-150mm f/2.8 PRO is a constant f/2.8 aperture and comes with a tripod/monopod collar and you're looking at a lens that is definitely more tuned to shooting soccer. That said, the lens won't make all the difference. In fact, a better body will likely be a smarter investment:
2. Better Camera Body?
The OM-D E-M10 you mention is quite similar to the other OM-D's in the range, however, let's be clear; sure it may be able to produce images just as sharp, but again, it's ability to maintain focus on a moving subject is going to be far more limited when compared to it's more premium brothers. Even (and especially) when compared to the now rather old Olympus OM-D E-M1. Aside from not having things like weather sealing, the area in which the E-M10 comes up short is that it only has contrast detect autofocus. So, when it comes to locking focus on a static subject in reasonable light it shouldn't have a problem at all, but the issue is when that subject is moving and light is less than favourable.
You may have seen my motorsports images that I shot with the E-M1. There were some circumstances that allowed me to do this. For starters, the E-M1 itself makes use of phase detect autofocus, meaning it is able to better determine the subject by the distance between the subject and it's background and by what's moving. The E-M1 does this in conjunction with contrast detect; it will pick out the vivid colours of a car (or the lights on the side of a car in the case of Le Mans) and use that to help maintain focus. Above all that though, and perhaps most importantly the subject is moving in such a way that it is ultimately easier to photograph: the cars themselves are actually moving in a predictable motion; i.e from left to right and they're also maintaining a relatively similar distance to me throughout the entire panning range.
Soccer, or Football and other team sports, whether that's hockey, Basketball, NFL football etc will pretty much all feature players changing directions and pace quite rapidly, which is why really you see the top sports photographers using those cameras with full frame sensors with a multitude of huge pixels making use of phase detect (often cross type I may add) focus points. Another factor is of course the multiple subjects. You will have players on the same team in the same colours both in the foreground and the background of your frame making it even harder for the rather limited focussing system on the E-M10 to determine which is the intended subject. Effectively cameras, such as the Canon 1Dxii and the Canon 7D are all going to lock focus using both the contrast and the distance of the subject and then be able to better maintain focus on that subject. They're going to far superior at shooting sports than the E-M10 (and E-M1) Which brings me to my final answer...
3. Something Else?
My answer to this last part is purely because your question talks about high school soccer. If you were shooting anything else, such as motorsports, weddings, portraits, macro work etc then sure, I'd tell you to keep at it and keep practicing, if you can reasonably justify an E-M1 and or a 40-150mm then go for it - it will help your cause.
But, given that you're shooting soccer, I would advise you to go and hire, or even buy if you're that way inclined, an old Canon 7D mark 1 at least and see if you can get a telephoto lens to go with it. You'll be able to see the difference immediately. Your keeper rate will improve no end. Not least because of the more capable auto focussing system, but also because the optical viewfinder is simply faster at this point in time. Perhaps in future the EVF's we've all become so fond of will refresh just as though you were looking through the lens, like with a DSLR. For now though, using a mirrorless for sports will reduce your keeper rate.
That's not to say that practicing won't get you some way to negating this. I found that with motorsports my keeper rate went up every time I went back to the track to make more photographs.
Lastly, I would add also that even Fuji and Sony mirrorless cameras won't do the same job as a high-fps, crop sensored DSLR can do when it comes to shooting this sort of subject. I'm sure they'll be there before long though. At the time of writing and recording this post an announcement for the E-M1ii is just a week away, but right now, if we talk about using the right tools for the job, I think realistically the most instant way to increase your keeper rate when photographing a team sport such as soccer, is to pick up a DSLR.
Your Results?
I would love to see sample photographs of Football (soccer), NFL, Hockey or any team sport that you've made using your OM-D or O;ympus camera. Share a link below for us all to go and take a look at and I'll be sure to give you a shout out in the next episode.
As always, don't forget to subscribe using the subscribe page to ensure the next time you're reading this blog, that it's in your inbox!