


Making Mono Macro Tulips (Video)
This week I started working on a new video series that I will be launching later in the year. In my upcoming series, I'll be sharing my entire post-processing method, from the moment I insert the memory card and import the images, through to the settings I like to apply, the way I crop, make use of brushes and my tips for exporting images too.
It will be a massively comprehensive series of videos with hours of footage broken down into bite-size chapters. If you're new to Adobe LightRoom this will serve as your one-stop shop to learn the program! Be sure to subscribe if you haven't already and you'll be notified when that is live and available.
If truth be told, though, it's been much harder than I had thought it would be! Creating high-quality videos takes far longer than you may think!
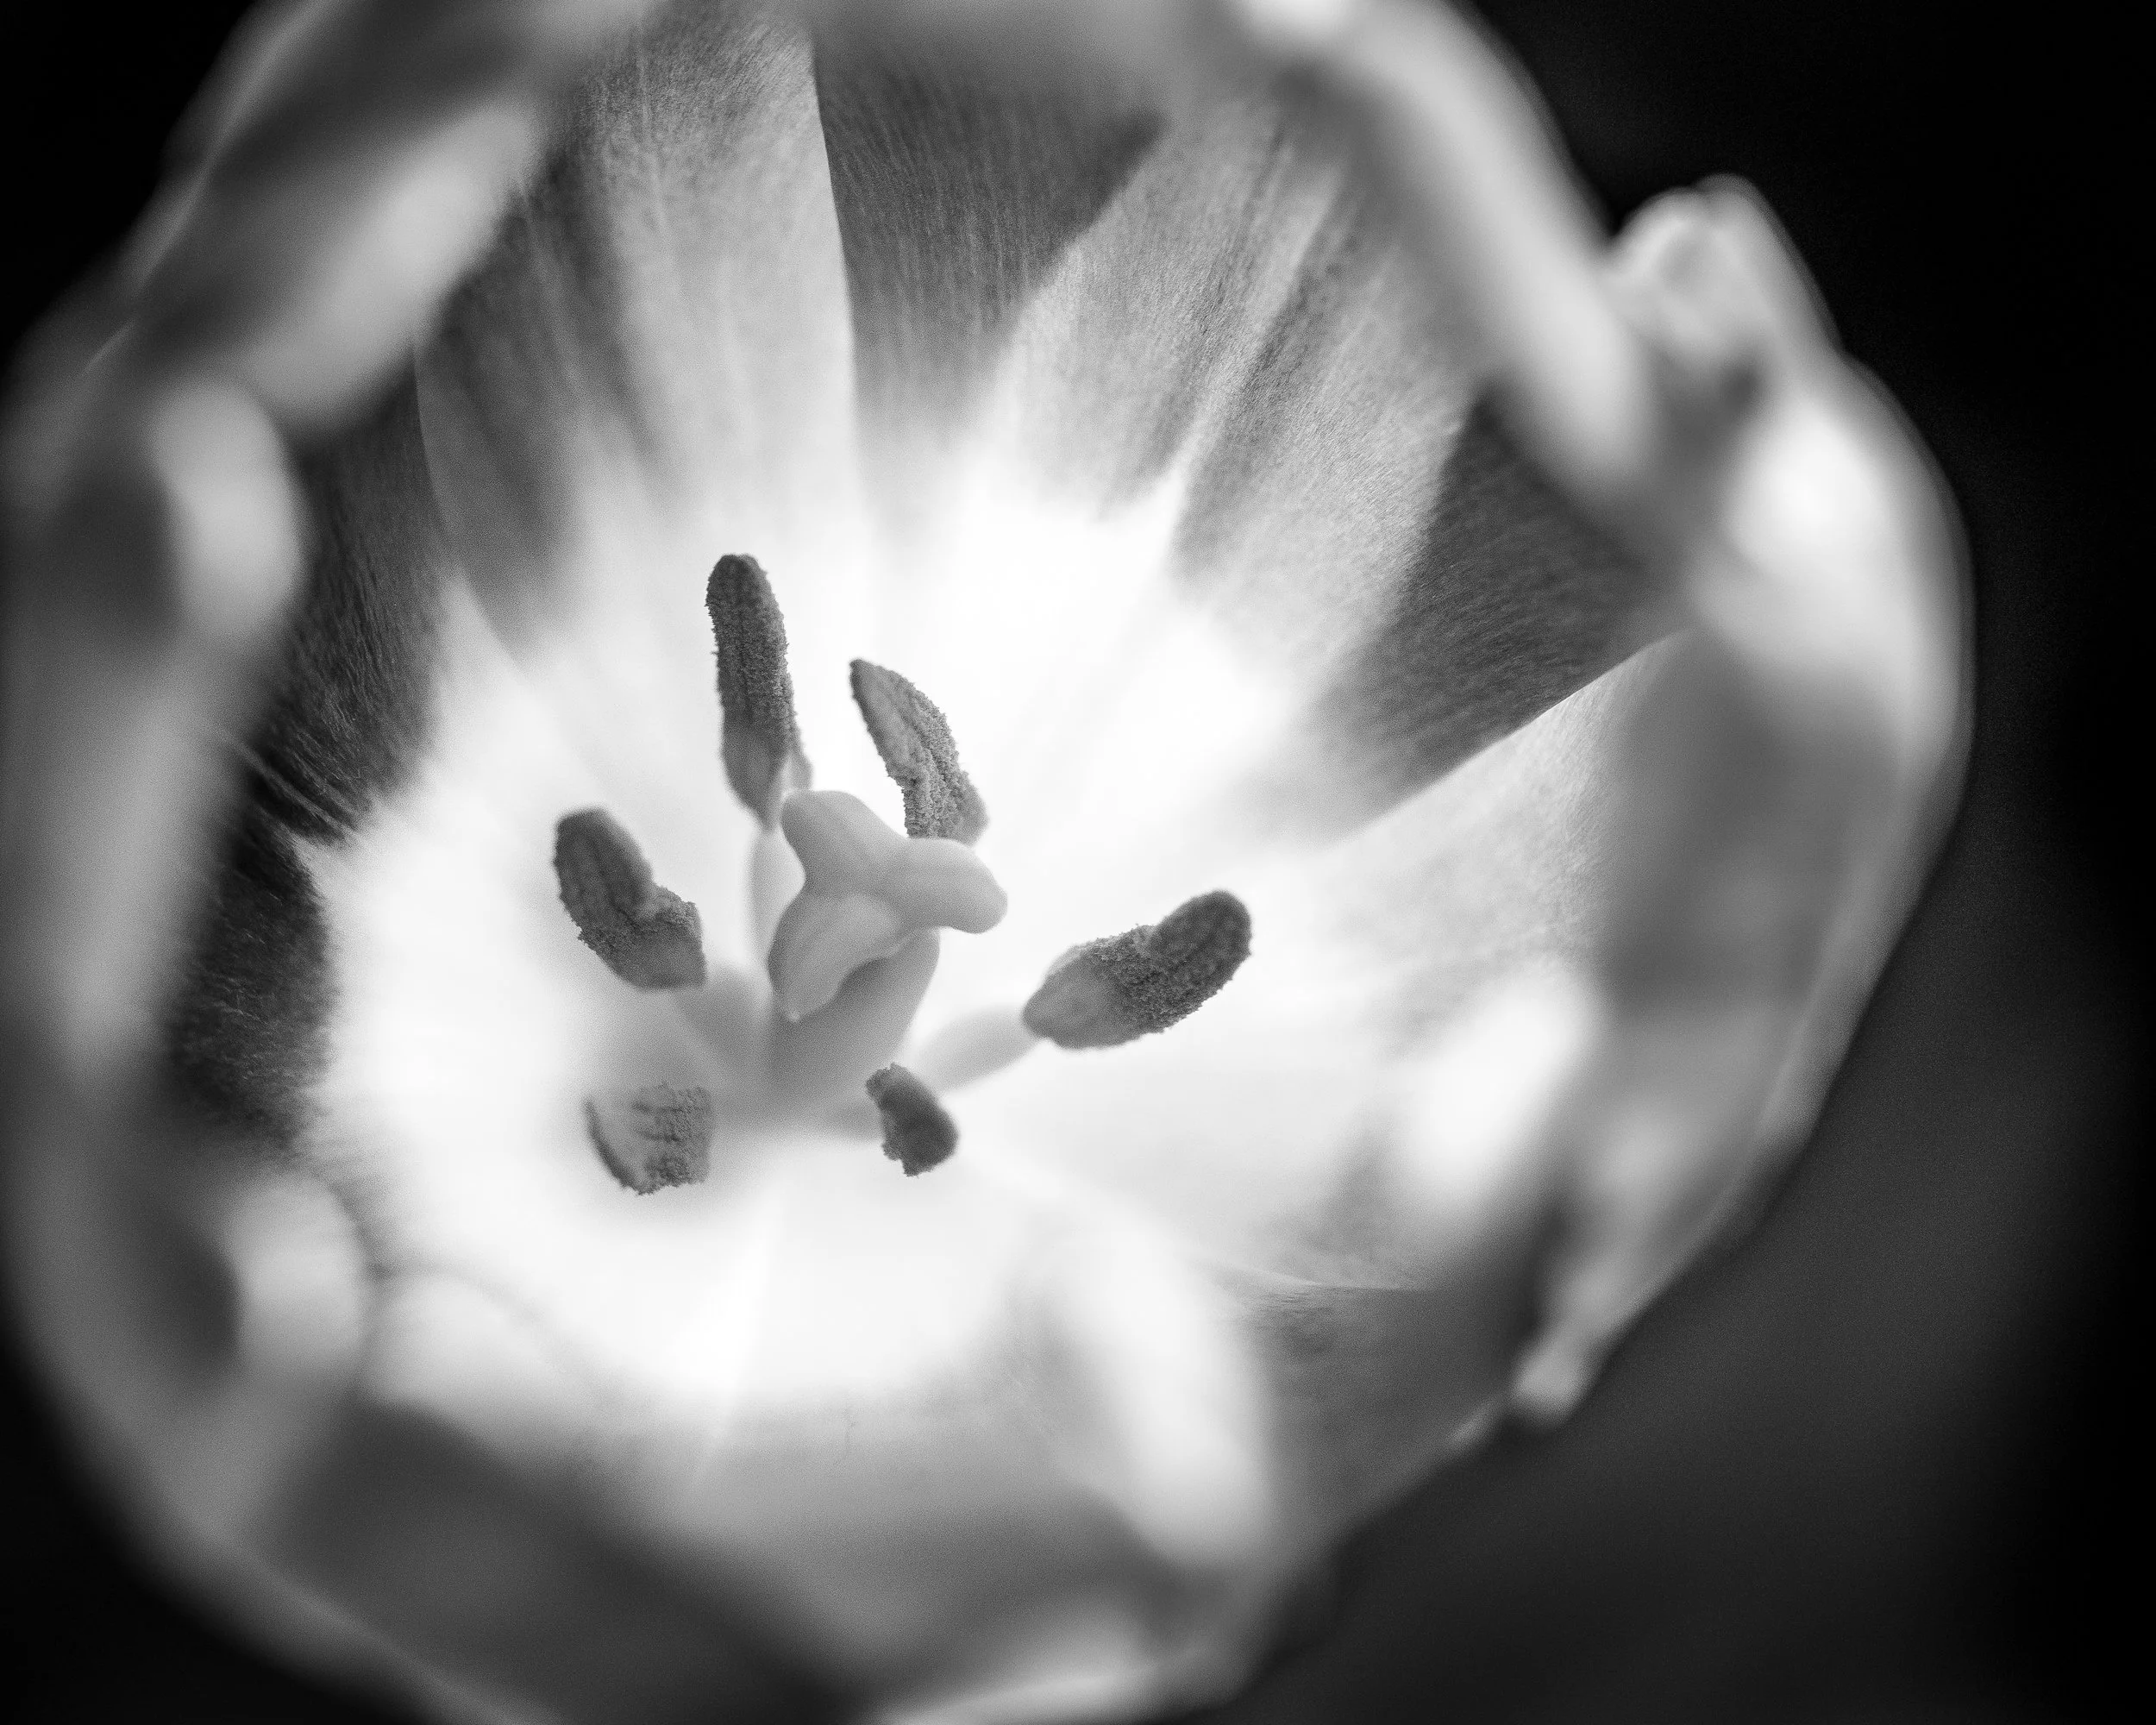
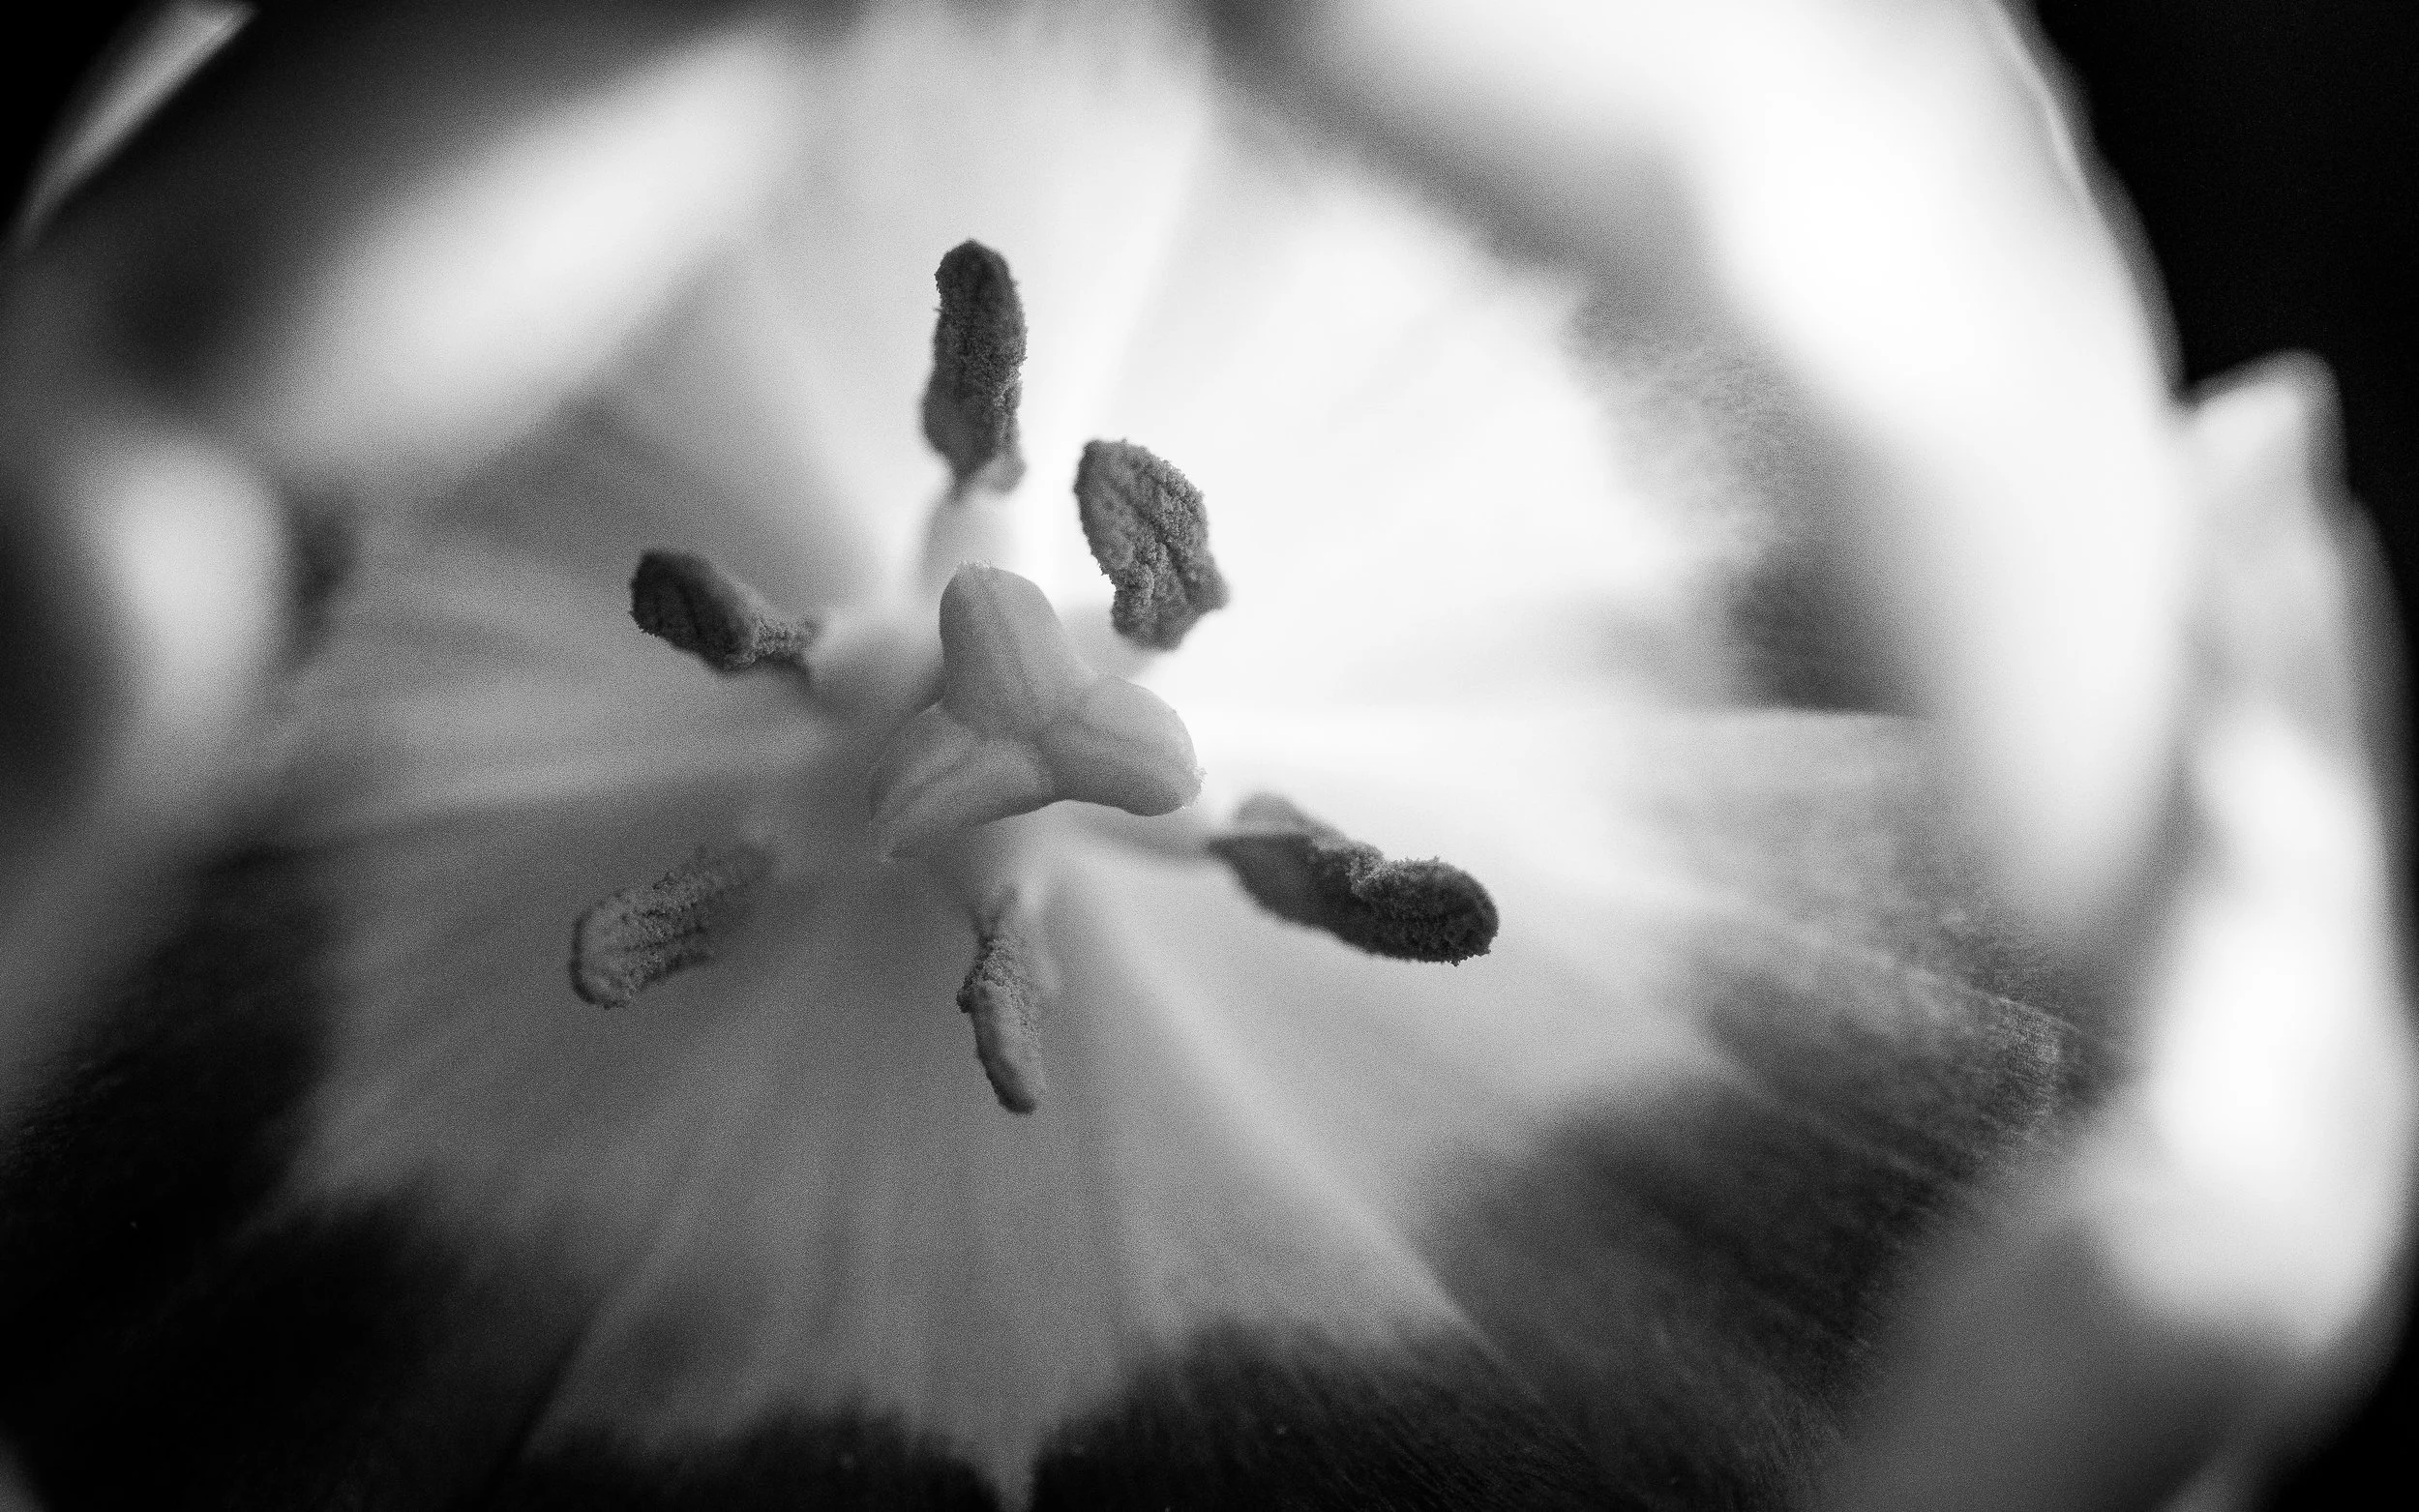
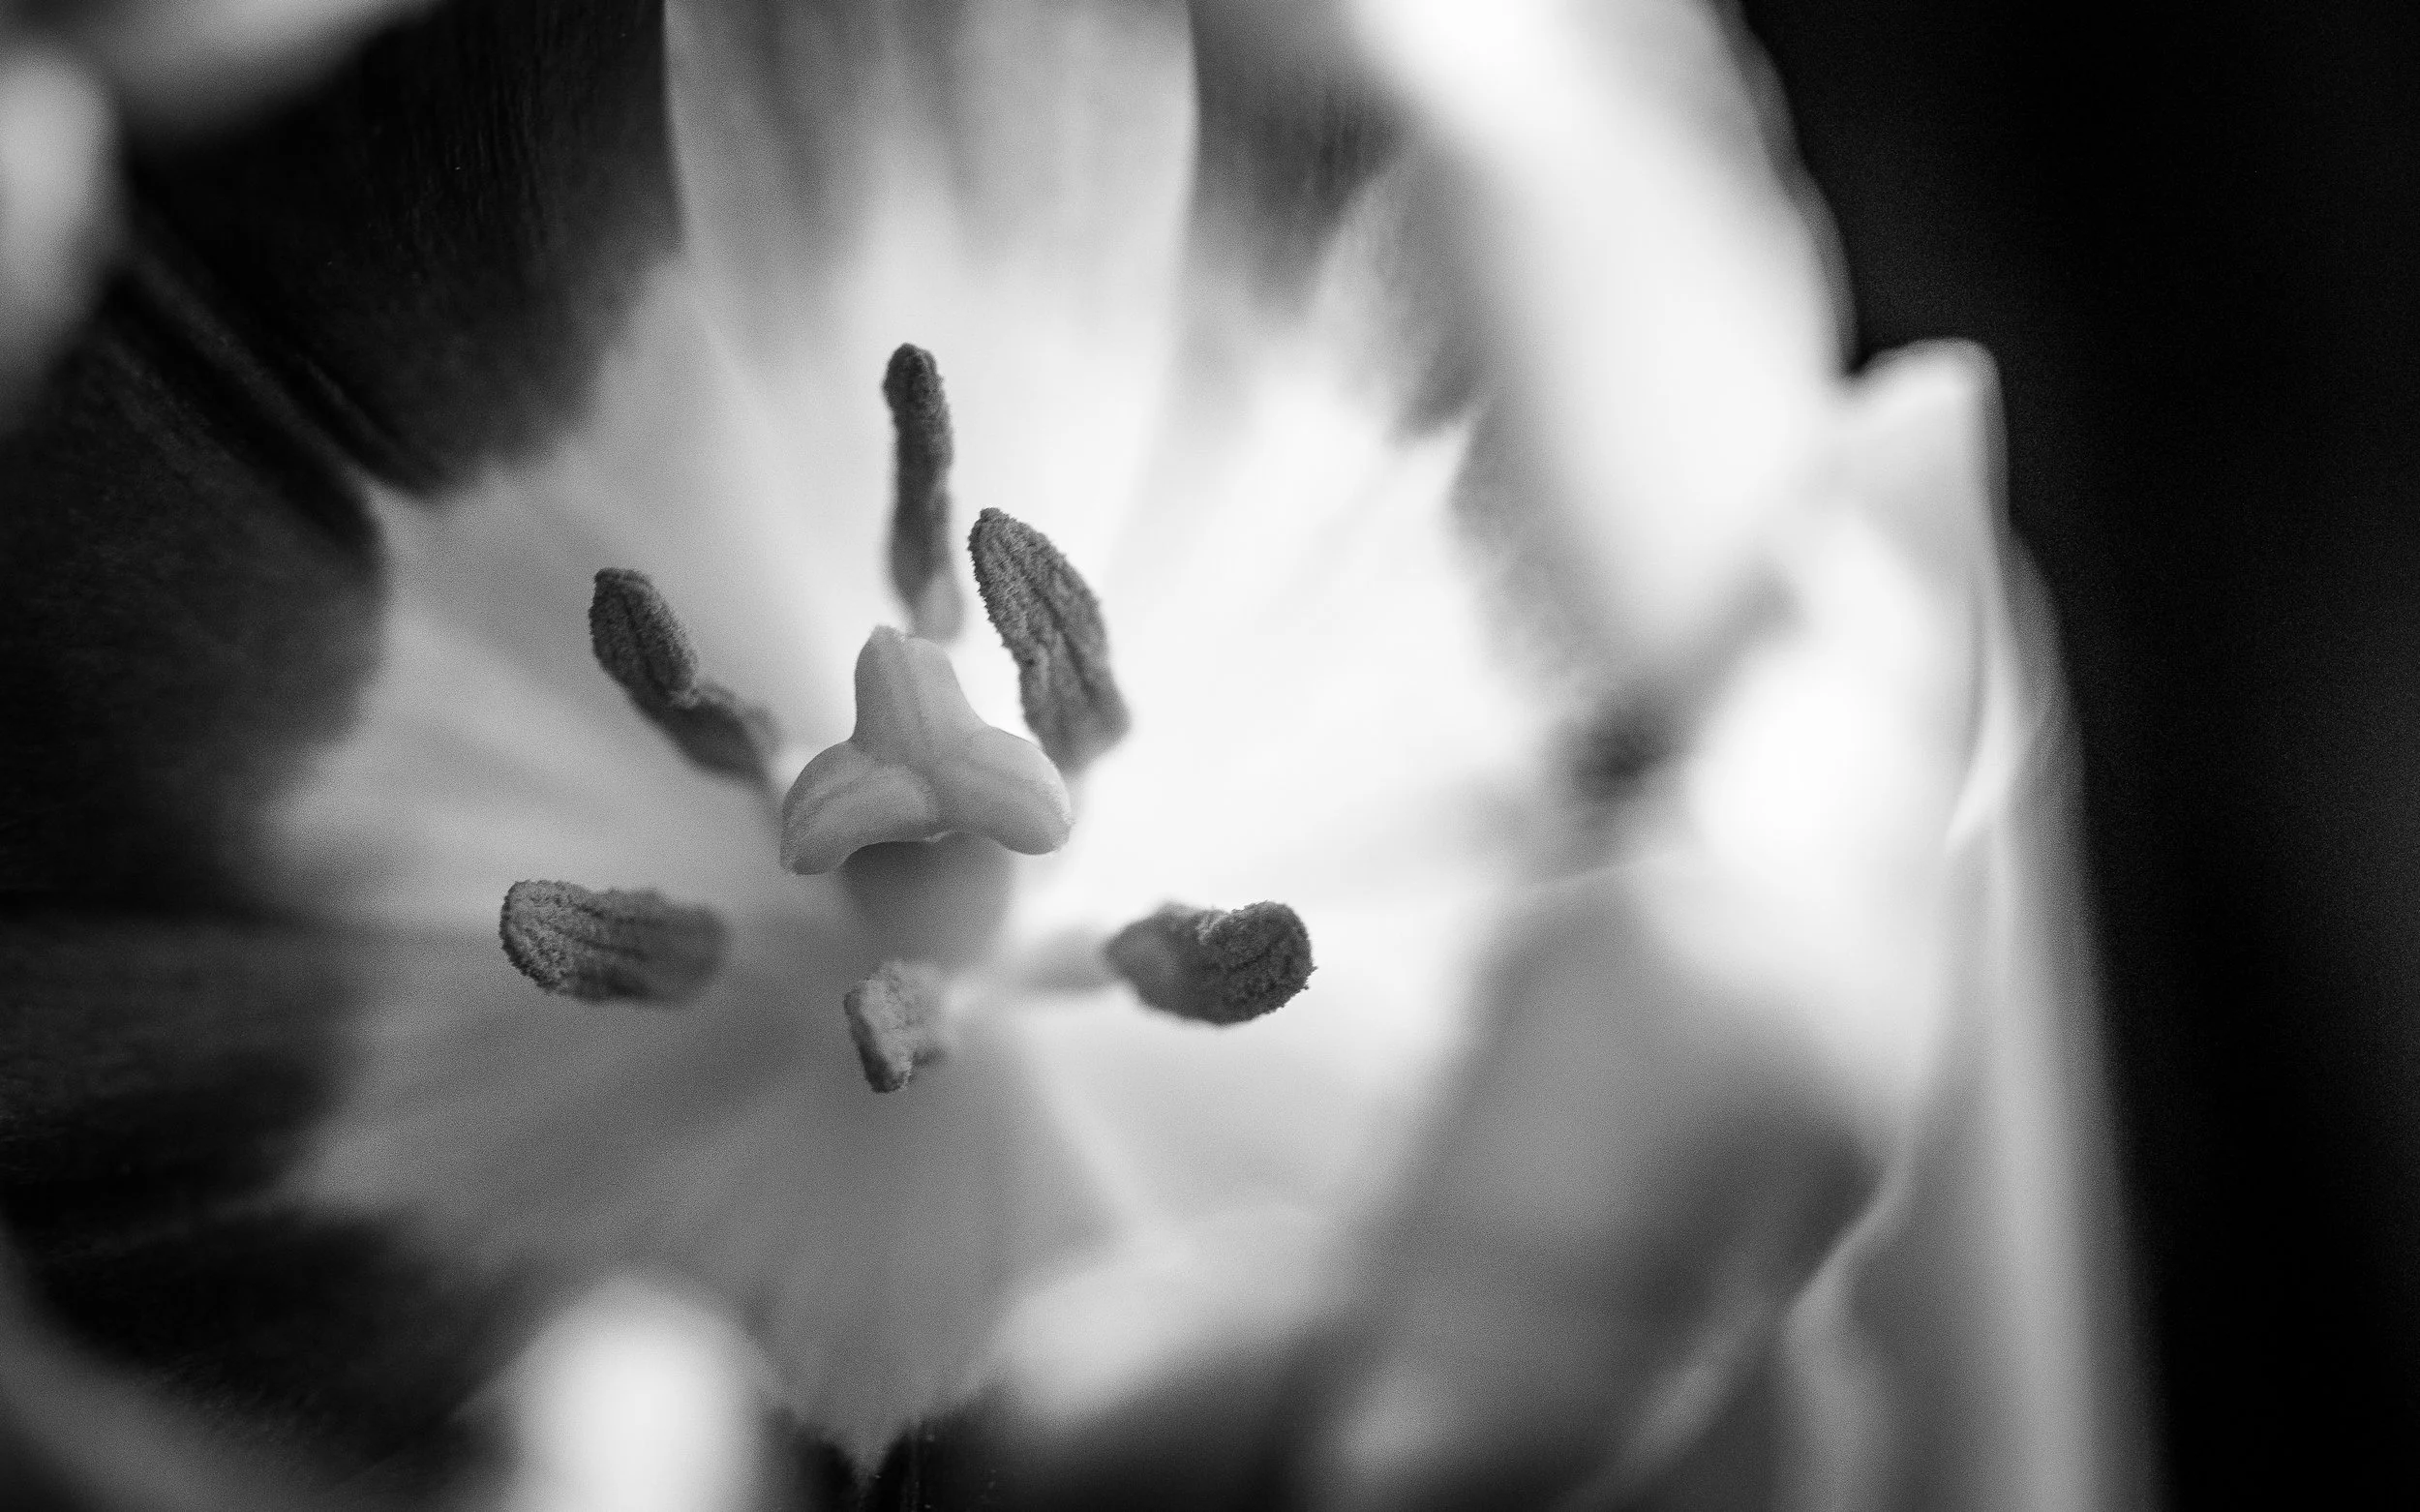
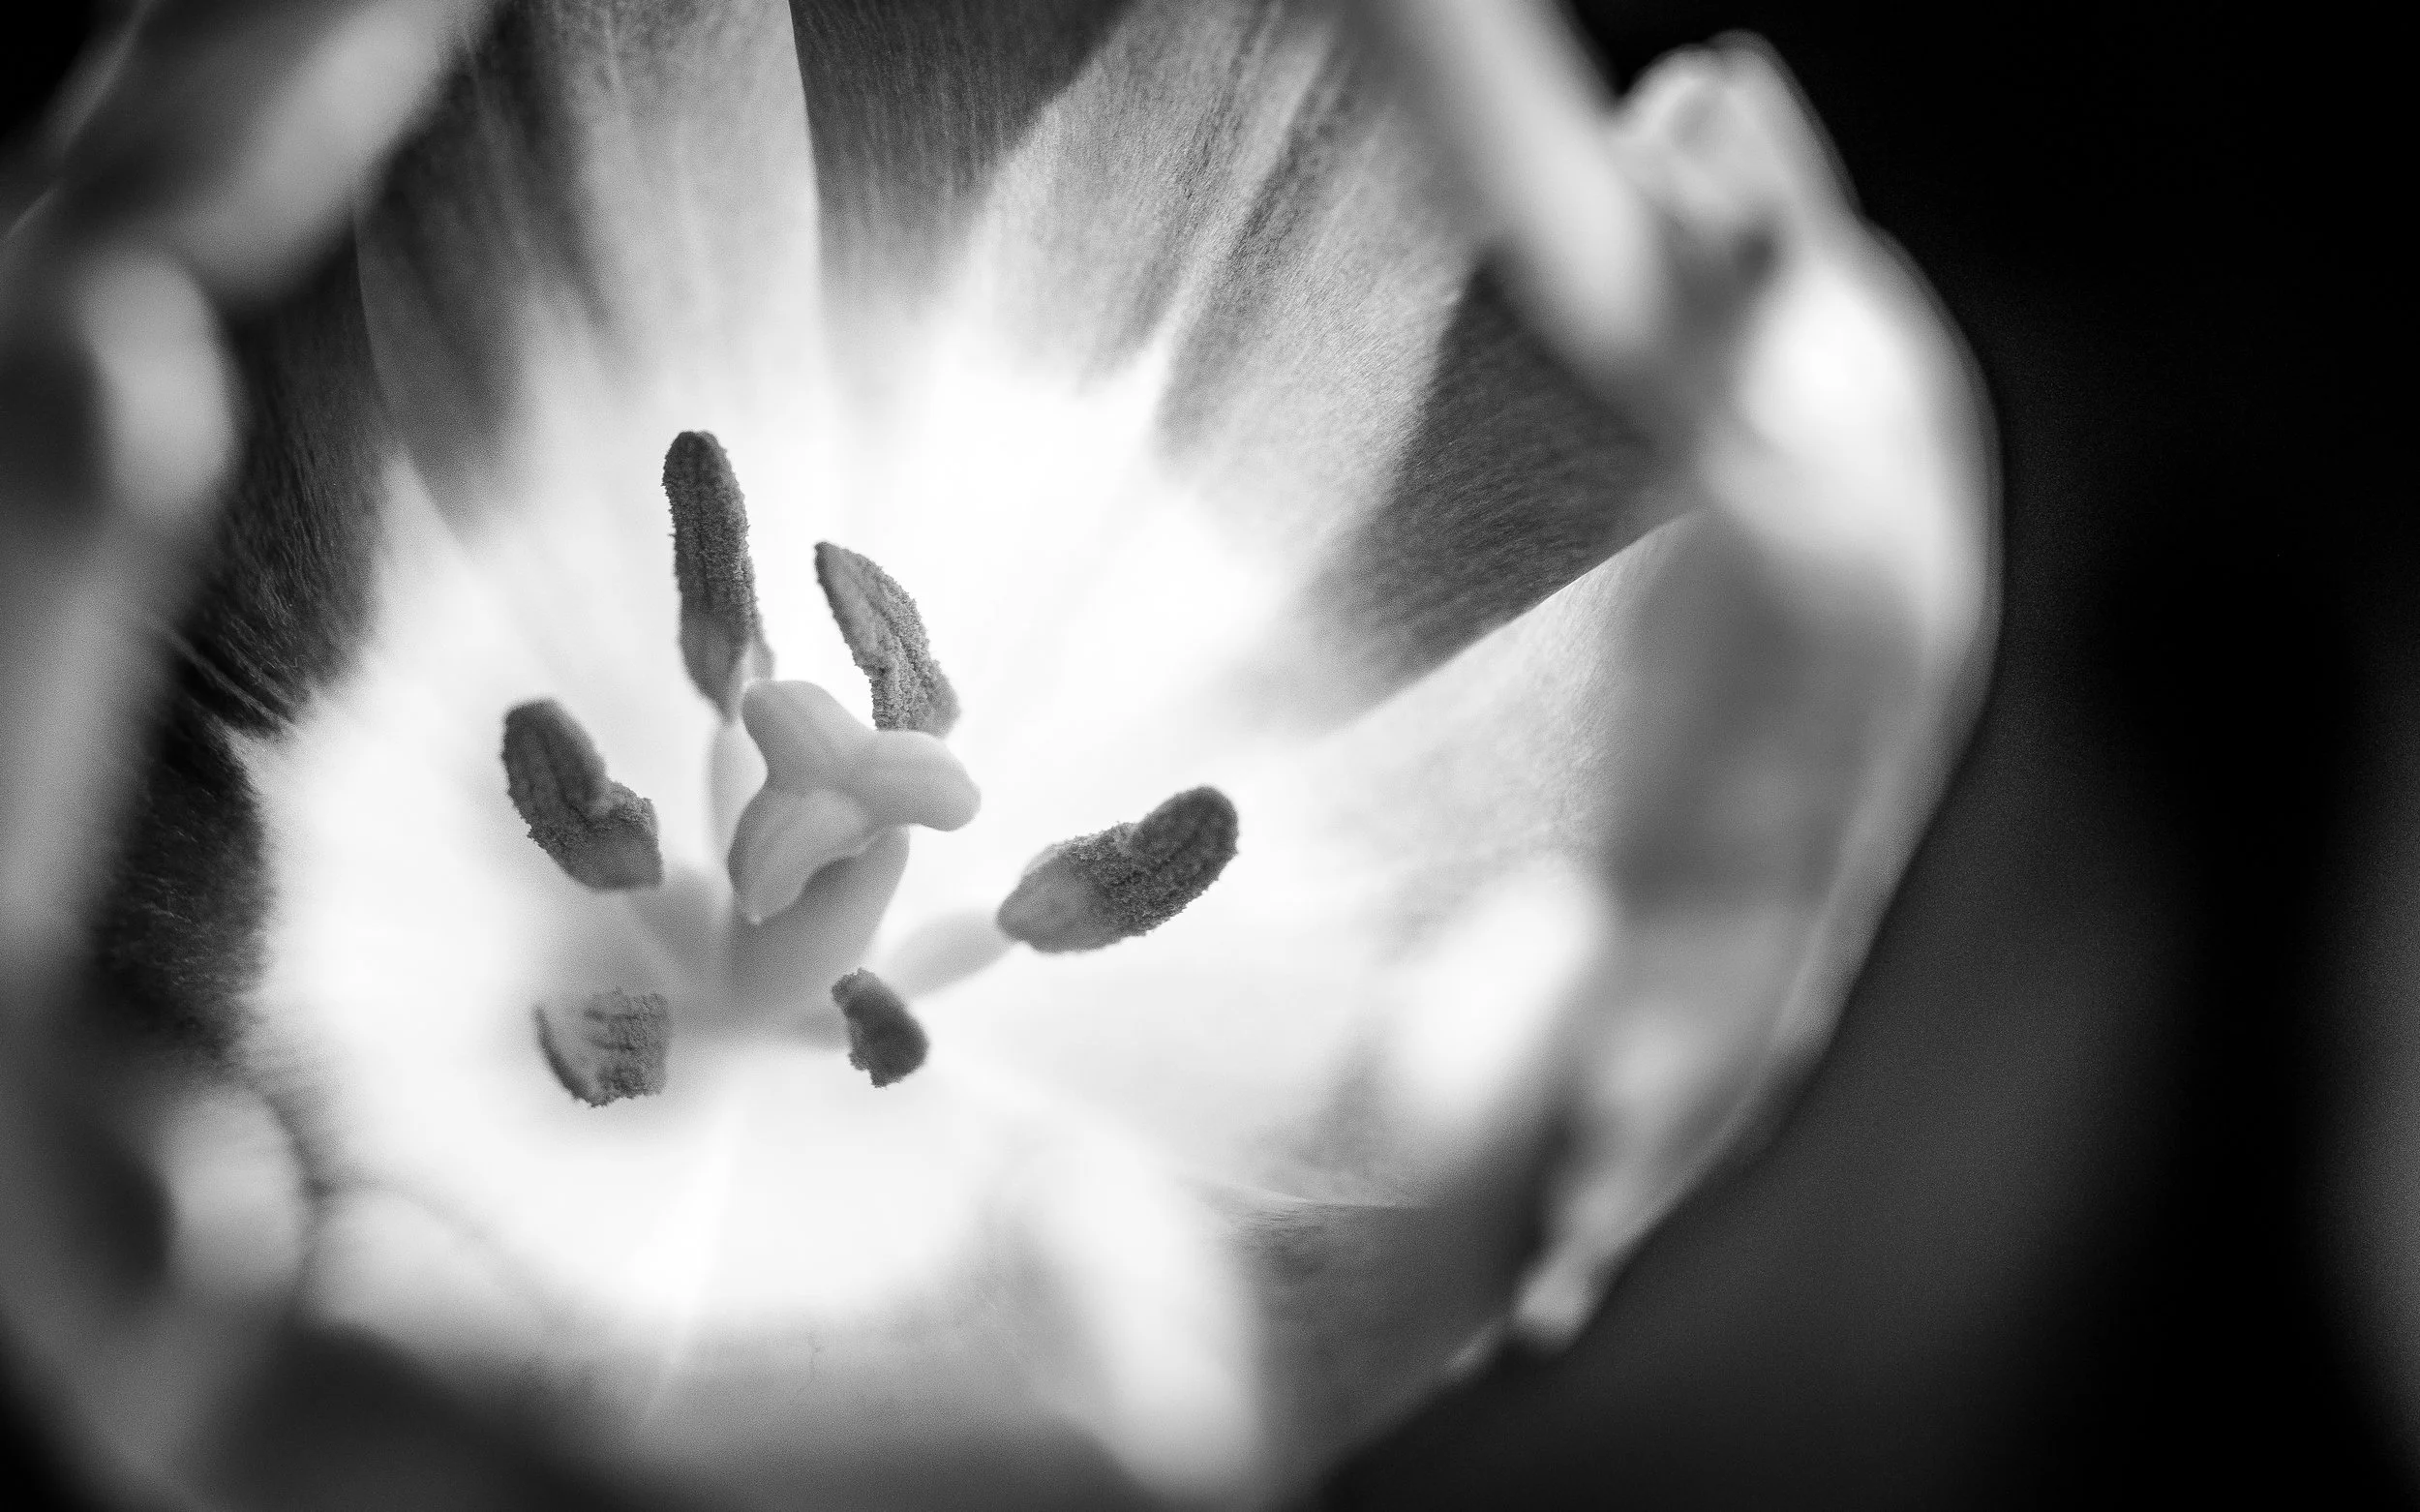
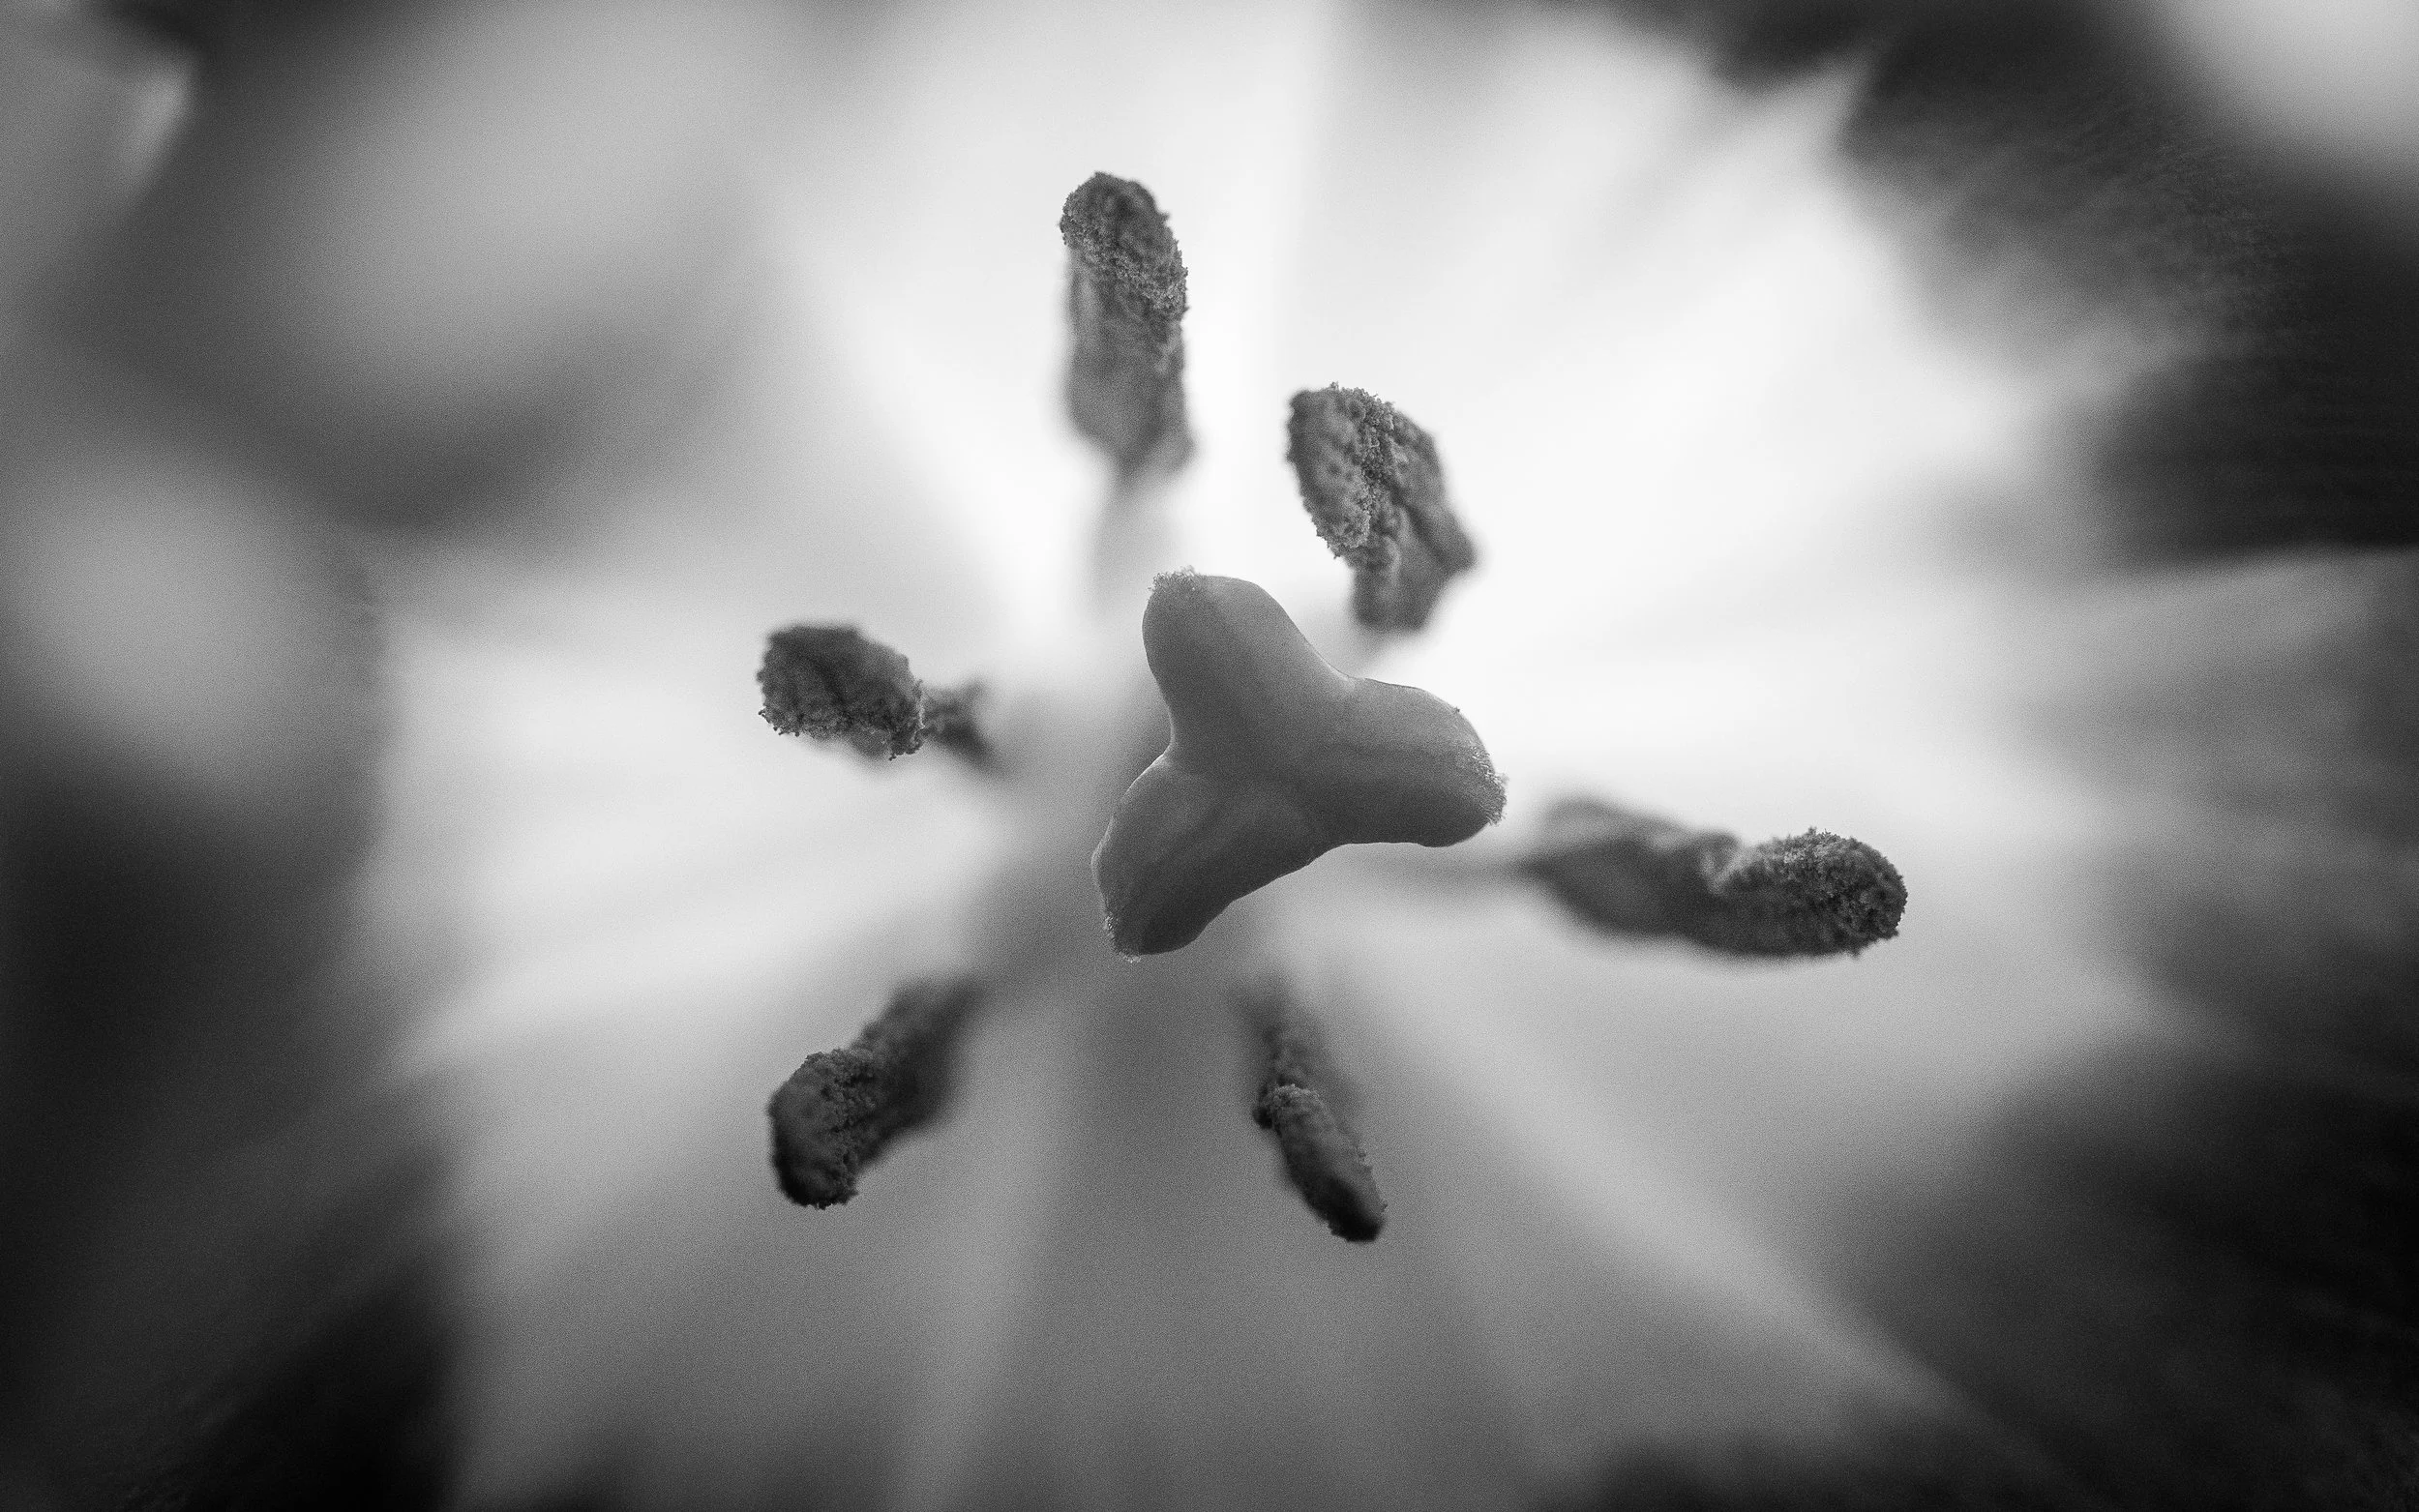
So, today I decided to take a break from producing that series and very quickly threw together this video: totally unscripted, quick & simple and hopefully it goes to show the sort of results you're able to achieve with a very simple setup and very little effort. I filmed behind the scenes and my post processing to show you how you can go from this to this:
All I used for this shoot was my Olympus OM-D E-M1, the Olympus M.Zuiko 60mm f/2.8 Macro, a large window, a purple tulip and Adobe Lightroom. Check it out:
It is a bit of a long video, so perhaps enjoy this on your commute or during your lunch break with a cuppa! :)
Download Wallpapers
Just in case you were wandering what I did with the other images that were left un-processed in the video, they're right here for you to take a look at. You can also download them (18Mb) to use as desktop wallpapers, but, please do note that they are copyright (details at the bottom of the post):
Copyright Notice
Please enjoy these photographs. But be kind: Do not edit these photographs and claim them as your own. Don't sell them without my permission. Do not use commercially without contacting me @ michael@rammellphotography.com.
All works are Creative Commons Licensed:

Mono Macro Tulips by Michael Rammell is licensed under a Creative Commons Attribution-NonCommercial-NoDerivatives 4.0 International License.
Based on a work at www.michaelrammell.com.

Street Photography Tips (Part 2) & Book Giveaway
[To listen to the audio hit play and then give it a second to buffer. The audio is high quality]
Following on from last week's post where I shared a few of my top tips for improving your street photography, today is the promised second part of this little series. In part one, I also announced the book giveaway too, where you can be in with a chance of winning my own personal copy of David Gibson's 'The Street Photographer's Manual'. The winner of that competition will be announced on January 31st, so be sure to enter today. Details on how to enter can be found at the bottom of this post.
Before we dive into the tips in this post, let's briefly recap on the first 3* tips I gave In last week's post:
- Isolate & Simplify - Keep the frame clean and make it clear what your subject is
- Tell a story - Is your photograph engaging and interesting? Does it have a point?
- Get closer to your subject and be bold and brave! Fill the frame.
- *BONUS TIP: Michael Pung - Street Portraits
If you missed that post be sure to check it out!
Improve your Street photography in 2017 with these top Tips:
1: Hunter & Fisherman approaches
I've been asked numerous times how it is I actually set about seeing and making street photographs; do I spend the entire day walking or do I sit and wait for the scene? The answer is both!
It's fair to say that these two different approaches will yield different results. They will also suit different photographers too.
Let's start by talking about the method whereby we pound the streets, walk around, cover ground and find the moments. Or, the 'Hunter' method as I like to call it...
As a hunter out on the streets, you'll find yourself spending the day walking. This can be great if you're able to physically do this, but you need to be conscious to keep your eyes open to the scenes around you, and your wits about you as you walk, especially on busy city streets. The idea of hunting for a scene and a subject offers us as photographers plenty of variety. As we move from street to street and district to district the backdrops will change dramatically.
Camera: Olympus OM-D E-M1. Lens: 25mm f/1.8 @ Aperture: f/1.8 Focal Length 25mm ISO: 400 Shutter Speed: 1/3200th
As with many larger towns and cities you'll find that the architecture changes from one area to the next. Knowing London as I do for example I can tell you that you have the white rendered buildings, people in suits and cigar shops of St James', then the tourist parts of Leicester Square and Covent Garden, the colours and smells of Soho & the uniqueness of China Town for example. Whatever city you go to, you're likely to experience that same variety. As a hunter you'll sit at your computer later that evening and be welcomed by photographs that are very different from each other owing to the fact you saw different parts of the area.
Camera: Olympus OM-D E-M1. Lens: 12-40mm f/2.8 PRO @ Aperture: f/2.8 Focal Length 25mm ISO: 200 Shutter Speed: 1/2000th
Whilst that variety can be found by clocking up miles, what I often find some people struggle with is actually seeing photographically whilst they walk. By this, I mean; the walking itself can actually prevent you from seeing things. Either because you're physically tired, aching & thirsty, or just because your mind can wander as you get lost and explore new places. If that sounds like you, then the fisherman method may be something you should start out by trying...
The fisherman method, as you may have guessed, would see a photographer finding a spot or an area in which to roam. Perhaps a park area or a junction or cross section in the city? Again, thinking about London you could perhaps consider South Bank. Whilst the fisherman approach to street photography is less likely to yield the variety that hunting offers, there are areas, such as South Bank, where the variety will come to you! In a small stretch of 100m, where the walk way is not too wide that people can't really escape your range, you can photograph people discretely as they walk past. Whether they're a commuter on the way to work, a jogger keeping fit during lunch time, tourists with cameras or street performers or skateboarders. Finding an area similar to London's South Bank can very much feel like shooting fish in a barrel (metaphorically speaking of course).
Camera: Olympus OM-D E-M1. Lens: 25mm f/1.8 @ Aperture: f/2.2 Focal Length 25mm ISO: 4000 Shutter Speed: 1/15th
The intention and idea of the fisherman method however doesn't necessarily just mean you stay in one area. In an even more intentional way with even less movement required you can instead look for a backdrop or a stage for a scene first (again, metaphorically speaking) and then wait patiently for your subjects to walk onto the set. For example, finding an archway, a set of stairs or steps or a bench, to name but a few ideas. You can position yourself and ready your composition and your settings and then just wait for something or someone interesting to happen. It could be that someone sits on the bench. It could be that a skateboarder jumps the steps or grinds down the rail. It could simply be a chef on a cigarette break in an alleyway behind a restaurant, cafe or diner. Whatever the case may be, you can start by readying the scene and waiting for the interest.
Camera: Olympus OM-D E-M5. Lens: 17mm f/1.8 @ Aperture: f/10 Focal Length 17mm ISO: 3200 Shutter Speed: 1/13th
Again, as the name suggests the fisherman method can very much be a waiting game, where the patience you invest is what will reap you those rewards.
Camera: Olympus OM-D E-M1. Lens: 17mm f/1.8 @ Aperture: f/1.8 ISO: 800 Shutter Speed: 1/640th
So, as I say: choose a method that you think sounds more appealing to you and give it a try. But you never know, some 'hunters' may find the 'fisherman' method more rewarding than they think, and some 'fishermen' may find the occasional hunt for a subject an exciting experience!
2: Choosing a cameras & lenses for Street Photography
If you're reading this post, I'd say there is a relatively high chance that you have looked online as to what equipment is best suited to street photography, or, you've already formed your own opinion as to what you think is best. My opinion is that there isn't one good answer and there isn't one camera that is necassarily better than any other. A DSLR will have advantages over a compact or a mirrorless camera, and likewise a smaller, lighter camera has its obvious advantages too.
Whilst there are cameras such as the brilliant Olympus PEN-F and accomplished Fuji X100t that are super small, lightweight and help you to look very incognito as if they're designed specifically for street photographers, I've heard some very compelling debates to suggest that having a DSLR out on the street can in fact help to convince others that you're just a tourist too! After all, it seems everyone is a photographer these days and more and more people are investing in 'big cameras'. I guess having a DSLR could in effect actually help you to blend in, in an odd sort of way.
My own belief is that you should use the camera you feel most comfortable and familiar with, whatever that may be. You don't need to wait until you have that latest mirrorless camera and you shouldn't be put off by 'only' having a Full Frame DSLR. Both will get you results - it's you that has to be ready to see the moment and capture it.
Without sitting on the fence though and with all that said, let's consider the practical advantages of a smaller, lighter camera here: you are going to find that you need a smaller bag for it all, which means you are likely to be less fatigued by the end of the day. These mirrorless cameras often offer a totally silent electronic shutter mode and, arguably, in my opinion, you are less likely to be considered a 'serious' or 'professional' owing to perceptions alone. So if you can put your ego aside for one minute, it could be that on this occasion looking like an amateur or tourist is a good thing (I would say though for the record, I don't agree with the perception, but it is a hard one to argue. I wrote about my feelings on this in my 'Why Olympus?' Post)
So, whilst this section of advice isn't necessarily me telling you exactly what to carry and use, I would loosely suggest the following things to I think aid you physically and creatively:
- travel light.
- pack one camera & one lens
- pack a spare battery
- use as small a bag as possible
Travelling with one camera and one lens, whichever lens that may be, will serve to help you focus only on the scenes and the moments happening in front of you and less on the gear you have in your bag.
3: Times, Locations & Days to shoot (Workshops)
Every time is a good time for street photography! It doesn't matter if it's a dark winter. It doesn't matter if it's raining! These elements are only going to provide an extra dimension and level of interest to your photography. Some of my own personal favourite images that I have made out on the street have come on late December and January evenings. I wrote a post back in 2015 that went on to be featured in the Olympus Magazine where I spoke about low light photography and how to tackle it (you can check that out right here on the blog).
Whilst this answer is somewhat generic, I would personally suggest that you should look to book yourself onto a local photo walk or tour with an experienced street photographer. Whilst that person doesn't necessarily need to know the area (one could argue), I'd say that a local will be able to take you to the lesser known areas, which will definitely go some way to helping you to produce more unique images.
One man that can talk about this a little better than me is Paul Griffiths and so I've invited Paul to share his thoughts on what it is a Street Photography Tour or Workshop can offer you. For those of you that don't know Paul; runs the popular Photography Live & Unct Blog Video Blog over on YouTube. Paul is an accomplished Photographer who knows London like the back of his hand having worked in the city for many many years. Today though, when not interviewing some of the world's most renowned photographers for his show, you'll find Paul leading tours & workshops on the streets of London.
Here's what Paul has to say about the value of work shops:
Setting targets, joining camera clubs and making New Years' resolutions are great. But ultimately, there’s nothing better than just getting out with your camera and ‘taking’ (or rather making) images.
Image used with permission of Paul Griffiths. Image Copyright by Paul Griffiths
For anyone that enjoys Documentary or Street Photography, you will likely be aware Photo walkabouts where a group get together and hit the streets together, but it could be argued that these are not necessarily the best means to learn when it comes to street photography. Sure, you can exchange ideas and talk about cameras all day, but invariably a walkabout typically starts off with a group sticking together and eventually disintegrating and becoming separated as attendees drop away, get lost or sometimes decide to go another route.
It's not really the type of event to gain tips & skills from!
"Practice makes perfect!" & "Your photography will improve if you practice!"; You've no doubt have heard these statements before? Well, they are true, but practice with guidance and the practice is improved!
http://www.photographyliveanduncut.com/aboutmecontact/
Rather than an unguided walkabout with a lack of intention, the ardent photographer should start to look for better options to learn and improve their craft. One such way is a structured Photography Workshop.
Whether you prefer working indoors or outdoors, these days you're very likely to find one to suit you and your style of learning. The best workshops typically host not more than 6-8 people, offer a ‘hands on’ and experienced tutor who encourages and can demonstrate camera skills and who can take you out of your comfort zone in order to expand your thinking and widen your horizons! That's the best way to learn!
This is exactly what we at ‘Photography Live and Uncut’ offer: a workshop that will teach you new skills and enable you to try different ways to make photos and to get you out of that comfort zone. You may know your settings and compositions already (great!), but we'll start by helping you to see photographically - the art of seeing a scene and a story in front of you. We offer workshops that are both studio-based and out on the streets, depending on your preferred genre. We're here to share everything we know with you to ensure you gain the most from your workshop experience. Everything we teach and do is aimed and focussed towards improving your photography
If you want to know more information about one of Paul's Workshops, made available through Photography Live & Uncut, simply check out his website. (Pssst, be sure to follow Paul on Social Media too if you want to be notified of the latest workshop dates)
4: Bonus Tip: Expectations of your own efforts
Looking at the portfolio's of some avid street photographers, who have galleries full of images from the street, it can seem that the expectation of an afternoon out on the streets is to come home with a dozen images that you think are wonderful. Whilst I don't want to suggest that your work isn't good and that you haven't got a dozen good images after a day of shooting, in reality, the chances are you'll end up with just 1 or 2...or possibly none!
As photographer's we should only be showing our absolute best work. So, when you load your images into Lightroom, or Aperture or whichever is your preferred tool be selective, conscious and give thought as to which images genuinely have content, story, an interesting subject and are of a quality you are happy with. If you are able to honestly look at an image and say that it contains elements from each of the tips from these two posts that i've written (that being part one from last week and this post too), then go ahead and share it. But if, after mulling over an image you realise it doesn't have any 'Pull' or interest, then don't be disheartened.
You've probably heard people before say 'I make my own luck' and whilst I think there is something in this phrase, really, what luck is, is where preparedness meets opportunity. I guess what I'm saying is that it is your job to be prepared and to spot the opportunity. But, that's not to say that opportunity will always present itself to you in the form of an interesting scene to photograph. Sometimes, the interest is more subtle and as such you have to try harder to spot it.
The reason I'm ending this short series on such a note is because, in reality, all you are doing by applying all of your skills and possibly even by following the advice that Michael Pung, Paul Griffiths and myself have provided in these two posts, is increasing your chances of capturing something worth sharing. It's not offering you a guarantee at all.
In the first couple of paragraphs in the first post I did say that Street Photography can appear to be easy and simplistic. But I'm sure, after having tried it yourself or even just having been through my top tips, you'll appreciate that there is far more to capturing an image on the street that you had possibly considered.
Sure, you may have days where you come back with a bunch of great work, but others, you may come back with nothing. You will soon realise that not everything you capture, despite your best efforts, is actually as good as you may initially think. Don't think of this as a reflection of your overall skills as a photographer, but remember that capturing a quality, engaging and interesting moment on the street requires a lot of things to fall into place at the right time and that everything happens in the blink of an eye; press that shutter just 1 second later and the story inside the frame you just captured could be totally different.
Street Photography can be a funny old mistress that can reward you. Other days you'll return home with nothing to show for your efforts. It's cruel, but that's street photography.
...The End!
Book Giveaway
Okay, so if you're here for the book giveaway, look no further. I'm giving away my own personal copy of The Street Photographers Manual by David Gibson.

I loved this book so much that I felt compelled to write a review here on the blog (you can read that book right here). Coupled with this post, I thought that it would be a great companion for anyone looking to improve their street photograph and so, I'm giving it away for free!
Review Excerpt:
"Whilst the book itself may be called a manual and does offer instruction to help you create more thought-out and intentional street photographs, this is also a very impressive and vast study of street photography. This book looks at both various techniques and elements that contribute towards stronger imagery and makes use of examples by the greatest street photographers of our time such as; Elliott Erwitt, Bruce Gilden, Saul Leiter, Trente Park and more. These examples give the book's instructions conviction and only serve to show that this thorough - yet concise - book is something you can not only read for inspiration, but learn from at the same time. Within each chapter we are introduced to either another master of Street Photography or another technique of shooting on the street, each accompanying a sample of that master's work or an example of that technique in action to best explain and demonstrate the case in point"
To be in with a chance of winning my own, personal copy of The Street Photographer's Manual, subscribe to the blog using the form below and share this post on social media (be sure to include a link back to this post). If you're already a subscriber, just drop a comment below. I'll canvas all new subscriptions and comments and pick the lucky winner from those.
Good luck everyone! Thanks for stopping by.