


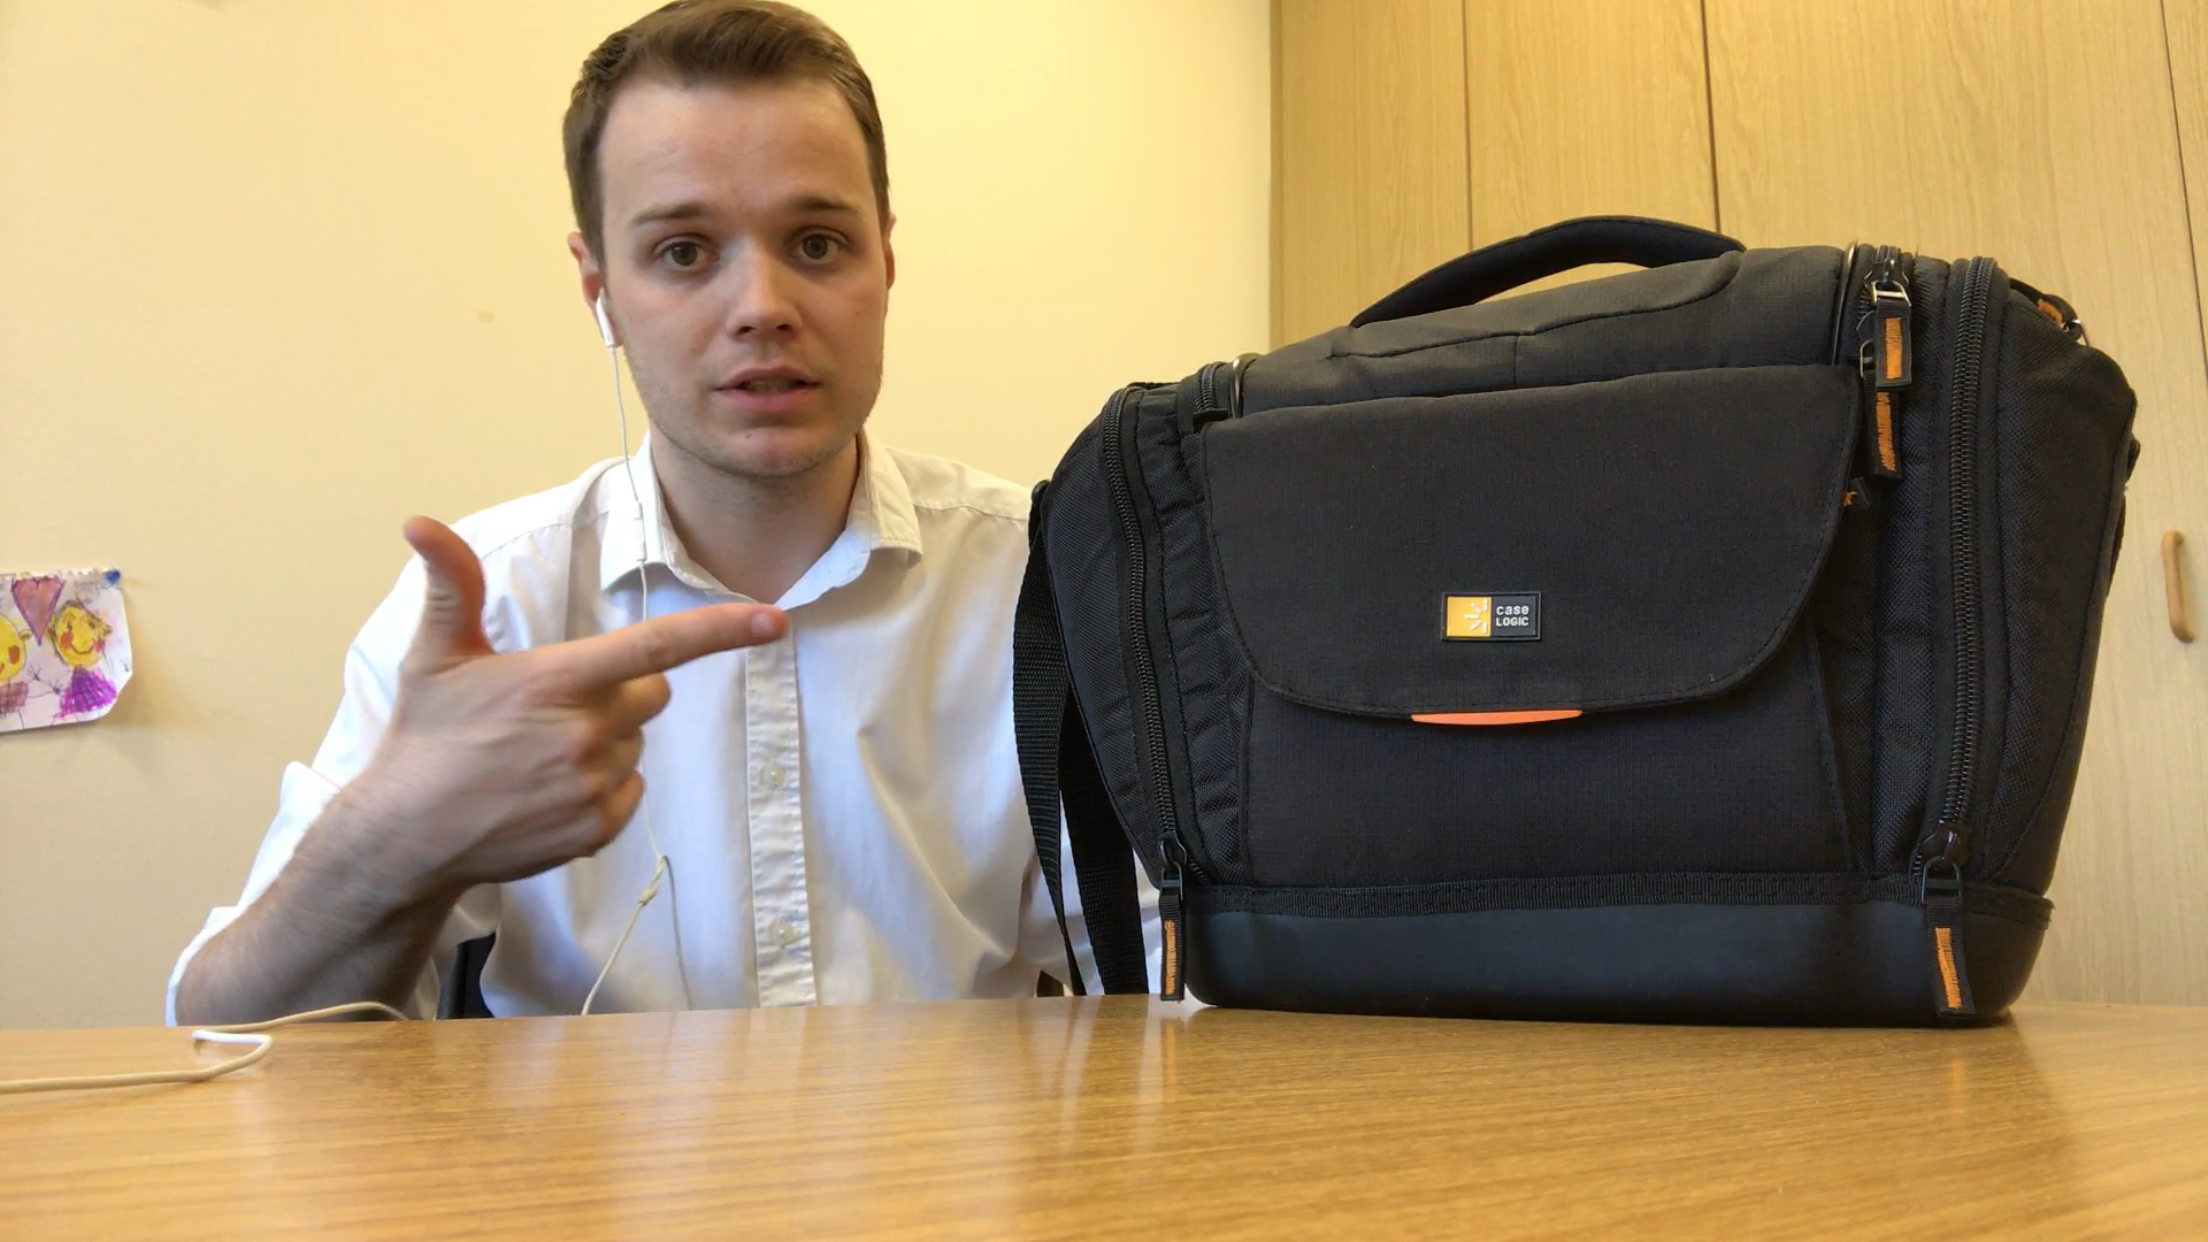
What's in my bag for Street Photography?
We're just a few days away from the big photo walk and a few people have asked me what it is I will be bringing in my bag on the day.
After years of walking the streets with a camera in my hand, I've refined the contents of my bag over time, down to just a few things. If you can watch a video, I explain everything in full over on YouTube. (just hit play down below here). If however you're not in a position to watch, then scroll down a little more, I've listed the contents with links to the product details too.
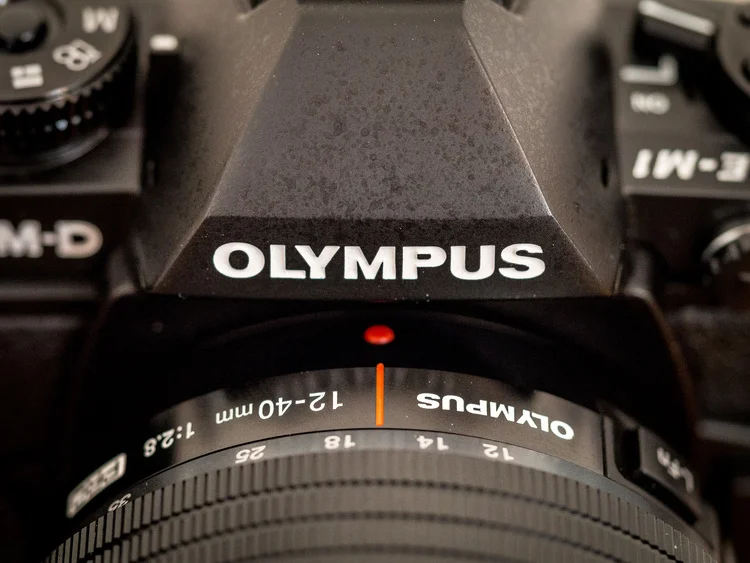
Olympus OM-D E-M1: http://amzn.to/2p1voSm
Olympus OM-D E-M5: http://amzn.to/2ot3osu
Olympus 17mm f/1.8 Lens: http://amzn.to/2qboisj
JJC Metal Lens Hood for 17mm f/1.8: http://amzn.to/2osYJXb
Olympus 9mm f/8 Body Cap Lens (for fun/convenience):
Case Logic Medium SLR Bag: http://amzn.to/2pfqCz7
Lens Cloth: http://amzn.to/2ot4dkR
Air Blower: http://amzn.to/2pfqDDx
Spare Batteries: http://amzn.to/2pwPrJQ
SD Cards: http://amzn.to/2otfAJu
iPhone Charger Battery: http://amzn.to/2qbKpyV
Water Proof Jacket: http://amzn.to/2oHgRYR
Join us - it's FREE!
If you want to join us on April 30th in London, just sign up today over on the events page

Street Photography Tips (Part 2) & Book Giveaway
[To listen to the audio hit play and then give it a second to buffer. The audio is high quality]
Following on from last week's post where I shared a few of my top tips for improving your street photography, today is the promised second part of this little series. In part one, I also announced the book giveaway too, where you can be in with a chance of winning my own personal copy of David Gibson's 'The Street Photographer's Manual'. The winner of that competition will be announced on January 31st, so be sure to enter today. Details on how to enter can be found at the bottom of this post.
Before we dive into the tips in this post, let's briefly recap on the first 3* tips I gave In last week's post:
- Isolate & Simplify - Keep the frame clean and make it clear what your subject is
- Tell a story - Is your photograph engaging and interesting? Does it have a point?
- Get closer to your subject and be bold and brave! Fill the frame.
- *BONUS TIP: Michael Pung - Street Portraits
If you missed that post be sure to check it out!
Improve your Street photography in 2017 with these top Tips:
1: Hunter & Fisherman approaches
I've been asked numerous times how it is I actually set about seeing and making street photographs; do I spend the entire day walking or do I sit and wait for the scene? The answer is both!
It's fair to say that these two different approaches will yield different results. They will also suit different photographers too.
Let's start by talking about the method whereby we pound the streets, walk around, cover ground and find the moments. Or, the 'Hunter' method as I like to call it...
As a hunter out on the streets, you'll find yourself spending the day walking. This can be great if you're able to physically do this, but you need to be conscious to keep your eyes open to the scenes around you, and your wits about you as you walk, especially on busy city streets. The idea of hunting for a scene and a subject offers us as photographers plenty of variety. As we move from street to street and district to district the backdrops will change dramatically.
Camera: Olympus OM-D E-M1. Lens: 25mm f/1.8 @ Aperture: f/1.8 Focal Length 25mm ISO: 400 Shutter Speed: 1/3200th
As with many larger towns and cities you'll find that the architecture changes from one area to the next. Knowing London as I do for example I can tell you that you have the white rendered buildings, people in suits and cigar shops of St James', then the tourist parts of Leicester Square and Covent Garden, the colours and smells of Soho & the uniqueness of China Town for example. Whatever city you go to, you're likely to experience that same variety. As a hunter you'll sit at your computer later that evening and be welcomed by photographs that are very different from each other owing to the fact you saw different parts of the area.
Camera: Olympus OM-D E-M1. Lens: 12-40mm f/2.8 PRO @ Aperture: f/2.8 Focal Length 25mm ISO: 200 Shutter Speed: 1/2000th
Whilst that variety can be found by clocking up miles, what I often find some people struggle with is actually seeing photographically whilst they walk. By this, I mean; the walking itself can actually prevent you from seeing things. Either because you're physically tired, aching & thirsty, or just because your mind can wander as you get lost and explore new places. If that sounds like you, then the fisherman method may be something you should start out by trying...
The fisherman method, as you may have guessed, would see a photographer finding a spot or an area in which to roam. Perhaps a park area or a junction or cross section in the city? Again, thinking about London you could perhaps consider South Bank. Whilst the fisherman approach to street photography is less likely to yield the variety that hunting offers, there are areas, such as South Bank, where the variety will come to you! In a small stretch of 100m, where the walk way is not too wide that people can't really escape your range, you can photograph people discretely as they walk past. Whether they're a commuter on the way to work, a jogger keeping fit during lunch time, tourists with cameras or street performers or skateboarders. Finding an area similar to London's South Bank can very much feel like shooting fish in a barrel (metaphorically speaking of course).
Camera: Olympus OM-D E-M1. Lens: 25mm f/1.8 @ Aperture: f/2.2 Focal Length 25mm ISO: 4000 Shutter Speed: 1/15th
The intention and idea of the fisherman method however doesn't necessarily just mean you stay in one area. In an even more intentional way with even less movement required you can instead look for a backdrop or a stage for a scene first (again, metaphorically speaking) and then wait patiently for your subjects to walk onto the set. For example, finding an archway, a set of stairs or steps or a bench, to name but a few ideas. You can position yourself and ready your composition and your settings and then just wait for something or someone interesting to happen. It could be that someone sits on the bench. It could be that a skateboarder jumps the steps or grinds down the rail. It could simply be a chef on a cigarette break in an alleyway behind a restaurant, cafe or diner. Whatever the case may be, you can start by readying the scene and waiting for the interest.
Camera: Olympus OM-D E-M5. Lens: 17mm f/1.8 @ Aperture: f/10 Focal Length 17mm ISO: 3200 Shutter Speed: 1/13th
Again, as the name suggests the fisherman method can very much be a waiting game, where the patience you invest is what will reap you those rewards.
Camera: Olympus OM-D E-M1. Lens: 17mm f/1.8 @ Aperture: f/1.8 ISO: 800 Shutter Speed: 1/640th
So, as I say: choose a method that you think sounds more appealing to you and give it a try. But you never know, some 'hunters' may find the 'fisherman' method more rewarding than they think, and some 'fishermen' may find the occasional hunt for a subject an exciting experience!
2: Choosing a cameras & lenses for Street Photography
If you're reading this post, I'd say there is a relatively high chance that you have looked online as to what equipment is best suited to street photography, or, you've already formed your own opinion as to what you think is best. My opinion is that there isn't one good answer and there isn't one camera that is necassarily better than any other. A DSLR will have advantages over a compact or a mirrorless camera, and likewise a smaller, lighter camera has its obvious advantages too.
Whilst there are cameras such as the brilliant Olympus PEN-F and accomplished Fuji X100t that are super small, lightweight and help you to look very incognito as if they're designed specifically for street photographers, I've heard some very compelling debates to suggest that having a DSLR out on the street can in fact help to convince others that you're just a tourist too! After all, it seems everyone is a photographer these days and more and more people are investing in 'big cameras'. I guess having a DSLR could in effect actually help you to blend in, in an odd sort of way.
My own belief is that you should use the camera you feel most comfortable and familiar with, whatever that may be. You don't need to wait until you have that latest mirrorless camera and you shouldn't be put off by 'only' having a Full Frame DSLR. Both will get you results - it's you that has to be ready to see the moment and capture it.
Without sitting on the fence though and with all that said, let's consider the practical advantages of a smaller, lighter camera here: you are going to find that you need a smaller bag for it all, which means you are likely to be less fatigued by the end of the day. These mirrorless cameras often offer a totally silent electronic shutter mode and, arguably, in my opinion, you are less likely to be considered a 'serious' or 'professional' owing to perceptions alone. So if you can put your ego aside for one minute, it could be that on this occasion looking like an amateur or tourist is a good thing (I would say though for the record, I don't agree with the perception, but it is a hard one to argue. I wrote about my feelings on this in my 'Why Olympus?' Post)
So, whilst this section of advice isn't necessarily me telling you exactly what to carry and use, I would loosely suggest the following things to I think aid you physically and creatively:
- travel light.
- pack one camera & one lens
- pack a spare battery
- use as small a bag as possible
Travelling with one camera and one lens, whichever lens that may be, will serve to help you focus only on the scenes and the moments happening in front of you and less on the gear you have in your bag.
3: Times, Locations & Days to shoot (Workshops)
Every time is a good time for street photography! It doesn't matter if it's a dark winter. It doesn't matter if it's raining! These elements are only going to provide an extra dimension and level of interest to your photography. Some of my own personal favourite images that I have made out on the street have come on late December and January evenings. I wrote a post back in 2015 that went on to be featured in the Olympus Magazine where I spoke about low light photography and how to tackle it (you can check that out right here on the blog).
Whilst this answer is somewhat generic, I would personally suggest that you should look to book yourself onto a local photo walk or tour with an experienced street photographer. Whilst that person doesn't necessarily need to know the area (one could argue), I'd say that a local will be able to take you to the lesser known areas, which will definitely go some way to helping you to produce more unique images.
One man that can talk about this a little better than me is Paul Griffiths and so I've invited Paul to share his thoughts on what it is a Street Photography Tour or Workshop can offer you. For those of you that don't know Paul; runs the popular Photography Live & Unct Blog Video Blog over on YouTube. Paul is an accomplished Photographer who knows London like the back of his hand having worked in the city for many many years. Today though, when not interviewing some of the world's most renowned photographers for his show, you'll find Paul leading tours & workshops on the streets of London.
Here's what Paul has to say about the value of work shops:
Setting targets, joining camera clubs and making New Years' resolutions are great. But ultimately, there’s nothing better than just getting out with your camera and ‘taking’ (or rather making) images.
Image used with permission of Paul Griffiths. Image Copyright by Paul Griffiths
For anyone that enjoys Documentary or Street Photography, you will likely be aware Photo walkabouts where a group get together and hit the streets together, but it could be argued that these are not necessarily the best means to learn when it comes to street photography. Sure, you can exchange ideas and talk about cameras all day, but invariably a walkabout typically starts off with a group sticking together and eventually disintegrating and becoming separated as attendees drop away, get lost or sometimes decide to go another route.
It's not really the type of event to gain tips & skills from!
"Practice makes perfect!" & "Your photography will improve if you practice!"; You've no doubt have heard these statements before? Well, they are true, but practice with guidance and the practice is improved!
http://www.photographyliveanduncut.com/aboutmecontact/
Rather than an unguided walkabout with a lack of intention, the ardent photographer should start to look for better options to learn and improve their craft. One such way is a structured Photography Workshop.
Whether you prefer working indoors or outdoors, these days you're very likely to find one to suit you and your style of learning. The best workshops typically host not more than 6-8 people, offer a ‘hands on’ and experienced tutor who encourages and can demonstrate camera skills and who can take you out of your comfort zone in order to expand your thinking and widen your horizons! That's the best way to learn!
This is exactly what we at ‘Photography Live and Uncut’ offer: a workshop that will teach you new skills and enable you to try different ways to make photos and to get you out of that comfort zone. You may know your settings and compositions already (great!), but we'll start by helping you to see photographically - the art of seeing a scene and a story in front of you. We offer workshops that are both studio-based and out on the streets, depending on your preferred genre. We're here to share everything we know with you to ensure you gain the most from your workshop experience. Everything we teach and do is aimed and focussed towards improving your photography
If you want to know more information about one of Paul's Workshops, made available through Photography Live & Uncut, simply check out his website. (Pssst, be sure to follow Paul on Social Media too if you want to be notified of the latest workshop dates)
4: Bonus Tip: Expectations of your own efforts
Looking at the portfolio's of some avid street photographers, who have galleries full of images from the street, it can seem that the expectation of an afternoon out on the streets is to come home with a dozen images that you think are wonderful. Whilst I don't want to suggest that your work isn't good and that you haven't got a dozen good images after a day of shooting, in reality, the chances are you'll end up with just 1 or 2...or possibly none!
As photographer's we should only be showing our absolute best work. So, when you load your images into Lightroom, or Aperture or whichever is your preferred tool be selective, conscious and give thought as to which images genuinely have content, story, an interesting subject and are of a quality you are happy with. If you are able to honestly look at an image and say that it contains elements from each of the tips from these two posts that i've written (that being part one from last week and this post too), then go ahead and share it. But if, after mulling over an image you realise it doesn't have any 'Pull' or interest, then don't be disheartened.
You've probably heard people before say 'I make my own luck' and whilst I think there is something in this phrase, really, what luck is, is where preparedness meets opportunity. I guess what I'm saying is that it is your job to be prepared and to spot the opportunity. But, that's not to say that opportunity will always present itself to you in the form of an interesting scene to photograph. Sometimes, the interest is more subtle and as such you have to try harder to spot it.
The reason I'm ending this short series on such a note is because, in reality, all you are doing by applying all of your skills and possibly even by following the advice that Michael Pung, Paul Griffiths and myself have provided in these two posts, is increasing your chances of capturing something worth sharing. It's not offering you a guarantee at all.
In the first couple of paragraphs in the first post I did say that Street Photography can appear to be easy and simplistic. But I'm sure, after having tried it yourself or even just having been through my top tips, you'll appreciate that there is far more to capturing an image on the street that you had possibly considered.
Sure, you may have days where you come back with a bunch of great work, but others, you may come back with nothing. You will soon realise that not everything you capture, despite your best efforts, is actually as good as you may initially think. Don't think of this as a reflection of your overall skills as a photographer, but remember that capturing a quality, engaging and interesting moment on the street requires a lot of things to fall into place at the right time and that everything happens in the blink of an eye; press that shutter just 1 second later and the story inside the frame you just captured could be totally different.
Street Photography can be a funny old mistress that can reward you. Other days you'll return home with nothing to show for your efforts. It's cruel, but that's street photography.
...The End!
Book Giveaway
Okay, so if you're here for the book giveaway, look no further. I'm giving away my own personal copy of The Street Photographers Manual by David Gibson.

I loved this book so much that I felt compelled to write a review here on the blog (you can read that book right here). Coupled with this post, I thought that it would be a great companion for anyone looking to improve their street photograph and so, I'm giving it away for free!
Review Excerpt:
"Whilst the book itself may be called a manual and does offer instruction to help you create more thought-out and intentional street photographs, this is also a very impressive and vast study of street photography. This book looks at both various techniques and elements that contribute towards stronger imagery and makes use of examples by the greatest street photographers of our time such as; Elliott Erwitt, Bruce Gilden, Saul Leiter, Trente Park and more. These examples give the book's instructions conviction and only serve to show that this thorough - yet concise - book is something you can not only read for inspiration, but learn from at the same time. Within each chapter we are introduced to either another master of Street Photography or another technique of shooting on the street, each accompanying a sample of that master's work or an example of that technique in action to best explain and demonstrate the case in point"
To be in with a chance of winning my own, personal copy of The Street Photographer's Manual, subscribe to the blog using the form below and share this post on social media (be sure to include a link back to this post). If you're already a subscriber, just drop a comment below. I'll canvas all new subscriptions and comments and pick the lucky winner from those.
Good luck everyone! Thanks for stopping by.
Street Photography Tips (Part 1) & Book Giveaway!
[To listen to the audio hit play and then give it a second to buffer. Alternatively,be sure to subscribe to the blog over in iTunes where you can listen on-the-go too!]
There's a lot going on today! In addition to my own 3 top tips to improve your street photography, I've invited the fantastic Michael Pung to offer a top tip of his own for street portraits too! In addition to all of that, I'm also running the first of my giveaways for 2017!
If you're interested in the street photography tips then just keep reading. If however, you're just here to put your name in the hat to win the book, skip to the bottom for entry information and terms & conditions. Good luck to you all!
Improve your Street photography in 2017 with these top Tips:
Perhaps you've just picked up your first camera for Christmas? Perhaps with some of the spare time you had over the festive period you ventured out into the street for the first time to try your hand at what can at first appear to be a very easy and simplistic photographic discipline - Street Photography.
Whatever the case may be, I've got a few tips to help you to produce stronger, more compelling images when in public spaces.
Now, I'm not suggesting that the tips in this post alone will transform you into a master Street Photographer overnight! There is so much more to Street Photography than can be condensed into 3 tips. In fact, I've got lots to say on the subject. That's why I'm going to actually split this post into 2. This is part 1 of 2. You can check out Part 2 right here
Today I'll start with the practical things; the things that you can practice and implement right now to instantly make stronger and more engaging photographs of life on the streets:
1: Isolate & simplify
I see too many street photographs with no clear subject! It's massively frustrating for me when I look through people's work and all I see are busy streets, without a clear point of focus, intent, story or subject.
Through use of light and shadows this image successfully leads the viewer's eye to the illuminated subject. Note however that the background is illuminated just enough to help tell the story, whilst at the same time is not too bright so that it is a distraction from the main subject.
Camera: Olympus OM-D E-M1. Lens: 12-40mm f/2.8 PRO @ Aperture: f/2.8 Focal Length 12mm ISO: 3200 Shutter Speed: 1/160th
Now, of course sometimes the subject in the frame can be the order among chaos, but unless it's easily identifiable or intentional the subject is often lost and the viewer is left confused as to what the intention of the image actually is! As such my first tip is to isolate your subject. By this, I mean make it clear what your subject is. This can be achieved by using contrasting colours; a lady in a bold red coat in a crowd of darker coats perhaps?
If you aren't able to isolate your image using contrast, colour or shadows & light, then go for plan B; simplify the contents of the frame.
This can be achieved by removing elements that are distracting, such as bright spots in the background (bright and bold colours as well bright lights). Text and writing in images can also be very distracting. Signage and shop fronts as shown below can often be distractions. (unless of course they add to the story as I discuss in my second tip). A commonly used method of simplification is to find a plain background to use as a stage for your subjects; brick walls for example can work quite well:
By putting my subject against a plain backdrop, I ensure that my subject is the only thing for my viewer to look at. Simple Framing.
Camera: Canon 7D Lens: 85mm f/1.8 Aperture: f/4 Focal Length 85mm ISO: 1000 Shutter Speed: 1/400th
Another means to simplify is to use a shallow depth of field to remove or hide or reduce a distracting element of the background from a frame. Here for example you can clearly see the city in the background, however the use of depth ensures that the viewer's is drawn back towards the object in sharp focus; the musician:
Camera: Olympus OM-D E-M5. Lens: 12-40mm f/2.8 PRO @ Aperture: f/2.8 Focal Length: 31mm ISO: 800 Shutter Speed: 1/2000th
2: Tell a story
Before I photograph anything I subconsciously ask myself a few questions: Why are you photographing that scene? What's the point? What is the story? Will someone else see or get the story?
I don't literally stop and ask myself these questions, but over time this thought process has become very much part what happens before I press the shutter. As the photographer, we were present at the moment it all happened and so we have the added context in our mind to aid the story, things like how hot or cold it was, what the street smelled like, what sounds could be heard and what else was happening outside of the frame to inform the action happening inside the frame. All of those extra senses we have add more to the story for us. Instantly, that provides a different and perhaps more informed narrative for us when we view the image back. It makes us biased. So, unless we somehow capture more inside the frame to help put the pieces of the story together for the viewer, what we ourselves often consider to be a great image because of how we feel about it, is nothing more than a snapshot of someone on the street to someone else.
For me, this is why Street Photography in itself is an often-misunderstood genre: It appears easy to walk around and shoot all the interesting things you see on a busy street, but that doesn't necessarily translate into a compelling and engaging or even interesting photograph for someone else to look at.
A dark scene featuring a man smoking (the smoke is obvious) leaning against the front of a betting shop (bookies as we say in the UK). The text reads 'When the Fun Stops, Stop'.
Camera: Olympus OM-D E-M1. Lens: 12-40mm f/2.8 PRO @ Aperture: f/2.8 Focal Length 12mm ISO: 3200 Shutter Speed: 1/80th
Now, without all of that additional context provided by our own senses as I mentioned above, the story told within a frame can be left to the interpretation of the viewer, even if you have provided a lot of additional visual stimulus and a clear backdrop to the scene. This is absolutely fine. Often, it can be more interesting for a viewer to look at the image and begin to imagine and write their own story to bring the image to life. Don't be upset if the story that someone invents to surround your image isn't the story you saw at the time you made the image. Just be grateful that someone has taken the time to study your image enough to see a story within it!
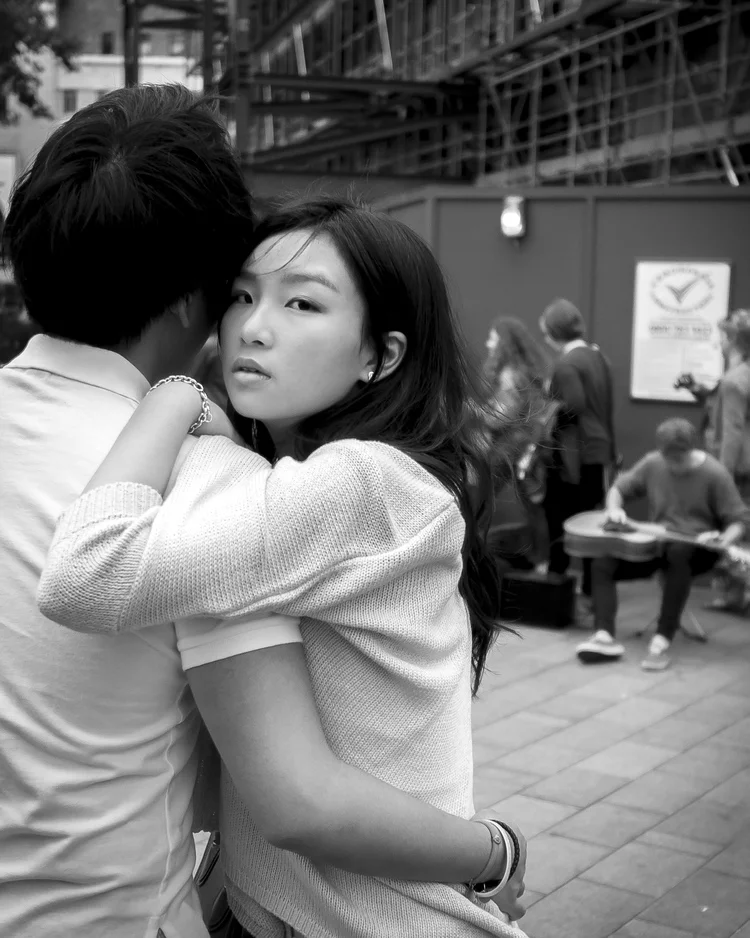
3: Get Closer & Be Bold
This is something of an expansion on my point to isolate & simplify what is in your frame, but here I want to suggest that you get closer to your subject to make the image more engaging. This works particularly well when you achieve eye contact with your subject (if your subject is a person or an animal that is). For example:
Note that despite my subjects occupying a large proportion of the frame, I still have composition, isolation and a story being told in the background.
Camera: Olympus OM-D E-M1. Lens: 12-40mm f/2.8 PRO @ Aperture: f/2.8 Focal Length 12mm ISO: 3200 Shutter Speed: 1/160th
Standing at a red light waiting to cross the street I took a few side-steps to get closer to this woman. I waited for the lights to turn amber before raising the camera and making a frame. With so much going on around us all my subject could do was to throw me a glance before crossing. This frame would have arguably been too busy had my subject been farther away and occupied a smaller amount of the frame.
Camera: Olympus OM-D E-M1. Lens: 25mm f/1.8 @ Aperture: f/1.8 Focal Length 25mm ISO: 320 Shutter Speed: 1/640th
Helping your subject to dominate the frame makes it immediately more obvious exactly what your subject is. Fact.
You will still of course have to keep an eye out for distracting elements, as always.
If you're shooting a street performer, get in closer to them (but be safe and don't invade their space). If you're shooting street, you're typically going to be in an open public space. As such you should have the freedom to move around - so do it! Don't just let life pass you by from one spot - go and get those images! That is of course, unless you're setting a scene and waiting for the subject (more on that part two though)
Don't be scared to raise the camera to your face to make a photograph of someone. Sure, this feeling will be worse if you're in a less densely populated area, but don't fear question or conflict; make the image and congratulate yourself for having done so later, because the alternative is missing the shot and kicking yourself for it later. Raising the camera up to your hip can be fine, but it will dramatically reduce your chances of getting the shot. It's also sneaky! So be intentional, bold and get closer to the subject!
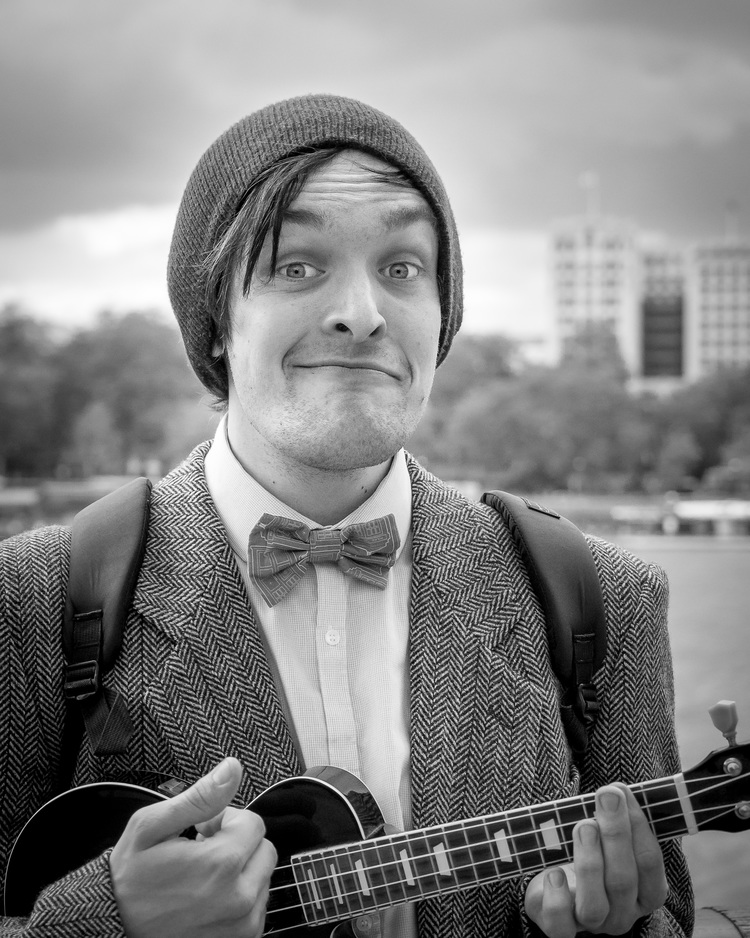
4: Bonus Tip: Michael Pung Shares his thoughts on making strong Street Portraits:
I've got an entire gallery filled with Street Portraits, however, I have to admit that the street portaits made by Michael Pung are on another level. As such, rather than me offering my thoughts on street portraiture, I have instead invited Michael (Pung) to give you his expert opinion on the matter:
I love taking street portraits. There is something exhilarating about making the approach, forming that connection (if even for a brief minute or two) and capturing their photograph.
Image used with permission of Michael Pung. Image Copyright of Michael Pung.
The approach is quite possibly the scariest part of taking street portraits, but once you get past it, you will discover that it really is quite rewarding. I enjoy making that connection with everyone I meet. It really isn’t about what you say, but how you do it. Try not to hesitate and just be upfront with your intentions. I usually just introduce myself in a friendly manner and ask for their photograph. I like to gauge if they’re busy, and if they aren’t then I ask them some questions to get to know them better. Sometimes conversations can go on for 20 minutes or more! But if not, it’s still okay! And even if you don’t get the photograph, making that connection really is something special.
Image used with permission of Michael Pung. Image Copyright of Michael Pung.
As for making the portrait, here are a few of my ingredients! I enjoy shooting at lower apertures to make the backgrounds soft (1.2 to 2.0 aperture on a 56mm on an APS-C sensor). If you find it too soft, it is okay increase it a little to have more of their facial features in focus. In general, try to keep eyes in the top half of the frame and if this means cropping a little off the top of their head, that’s okay! There should be a balance in the shot and this varies from how close or how far you want to crop. The focus here is on the individual and you want to remove as much of the distractions away from the subject. The individual doesn’t need to smile usually and a neutral expression is better than anything forced. Make a connection, and once that is made, the other things come together to make a strong portrait!
Image used with permission of Michael Pung. Image Copyright of Michael Pung.
For more of Michael's wonderful work, check out his blog at www.michaelpung.com/blog
Part 2 - January 2017
This post runs the risk of becoming way too long if I continue with the other tips I have, but I really do want to offer further advice. For now, I'll leave you with these things to digest and try out. I'll post part 2 of this next week. So you if want to receive part 2 of this post in your inbox, be sure to subscribe. In part 2, I'll talk about:
- Hunter & Fisherman approaches
- Choosing a cameras & lenses for Street Photography
- Times, Locations & Days to shoot
- Bonus Tip: Expectations of your own efforts
Book Giveaway
Okay, so if you're here for the book giveaway, look no further. I'm giving away my own personal copy of The Street Photographers Manual by David Gibson.
I loved this book so much that I felt compelled to write a review here on the blog (you can read that book right here). Coupled with this post, I thought that it would be a great companion for anyone looking to improve their street photograph and so, I'm giving it away for free!
Review Excerpt:
"Whilst the book itself may be called a manual and does offer instruction to help you create more thought-out and intentional street photographs, this is also a very impressive and vast study of street photography. This book looks at both various techniques and elements that contribute towards stronger imagery and makes use of examples by the greatest street photographers of our time such as; Elliott Erwitt, Bruce Gilden, Saul Leiter, Trente Park and more. These examples give the book's instructions conviction and only serve to show that this thorough - yet concise - book is something you can not only read for inspiration, but learn from at the same time. Within each chapter we are introduced to either another master of Street Photography or another technique of shooting on the street, each accompanying a sample of that master's work or an example of that technique in action to best explain and demonstrate the case in point"
To be in with a chance of winning my own, personal copy of The Street Photographer's Manual, subscribe to the blog using the form below and share this post on social media (be sure to include a link back to this post). If you're already a subscriber, just drop a comment below. I'll canvas all new subscriptions and comments and pick the lucky winner from those.
Good luck everyone! Thanks for stopping by.
Happy New Year & The Best of 2015
I wanted to leave my 'Happy New Year' post until a week or so after New Year. I don't know about you but my inbox was full of offers, promotions, discounts and all sorts of other things that just added to the noise immediately after New Years. Everyone wants you to visit their site and buy their product. I felt that If I were to release this post just after Christmas, or on the 1st of January that I too would be adding your inboxes that are likely (like mine was) busting with things I just wasn't interested in.
Now that most of us are returning to some sort of normality and a sense of routine I thought it would be a good time to share with you, what I think, was some of my best work from 2015 and take a look back on those 12 months.
So, firstly I hope you had a wonderful Christmas and that you spoiled yourself with some lovely new photography-related goodies. Personally I think photography books are the best Christmas present. As great as new gear is photography books give you so much and can help you grow. If you get a new book at the beginning of a year it can really inspire and inform you for the year ahead. Whether it's business or technical, or even just a photo book filled with amazing photographs to inspire, photography books are fantastic. If you've received Amazon or book vouchers, one book I would recommend is Gregory Heisler: 50 Portraits. Wow!
Best Street Photographs of 2015
I found this to be harder than I thought this year. Usually I would just pick out 10 images and post them right here, but this year I thought instead I'd select a few more and put them in to a slide show. Some of these images are seeing the light-of-day for the first time, which surprises even me. As I looked back through my library in Adobe Lightroom there were a few images that jumped out at me - images that I had previously overlooked as good enough to share with the world. So, here are my favourite Street Photographs from 2015:
[If you're reading this email in your inbox you may need to open this in a browser to watch the video]
Best Of the Rest
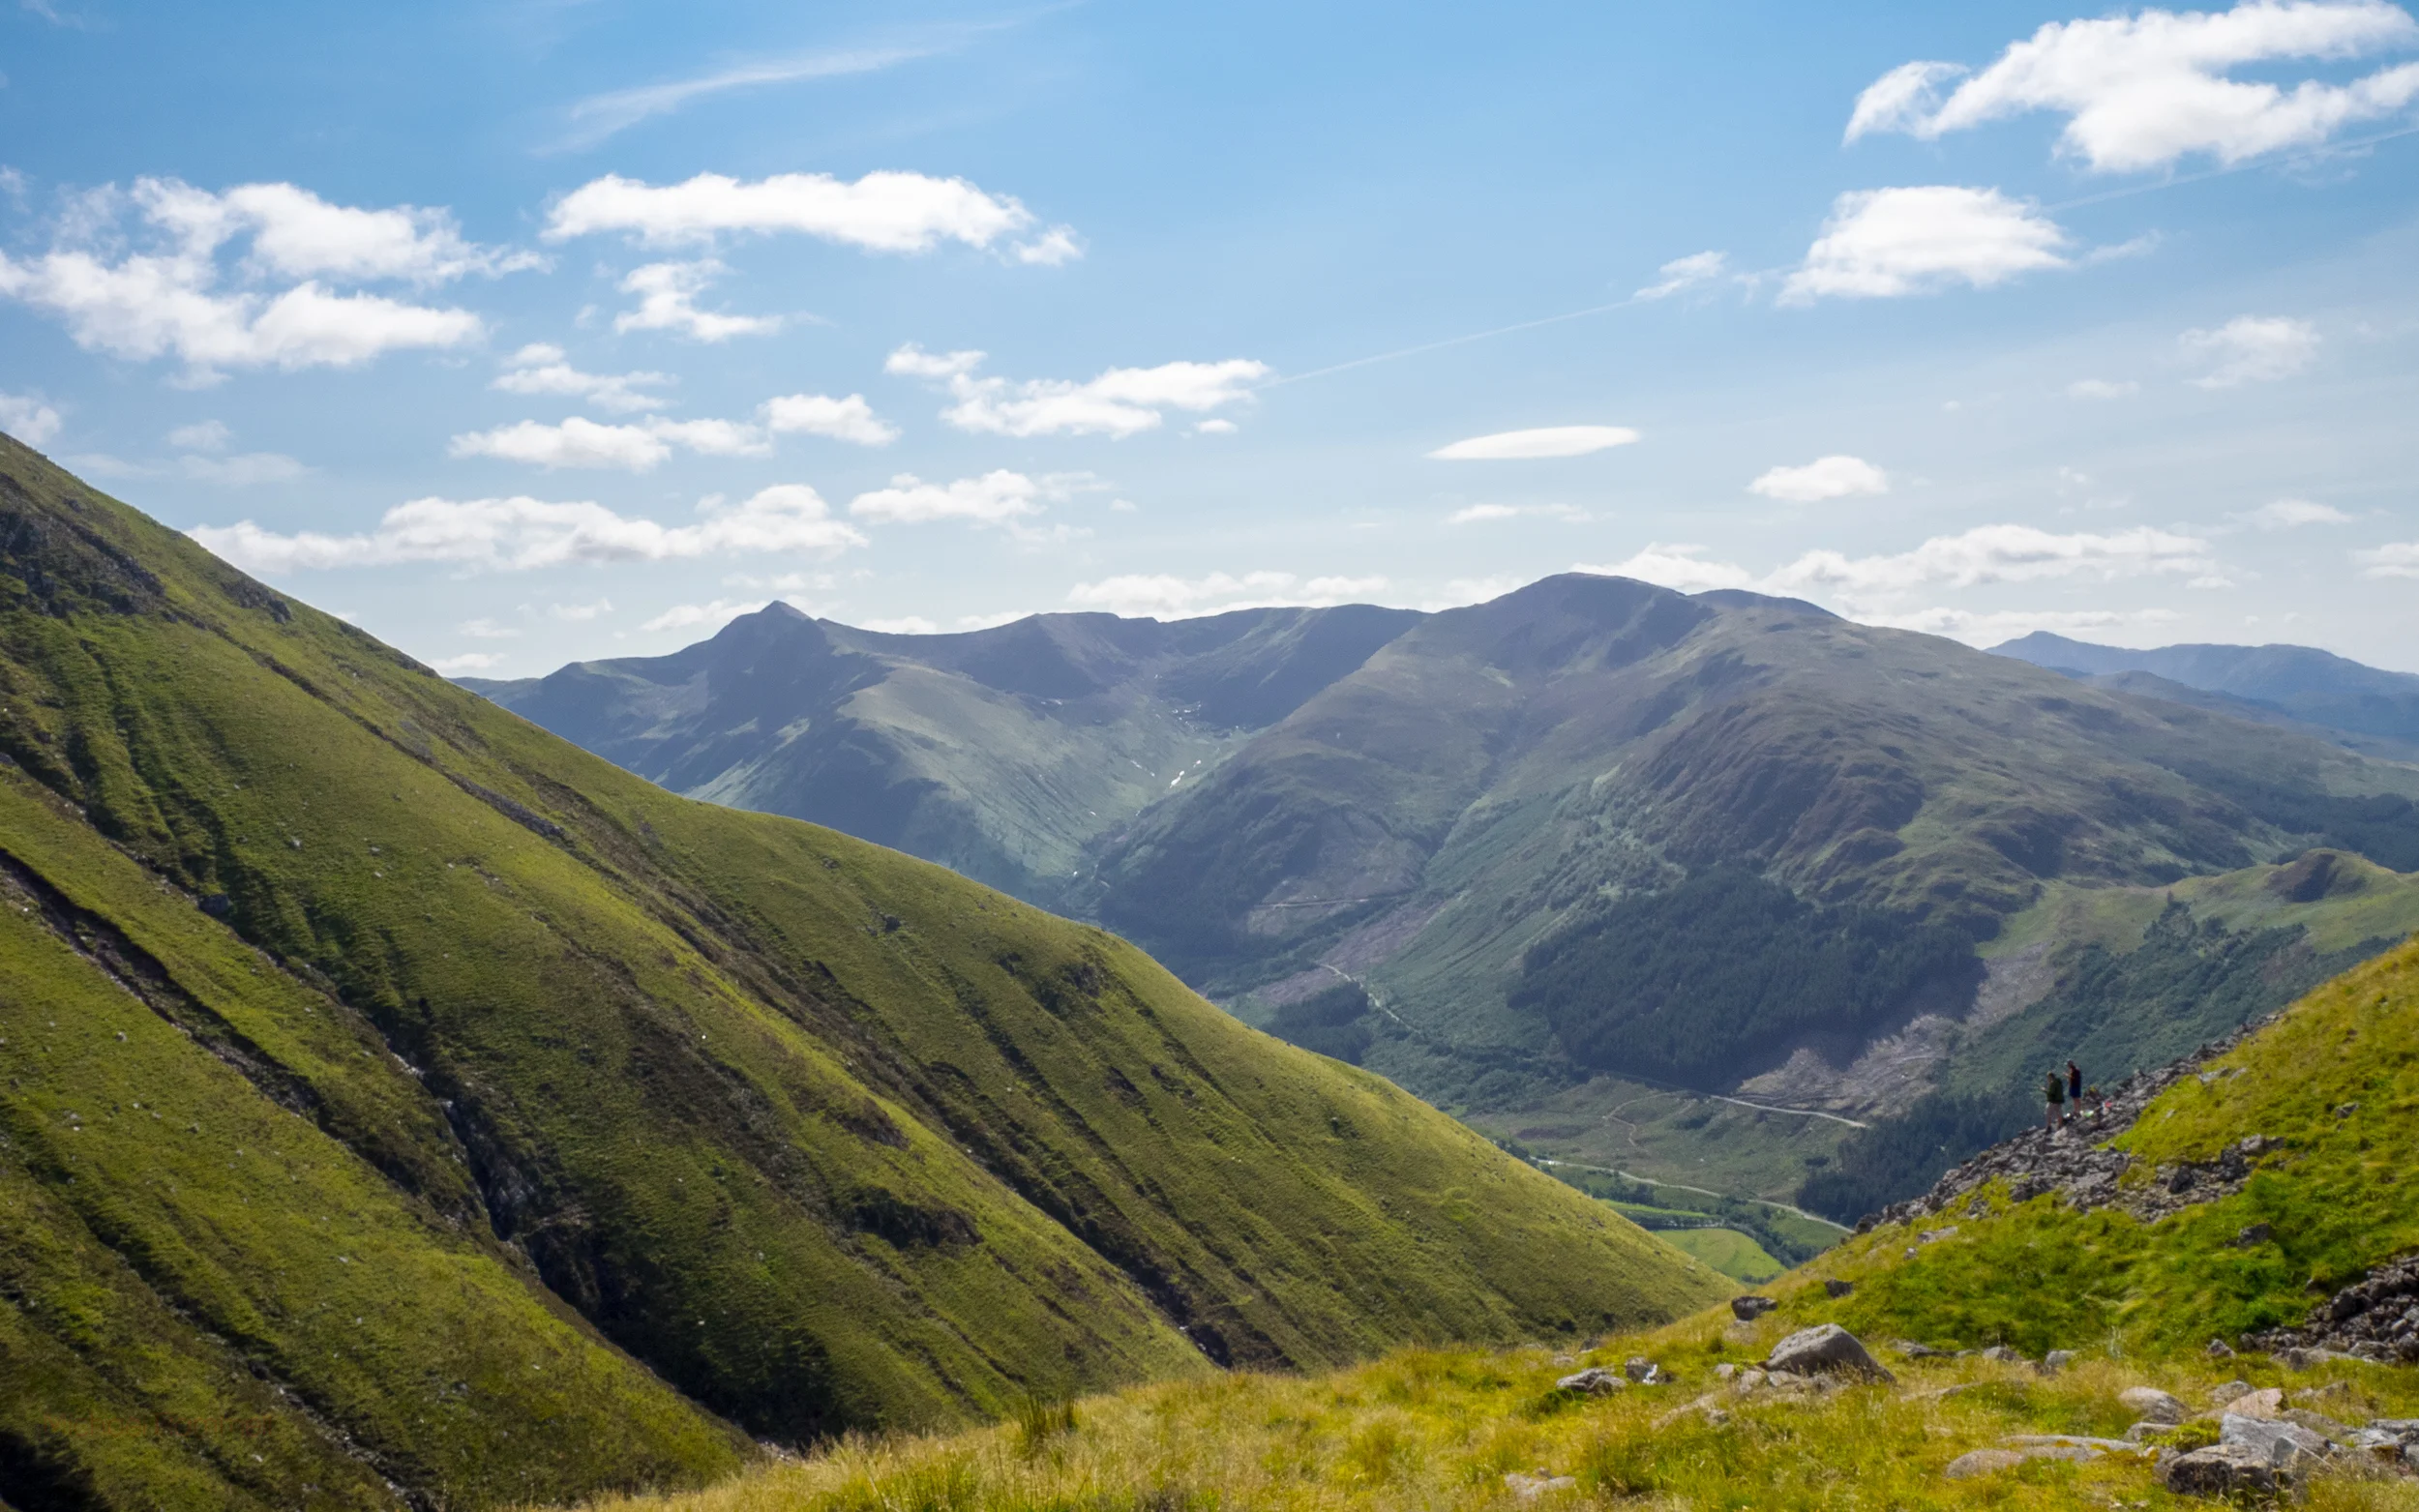
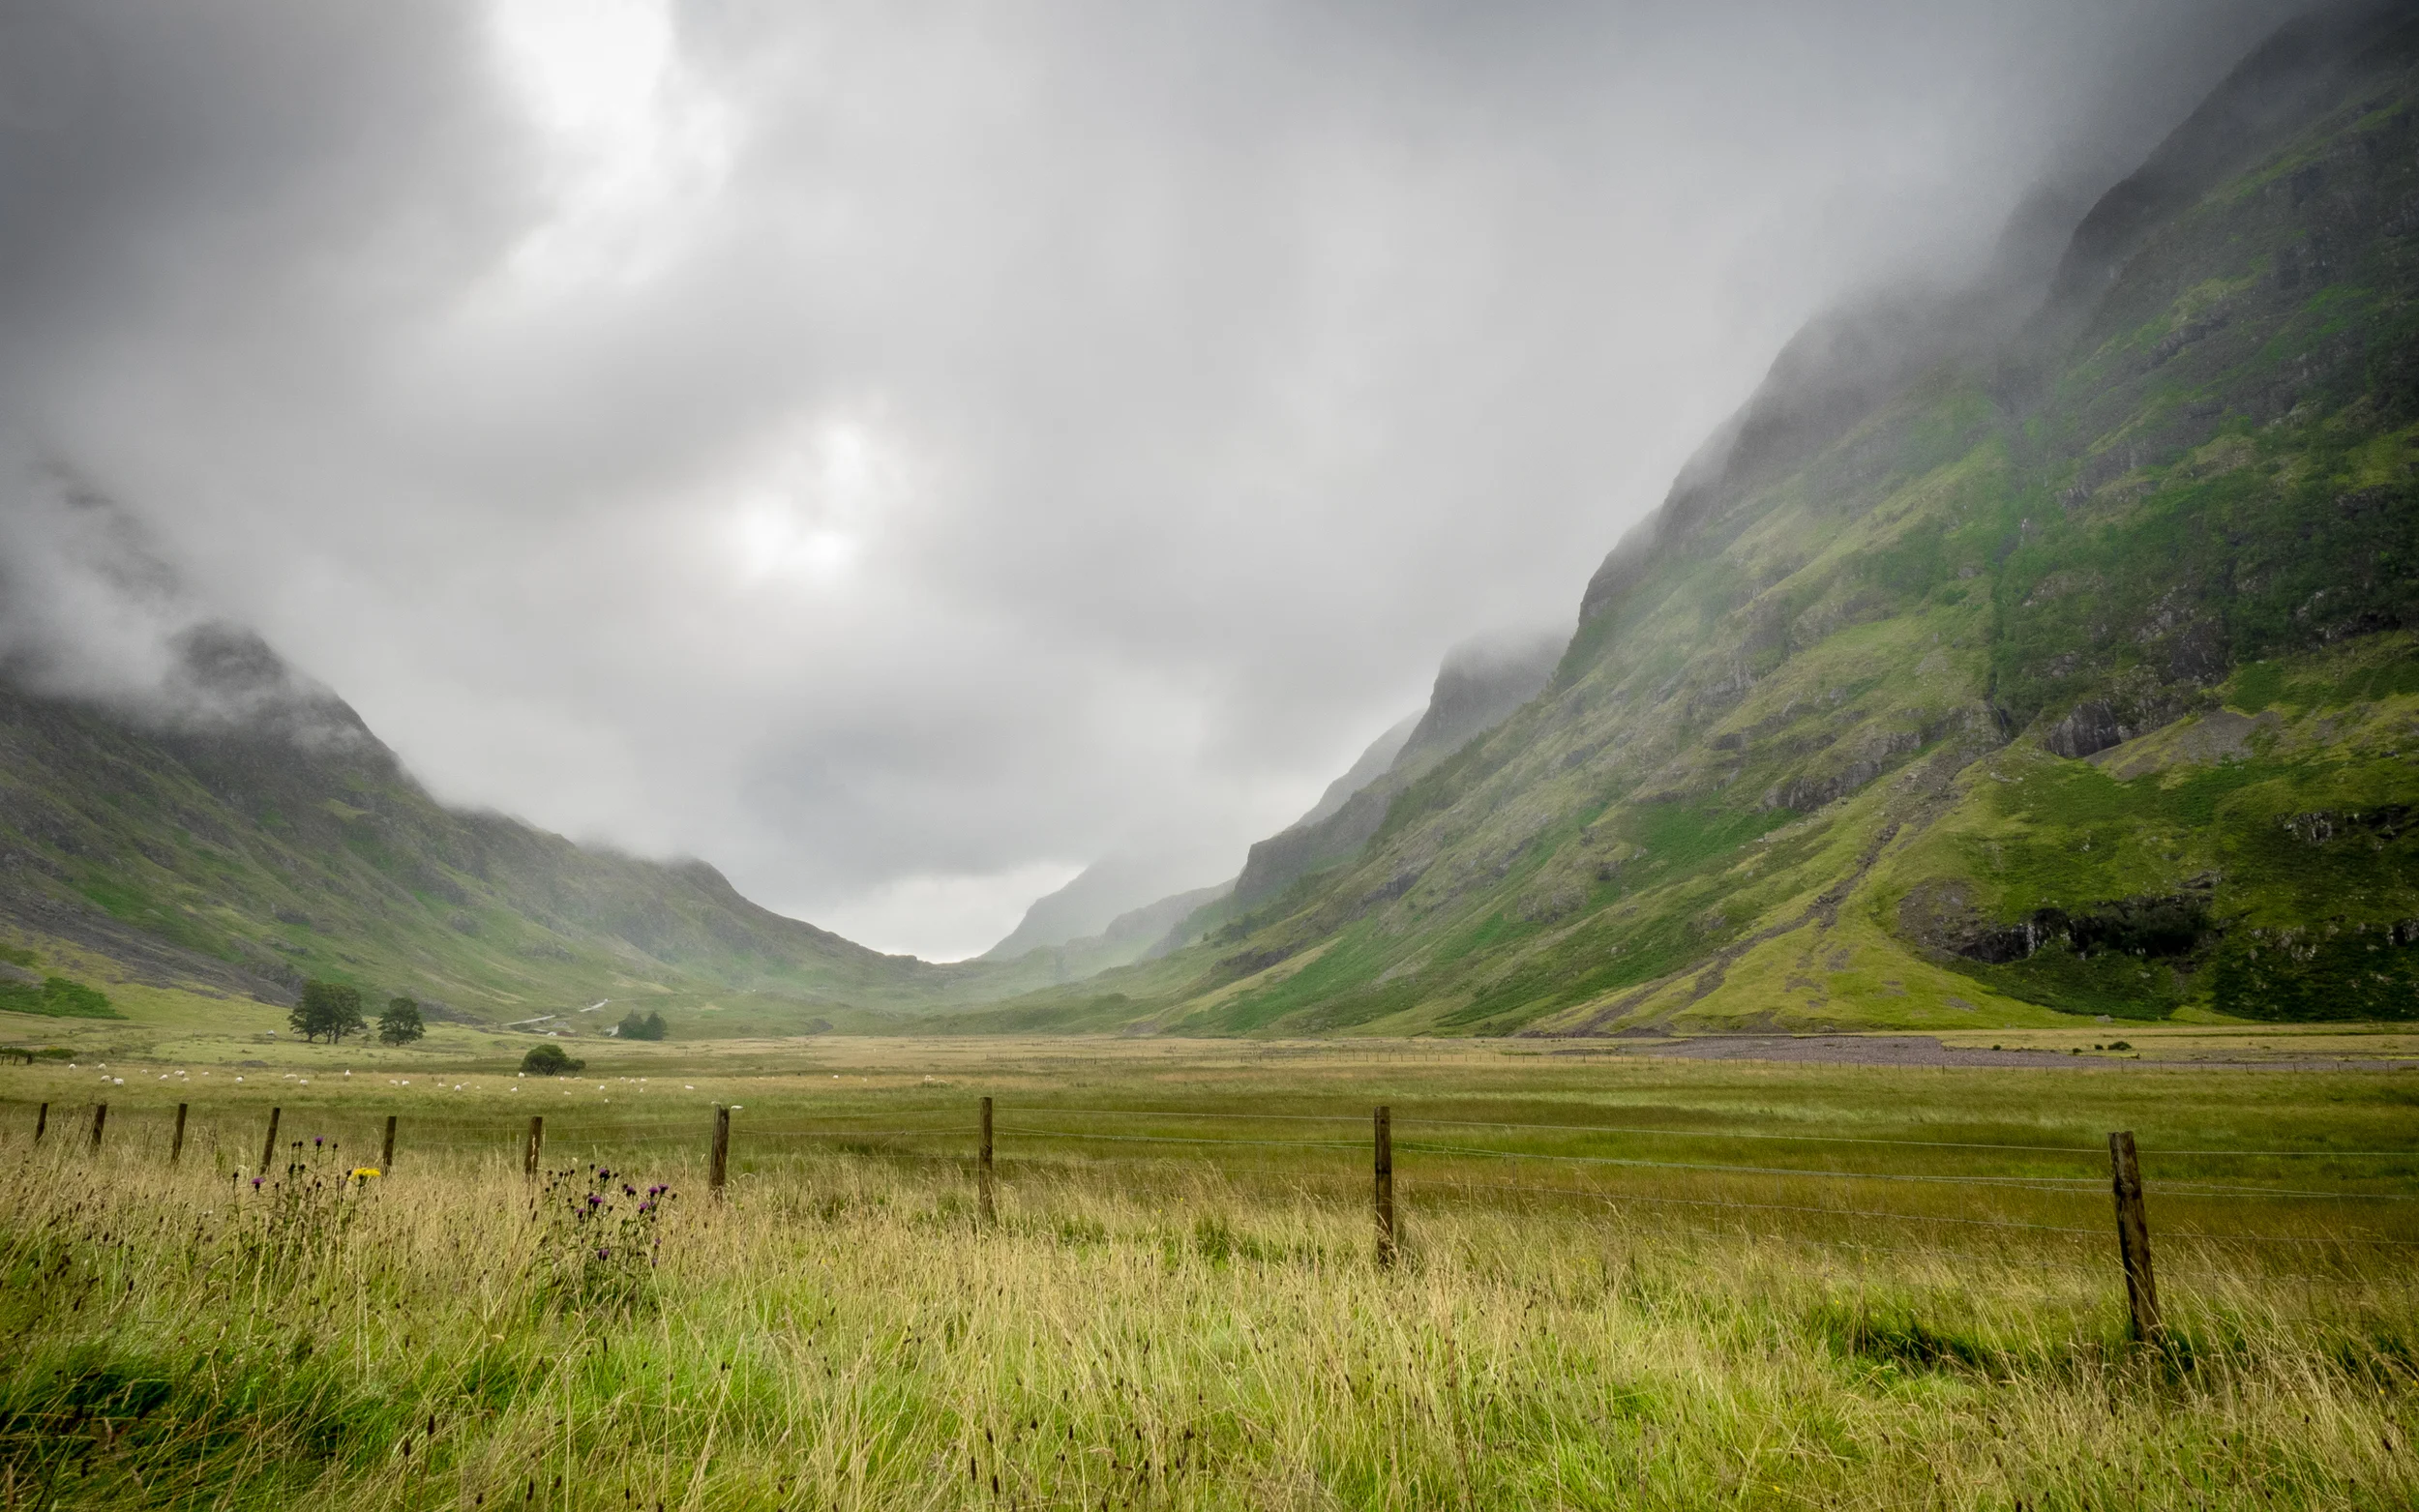
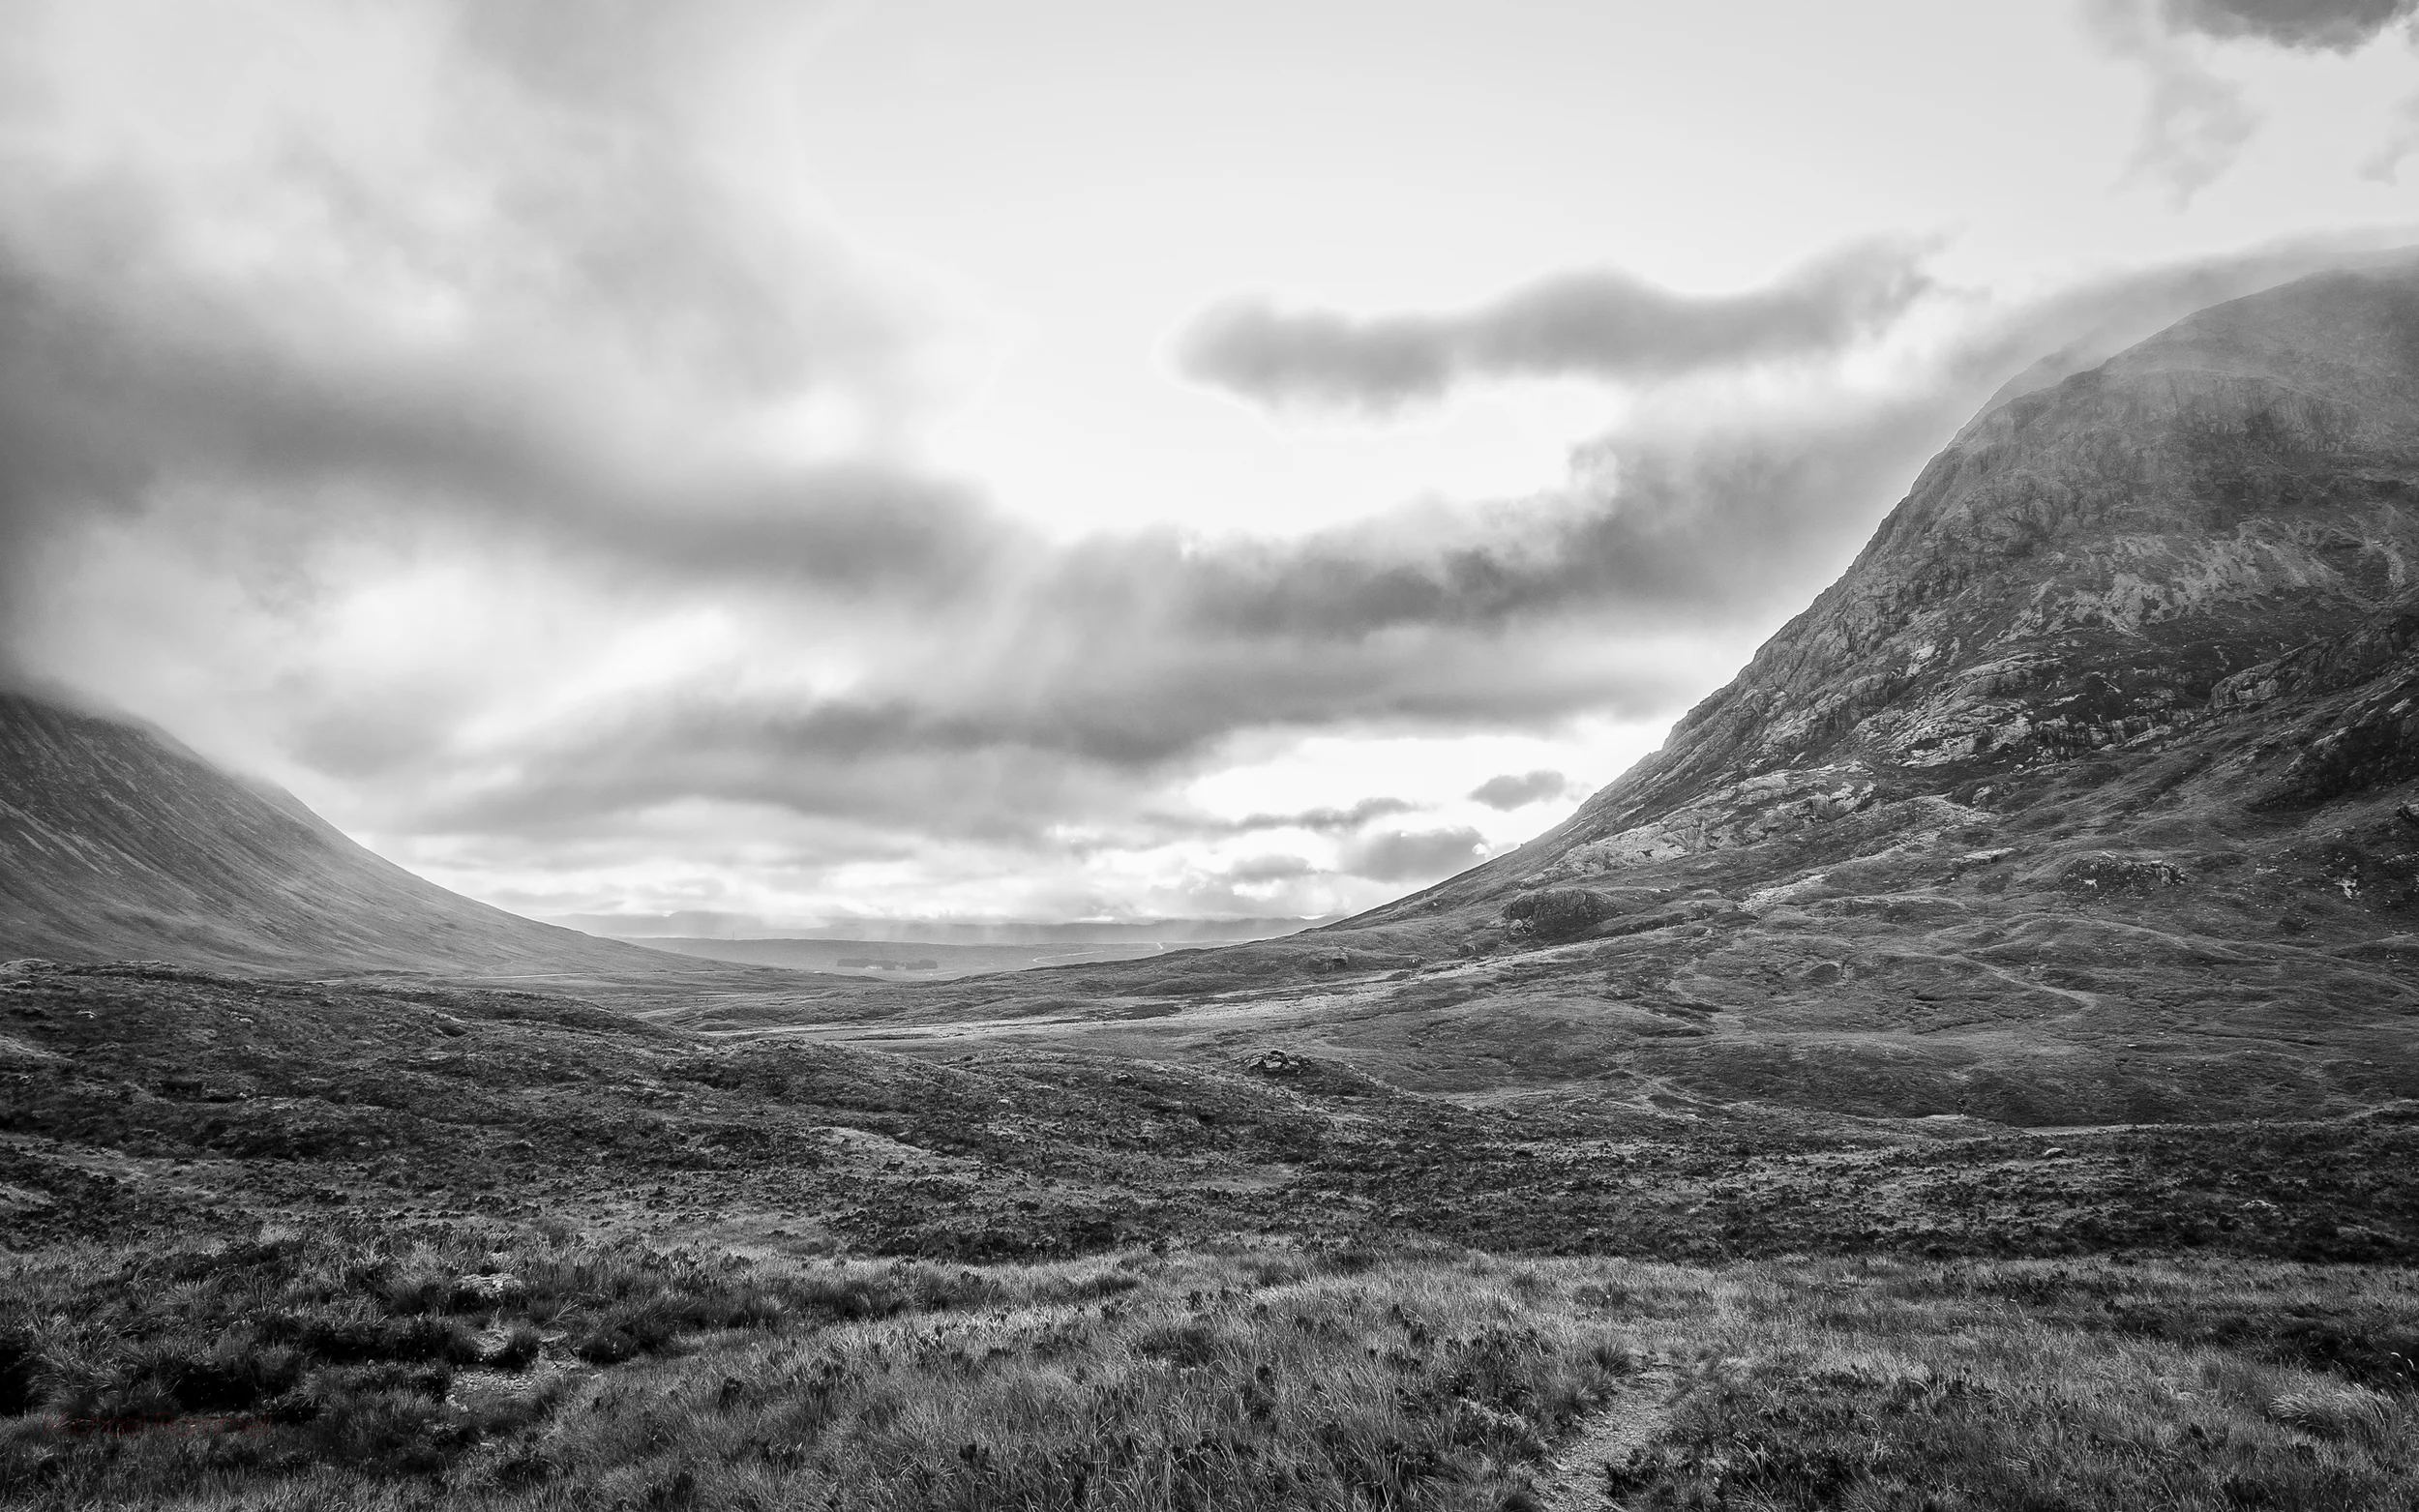
As much as I consider myself primarily a street photographer, the truth is that I photograph everything. 2015 saw me travel to Dubai, Venice, France (for the Le Mans 24hr) and Turkey. I moved to a new area here in the UK and of course I'm actually a wedding photographer 'by day' and so this year has seen me make some photographs that I just haven't made in previous years that I'm particularly proud of. I would add though that one massive change to my photography has been the move to the Olympus system. I'm not suggesting that without the Olympus I wouldn't have made any of these photographs however, there were times when I was undecided as to whether I'd take a camera with me because of the extra thing to carry. More often than not I took the camera but I do feel that If I were still shooting Canon and had to lug a DSLR body and a selection of not-so-small lenses, it would have been the other way round and I'd have been consigned to using my iPhone for moments that really called for a quality camera. Ben Nevis is a perfect example of this.
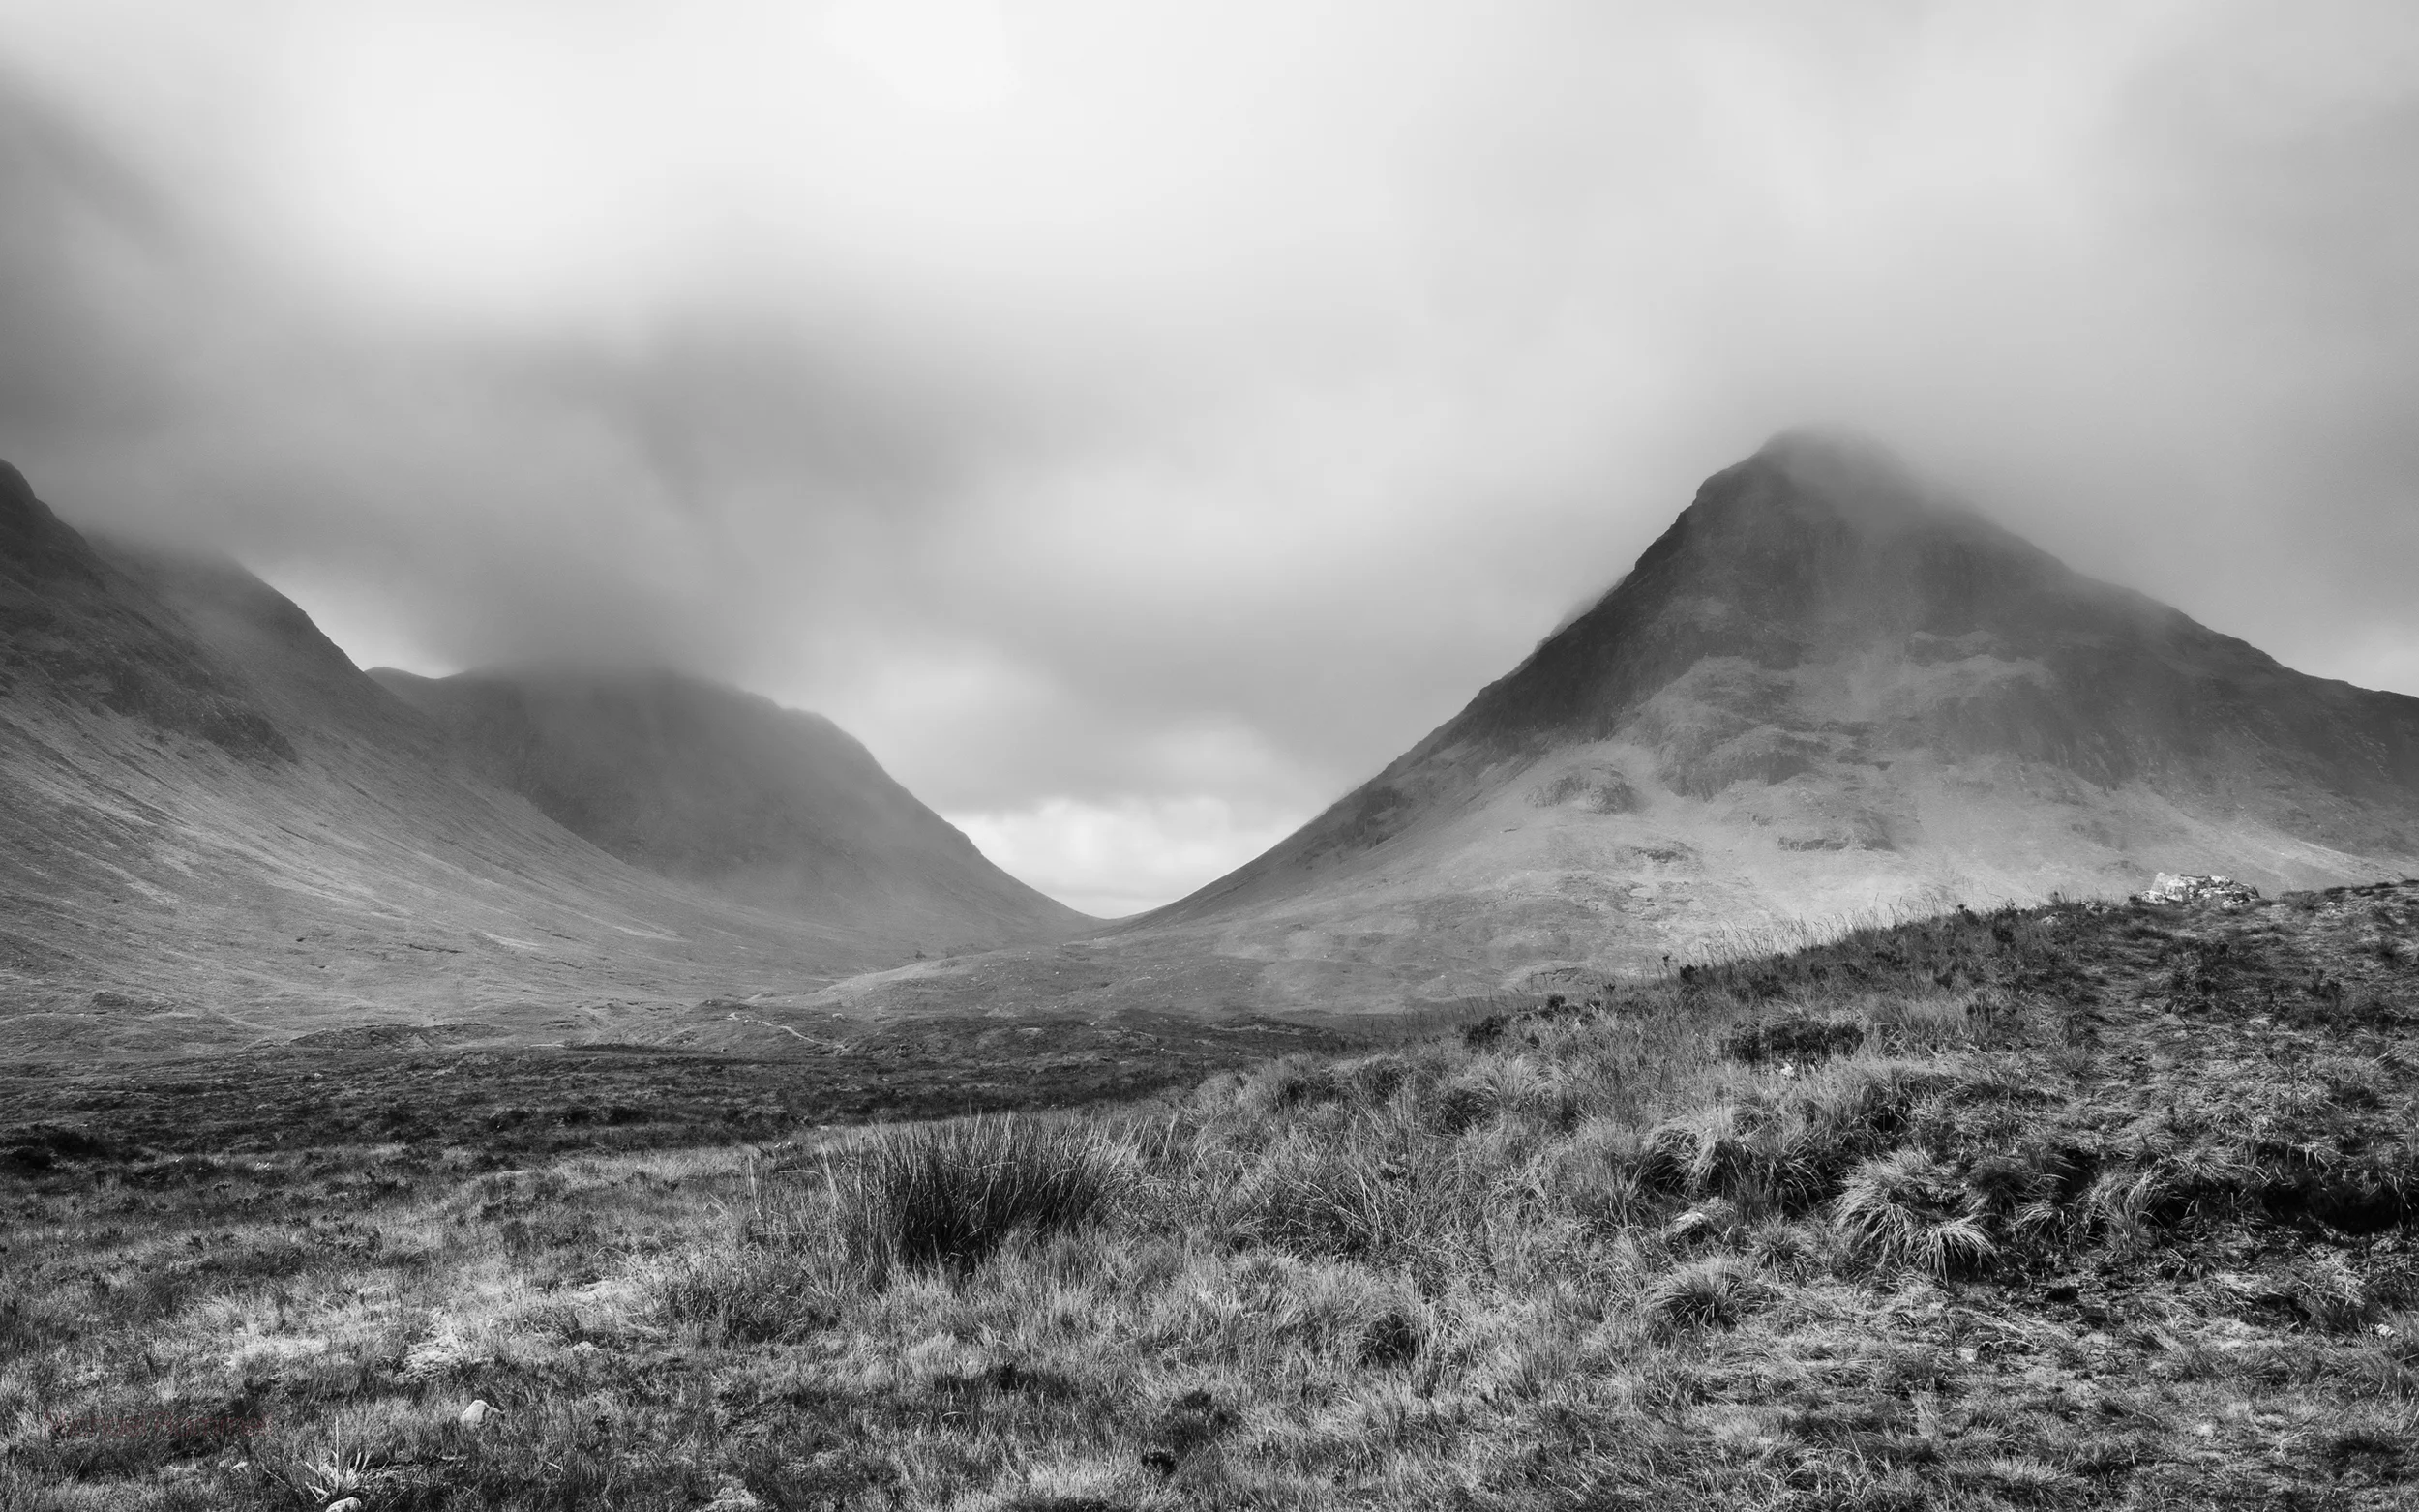
This was perhaps my favourite photograph from my trip to Scotland. This is not from Ben Nevis at all but was actually a photograph I took as I pulled over the car on the way home to jump out an make a final few photographs before leaving these beautiful landscape behind me. I was most pleased with the colours, the stream in the foreground, the rolling clouds - everything seem to come together to give me exactly what I was looking for!
Ben Nevis & Glencoe
Here are a few more from that same trip:
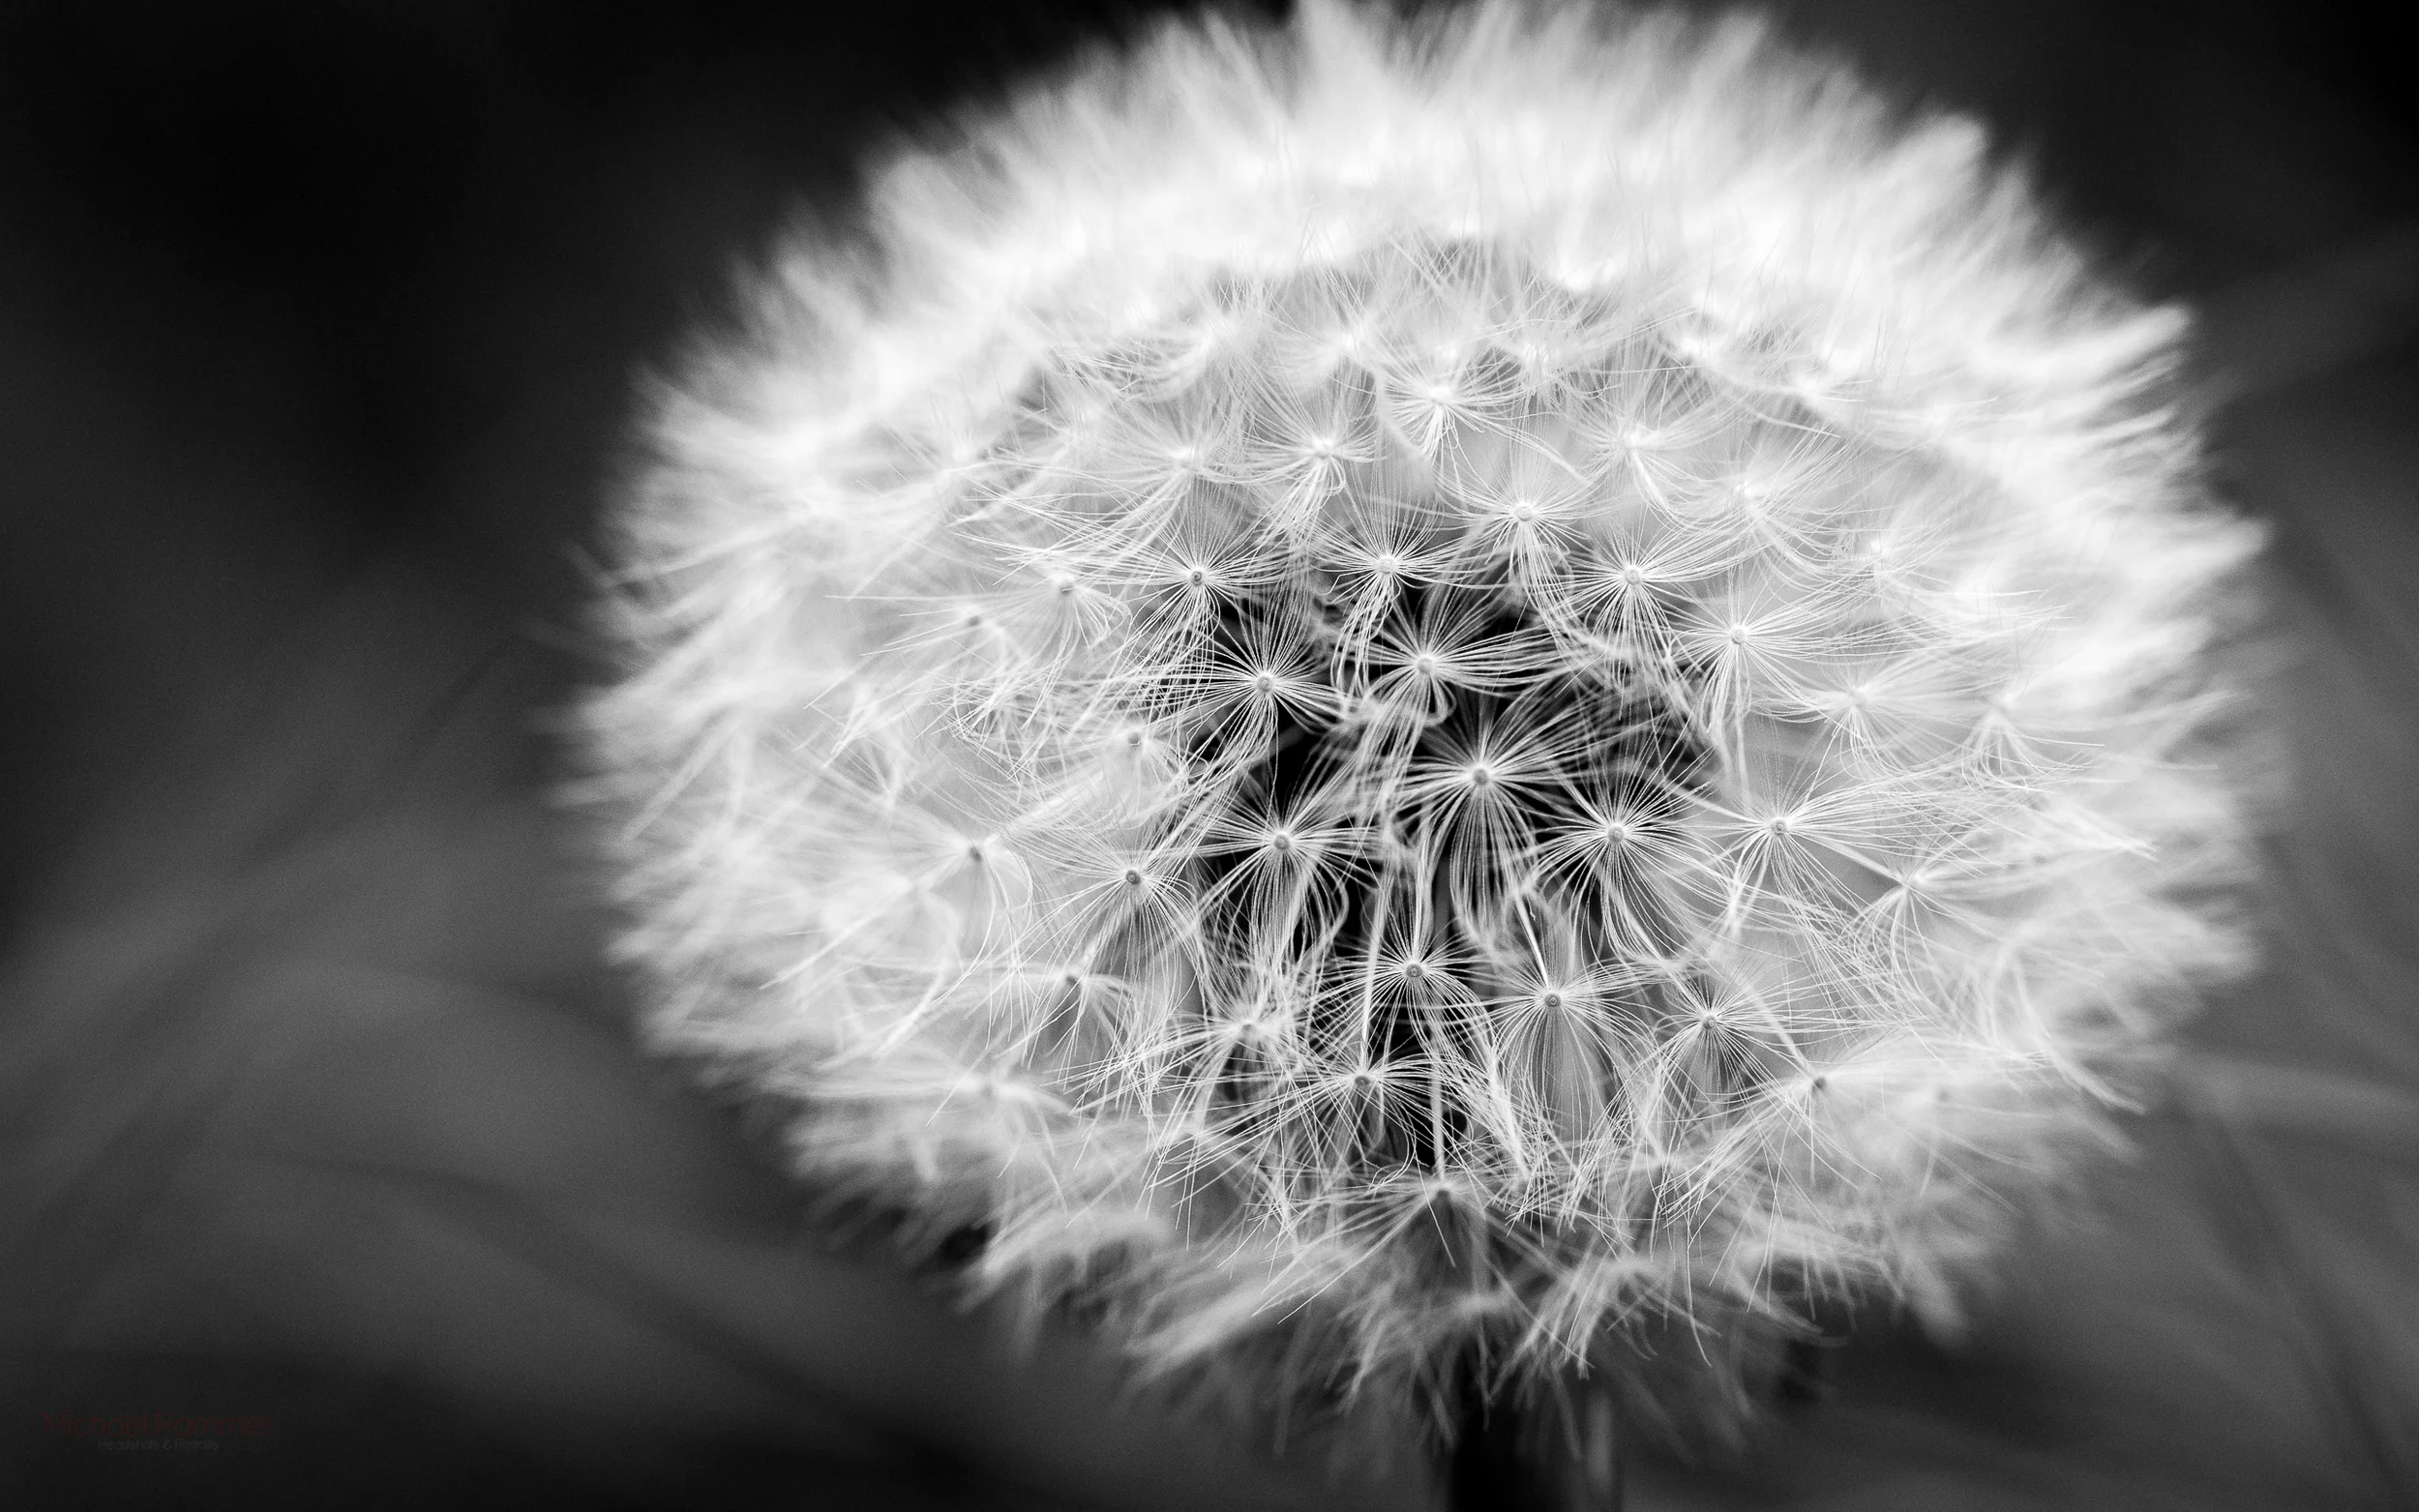
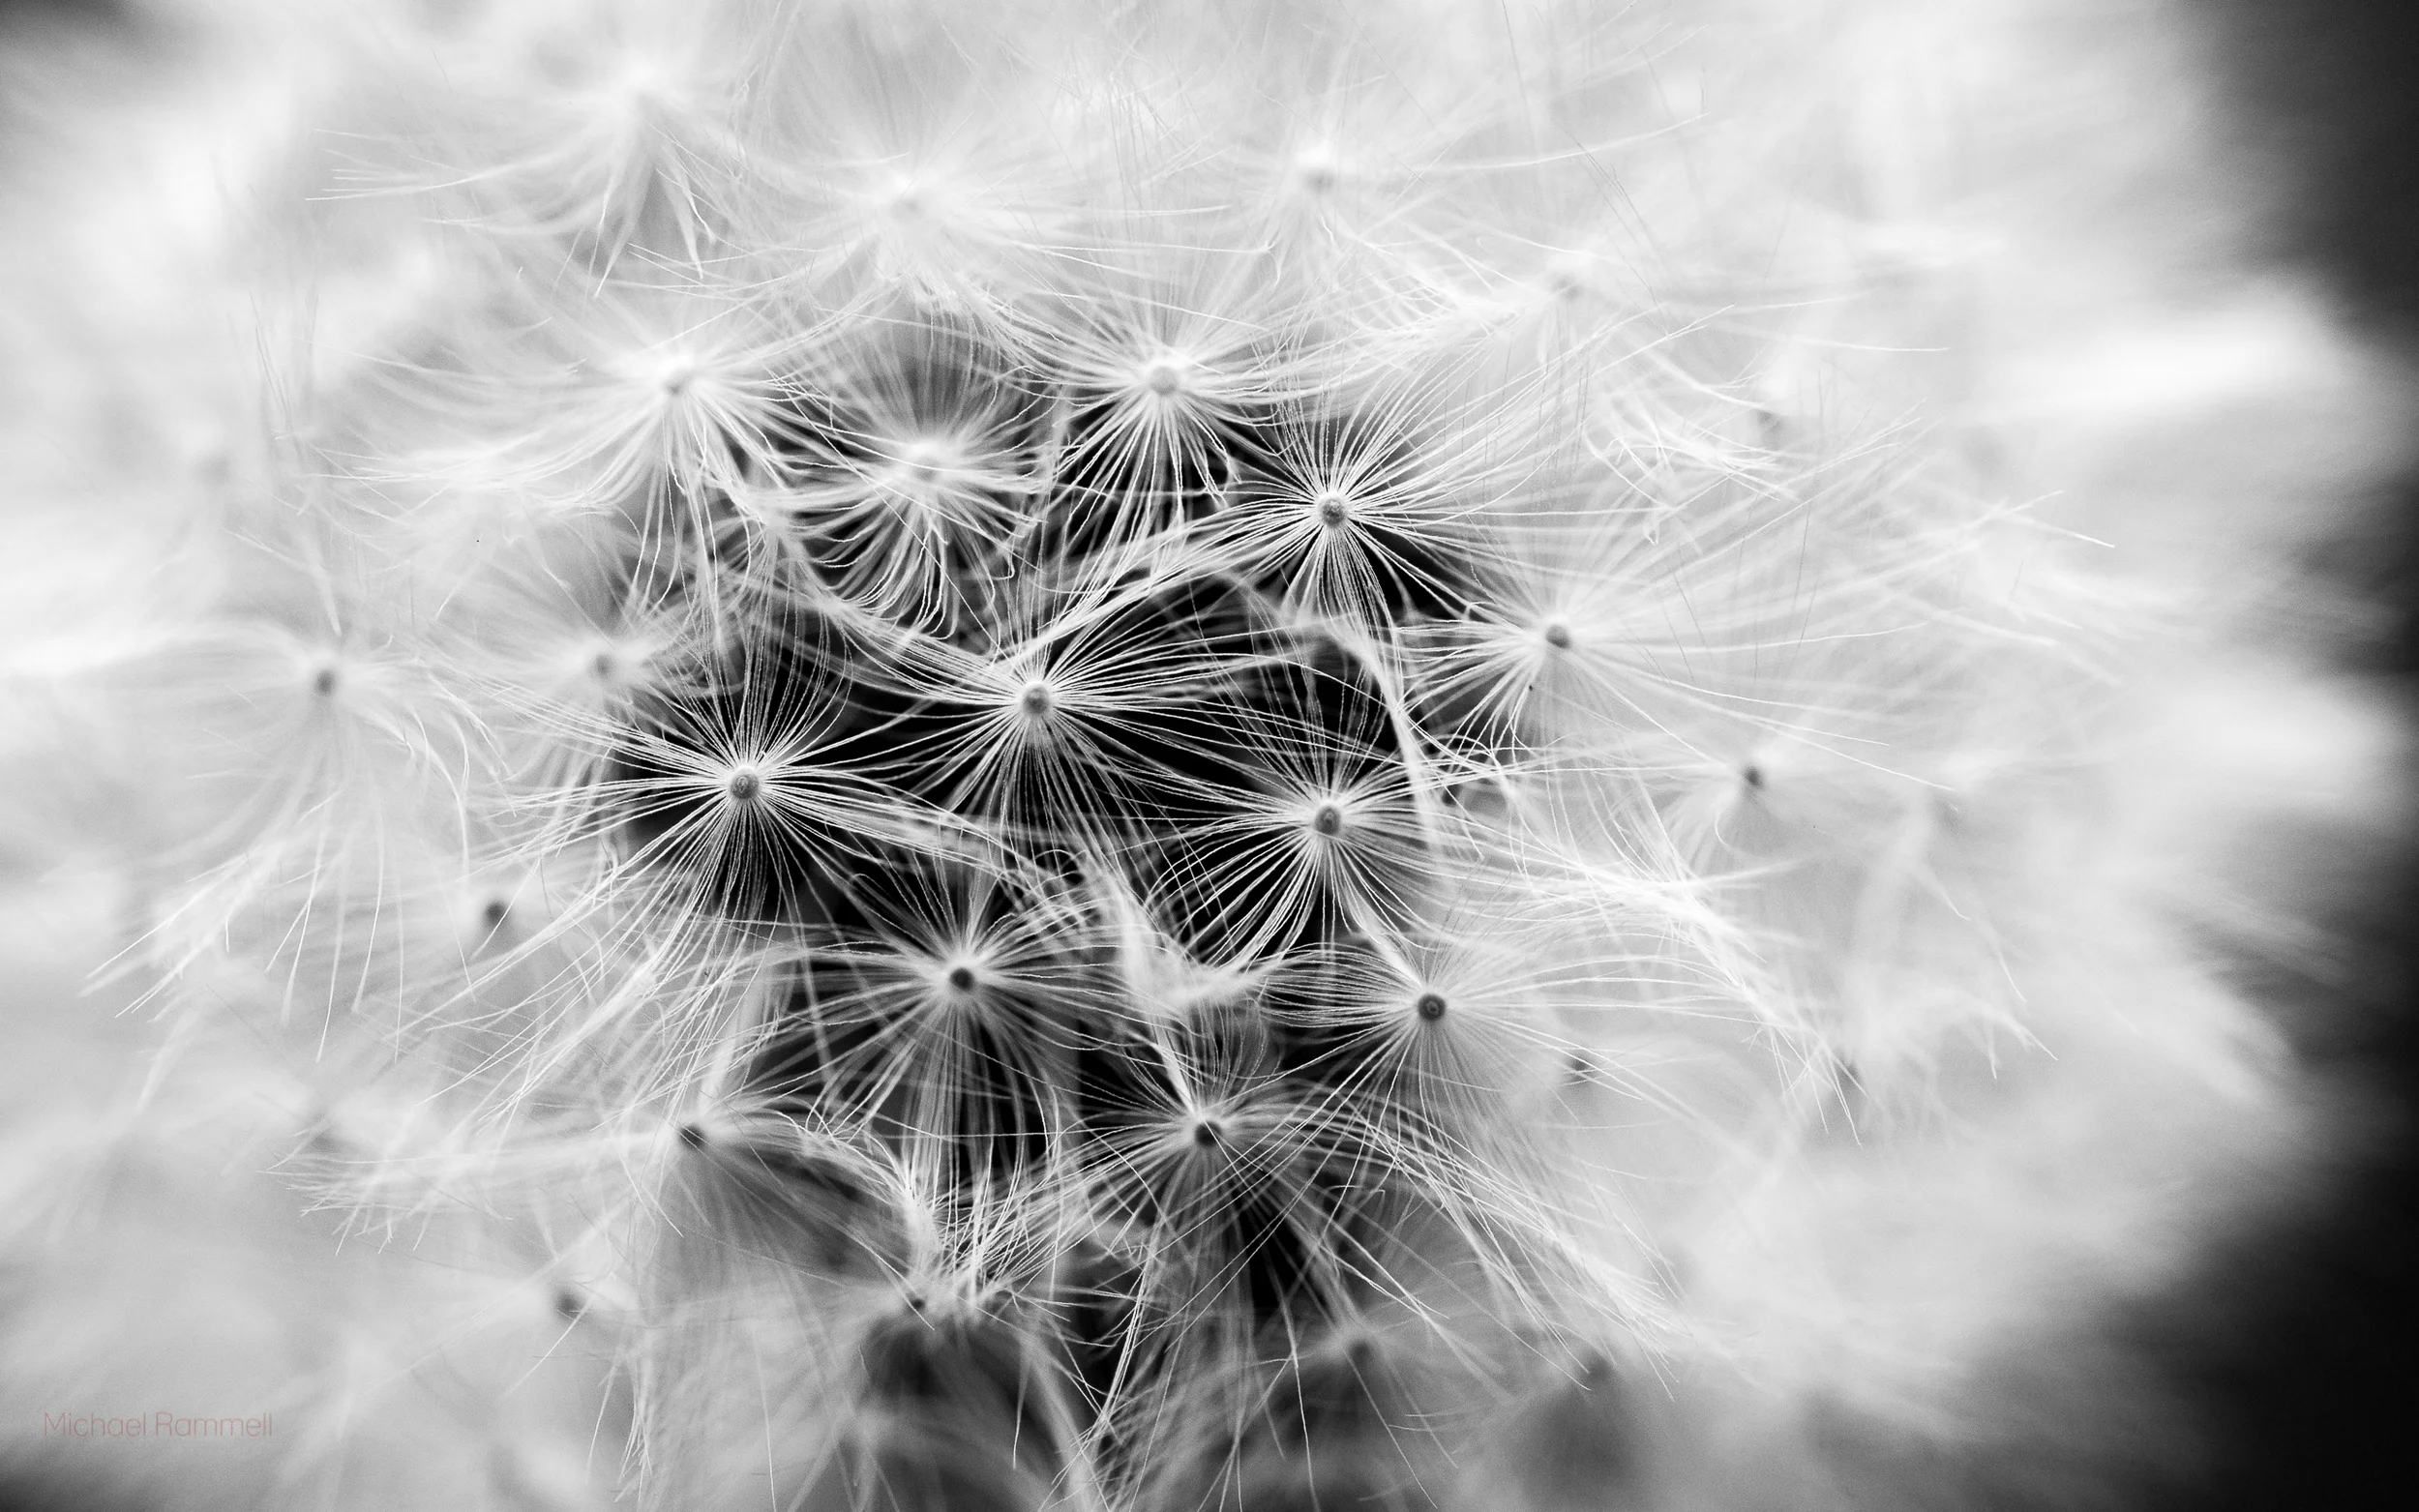
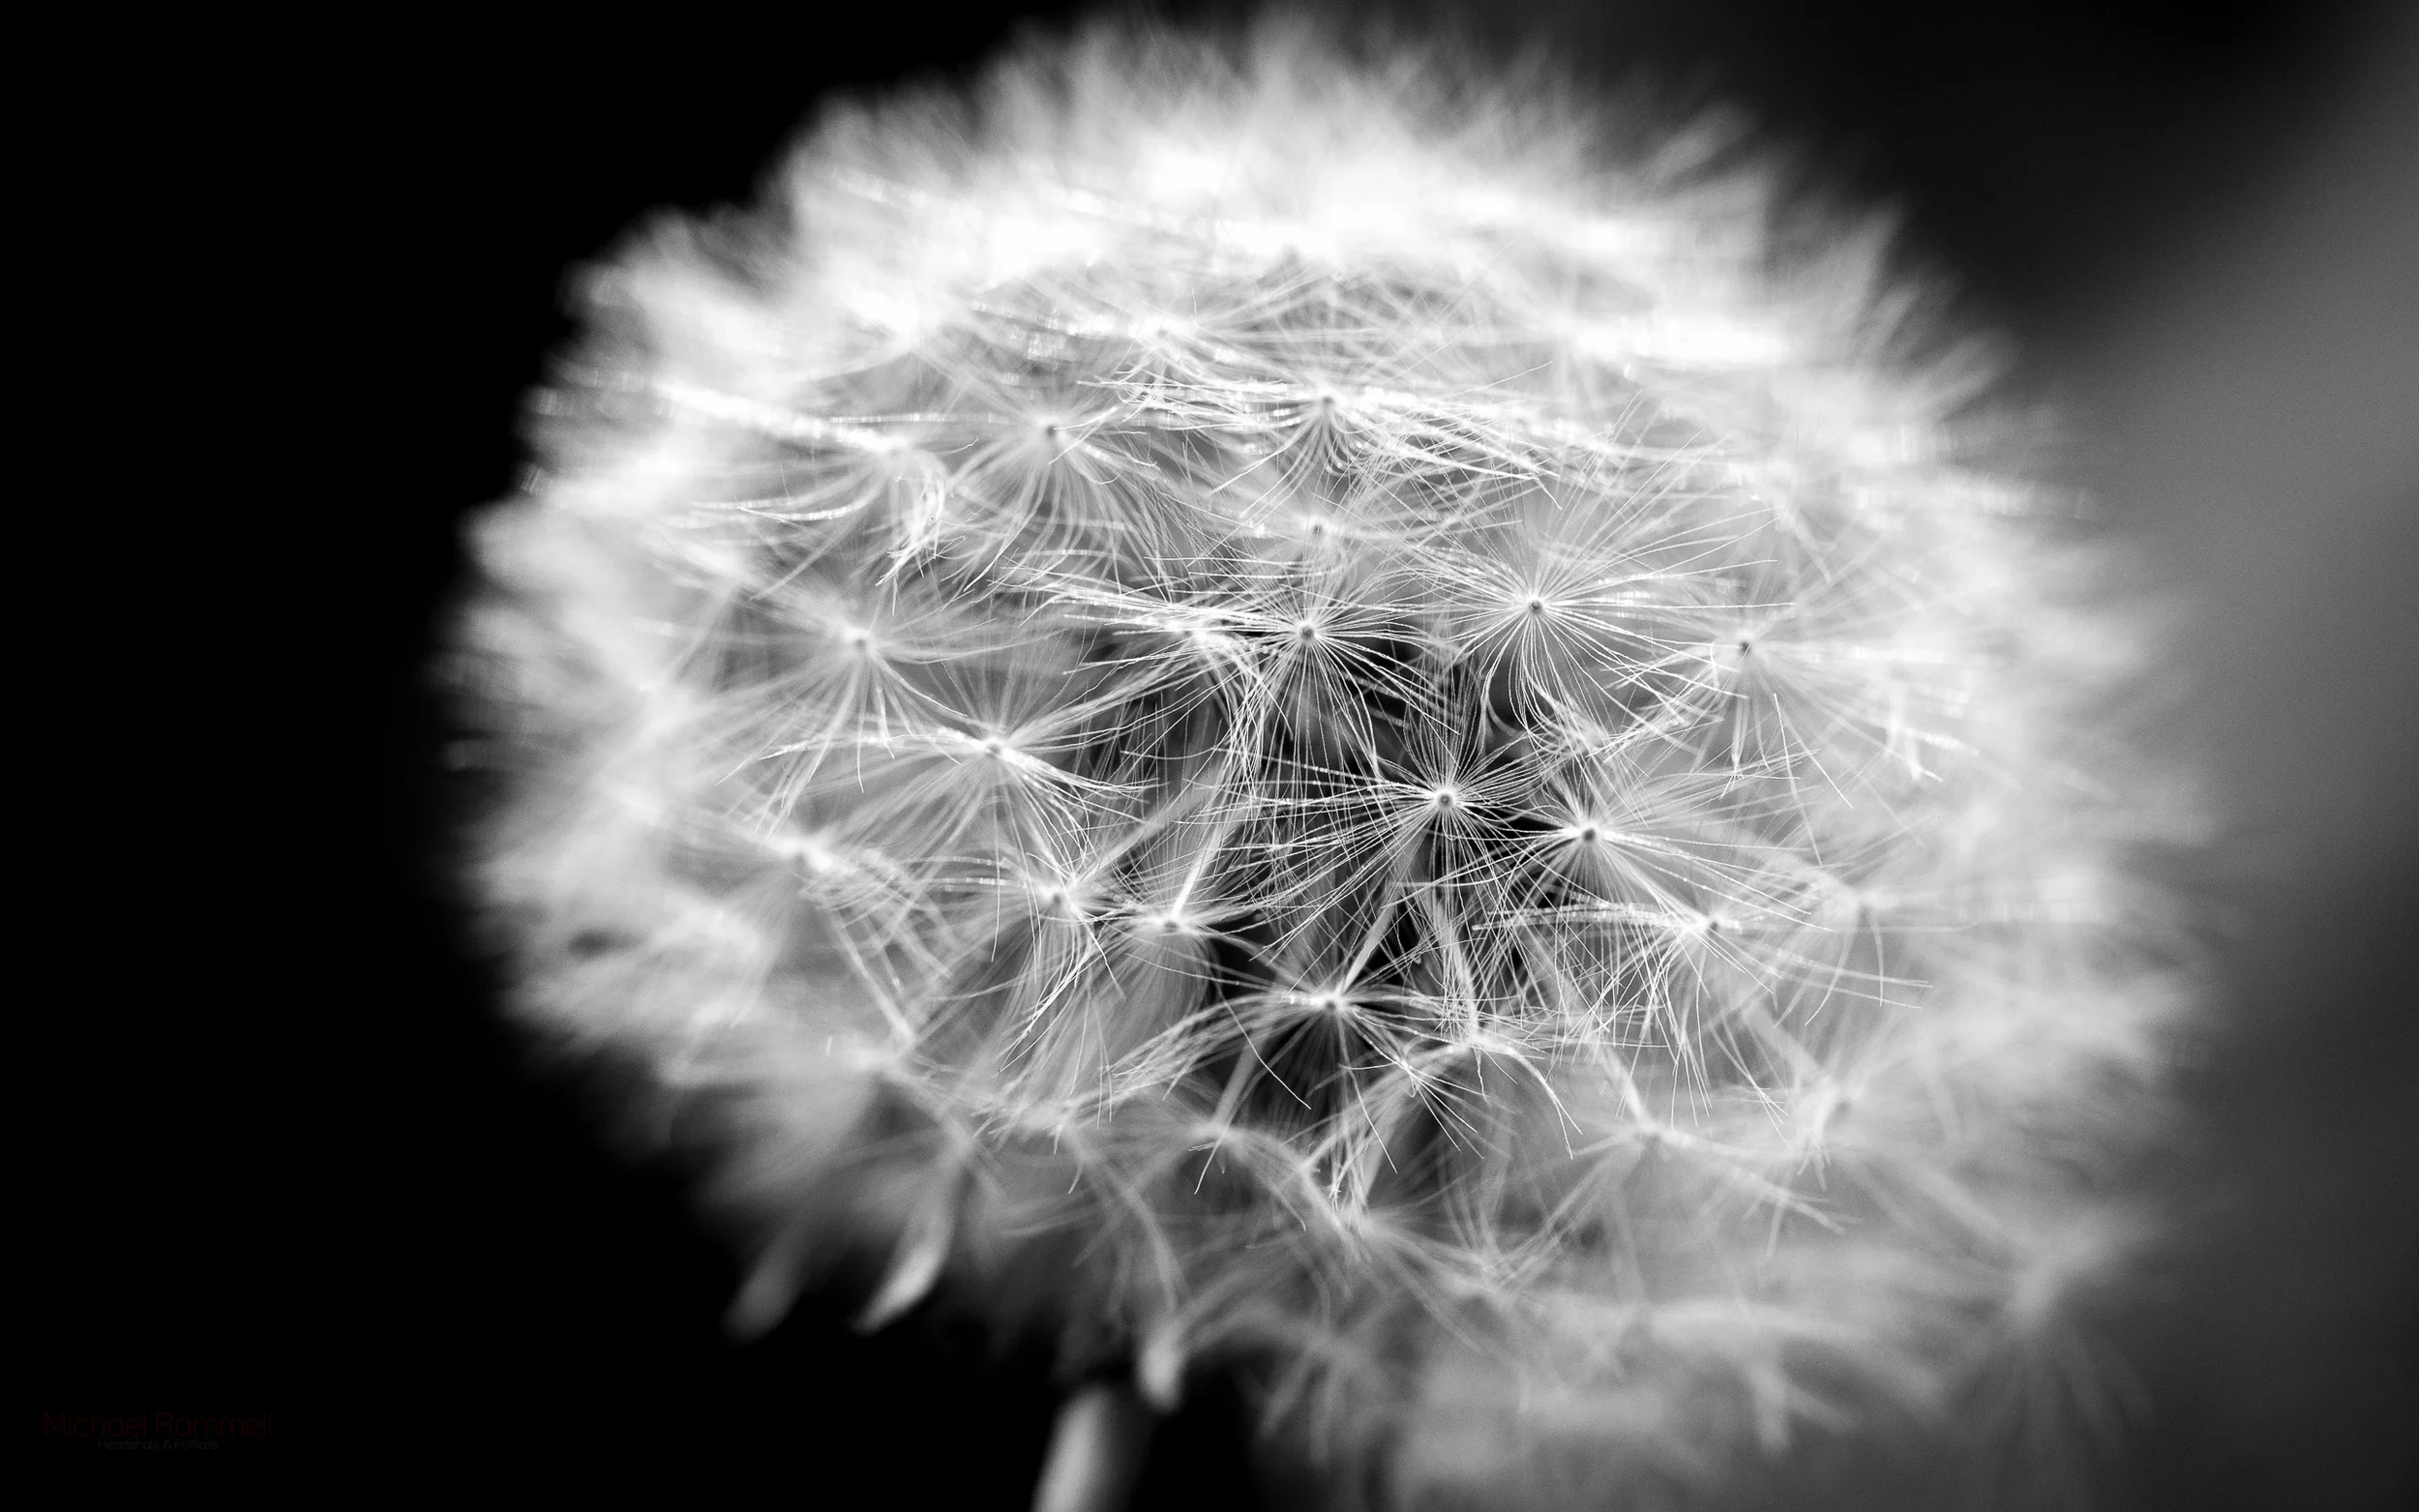
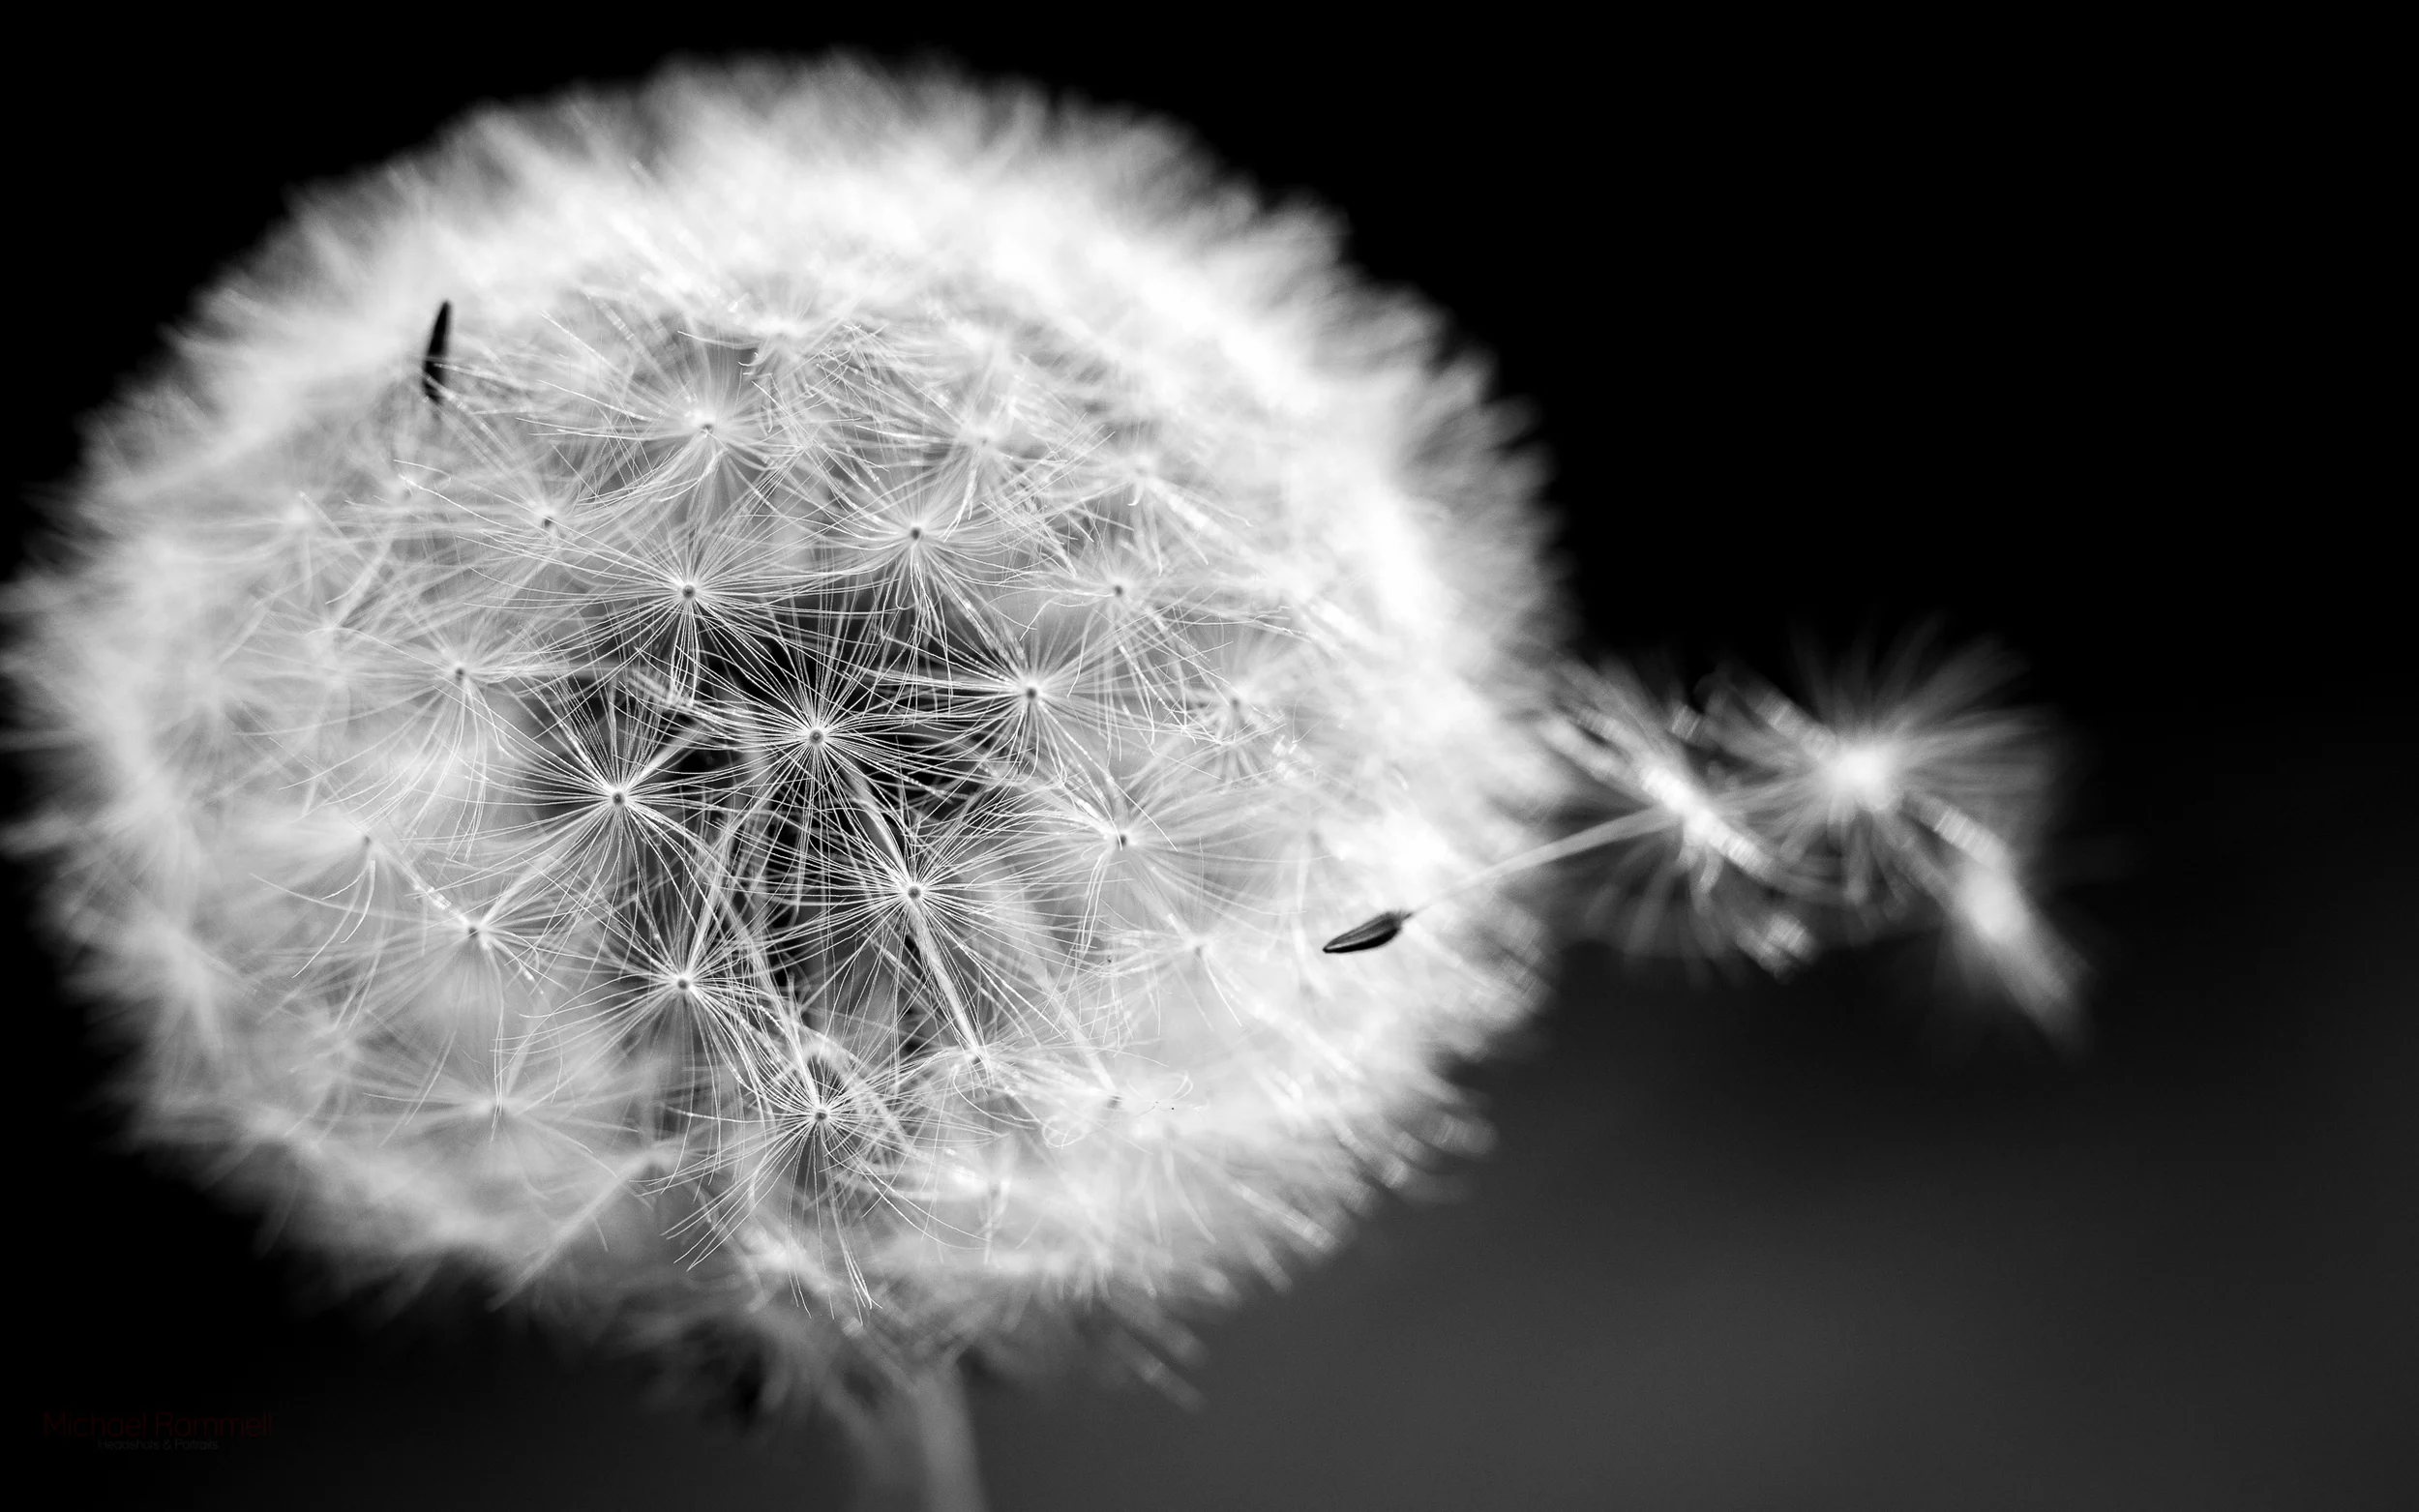
Macro Dandelions
Another surprise in my library of favourites were these images of Dandelions that I made using the superb Olympus 60mm f/2.8 Macro lens. Before this lens I had only used a Canon Macro lens on hire on a few occasions for weddings. My need and desire for a Macro lens never warranted me owning one, however when making my switch to Olympus and making a sizable investment in new kit I decided that a Macro will be part of that. Before my first wedding of 2015 I took it to the lake near my house to see what i could find to photograph with it - and this was the result:
From that very same trip here are a few more Macro's of Dandelions. I find the close-up detail fascinating!
Motor Sports
If you've been following me for some time you may be aware that each June I make my way to Le Mans in France to watch / photograph the legendary 24 hour race. Although this photograph isn't from the Le Mans 24 Hour Race (it's from the 6 hours of Silverstone here in the UK (another date on the same race calendar) this was the first time I had put the Olympus OM-D E-M1 through it's paces and shot motorsport with it. It was on this day, with photographs like this, that the E-M1 proved to me that it was able to do what my Canon DSLR could and that my switch to Olympus was a justified move. I wouldn't have been overly upset had the E-M1 not been able to produce the goods, but knowing that my new favourite camera was a match for the system I had just moved from, it made me very happy indeed. The post I wrote about the E-M1 and motorsports was also one of my most popular posts in 2015 as well. This was also the first time I really got to put the astounding Olympus 40-150mm f/2.8 PRO through it's paces.
For more E-M1 motorsport photographs have a look at my post 'A Day At the Races with the Olympus OM-D E-M1'
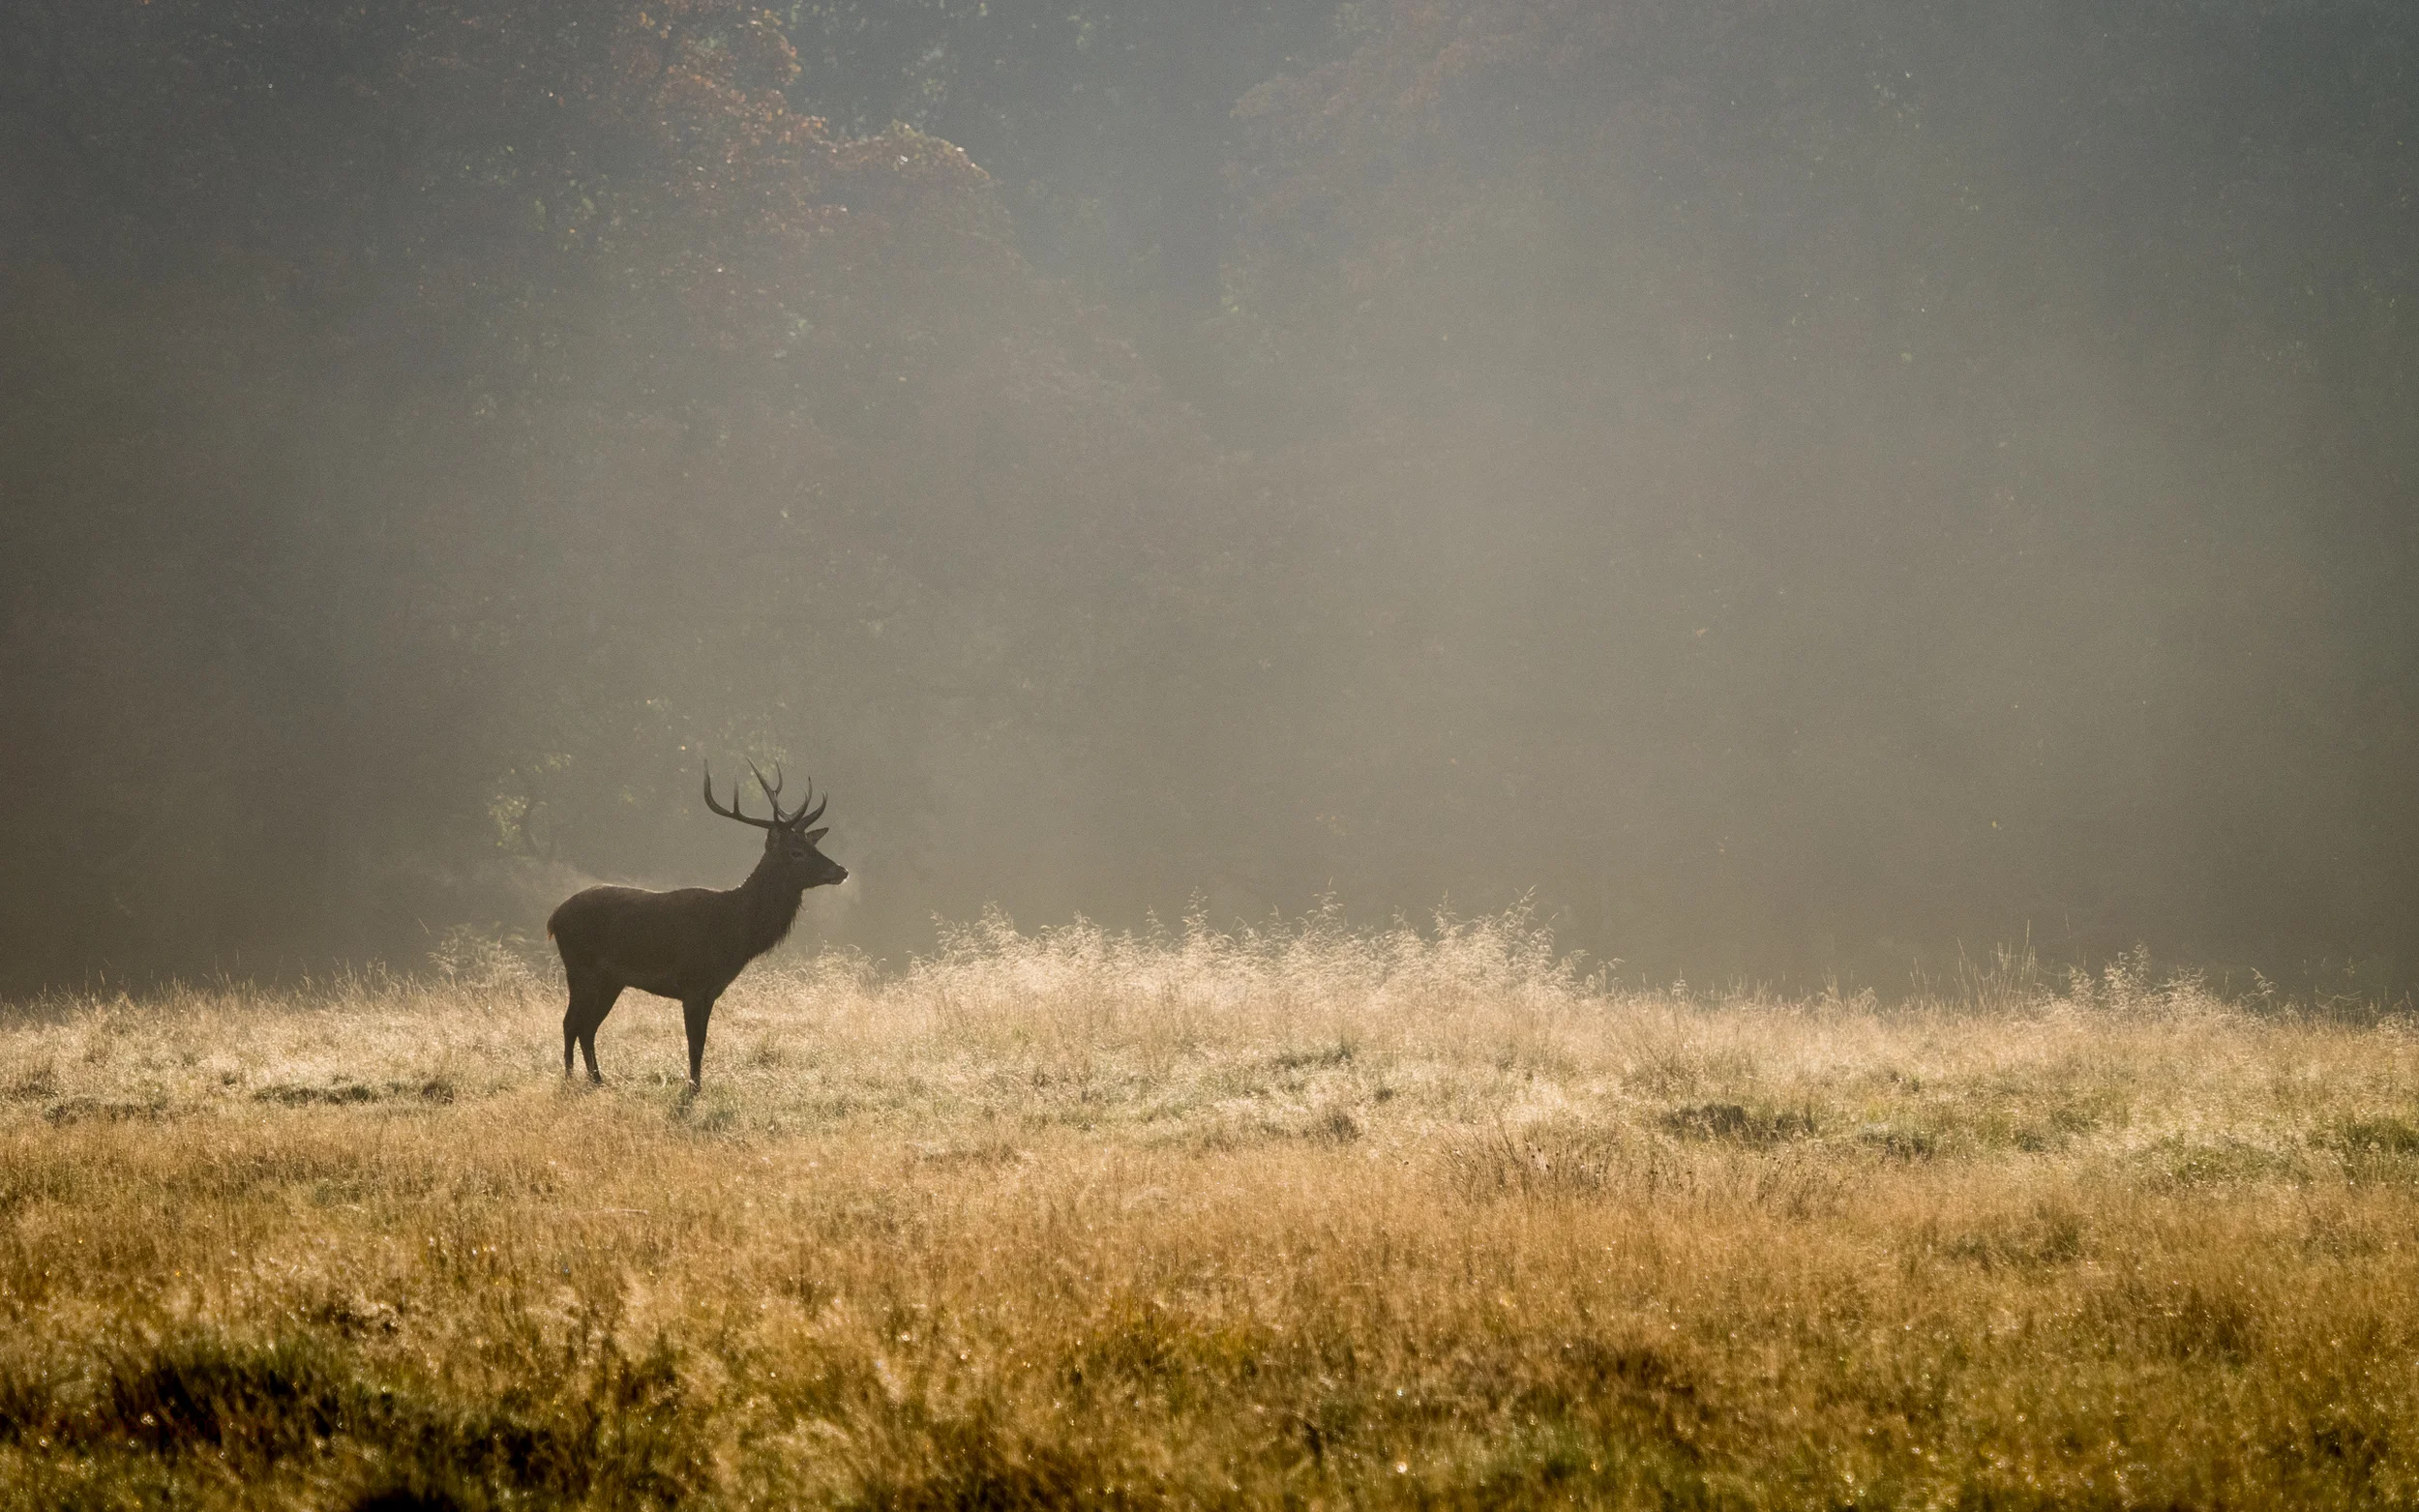
Richmond Park
This was a memorable day for me, as much for what I saw with my eyes as for what I managed to capture with the camera. This was perhaps the most golden of golden hours I have ever experienced. The light really was the colour you can see here in the photograph:
I've been to Richmond on numerous occasions to capture the stags rutting and the images I usually make are close ups of the stags with as much detail as possible. I tend to end up coming home with technically sound images; well cropped, good Depth of Field and sharpness etc. Being a park the images almost always have a dark or green feel to them as well. But this particular day I wanted to try something different than what I had before and the Golden Stag above reflects that. I was really pleased that what I had when I got home was something a little different and that, for me, was very reflective of 2015 as a whole. In part thanks to the EVF in the Olympus, more in part to my own personal development and growth as a photographer. Here are a few more from that morning in Richmond:


Summary
So my top picks for 2015 certainly differ dramatically from my look back in 2014 (which you can find here: 2014 Top 10). You'll see that back in that review I was still between systems; shooting both DSLR and Olympus (mirrorless). Whilst for many it doesn't have to be a question of one system or another, for me, I simply found that the Olympus was a very intuitive system to use and the EVF allowed me to (literally) see what it is I was about to capture. This made 2015 a year where I learnt even more about photography; with a solid technical background I found I was now able to more easily break rules and try out new things with a higher chance of success.
Throughout 2015 the only camera I have used has ben either the Olympus OM-D E-M5 or the OM-D E-M1. And I couldn't be happier.
Show me your top 10 from 2015
I'd love to see your top 10 or even just some of your favourite images from 2015. Drop a comment in the comments section below on the blog and be sure to include a link.