


High ISO - Don't believe the hype
ISO seems to be a feature of every camera's spec sheet that gets most of the attention these days. All people seem to care about is a camera's ability to shoot in low light!
Now, if you know me and follow my blog you'll agree that I make it pretty clear that I'm a big fan of Olympus' OM-D Micro Four Thirds system. You could then, be forgiven for making the assumption that today's post is going to be all about taking a defensive stance on the ability of Olympus OM-D's and their ability to shoot at high ISO's in low light...you'd be wrong!
I'm not here today to do that at all, but instead, I want to talk about ISO whilst being totally agnostic of camera systems. My reason for wanting to talk about ISO, specifically though, is to clarify what it is and when it should be used. I also want to talk to you about what ISO is NOT.
Most people view a camera's high ISO capabilities in completely the wrong way, or at least - owing to the way we’ve been taught about ISO, to have a singular belief about how and when to use a higher ISO setting.
Most photographers these days appear to believe that you can simply use a higher ISO in place of good quality light, or worse still: that you can use a higher ISO in the absence of any light.
A good quality image is made up of a good subject, great composition and good light, of course. You cannot simply substitute good light for high ISO. High ISO is not some magic bullet to make your images better!
Secondly, it would seem that photographers these days are taught, in a bid to maintain as high a quality image as possible, that you ought to keep your ISO as low as possible. And whilst this is strictly true, there are times and scenarios, such as when there is plenty of light, that you can increase your ISO with little detriment to the end result. This can be used as a means to make use of a faster shutter speed, or a lower aperture of course.
Noise is not bad! I made my point on a recent episode of Camera Aspects, with Paul Griffiths, where I said that if anything, an image that is so totally free from noise tends to resonate less with me. Further to that, in an interview that I did with David DuChemin, he spoke extensively about the 'too perfect rule', and this is something I can only completely agree with; the idea that as humans we resonate far more with imperfection. David said: "you don't see people walking up to images in galleries and then have streams of tears running down their faces because of the complete absence of noise! 'Oh wow, this image is so clean it hits me right here (hitting his heart)".
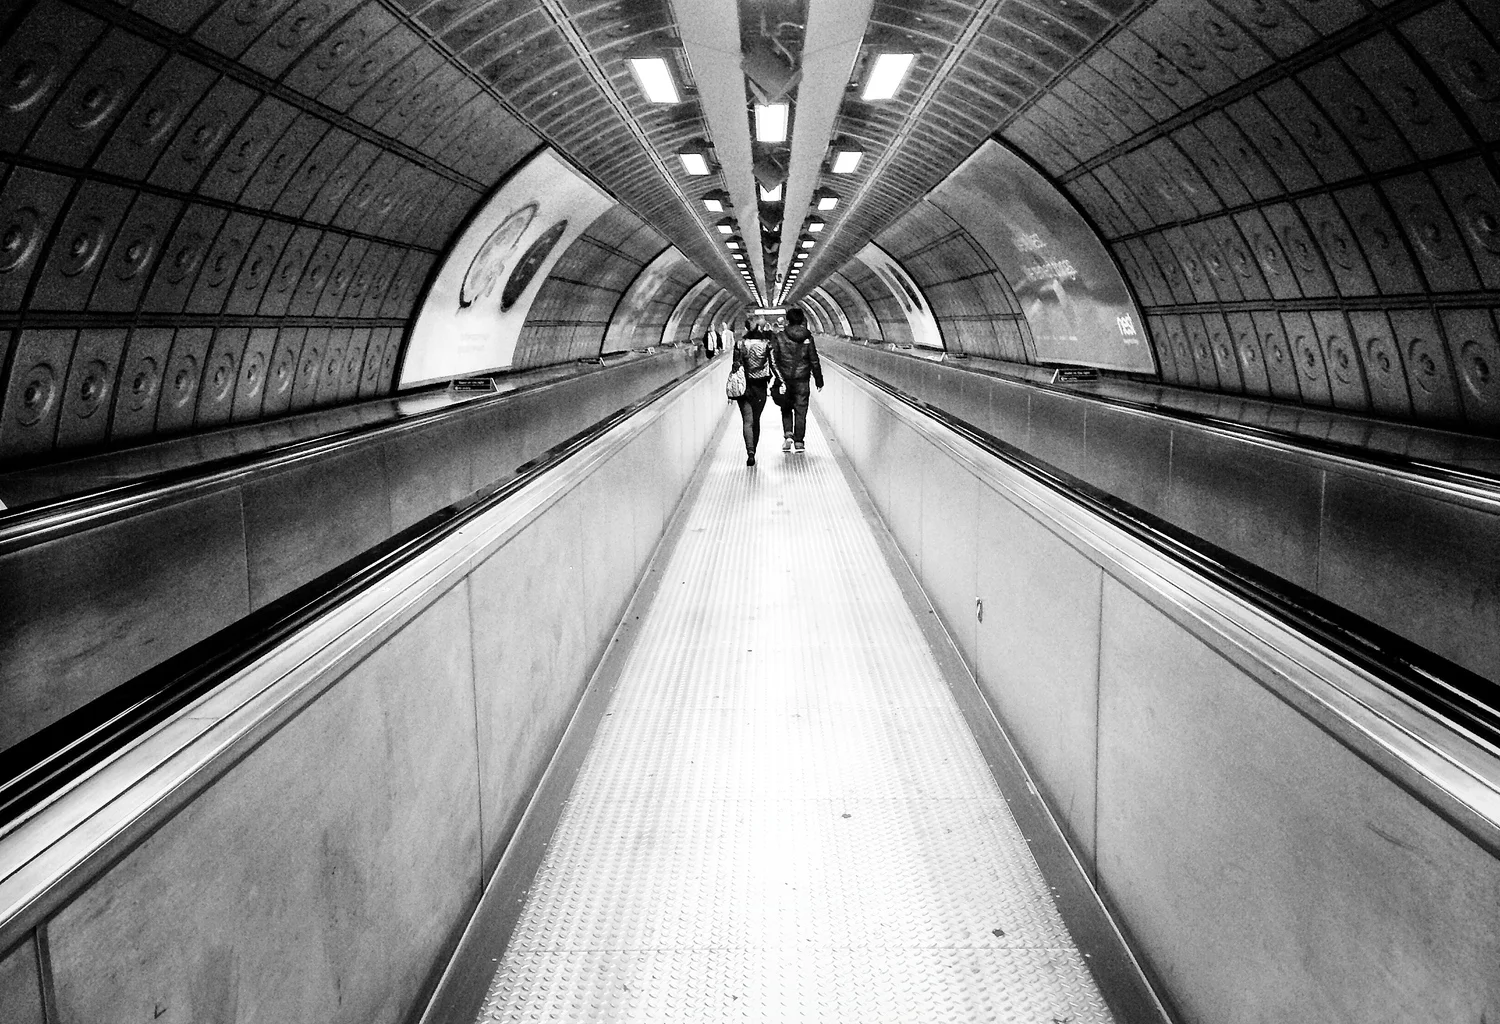
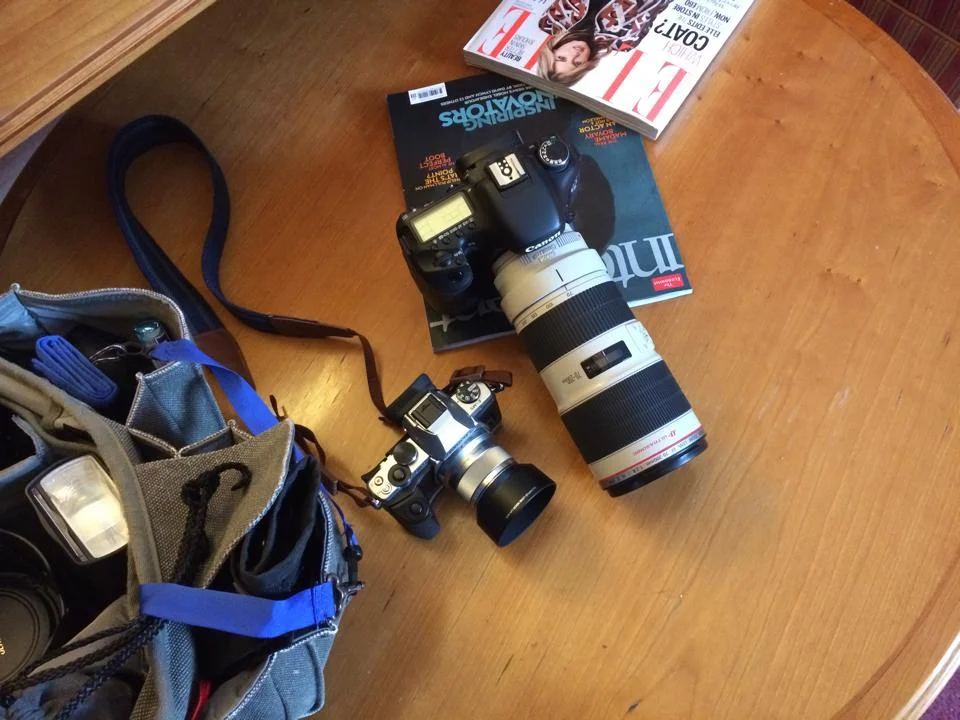
I've no issue shooting at ISO 5,000 on my Olympus O-MD, a camera I'm happy to admit, and I'm sure we all know, is not renowned for its high ISO capabilities. I get asked all the time what post processing I use to clean up my images when I shoot at ISO 5,000. The truth is though, nearly none. My simple answer is that I take my noise reduction slider to about 15-20 in Lightroom (CC) and say no more about it. I embrace the digital grain and accept it for what it is. In a good black and white image, with strong subject engagement, it is easier to look beyond the noise.
Robert Cappa once said; "If your pictures aren't good enough, you're not close enough.". In the same vein, I'd say; "If you notice the noise, the image isn't good enough".
Now, don't get me wrong: I'm not lambasting a clean image. I'm not suggesting a noisy image is BETTER than a clean image, but I am saying that we shouldn't all vilify noise as some terrible thing that detracts from the quality of an image. Noise is not bad!
Now, I'm not saying you simply need to learn to ignore it, or that you absolutely have to come round to my way of thinking and learn to love a bit of noise, because there are actual techniques you can use in camera to reduce the visual impact of noise. Or, in effect, you can shoot in certain ways to make noise less apparent. And I want to touch on this a little today. I shoot using a specific technique all the time, in every scenario pretty much and I've found that it does reduce the amount of noise evident in my images, and perhaps this is why I'm asked so regularly what tools and software I use to reduce my noise.
The first thing you ought to know, if you don't already, is that noise in a darker part of a frame is more prevalent. You will simply see more of it in the shadows than you will in brighter parts of an image. Furthermore, when you brighten an image in post processing you also make the noise more apparent too.
To help tackle this (and generally for a better quality file anyway), I use the Expose To the Right Method.
I had actually been using this method so much by mistake but the first time I realised I was doing it and the first time I realise the benefits was when Martin Bailey release an episode on his blog about using the ETTR method.
When people ask me what it is all about and what the benefits of exposing to the right arm I always use this analogy. It is not a perfect analogy but I think it helps to make the point so
Imagine having a white piece of paper and a black felt tip pen or marker pen try colouring the entire piece of white paper black using that marker pen you should find that given enough time and effort you will be able to cover up all of the white and make the entire page black
On the flip side, however, imagine then having a white pen pencil or crayon and trying to cover up at the black again you will find that you cannot do it as well as you did when making the white paint black some black well almost always keep the weight in places or the weight will be somewhat grey
The analogy in my mind works because if you have a white piece of paper or a bright image it is easier to darken the image. If however, you have a dark image or a black piece of paper it is somewhat harder to lighten or brighten at the image as easily as it was to darken the paper/image.
As a result; the Expose To The Right method teaches us to somewhat slightly over exposed our image by a third or a half stop depending on the scene possibly even a. If there aren't many highlights and then in post processing, you can bring the image back down to the correct exposure. By using the expose it to the right method you are adding detail into the shadow areas of your image and you will be getting a more full and complete histogram too. So when you take your slightly over exposed image into your choice of post processing software, for example, Adobe Lightroom you can see some noise if you were shooting at a higher I SO but of course you now do not need to increase the exposure in postprocessing meaning that you will not be further enhancing or making any existing noise more evident
In fact, when you bring the exposure back down you can even see a slight reduction in the evidence noise in the shadow areas of the image because the detail is in that part of the frame
Now this is a something thing of a contentious technique especially because in the days of Phil you were often actually taught to underexpose in order to increase the saturation of the colour of the film so as you can imagine the Expose To The Right technique is somewhat at odds with the old technique of underexposing by a half a stop. I have even had discussions with relatively successful digital photography is still underexpose by a half a stop in the belief that it will further saturate their colours
However, when shooting in digital bracket if you are shooting roar of course you need not worry about saturating colours anymore because with a 14 bit more image you have something like 28 billion colours on data channels available which allow you in postprocessing to edit their saturation luminance Hugh et cetera
As a result, I use the Expose To The Right method to cram as much data into my digital files as possible to give me more scope and flexibility when it comes to postprocessing
You will find a level on over exposing that works for you over time there is no magic formula to suggest that in every scenario you should be one-third or a half a stop over exposed you will learn using your own intuition and experience which seems are able to handle a certain level of overexposure
The term over expose can often sound quite scary because it suggests that you are doing something wrong or exposing too much or incorrectly or a scene but remember the exposure dial inside your viewfinder is exposing for 50% grey it is taking into account the highlights and shadows in the frame and trying to find a middle ground to satisfy them both what you are doing by exposing to the right is in effect going from something like a 50% grey 60% or 70% grey. As we all know cameras are quite simple in their ability to expose so by using our own human eyes and the ETT are method we are able to more intelligently expose for this scene than the camera is able to do so
Perhaps this is why I enjoy using the Olympus OMD so much with the electronic viewfinder I am very immediately able to see how much I am exposing to the right and whether I need to pull that back a half stop or a third stop or in fact whether the scene can take more over exposing
Now your immediate thought maybe about blown out highlights and if you are exposing to the right my third or a half stop that the sky or brighter areas of your scene will be blown out and yes this is a risk and a trade off with exposing to the right however I would debate that if you are concerned about noise enough to be listening to this post all reading this blog post then you should at least give the exposed to the right method a try to reduce the impact of noise in your images and then simply instead Paul the highlights back in post processing using the highlights and all or in the case of an over exposed sky use the digital graduated filter available in Lightroom alternatively there are more advanced techniques for pulling. Pulling back blown out highlights such as Leo masks and of course brushes in Lightroom but as I always say certain parts of the frame can be blown out without any adverse effects for example if there is a small amount of sky in your frame in a corner and your subject dominates the frame then why not have a small corner of your frame blown out what is worse a very noisy image or a small amount of highlight clipping in parts of the frame
Switching to a method such as exposing to the right does and will call for a slight adjustment to your work that you do in post processing
Four example I used to find when exposing according to my in camera exposure meter that I would often have to boost shadows boost highlights and ever so slightly increase my exposure oh are things that will contribute to increasing and enhancing the evident amount of noise in an image
With the exposed to the right method however I am in effect working in reverse to that I now find that I am reducing my highlights pretty much leaving my shadows as they are and if anything reducing my exposure in price processing ever so slightly these if we think about the paper and pen analogy I gave earlier are all changes that do not contribute to enhancing the amount of evident noise in an image
That is my technique for reducing the amount of noise visible in your pictures
Next up I want to talk about I SO and when to use it most people will understand that to increase your ISO is to increase your sensors sensitivity to light which in turn will allow us to make use of a faster shutter speed and or a lower aperture with the caveat being that the higher the I SO you use the more noise will be introduced into the frame. As such by default logic would suggest and many of us are taught that we should stick to using the lowest ISO at all times where ever possible when appropriate for the scene.
Now whilst this is true…there are plenty of situations that increasing your ISO slightly or even more than just slightly will have nothing more than a minor impact on the end amount of noise at the frame. especially when paired with a technique such as exposed to the right
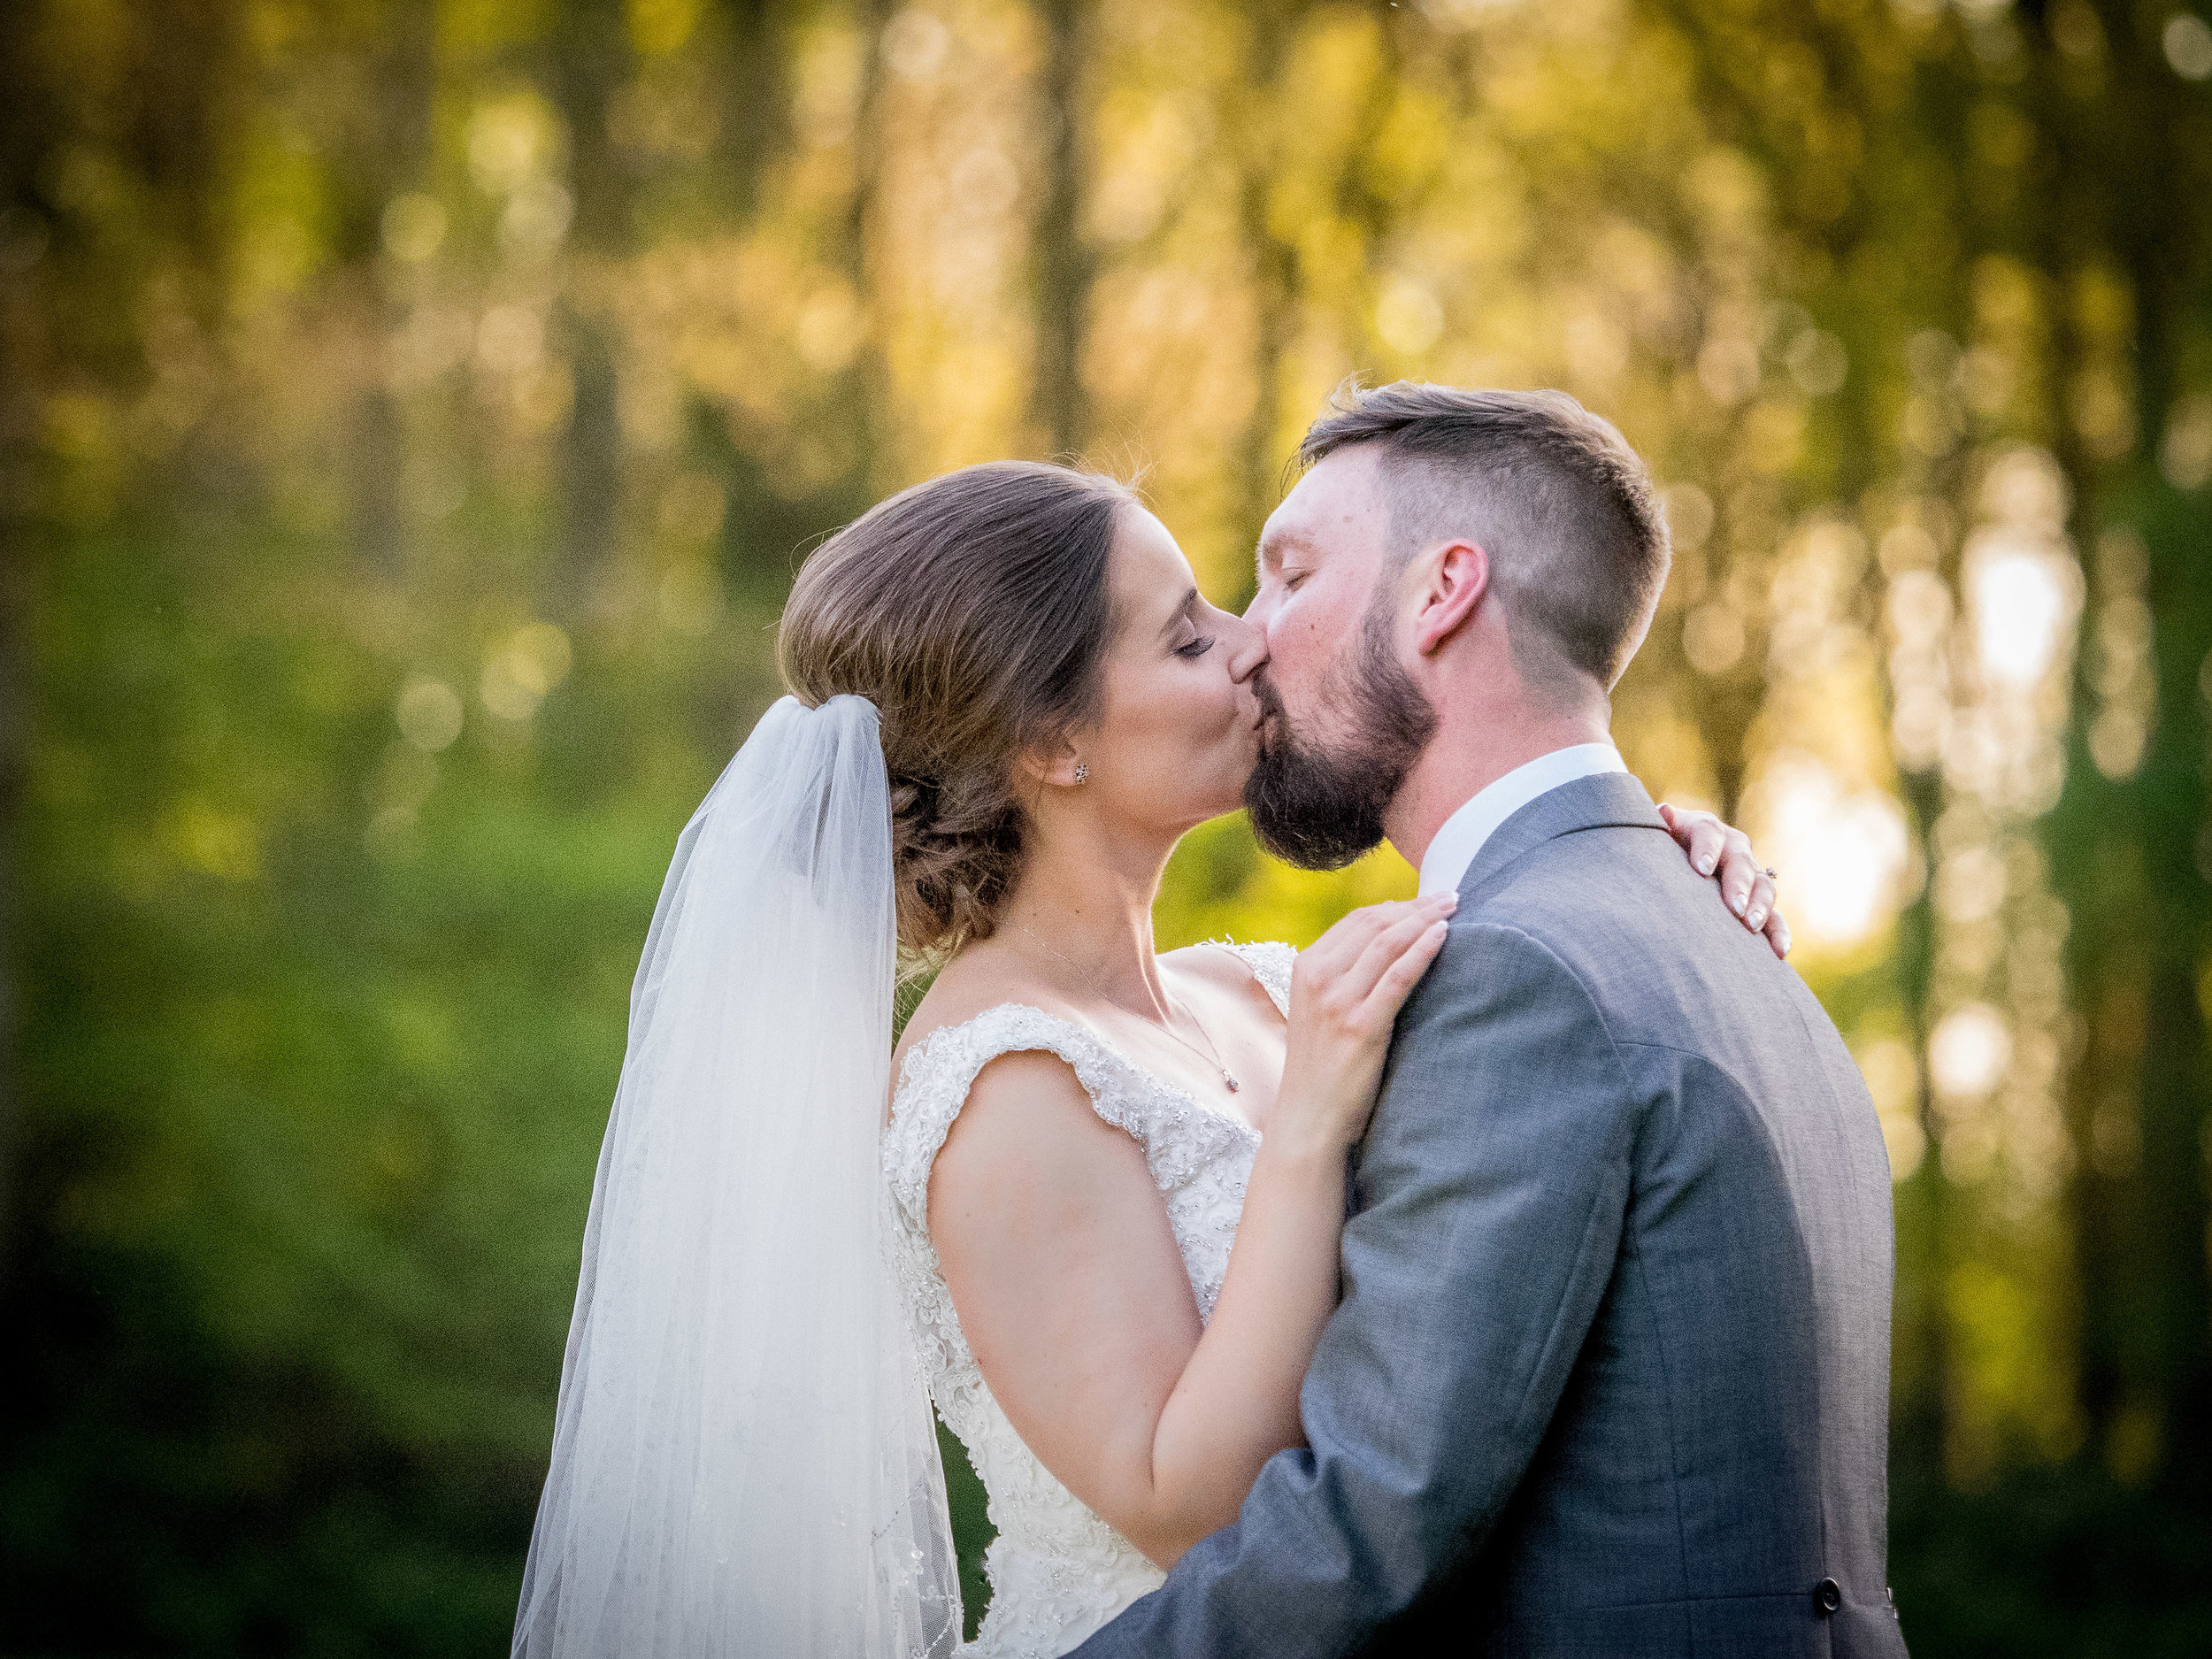
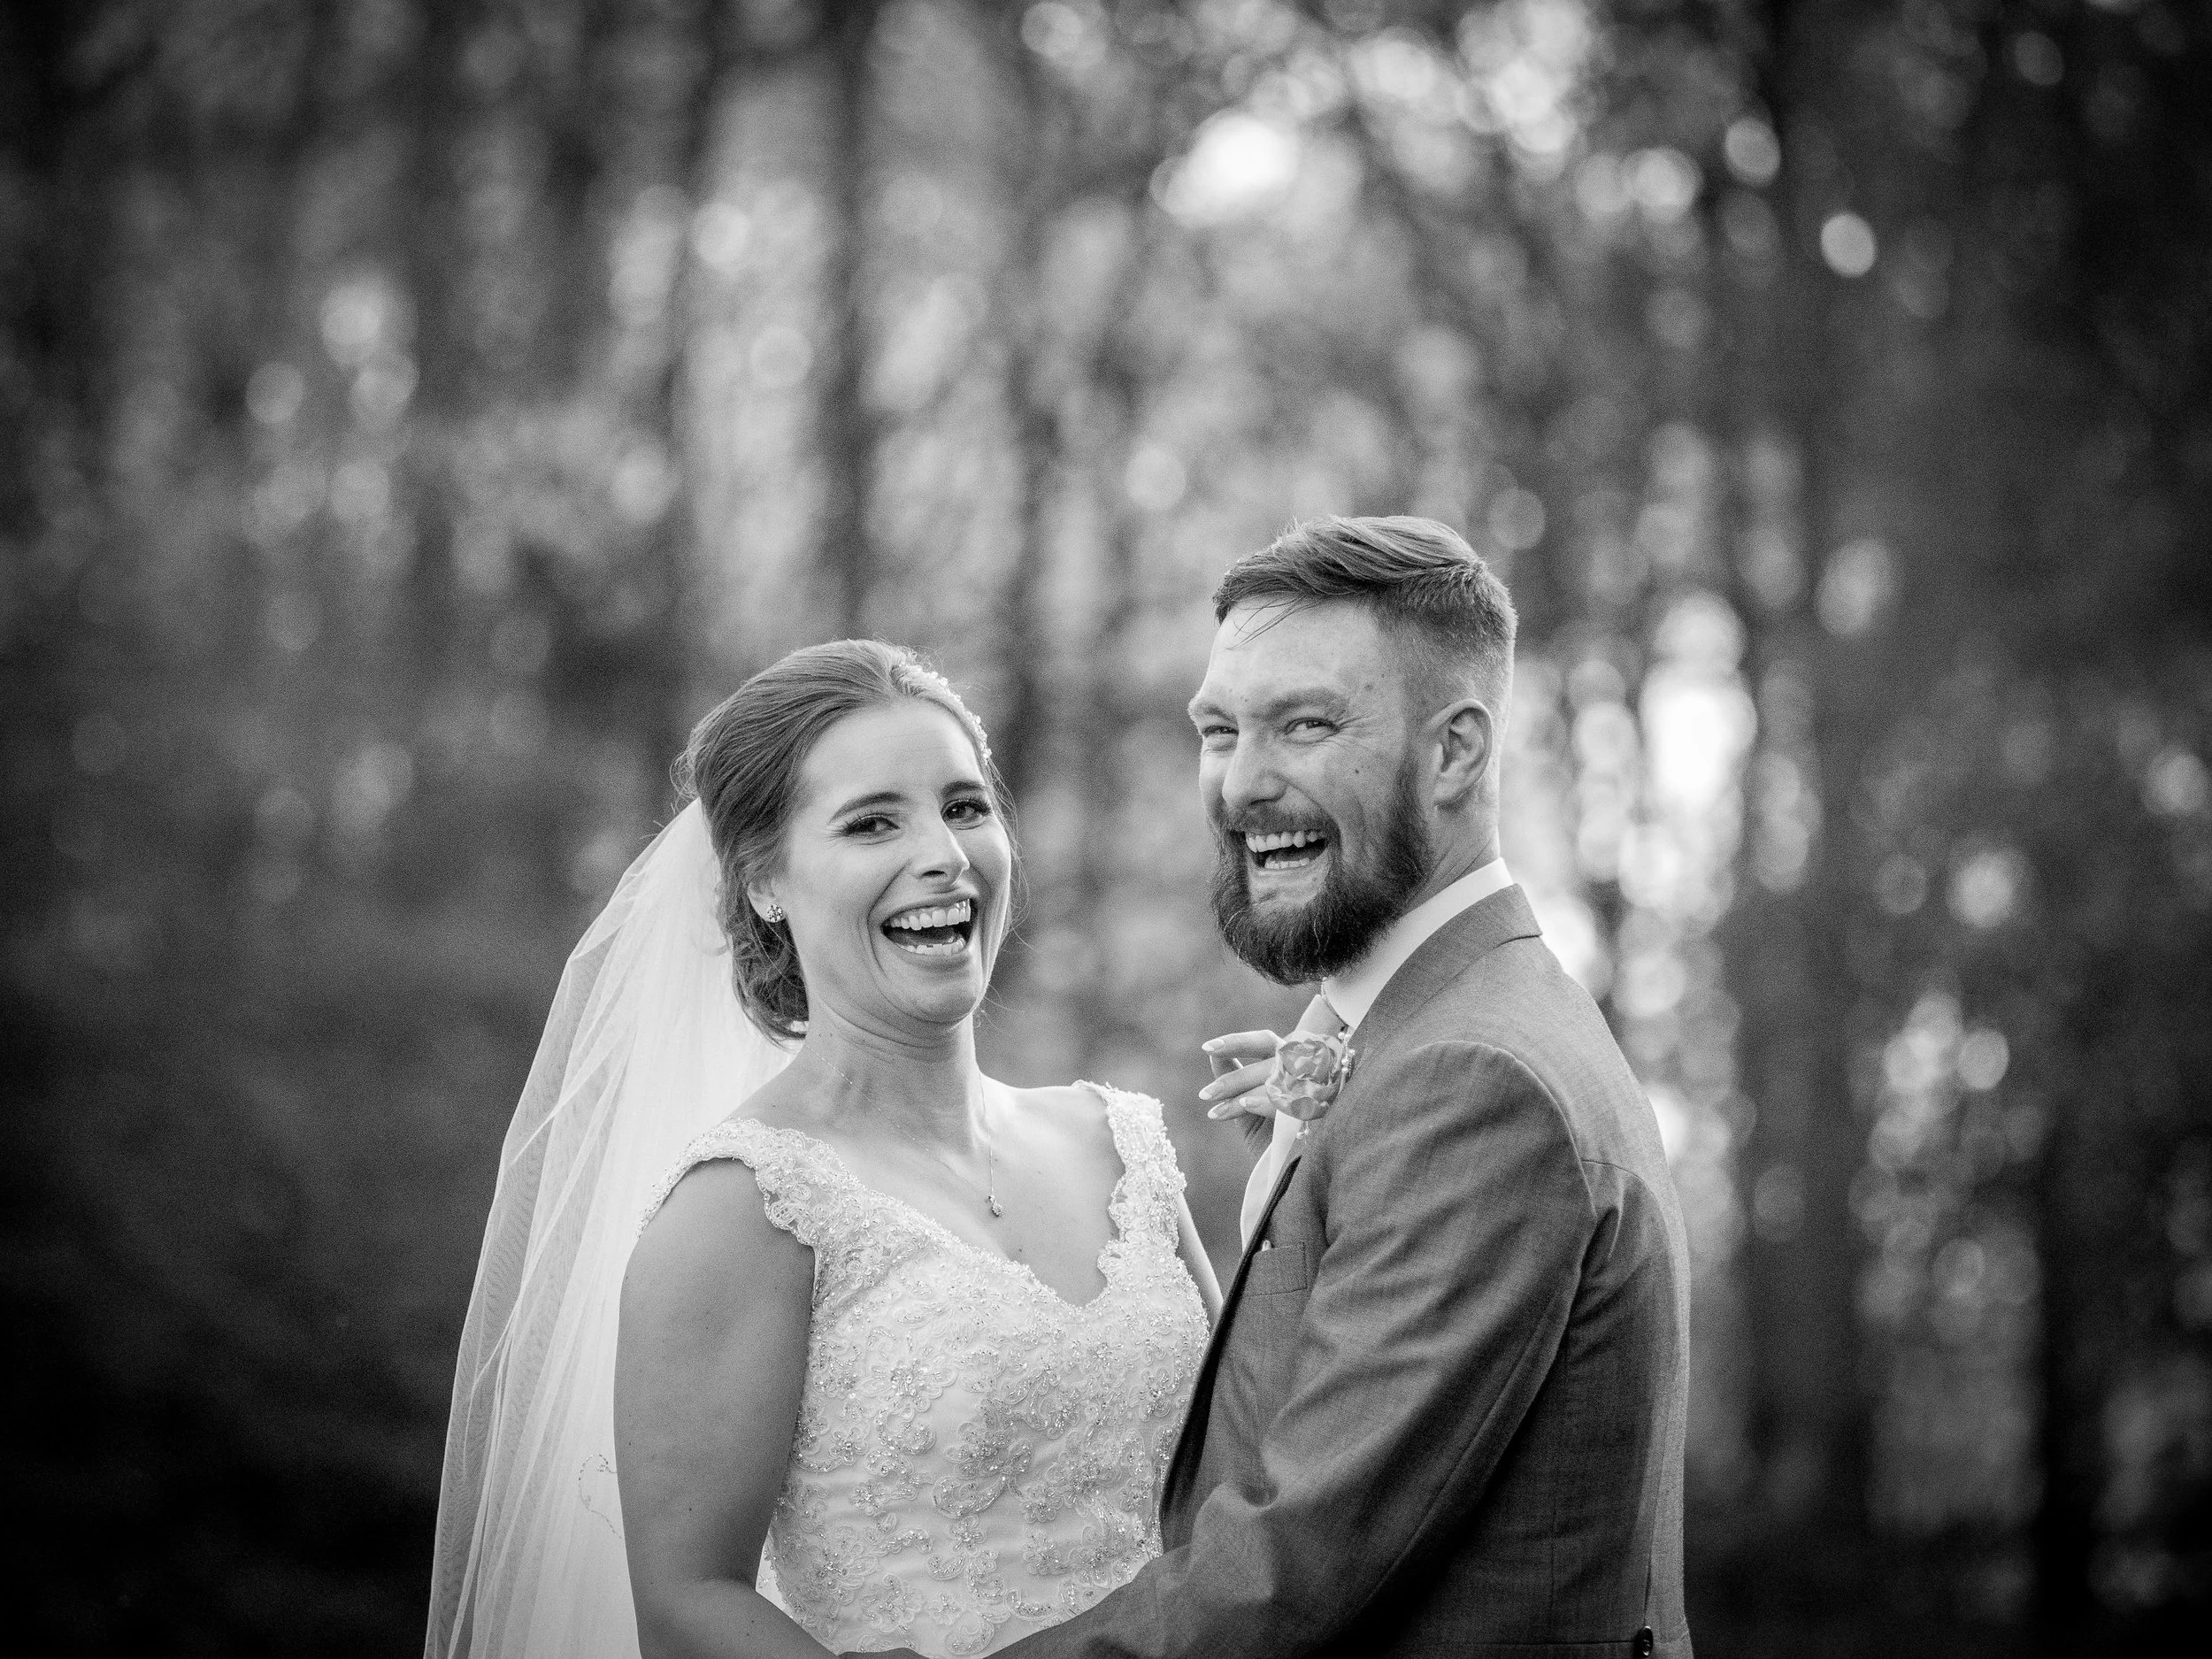
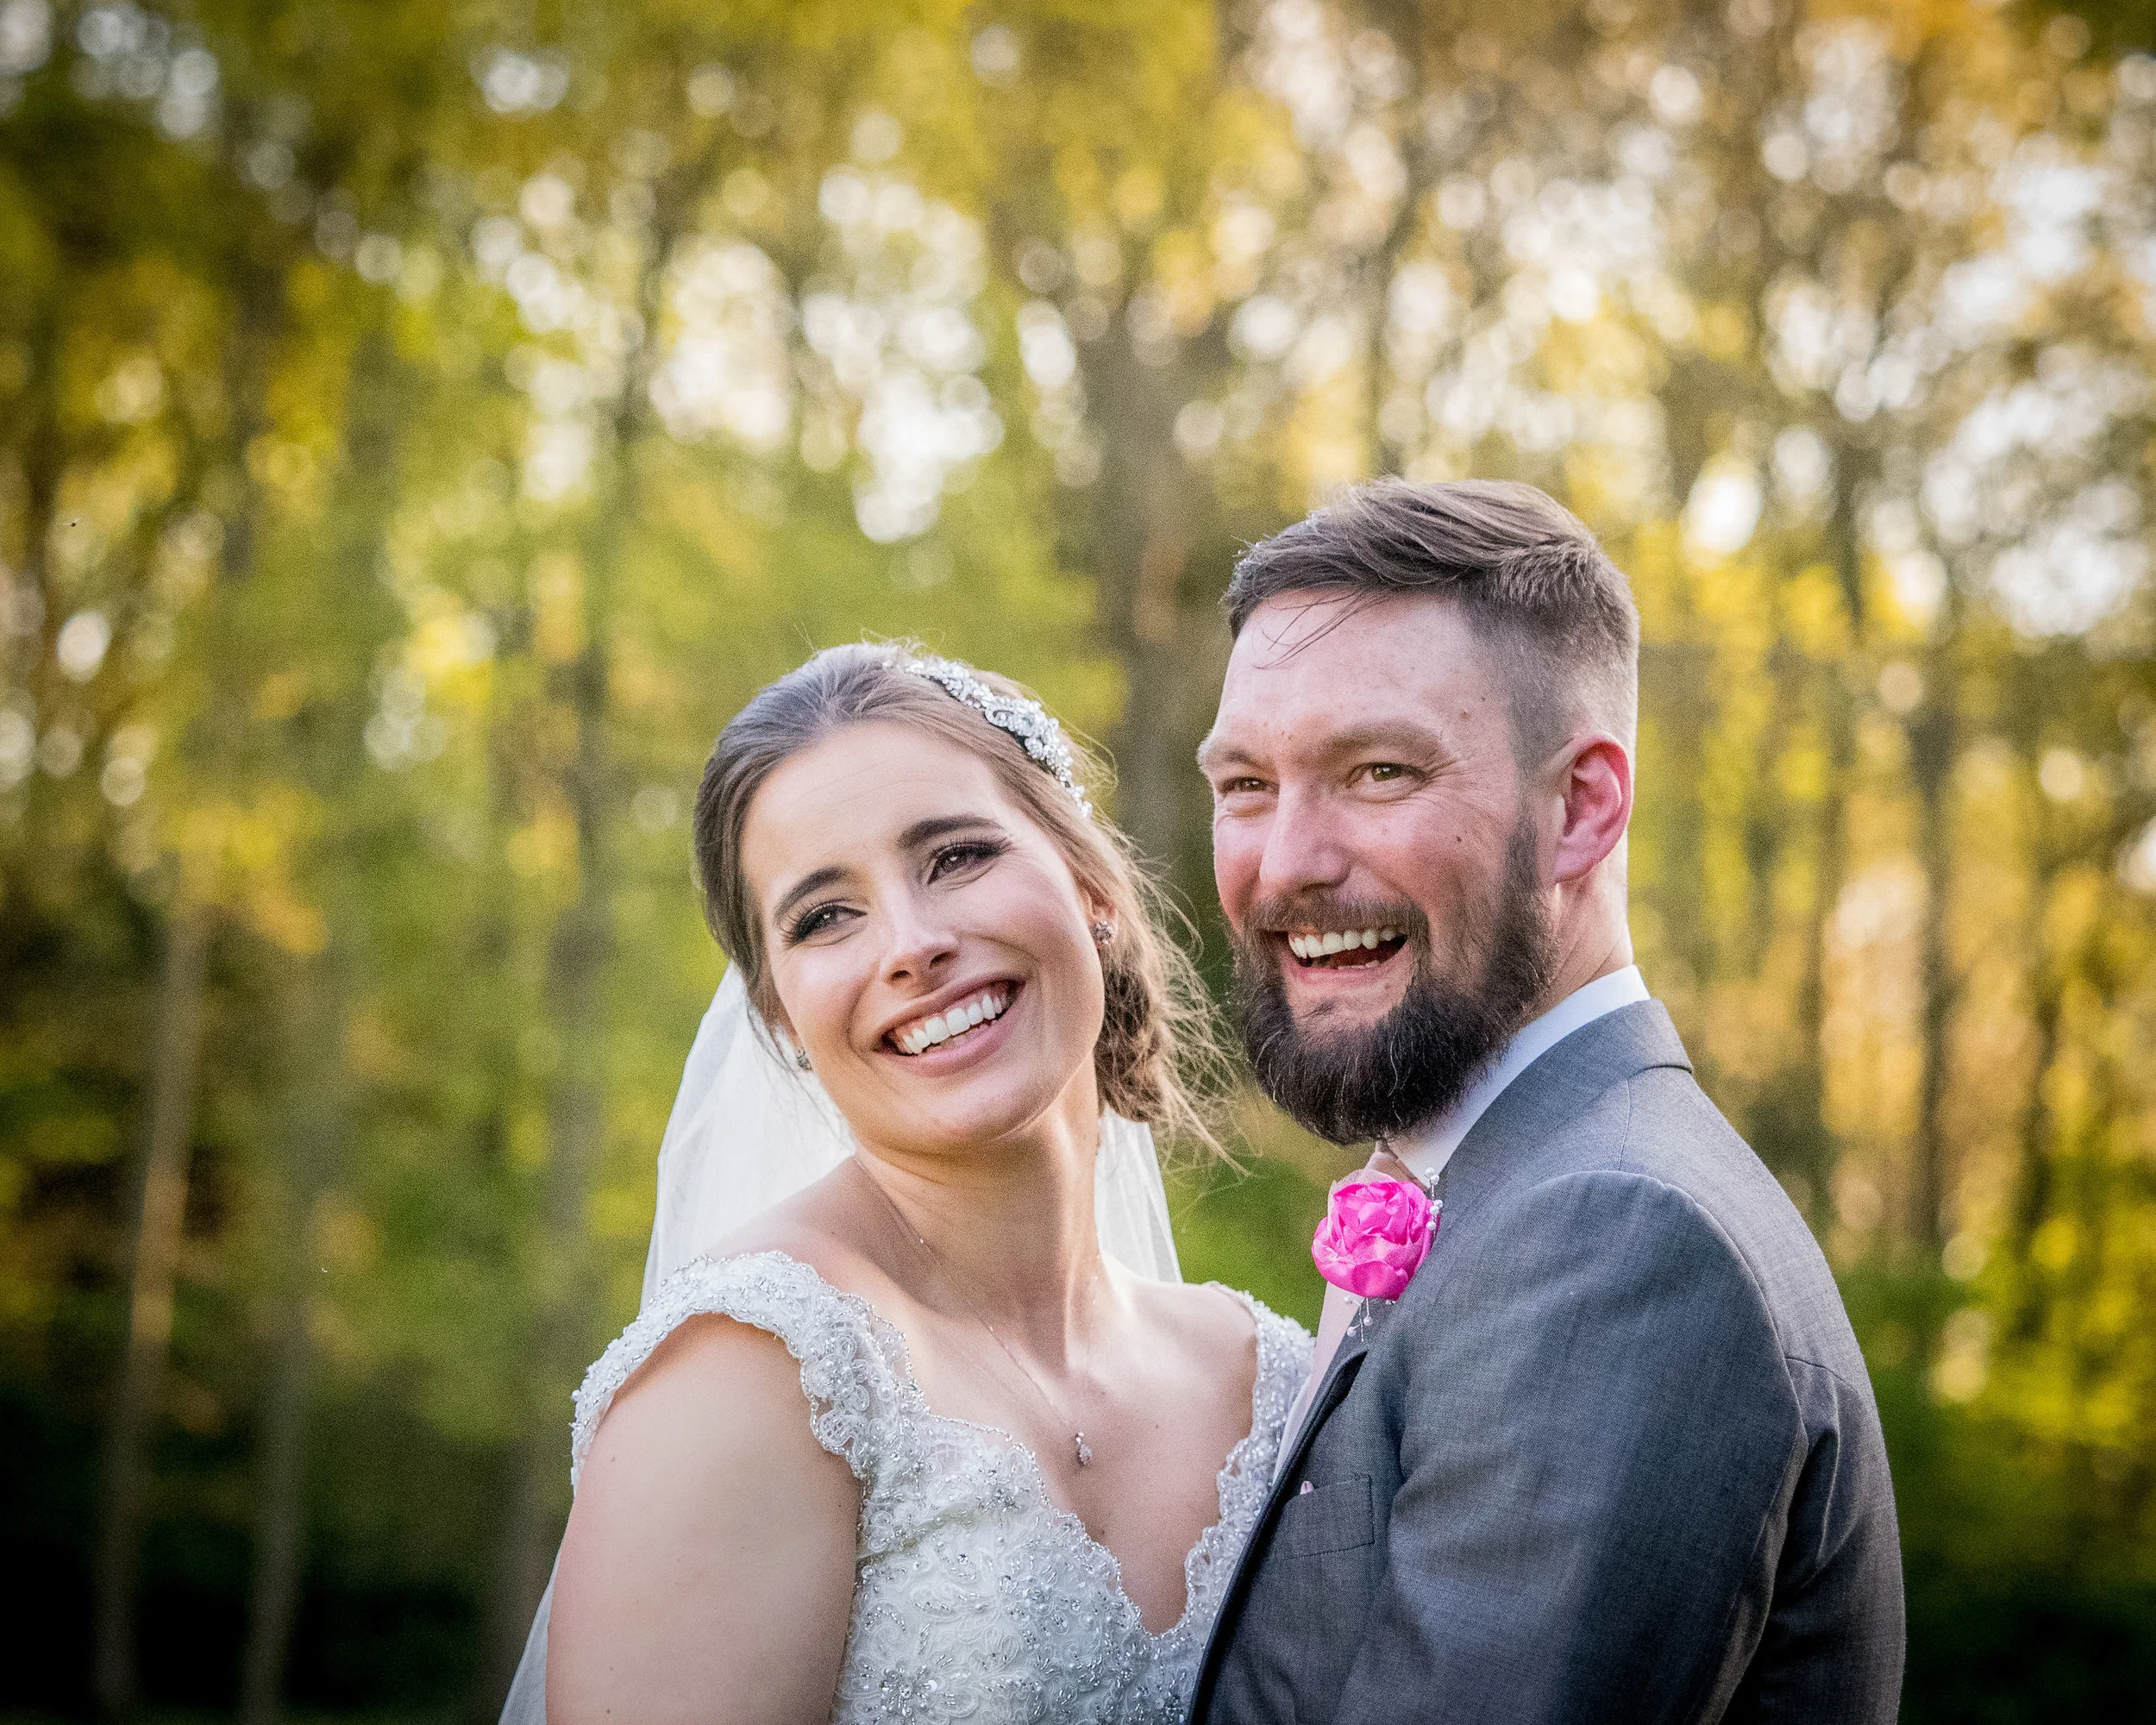
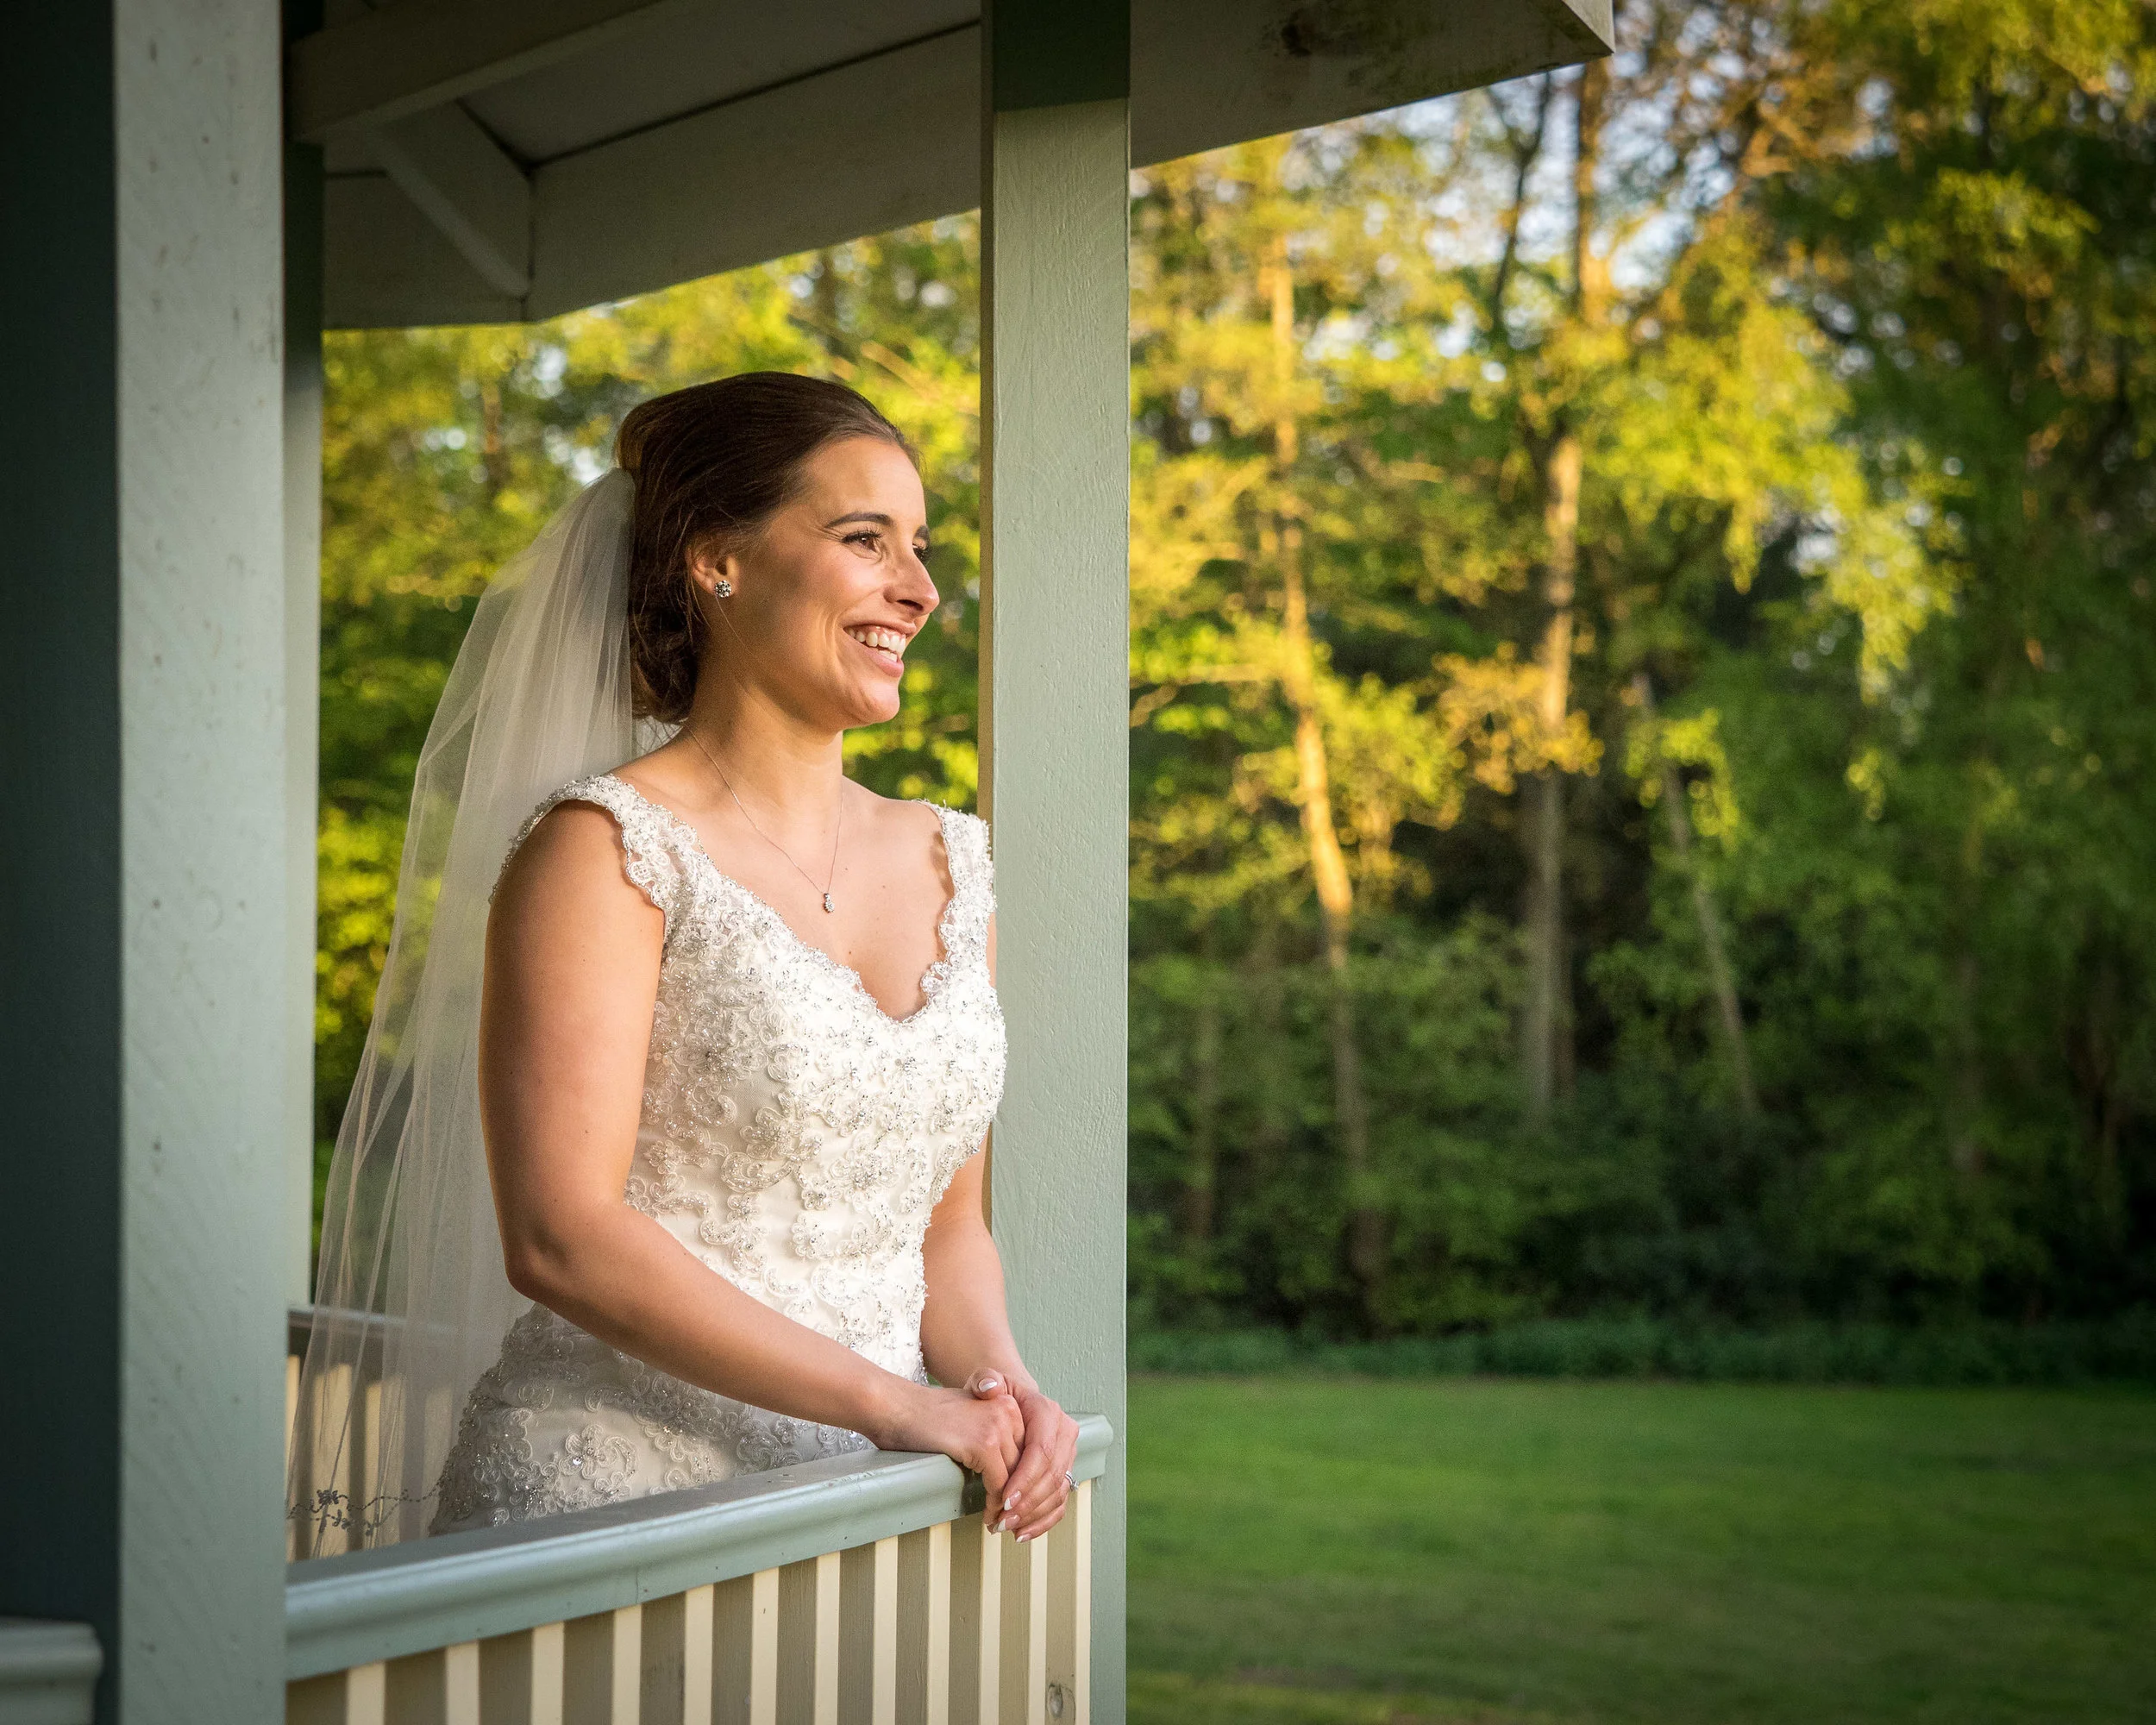
Four example I recently was shooting a wedding and during the evening we took the bride and groom out for some couples portraits. We were in a beautiful garden of the hotel and it was around 7:45 PM there was plenty of light and I could have shot at ISO 100 or 200 aperture F1 .8 .2 .8 and still maintains a shutter speed of around one the 50th to hundreds of a second.
However, When I am shooting portraits my main focus and priority is on then it's about making them laugh smile and be natural. The camera can often be a barrier to helping make that happen and so I don’t want to be seen to be tinkering with my settings. It will kill the mood! Often the moment that is worth capturing will come from a funny remark or something unplanned and I need to be ready to capture that as heads go back with laughter. Or, even those more intimate moments where an unplanned gentle kiss takes place, totally unprompted: if I’m looking at my camera or tinkering with settings: I’ve missed it.
As a result of knowing that and wanting to be ready to capture everything that may happen, I often give priority and preference to a faster shutter speed during portraits, meaning a 50th or even 200th of the second enough for me, especially if I am to achieve a critically sharp image, so to that end and to allow me to make use of a faster shutter speed, I’ll often take my ISO up to 1,000 or more. In the case of the recent evening portraits at Dan and Lauren’s wedding, I bumped my ISO, rather ambitiously, to ISO 5000 and then made use of a shutter speed of over 2000th of a second
This is very much contradictory to what many of us have been told: in that good light scenario I would have perfectly been able to use ISO 800 or 1000 a shutter speed of 500 of a second and maintain a relatively sharp image, however, we were all laughing a lot, having a good time and were generally very animated, so it did call for a faster shutter speed.
If you want to take a look at the results, head on over to the accompanying blog post for this audio, where I share a few images. In that good with my OM-D, I was not in any way concerned about using ISO 5000.
Had I been inside with very little natural light then yes - perhaps I would have considered a lower ISO that was more appropriate for the situation. But given that there was plenty of light and that the sun was setting I wanted to be sure that my shutter speed was fast enough to produce sharp images. In the sample Images I’ve shared with this post you will, of course, notice a little bit of noise, however, I would argue that the noise actually adds to the atmosphere of the image. Without knowing about my Expose To The Right technique and about ISO, you could also be left wondering how there is so little noise considering I was shooting at ISO 5000.
In post processing, the exposure of this image was actually reduced, rather that increased. So any noise you can see has not been made more visible.
Now, for someone to share an image shot at a High ISO and herald it as great isn’t new. What I'm sure we’ve all seen before on blogs, forums and new camera product releases are pictures shot at ISO 12,500 or higher with the main objective being to demonstrate how little evident noise is in the frame and all of that is fine, but what sometimes people often overlook, is that the image itself is actually quite simply very poor. There is no or very little quality of light or the direction of the light is poor and they are instead choosing to 1st look at the technical accomplishment of the frame and our forsaking the actual emotional moment and seen itself.
As photographers and wedding photographers, in particular, it is our job not only to make a technically accomplished image of our clients but it is also our job to capture the right moments that mean something that has sentimental value to the clients. For those photographers still obsessed about gear and everything being technically perfect, there is often a disconnect between what they consider to be a good image and with a client is actually looking for.
I assure you the client will not mind a little bit of noise if you managed to capture that perfect image of them and a husband or a great grandma from New Zealand who has flown over for their wedding who is particularly elderly. I guess what I am saying is what is worse a slightly noisy image or no image at all?
ISO is not simply the cameras ability to see in the dark it is not a night vision setting. It is as the name suggests a sensitivity option so it does not make up for a lack of light or a lack of good quality light
It will, however, help you to capture, with your camera the light you see and envisage, creatively, with your own eyes. Our eyes have a dynamic range that our cameras simply do not.
Even if your camera can achieve relatively clean images at ISO to 12,500 or 24,600, ASK YOURSELF ‘Is there a picture worth capturing here’, even if you were able to shoot at ISO 100. High ISO does not guarantee you a better image. It does not make you a better photographer and it won’t earn you more money.
so, if you ask me, high ISO is not the be all and end all. I’m not just saying this because I shoot Olympus, because believe me if I had an issue with ISO I would follow suite like most other photographers and go pick up a Sony A9 or a Nikon D800 etc, but as I say - it won’t make me any more money and ultimately, it is highly unlikely to make my images dramatically, or even noticeably better.
High ISO. It’s the camera manufacturers way to sell you last years camera, a little bit better. Don’t believe the hype.
iPhone 6 Plus Camera - Better, or just Bigger?
I've been an iPhone user since the 3Gs, which was way back in 2009. From there I moved to the iPhone 4s, the 5s and now the 6 Plus. The camera on the 4s was 'adequate' by today's standard, but back then it was excellent. The 5s was, and still is, by smartphone camera standards quite simply excellent. In my mind there is no question as to why the point-and-shoot market has had it's plug pulled - the cameras inside phones today are more than able to produce photographs of a decent standard. Of course, knowing the basics of what makes a great photograph in the first place will always put you at an advantage. I could be controversial here and say "and even if you don't know how to make a good photograph there are an array of filters to patch over that"...but I won't :D
I've even got a dedicated iPhone gallery right here on the website, so once I capture something on the iPhone, I edit it in Snapseed and then email it directly into the gallery.
Anyway, today's post is about how the iPhone 6 Plus functions as a camera. Is it an improvement on the iPhone 5s? Read on to find out more and see lots of iPhone photographs.
Richmond Park, London UK. iPhone 6Plus
One golden morning in Richmond Park I was able to capture this photograph on my iPhone 6. Sharpened, warmed and contrast-boosted using Snapseed for iPhone.
Lets take a brief look at the specs
Contrary to the title of the post, the iPhone 6 Plus' camera is definitely a better camera than the previous iterations of the iPhone to date...on paper at least.
The 6 Plus was released at the same time as it's just-as-new-but-smaller-brother the iPhone 6. Although the cameras in these two phones are pretty much identical and offer some technical improvements over the iPhone 5s, these changes don't seem quite as revolutionary as many iPhoneographers would have hoped. Improvements over the iPhone 5s include:
- Increased dynamic range
- On-sensor phase detection (or "Focus Pixels" as Apple call them) for faster and more accurate autofocus
- A burst rate of 10 photos per second.
- The iPhone 6 Plus does feature optical image stabilisation too, meaning it will help to prevent blurry shots, particularly in low light.
Otherwise, the iPhone 6 Plus maintains the same megapixel count of 8Mbp (which has remained the same since the iPhone 4s), it continues to have an f/2.2 aperture as well, which again was the same in the iPhone 5s. There are a whole host of other improvements too, most notably for video, but this review is looking mainly at the iPhone 6 Plus' ability to take stills (but, I'll talk about video in another blog post once I have something of note to share. I do shoot stills afterall, not really videos).
I should add that there is a timelapse feature, but this was part of a software update, as opposed to a feature exclusively on the iPhone 6 and 6 Plus.
"So what's with the title of the post then?" I hear you ask. Well, sure, it's a better camera in terms of on-paper specs etc, but in my humble opinion having walked around a Greek town, London, Richmond Park and used it every day at the day job and at home; armed with both the iPhone 5s and the iPhone 6 Plus (and my beloved Olympus OM-D E-M5) I can honestly say that the iPhone 6 Plus doesn't feel revolutionary in it's ability to produce cleaner, sharper images than that of the iPhone 5s. Side-by-side the two perform near enough the same. Which is very disappointing for me.
I'm sure I'm wading into dangerous waters here as lovers of Apple products can sometimes be carnivorous fish (to continue the metaphor) but unless you put them side by side in some sort of studio setup and really tested them and compared the shots, I can't see or feel much difference at all here in the real world in terms of the files that are coming out of the iPhone 6Plus.
So, to actually set them apart we have to look at other things, such as the screen, the size of the device and the handling of the device. The things that can make it more, or less of a practical and easy to use camera. So, I'm going to go through a few key physical differences of the 5s and the 6Plus and give a quick conclusion on each:
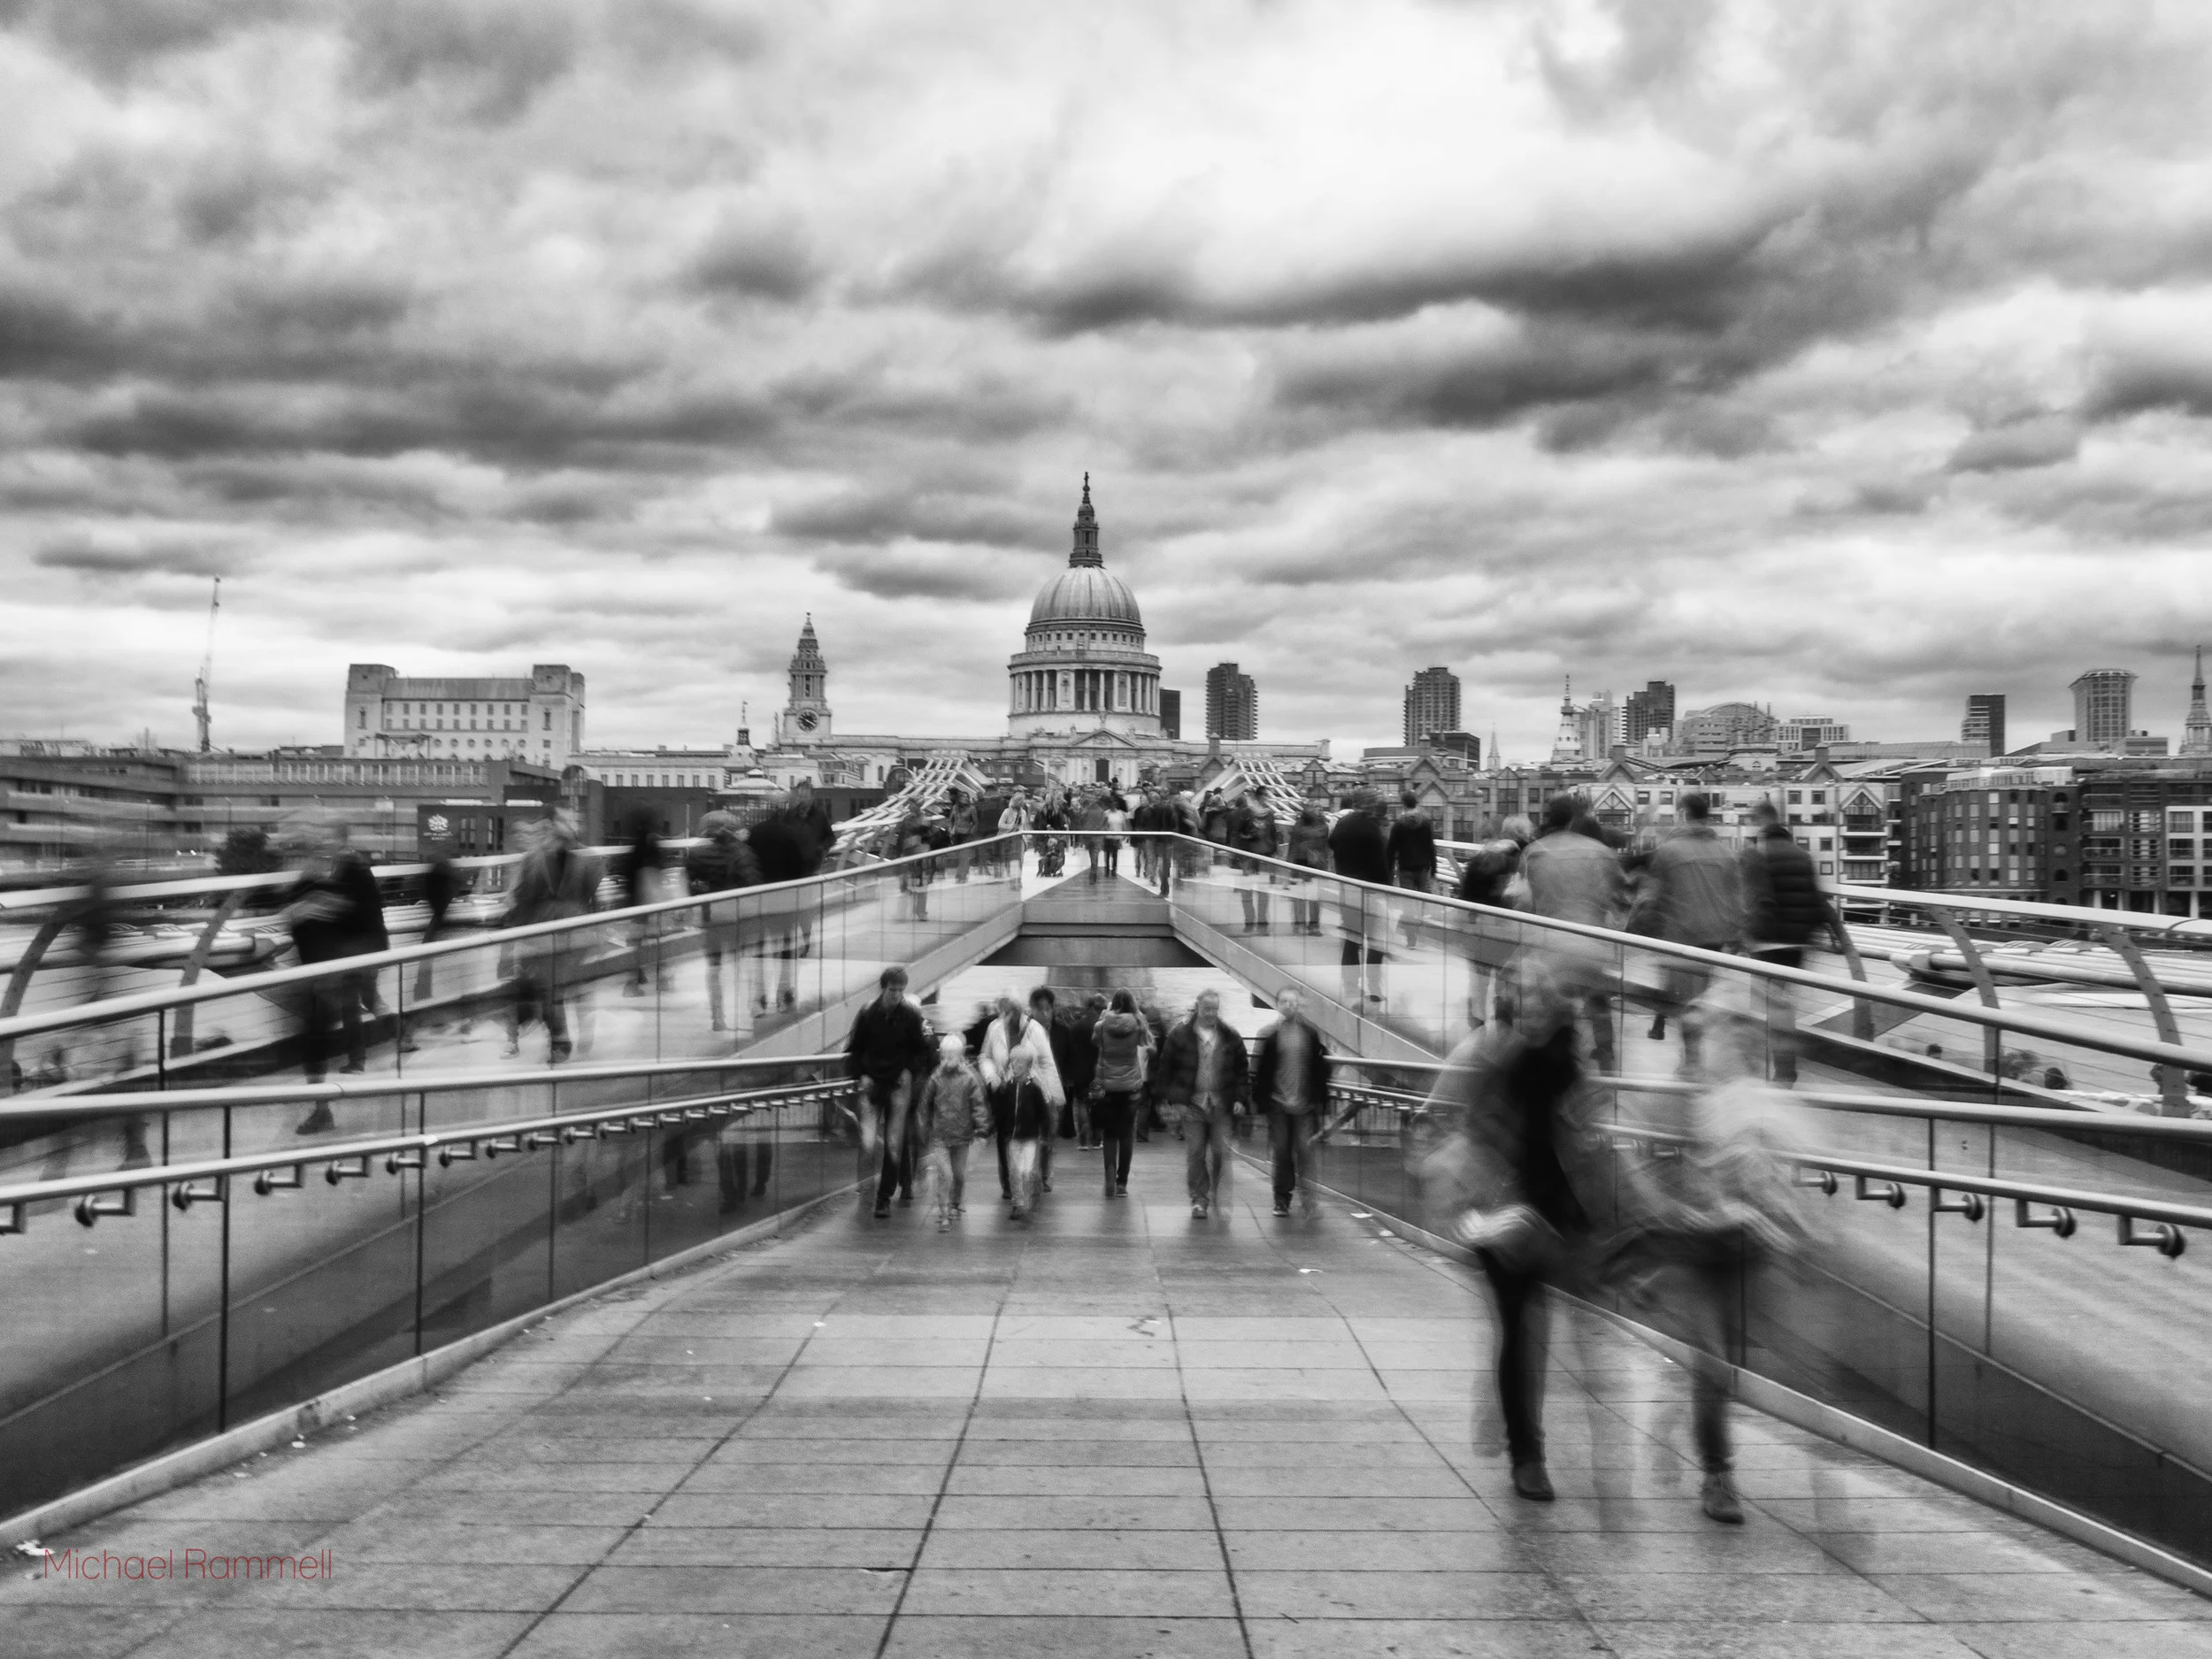
London Underground, iPhone 5s
Size
"Too big to be convenient" is my quick answer. It's too big to pull out one handed and swiftly swipe up from the bottom of the lock screen and snap away. The iPhone 6 Plus requires two hands. It's less convenient than it's older and smaller brother the iPhone 5s. There is apple's reachability feature, which is genius, but another issue is that the back of the iPhone 6Plus is made of a material that isn't exactly as 'grippy' as I'd like it to be for a phone this size. I always feel like I'm about to drop it! In fact, now that I've had it a few months I can tell you I have dropped it a few times, fortunately it's just been onto a carpet, or the sofa, or a few inches, but I can tell the day is coming where the beautifully crafted iPhone body will come to a blow with hard concrete (and likely come off worse!)
It's not just that though - the iPhone 6Plus seems oddly balanced in it's weight distribution too (If I am allowed to be hyper critical). It could just be that I've spent a couple of years with iPhone 4s and 5s shaped and sized phones so something this large seems odd, but even with my medium-to-largish hands it still feels like it's a phone that requires your full attention, two hands, no distractions and possibly even a small case with a better material to hold onto.
At the time of writing I've not extensively tried the 'plain old iPhone 6' as yet (the non-plus version). But my hope is that it's a better more one-handed and actually pocketable size.
So, in conclusion when it comes to physical size - bigger isn't always better for a camera. The iPhone 6 Plus is really a two handed device, which for me is somewhat of a step back as the iPhone 5s and previous iPhone's were ideal as a quick device to yank out of a pocket and make a photograph of something. With this you need to dedicate two hands and if that's the case, you may as well carry a more capable point and shoot and shoot RAW for later.
As a phone for emailing, texting, games videos etc the screen size is a welcoming sight for sore eyes, but that's if you're in a controlled environment able to use two hands to hold onto it.
Materials
As I briefly mentioned above the iPhone 6Plus seems to be made of a metal that doesn't grip well with human skin! It's forever sliding and slipping out of my hands. This is partially the size, but the phone often feels like an eel - it just wants to jump out of your hands and kiss the nearest, hardest surface screen side down (like a piece of buttered toast, with the screen being the buttered side!)
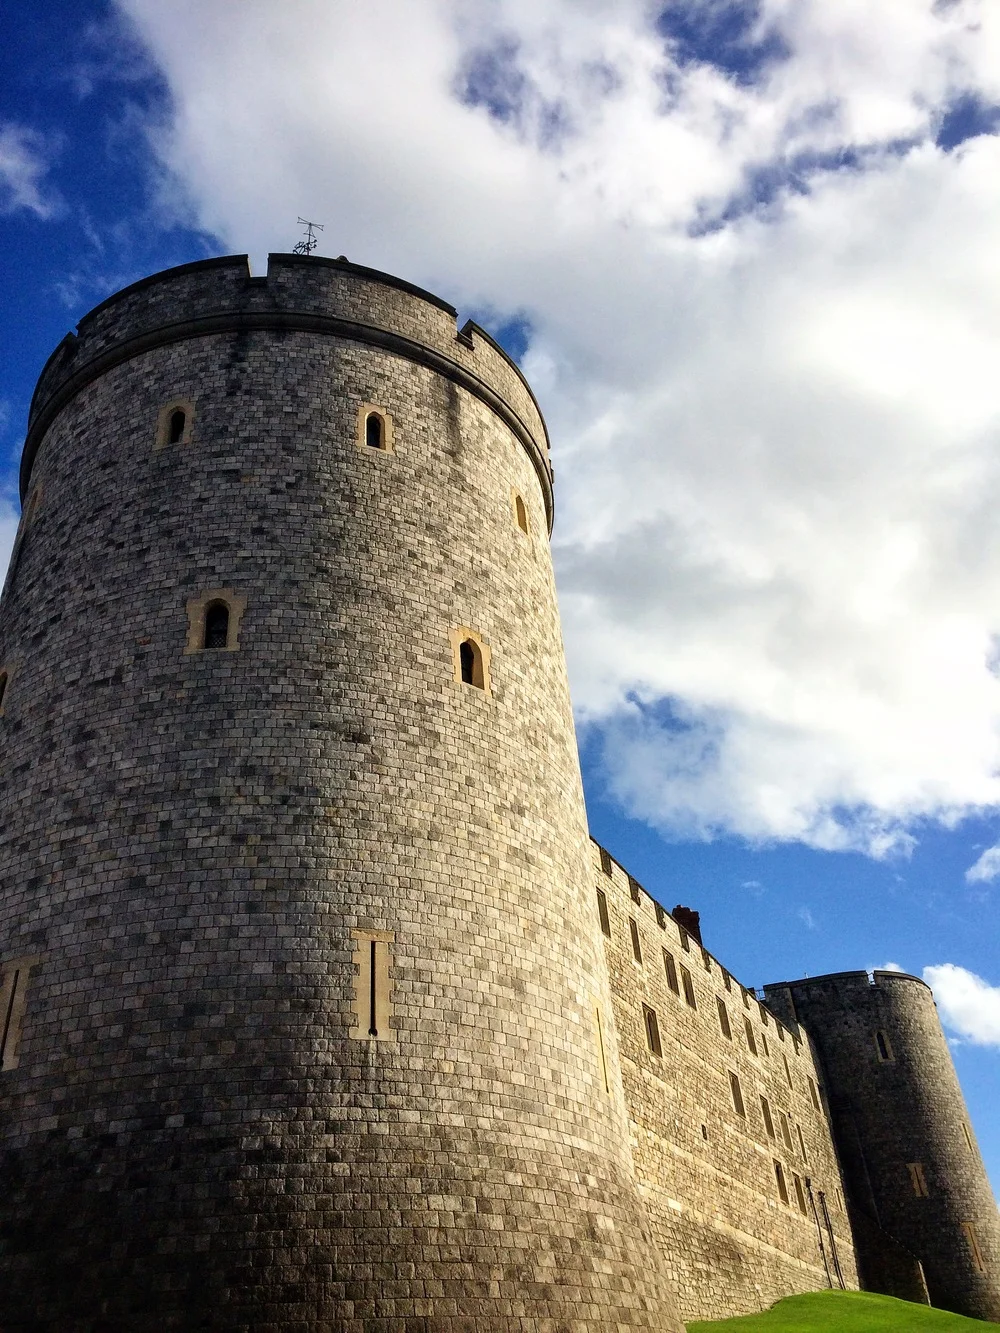
Windsor Castle, Berkshire, UK. iPhone 6Plus
In good light anything is possible with an iPhone camera
Screen
Now, I want to be clear that as a phone, the iPhone 6 Plus' display is wonderful. It's great for messages, videos, viewing photographs and of course everything else, but that screen size for me is actually a concern; I always feel like I'm about to smash it. So, a case is a must with the iPhone.
If, like me, you've historically forgone a case because 'The iPhone has been manufactured wonderfully and I don't like the idea of covering it with a case'...well think again with the 6 Plus.
That's not to say it hasn't been manufactured well (which I'll come to when I talk about bending in a moment) it's just that it feels so prone to dropping that i'm just not confident It'll make it to upgrade time one one piece if it doesn't have the protection of something to keep it safe for each time the seemingly suicidal iPhone 6 Plus wants to leap out of your grasp in a bid to meet
Stabiliser
The stabiliser, as far as I can feel and in my resulting photographs seems to help a little. It's certainly more for video from what I can gather. I typically know the limitations of the iPhone and just put it away when it's too dark to use. The Flash still isn't suitable and with it being positioned directly next to the lens everyone I shoot ends up looking like they're in a 70's club with a sweaty, over-exposed forehead and crazy-huge catch light in their eyes. Red eye is a thing of the past though.
Anyway, the reason I mention about the stabiliser is because if there is plenty of light, or it's a bright day, then the stabiliser isn't necessary anyway: the iPhone sensor of the 6 Plus (and iPhone's as far back as the 4s) were able to record great images in decent light. So, the stabiliser has been added to get sharper images in low light. The problem is however is that whilst the stabiliser makes the camera nice and still and free from shake, your subjects are still moving around all over the place when it's dark so they're still blurry. But this isn't from the camera, this time it's the subjects' fault. You see, much like a point and shoot on auto mode often used to do, it'll control the aperture, shutter speed and ISO: when ISO is as high as it can go and the Aperture is pushed as large as can be the next thing the camera can do to let more light in is to slow it's shutter speed - when it does this to a crazy level (anywhere below 1/60th I would argue - it's unlikely you're going to get sharp photographs. But, seeing as you can't control these settings wihout the use of a manual-mode camera app for iPhone, it falls back into that old trap of: flash everyone and make them look sweaty (even though you're just having Sunday Carvary with your Nan) or put the phone away. Or...have burry subjects of course.
So, know your cameras limits and work to them and embrace them
iPhone 5s - Same low light performance as the 6 Plus
Know how well your iPhone will perform in not-so-favourable light and work to those limitations. Experiment as well.
Other features and general review of the iPhone 6 Plus
So before I come to a general conclusion about the iPhone 6 Plus as a camera I want to talk more about it as a phone and a device in general. If this part of the review doesn't interest you just skip to the 'Conclusion' section nearer to the bottom of this article...
Bending
Let's keep this section simple
Q: Does it bend?
Possible Answer 1: No
Possible Answer 2: If you put the phone in your back pocket. Yes, it could bend. If you put the phone in your front pocket and then lean over something, like a railing, or a fence then yes, it could bend. If you have a YouTube channel, too much money and a lot of time on your hands and want to try and bend an iPhone 6 Plus - Yes, you're likely to be able to bend an iPhone 6 if you do so with intent and have enough time on your hands.
Otherwise, please see Answer 1 above.
If you insist on elaboration for this section: with everyday use and even with a little bit of a beating: the iPhone 6 Plus should be fine. If you're prone to cracking screens or sitting on phones then sure, you're likely to bend the phone or crack the screen after all it is much bigger than previous iPhone's, so it's logical really that the chances of a cracked screen will increase if you're not the careful sort, but otherwise, you should be okay. Just be careful with your iPhone 6 Plus. Afterall, it's probably cost you the same as a mid-range laptop would cost, so it makes sense respect it. But, in short no, i've not found mine to be prone to bending any more than my iPhone 5s.
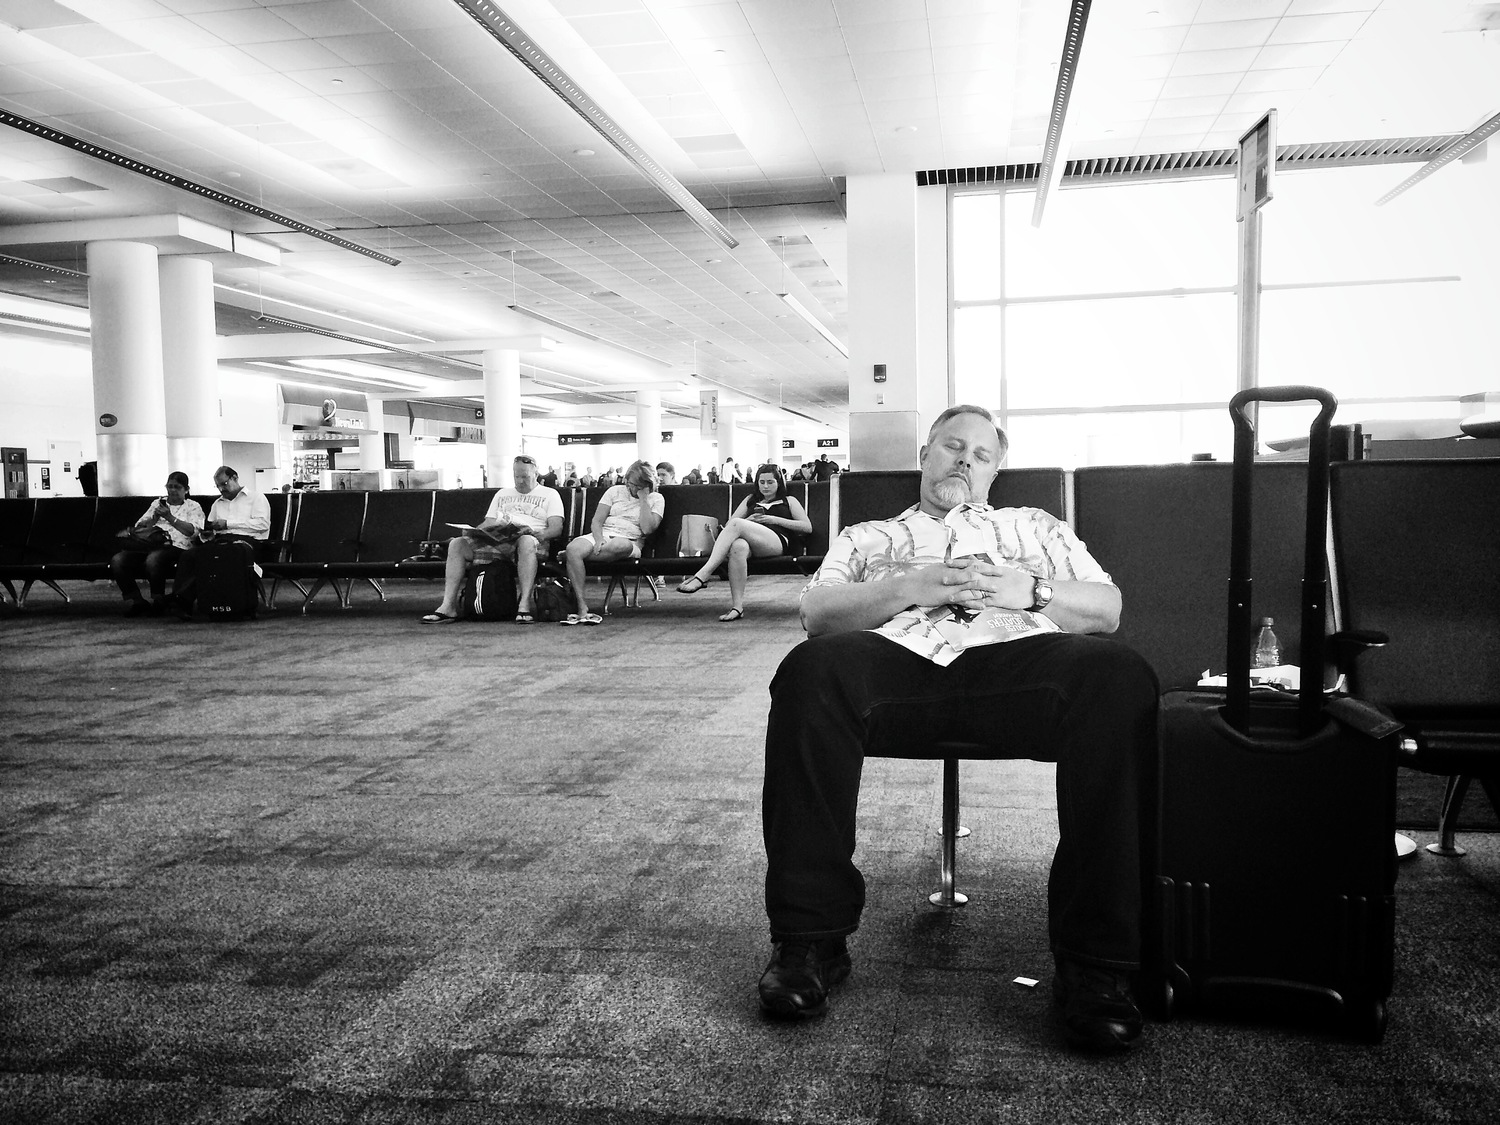
Boston Logan International Airport, USA. iPhone 5s
The small size of the iPhone 5s makes it very inconspicuous
battery life
The battery life is better than my iPhone 5s, but I am attributing some of this to the 5s now being just a little over a year old. I got myself a 5s because my 4s' battery started to plummet quickly. It's just age.
I charge my phone's overnight and they'll often need little boost at lunch time to get them through a day, or they'll be on their knees and showing 'Less than 10% battery remains' a few times. Which is never nice. The iPhone 6Plus is thinner than previous iPhones, but the phone is much bigger too, so it does have a larger battery. Then again, that large screen is going to sap a lot of juice, so the battery life is probably only marginally better as far as I can tell.
Perhaps more pertinent to this review is to know that if you use the camera on the iPhone throughout the day then the battery is of course drained much quicker too. If you're used to the battery life of an iPhone - none of this will be a surprise to you. My advice is, if you're planning on using your iPhone as a camera for much of the day, or if it's the only camera you've got, then put it into airplane mode to preserve battery whilst you're using it at as a camera. So, if you're abroad in a city or photographing your children in a play for example - having the phone in airplane mode won't be such an issue because you're not going to be receiving too many calls whilst you're abroad and you're surely not going to step out of a play to answer your phone, right? Airplane mode will save a good amount of battery and can be flicked off and on with just two swipes.
Keyboard
For those of you experiencing an iPhone for the first time you may find the keyboard takes some getting used to anyway, but for those of you coming from a previous generation iPhone with a smaller screen, you'll also have to get used to a keyboard that is marginally different also. The keyboard is better, there's no doubt, thanks to the buttons being larger and spacing being a bit better, but if your muscle memory has registered keys in certain places from the old iPhones you're going to have to adjust. I find myself constantly pressing keys next to the key I want, but it's getting easier.
having said that it goes back to the one-handed situation again where the keyboard is too wide now to use with just one hand.
On the flip side though the new, wider horizontal keyboard is a breath of fresh air:

Pocket Sized?
No. It's not pocket-sized. the iPhone 6 Plus is forever sticking out of the top of my pocket in the front of my jeans. If I am wearing smart trousers with pockets that aren't quite as deep I dare not put the iPhone 6 Plus in my pocket as it does fall out when you sit down. It's size could be described as 'cumbersome', yet handy when you need a big screen.
Corfu Town, Greece. iPhone 6Plus
Given the time to use two hands and compose the shot, the iPhone 6Plus is probably a bit better thanks to it's larger screen
Power Button Placement
In a bid to make the phone operational with one hand Apple have moved the power button (screen off & on) to the right hand side of the device, instead of having it at the top like we've been used to with every version of the iPhone that came before it. It's odd at first, but the move makes perfact sense really. It does however mean that if you're watching a video, or doing something with the phone in a landscape orientation there is a chance you can press the power button and turn the device off. Which can be a real pain!
Camera Lens Protruding
The lens element of the camera sticks out. It's annoying. The back of the phone is flat and flush but the lens element is proud of the surface. Odd. Not a deal breaker, but I get the feeling Steve Jobs wouldn't have allowed that.
Not an issue, but worth a mention.
Conclusion
If I have both the iPhone 6Plus and 5s with me and both hands available (not holding my daughter in one arm, carrying a shopping bag, pushing a pushchair etc) I would go for the iPhone 6Plus as a camera: the larger screen makes composing a what you're about to photograph easier. Additionally, with the minor improvements, even it were just 1 or 2% better (what ever 'Better' means to you) then why wouldn't you use the best camera you have with you. Further more the hardware inside the iPhone 6 Plus does make it marginally faster than the iPhone 5s as well, so the camera activates quicker and is generally just more responsive.
However, if I were shopping or occupied doing something then the iPhone 5s is a natural go-to device thanks to it's convenient size that suits one-handed operation.
It is swings and roundabouts really. Your preference will dictate your opinion, rather than cold hard performance and specs making one phone the stand out winner and camera champion over the other. As a result of the iPhone 6 Plus not being enough of an improvement to warrant it's cost, my advice would be to stick with the iPhone 5s if that's what you have and not sweat it about the camera in the 6 Plus. In short, they're the same but the size it what separates them. Although, I don't feel like I'm holding my breath everytime I have my 5s in my hands as it does feel more robust.
As a photographer, blogger and someone who uses their iPhone for pretty much everything including note-taking, calendars etc. The iPhone 6Plus, if the circumstances permit, is a better all-round camera. But, if you're after something to pull out one handed and make a quick snap, then perhaps a 5s or the smaller iPhone 6 is the better option.
Sorry to sit on the fence with the conclusion, but in short you can pick one of the following cliches as your choice of conclusion:
- "It's horses for courses"
- "Swings and roundabouts"
Fact of the matter is the iPhone 6Plus camera isn't dramatically better at all, but the features of the phone probably do help it to edge it's predecessors.
Every single photograph featured in this post was shot using an iPhone 5s 64Gb or an iPhone 6 Plus 128Gb. The files have not at any point been adjusted, modified or edited on any application outside of the iPhone itself (i.e they've not been in photoshop or Lightroom). All photographs went through my usual iPhone post-processing method in Snapseed for iPhone
London Street Photography with Ready Steady Pro
This past Sunday 26th October I made my way into London to meet up with some wonderful photographers and members of the Ready Steady Pro community for a walk around England's capital with the cameras.
We hold regular walks in various locations and photowalks are a great way to get to know more photographers that are otherwise profile pictures and banter over the internet.
So, we met in Leadenhall Market and after a few introductions we set off on our route
This is the Lloyds Tower, just outside of Leadenhall Market. Very Swanky!
Sometimes you just get busted taking someone's photograph. Damn!
"In Rememberence" - The Tower of London - the ceramic poppy display as a tribute to those who laid down their lives for us.
Love Lock - A now common practise on the railings of bridges all over the world
So, if you're interested in joining a photowalk just head on over to Ready Steady Pro and join us! You can also subscribe to this blog for updates and announcements for new walks.
The next walk is Manchester on November 22nd!
Looking forward to seeing you there!
The Olympus OM-D E-M5: 10 Months Later
All relationships start out with a honeymoon period where you can easily, and often unconsciously, forgive all those annoyances: not squeezing the toothpaste from the end of the tube, not putting the toilet seat down or the eye cup constantly falling off... That's right. Now my honeymoon period with the Olympus OM-D E-M5 is over I wanted to give another review with a bit more of a harsh and honest light being shone on this camera.
The initial review of the Olympus OM-D E-M5 was posted back in February 2014. That 'review' was a first impressions type post about my immediate thoughts having used the camera for a few weeks. Naturally I was excited to have my hands on a new camera. In general I was very impressed with the E-M5. In fact, that's an understatement: I went out and bought my own after only a few weeks of having the loan camera from OlympusUK. At the time of that review there were a few quirks that sort of bothered me and upon reflection my initial excitement may have paved over those quirks a little. So I'm not going to hold back in this review. I'll tell you about the good, the bad and the ugly. No holes barred.
One thing I would like to say before I begin though is that most of the issues are physical things, some of them practical things, but almost none of the issues I'm about to point out with the E-M5 are related to picture quality or the ability of the camera to produce photographs. Let me be clear in that respect: the E-M5 is a stunning camera. I talk more about the picture-making ability of the camera more towards the end of the post, but for now, here are my updated thoughts on the E-M5. The review starts off as a bit of a rant, but becomes more positive, so stick with me until the bitter end:
The Eye Cup (Olympus EP-10)
The first issue with the OM-D E-M5 is the eye cup. The reason I point this out first is because it was the first thing to go wrong. In fact there are two issue with the eye cup:
- It doesn't offer enough shade to the EVF and it isn't comfortable enough when pressed up against your face.
- It always falls off the camera when you take it out of the bag or even if you're just carrying it over your shoulder. I'll admit it took about 3 months for it to fall off for the first time, but once it was off there was no stopping it. The little piece of rubber spent more time in the bottom of my bag than it did on my camera!
So, the first of the two issues is that the eyecup just isn't sufficient in terms of offering you shade enough to comfortably look into the viewfinder, particularly in strong light. It's acceptable in most conditions, but in London on a sunny day I found myself having to sometimes use my left hand to actually provide additional shade. A baseball cap would have also done the trick, however I don't look good in hats!
Secondly, I've lost count of the number of times I've put the camera up to my eye only to realise that the eyecup is nowhere to be found! Most of the time it had fallen off into my bag and was recovered, but on one occasion I was shooting a birthday party for a client and after packing my gear away I had to go back to search for it in the last place I remember seeing it. I found it, thankfully.
Now this may not seem like such a big deal to many, but the fact that the official replacements retail at around £25 from most places seems absurd to me. (this is for an EP-11 replacement. I'll come to that in a minute). The fact also that it comes off of the camera so easily is crazy! You only have to look in the Olympus groups on Facebook to know that Olympus users are purchasing cheaper alternatives from Ebay in packs of 3 or 5 and using them as some sort of consumable.
Call me a fool but I'm not one to purchase cheap alternatives for a camera that I've spent good money on, so I personally took the plunge and purchased the EP-11 from Park Cameras. Part of the reasoning for this was that I was leading a photowalk in London on a sunny Saturday and the eye cup that comes with the E-M5 came off again but this time it broke (one of the parts that helps the eye cup clip (poorly) onto the E-M5 snapped). I used the E-M5 for much of that day without an eye cup. When we were near to Park Cameras I popped in and picked one up.
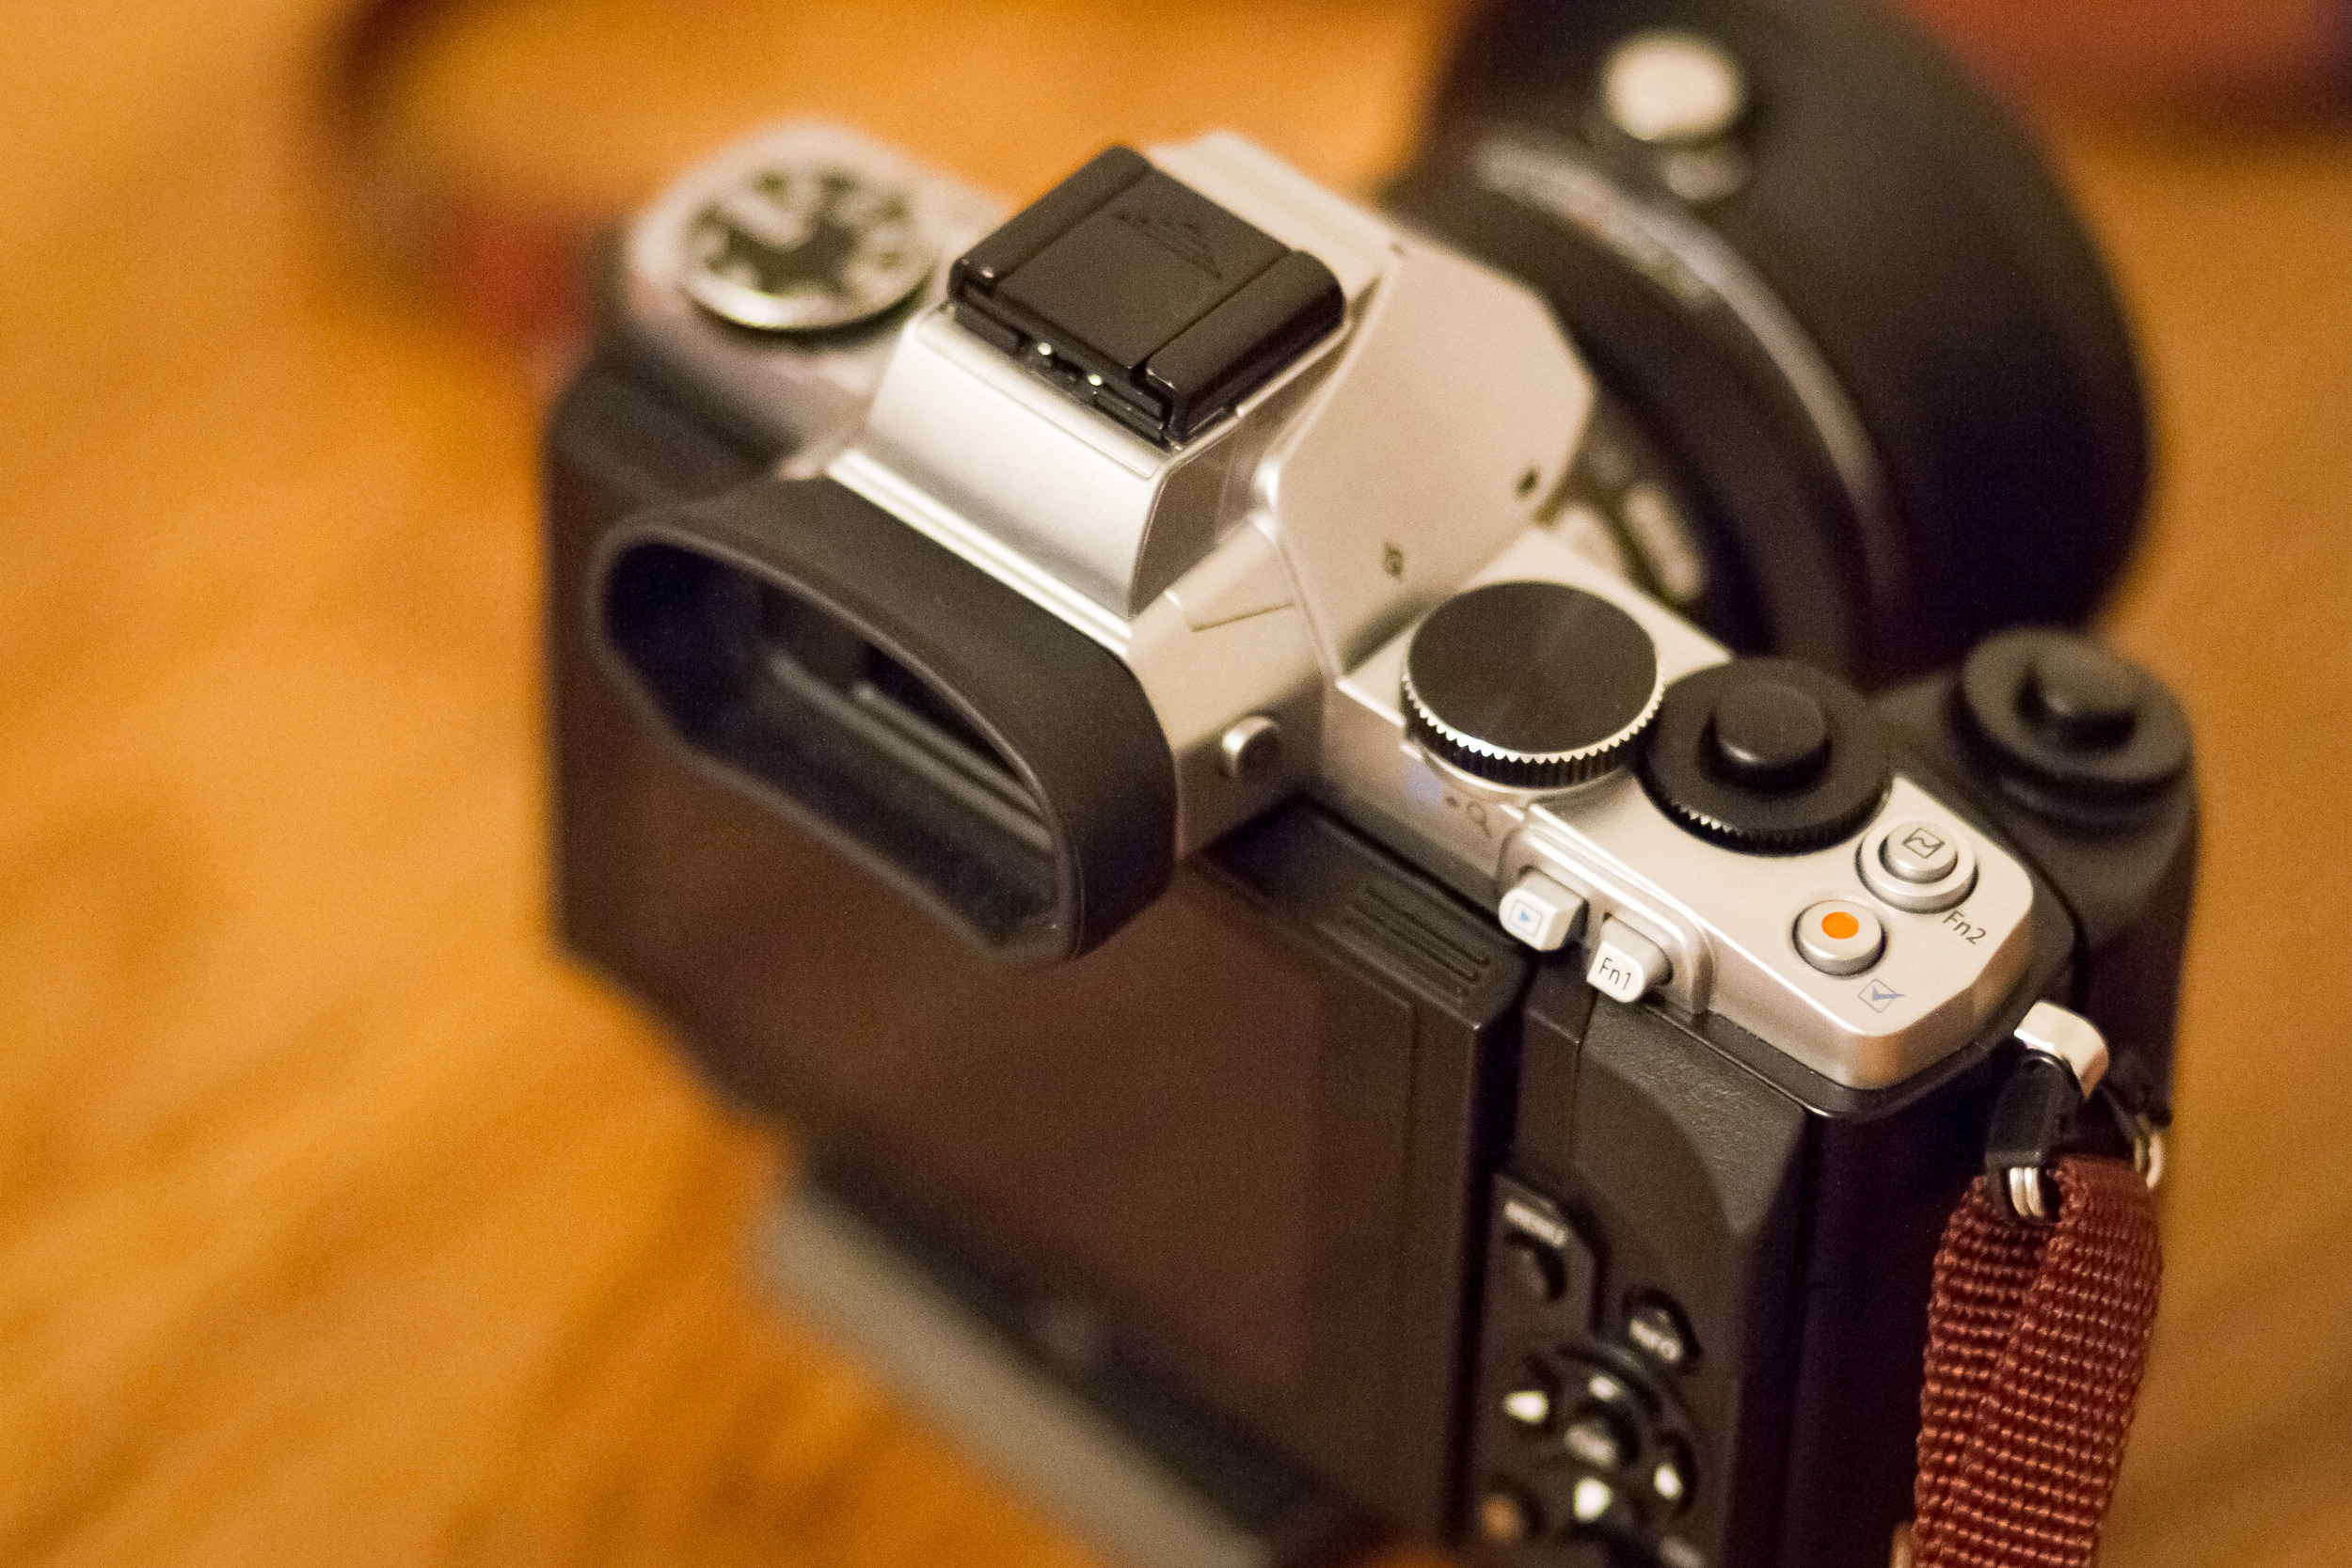
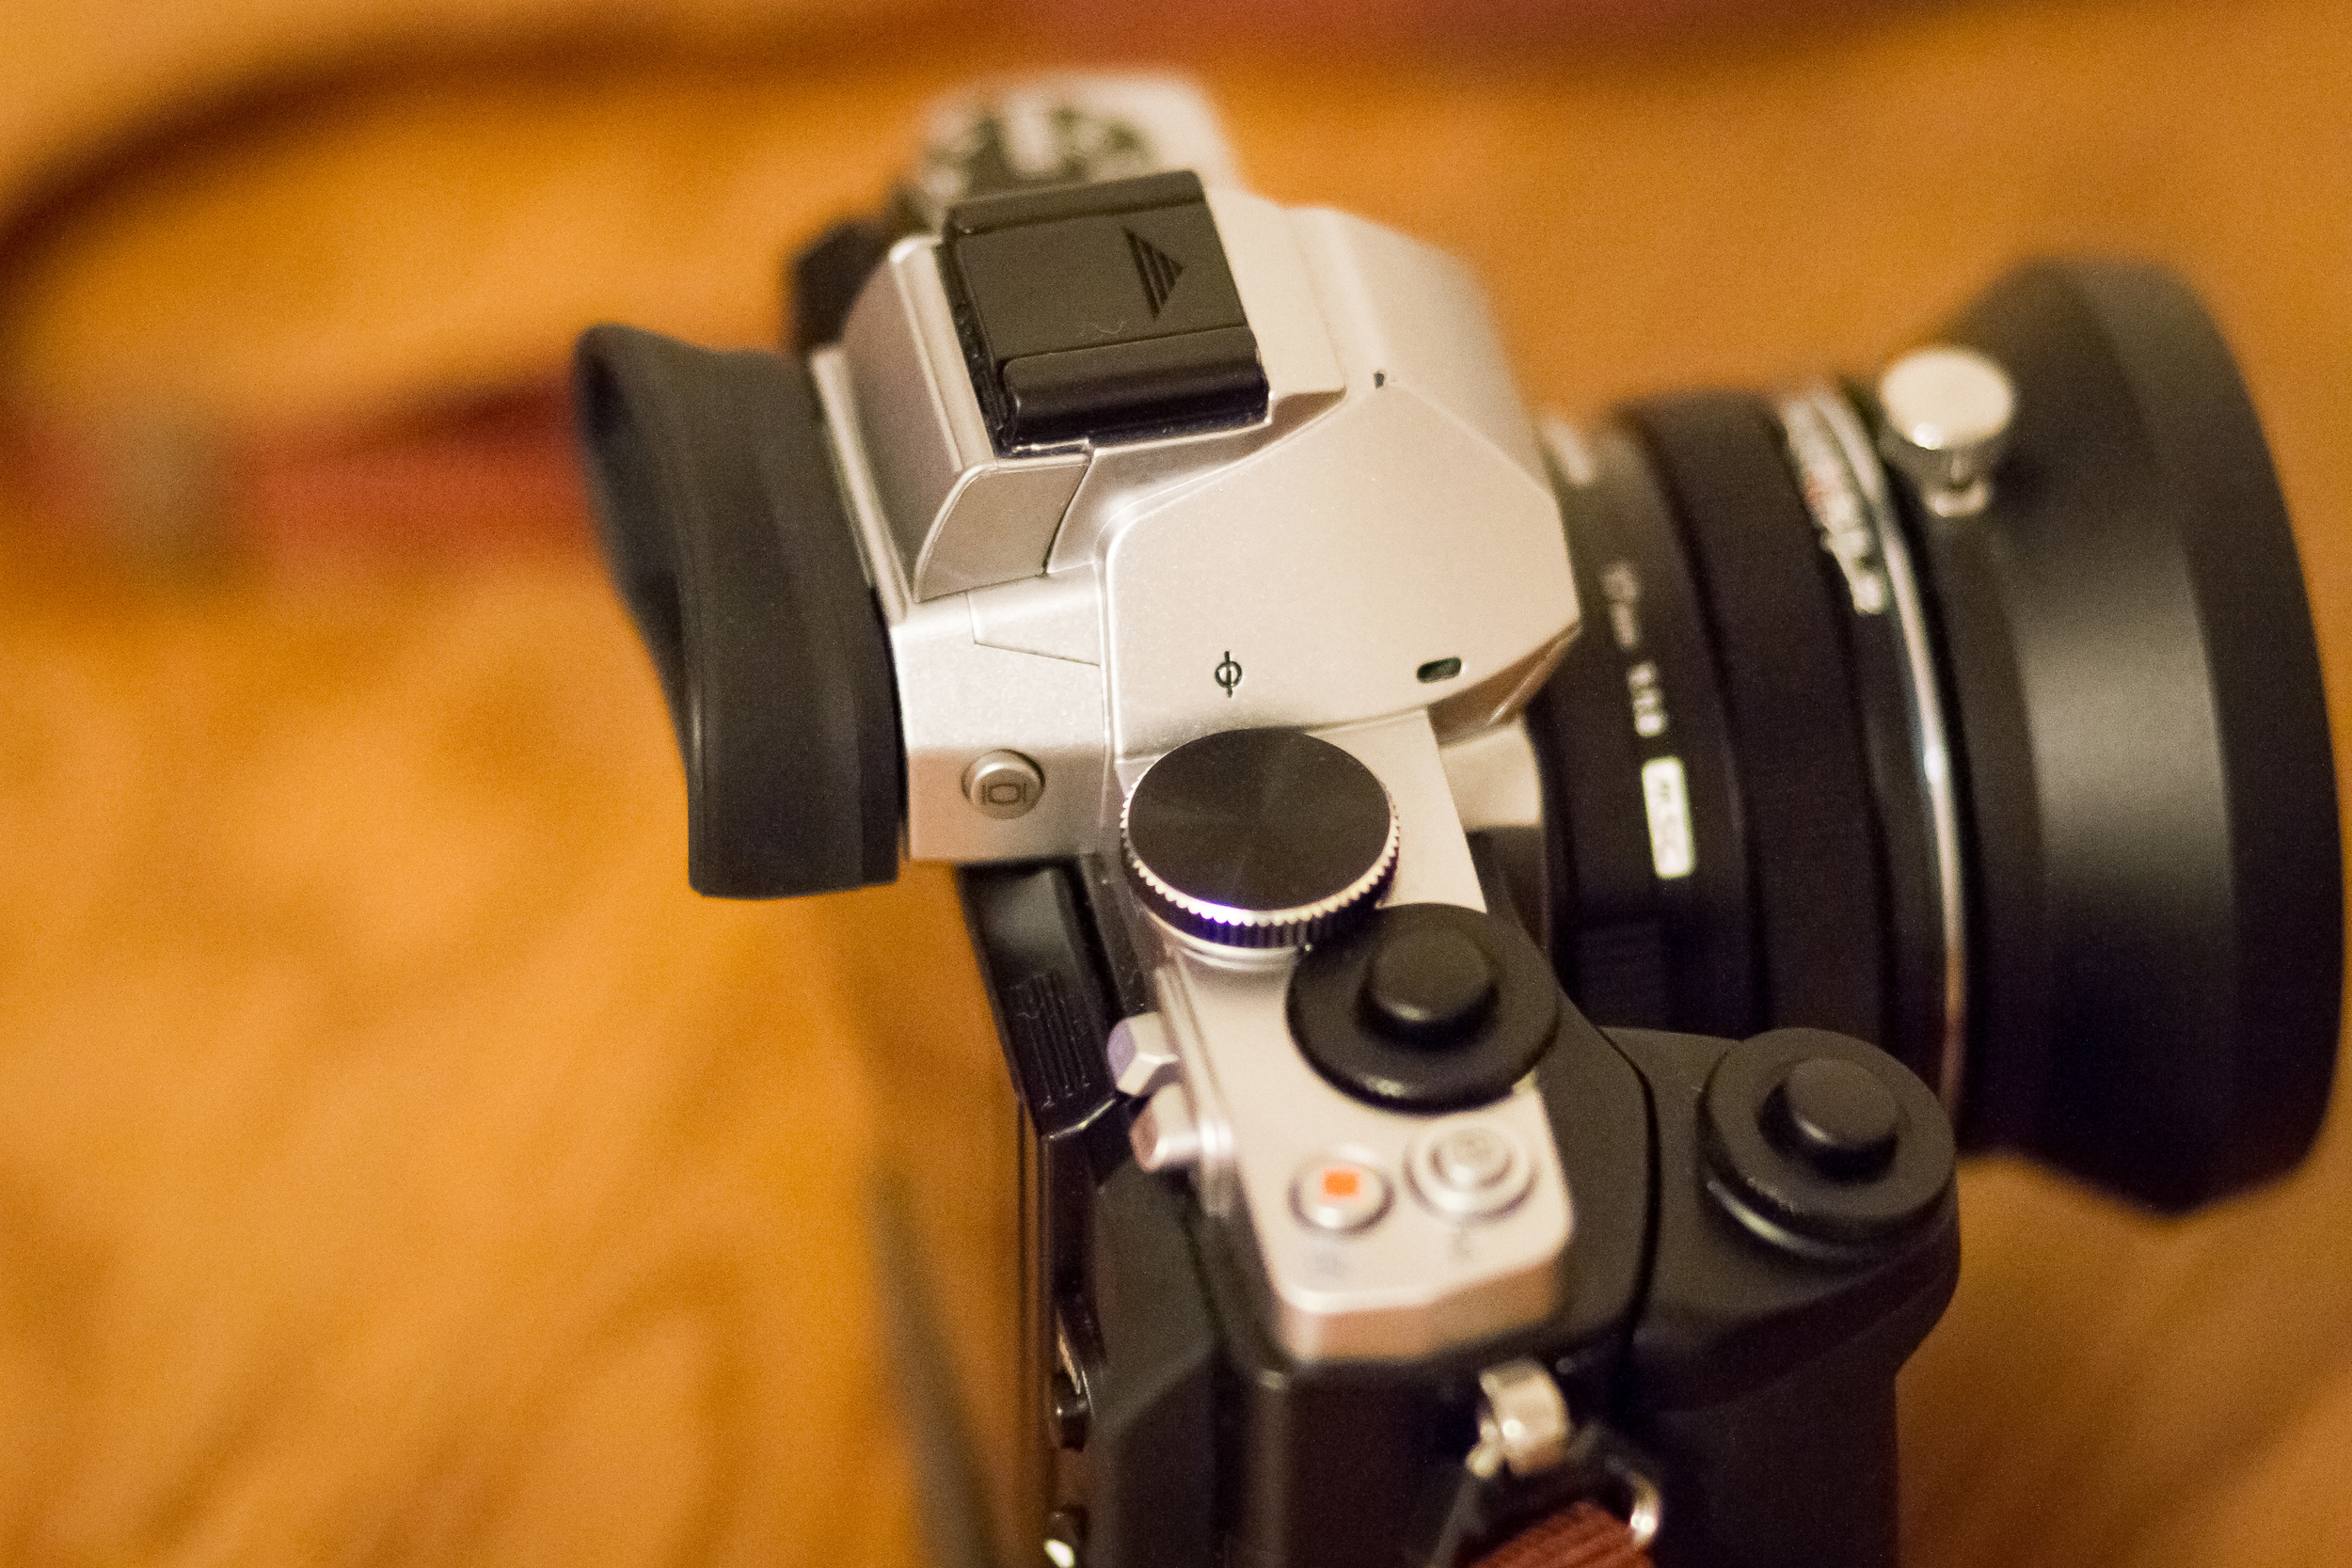
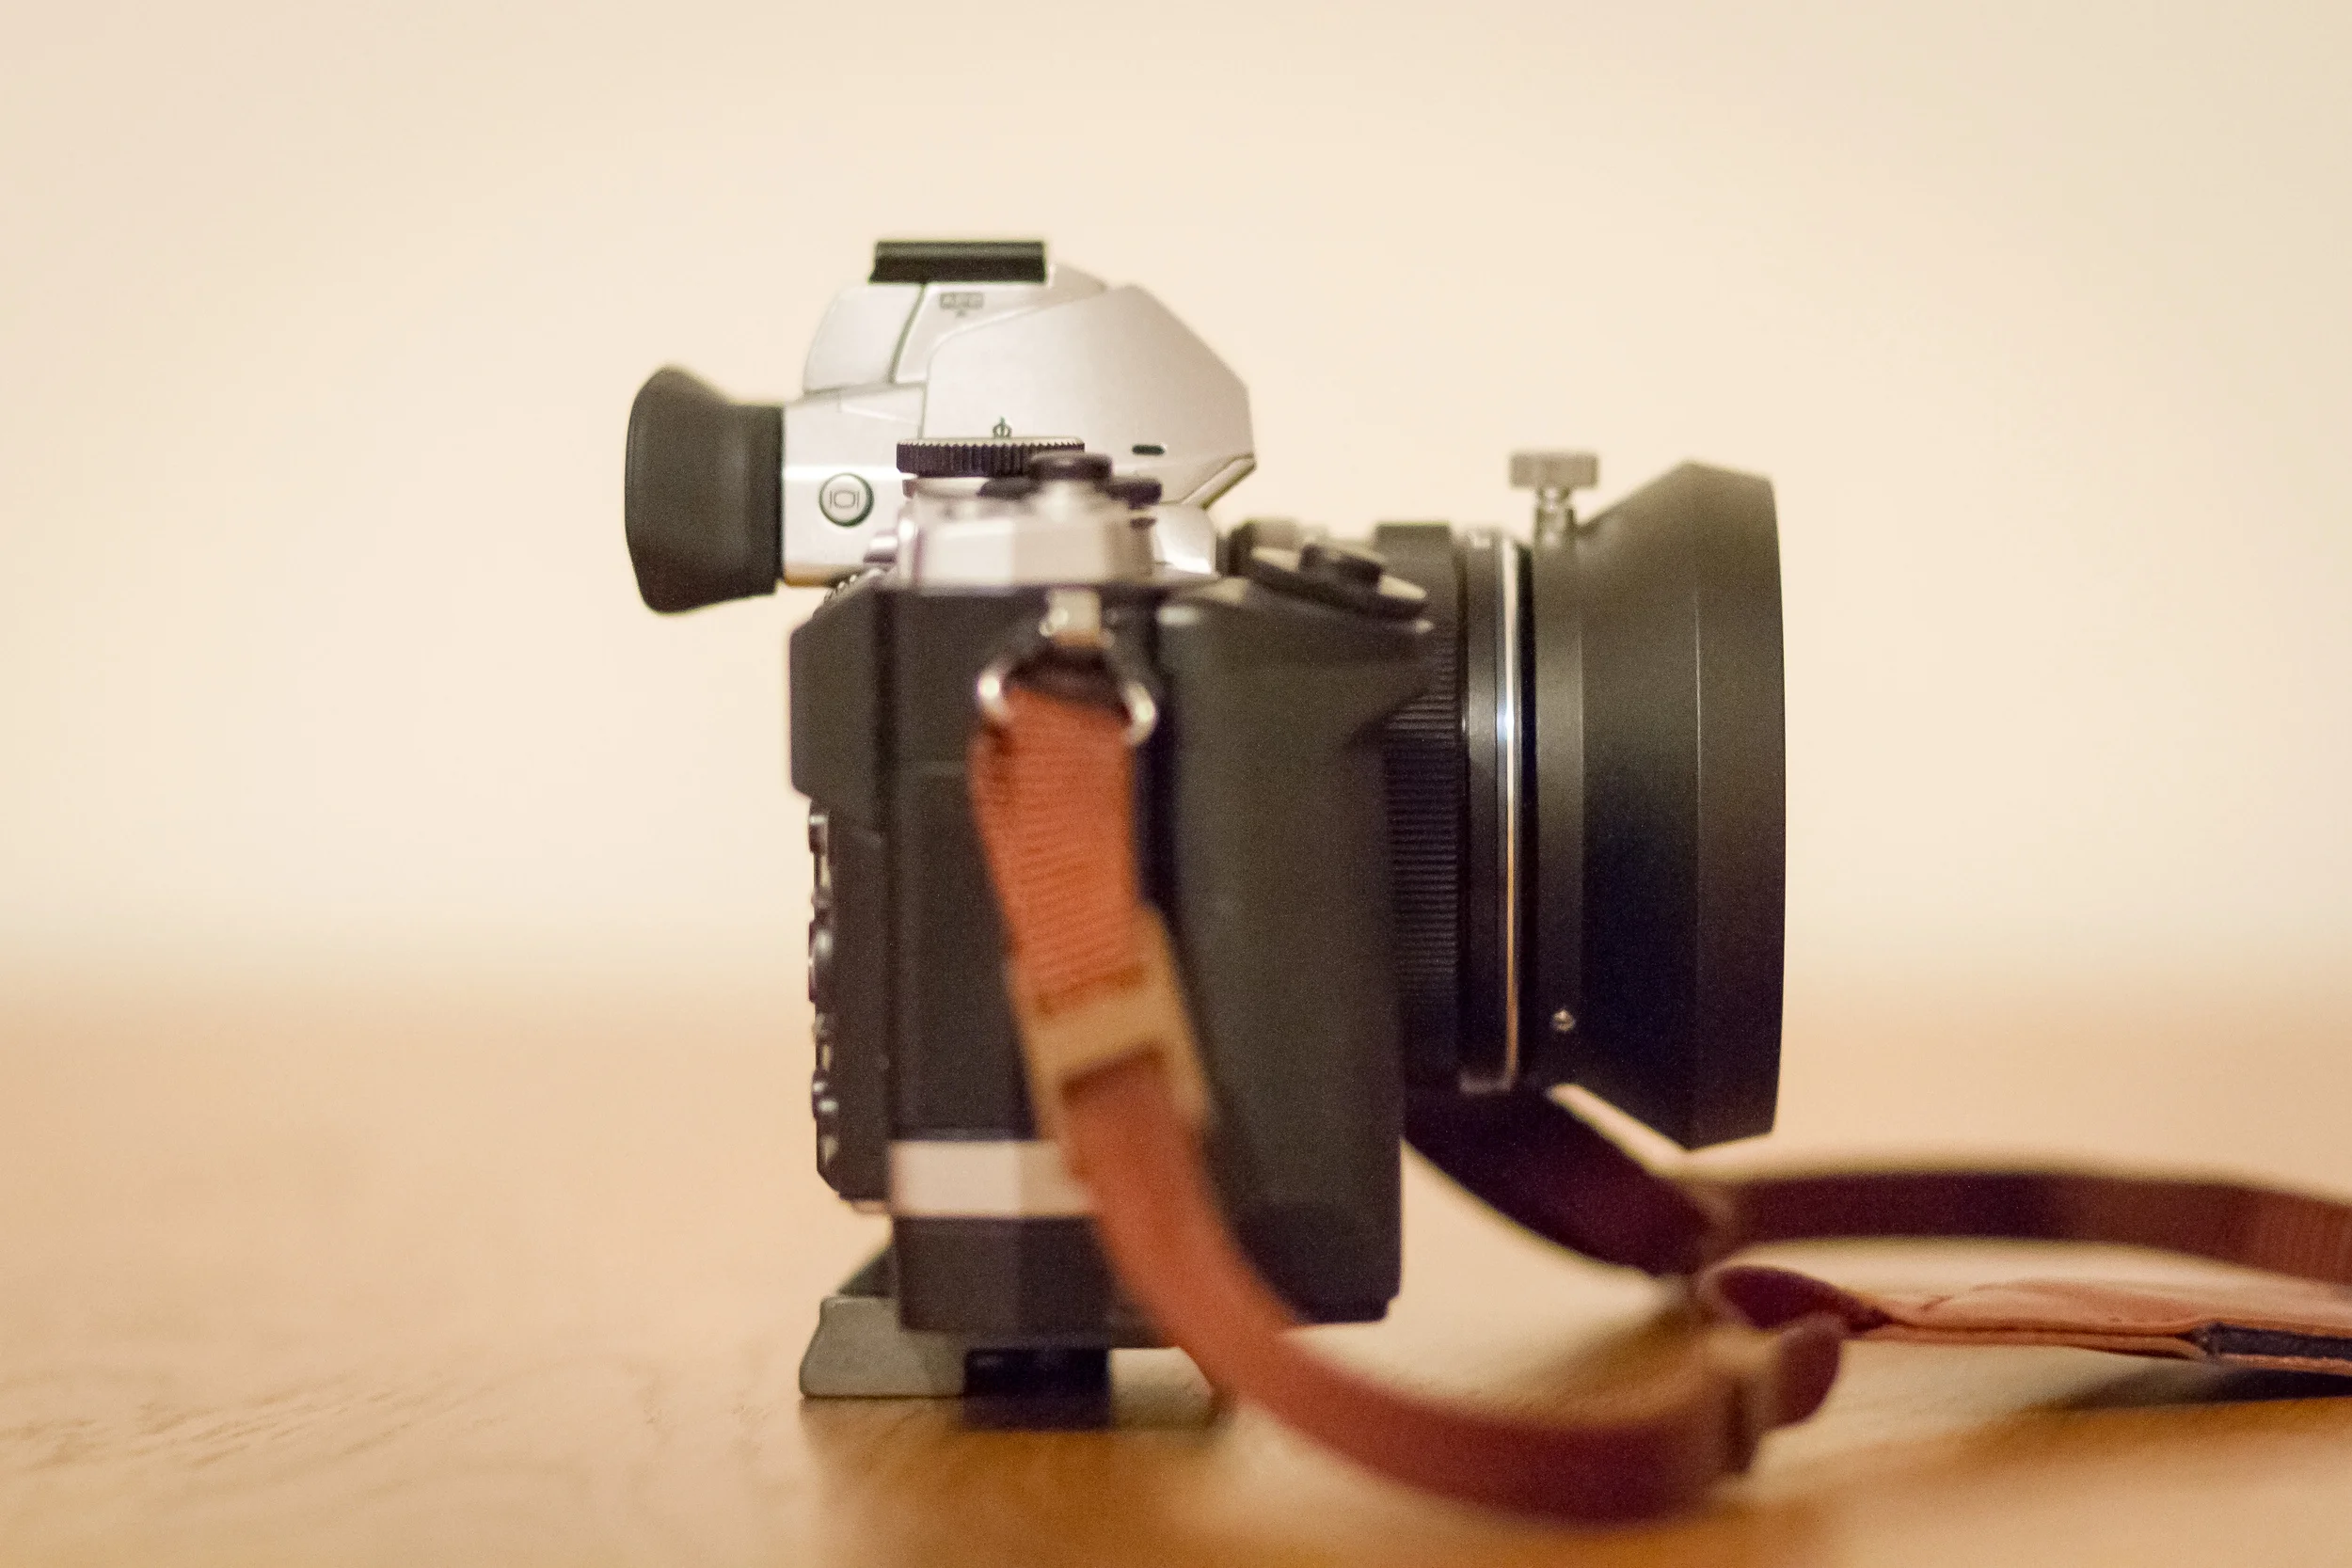
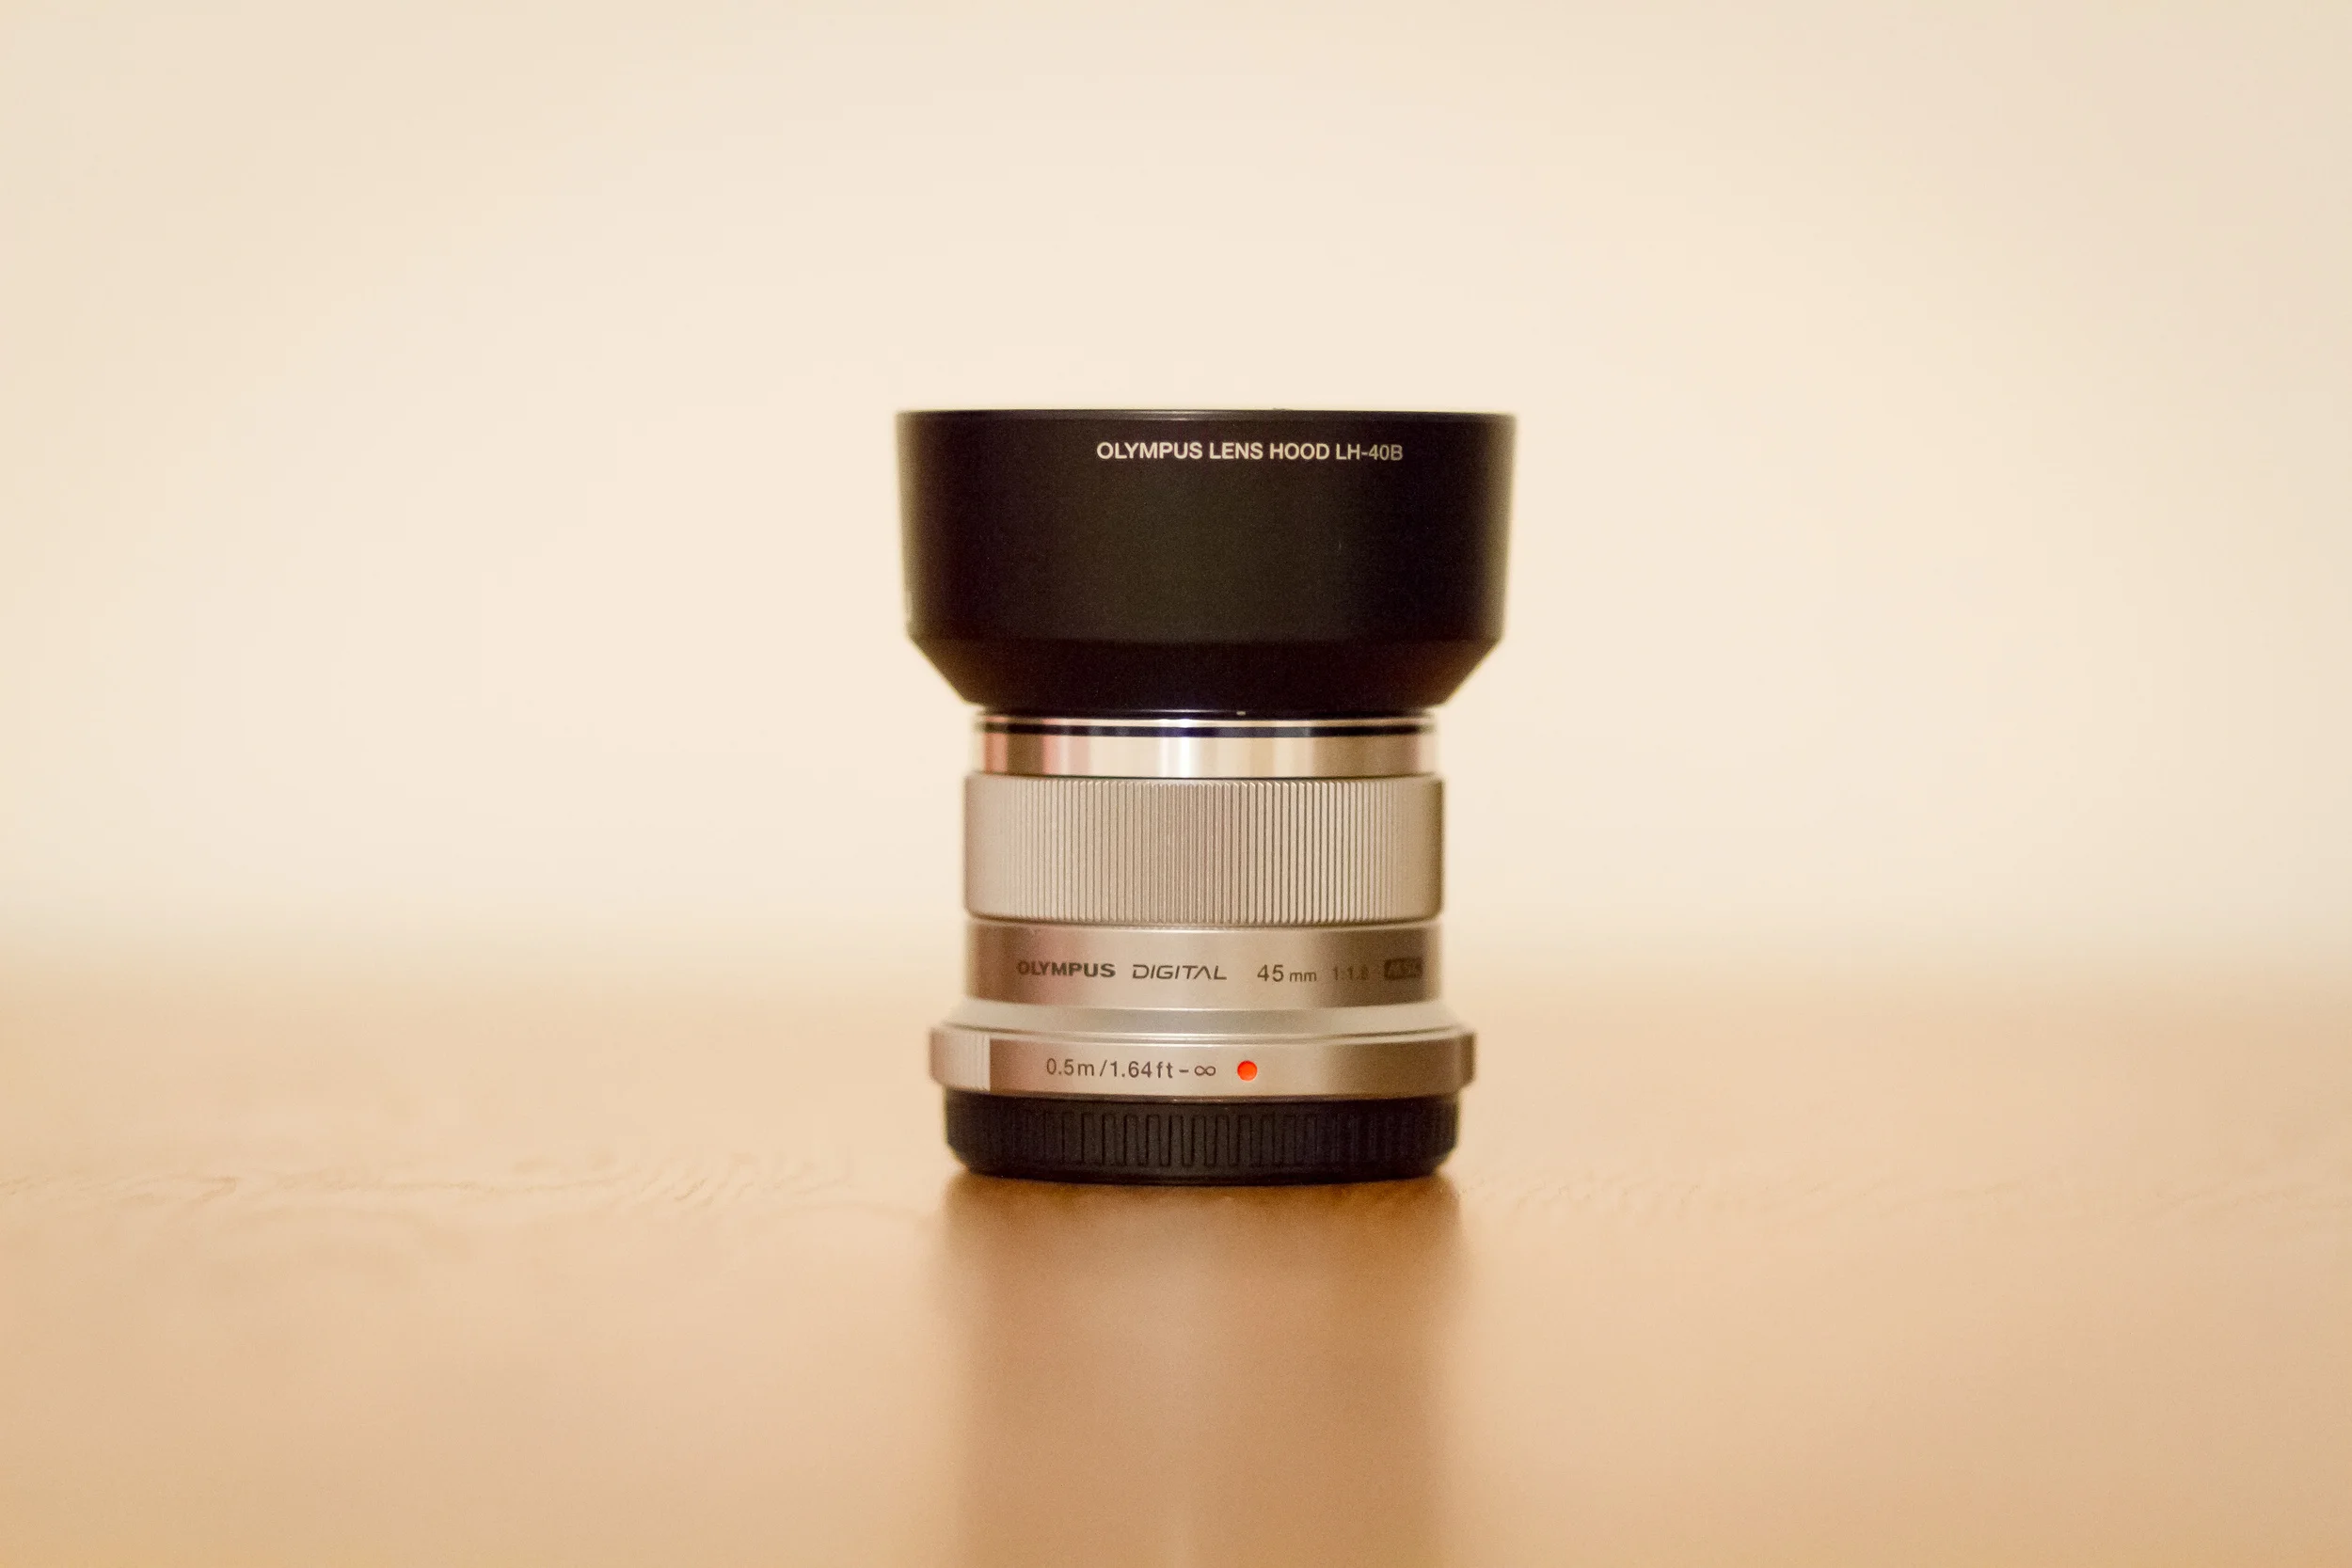
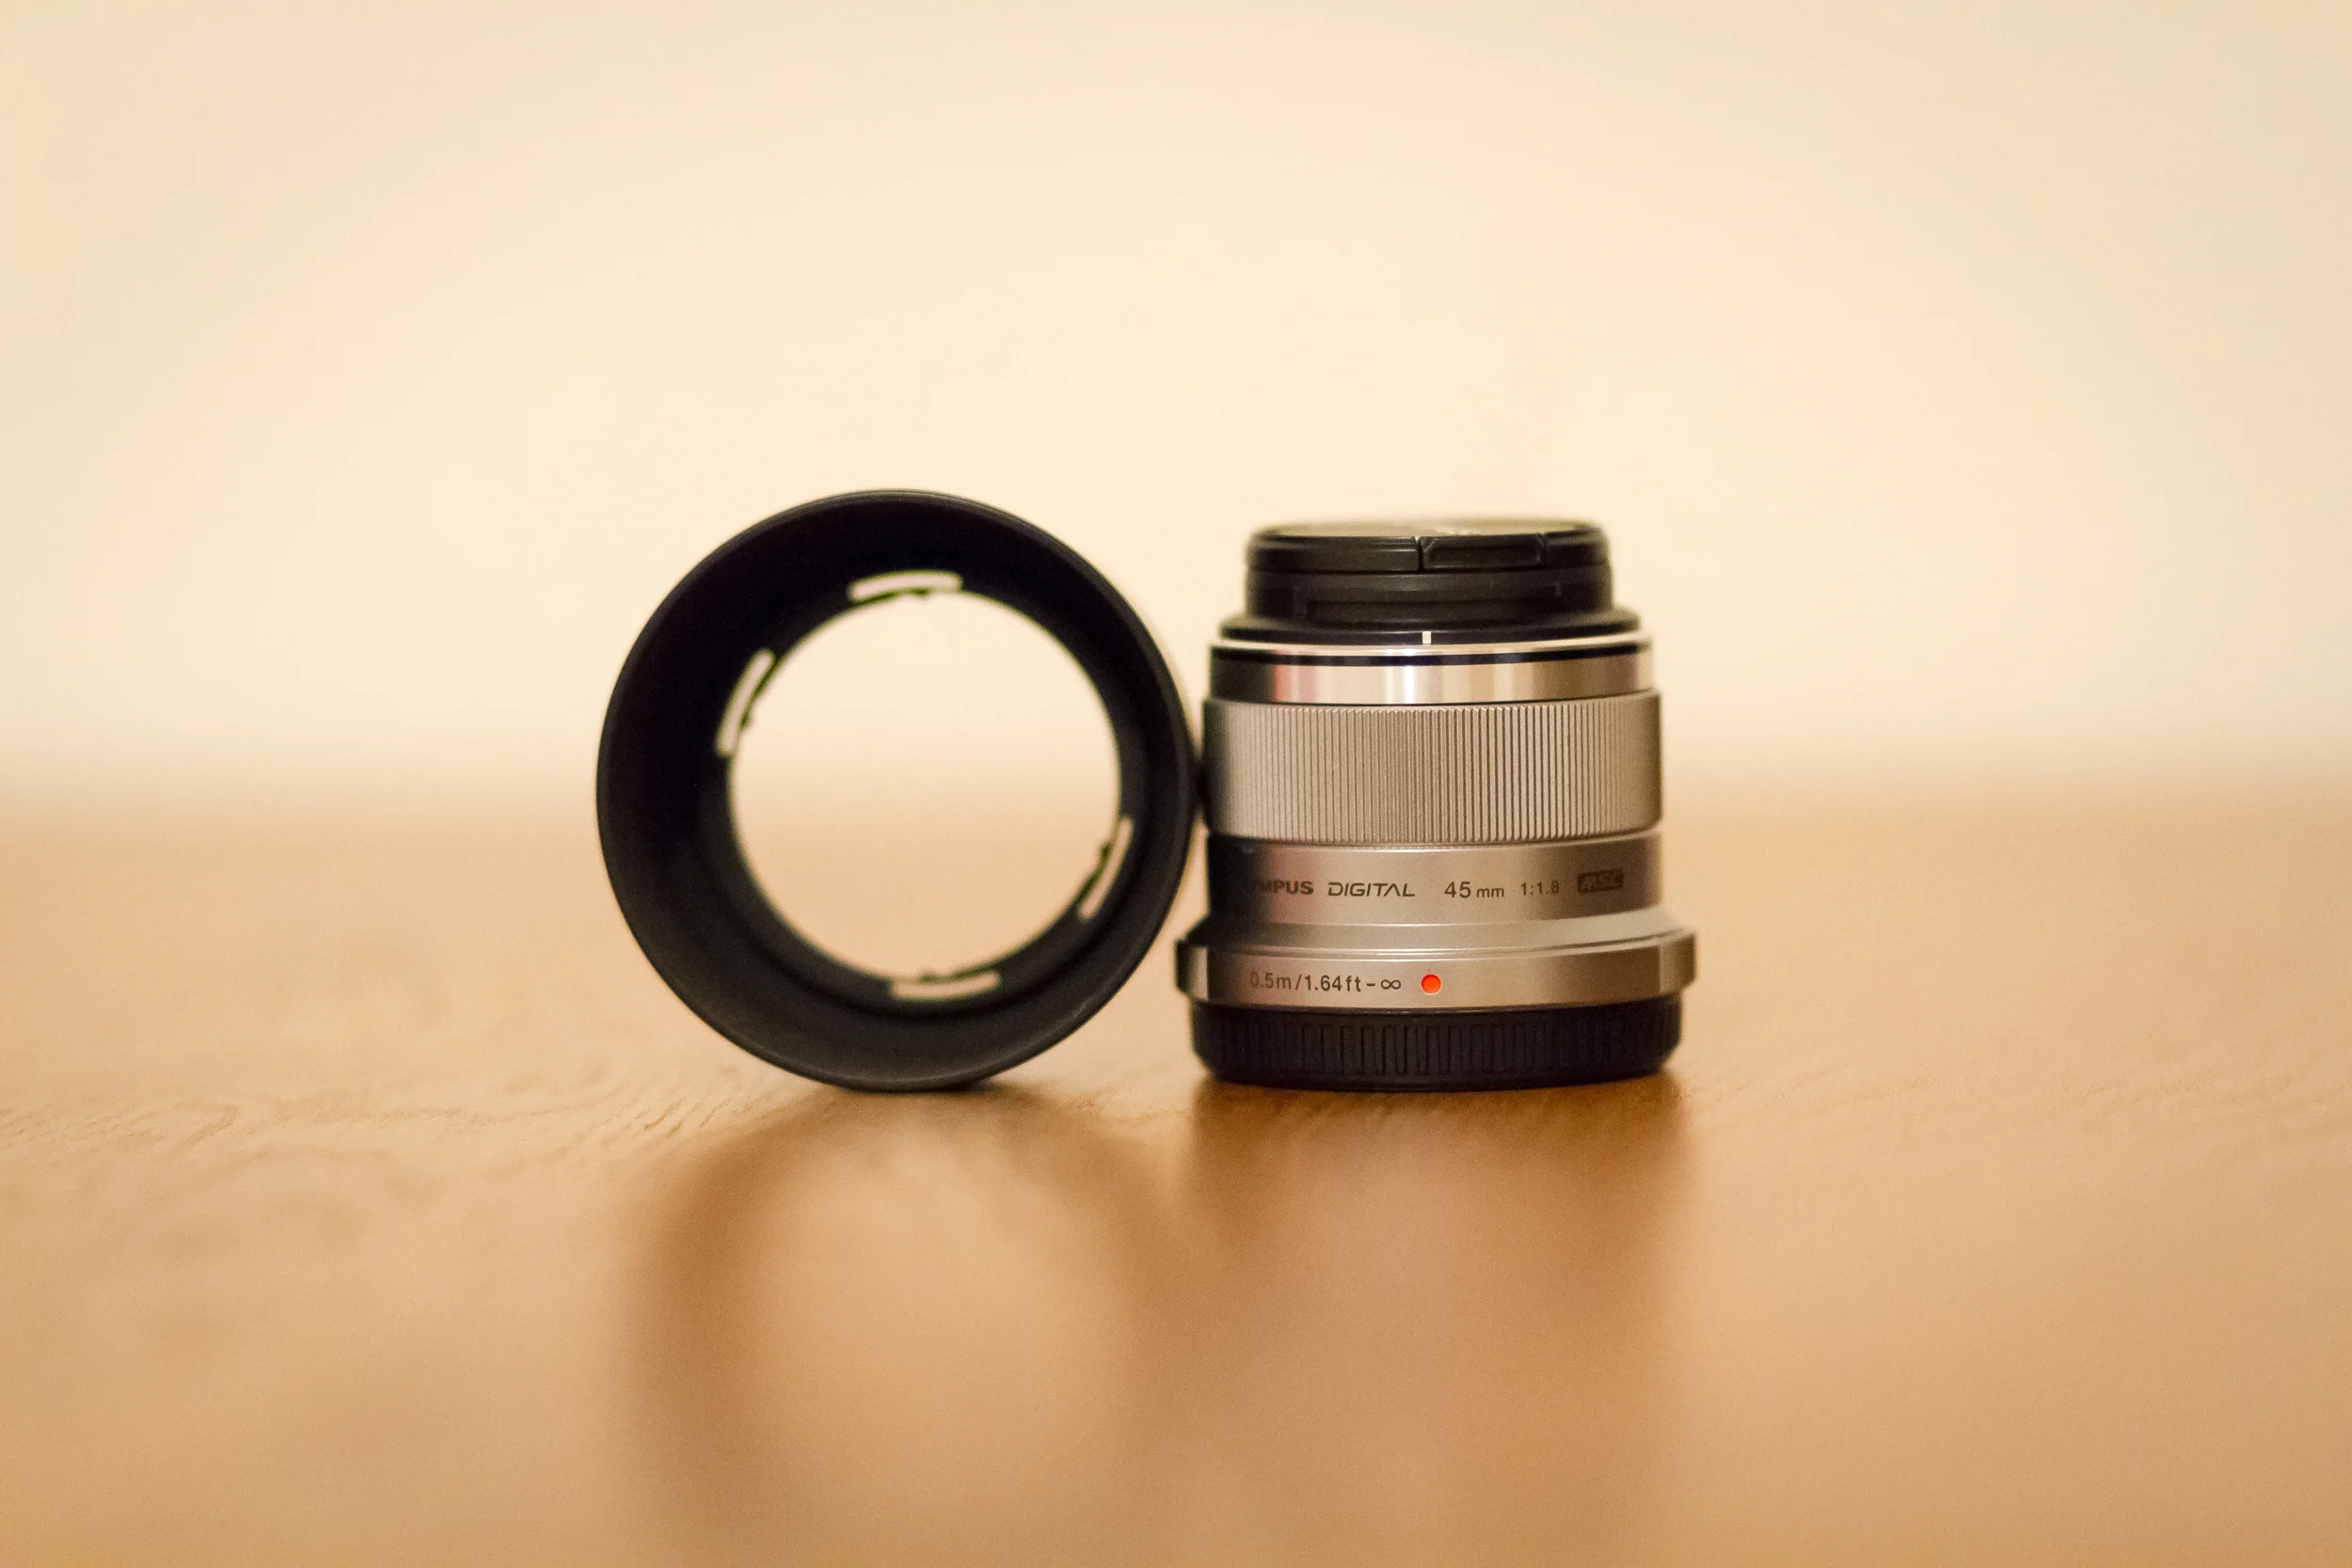
What I would say about the EP-11 that I bought though is that it's solid, doesn't come off and offers all the shade the factory eyecup should have offered. My advice here would be to start shipping the E-M5 with the much improved EP-11 and discontinue the EP-10. It's problematic. You'll have to go into a store to see why, or have a look on Google Image Search for the EP-11 to see the difference. I've included some shots of the EP-11 on the E-M5 right here:
(click to enlarge)
The price of the replacement eyecup conveniently brings me to my next gripe:
The Lack Of Lens Hoods
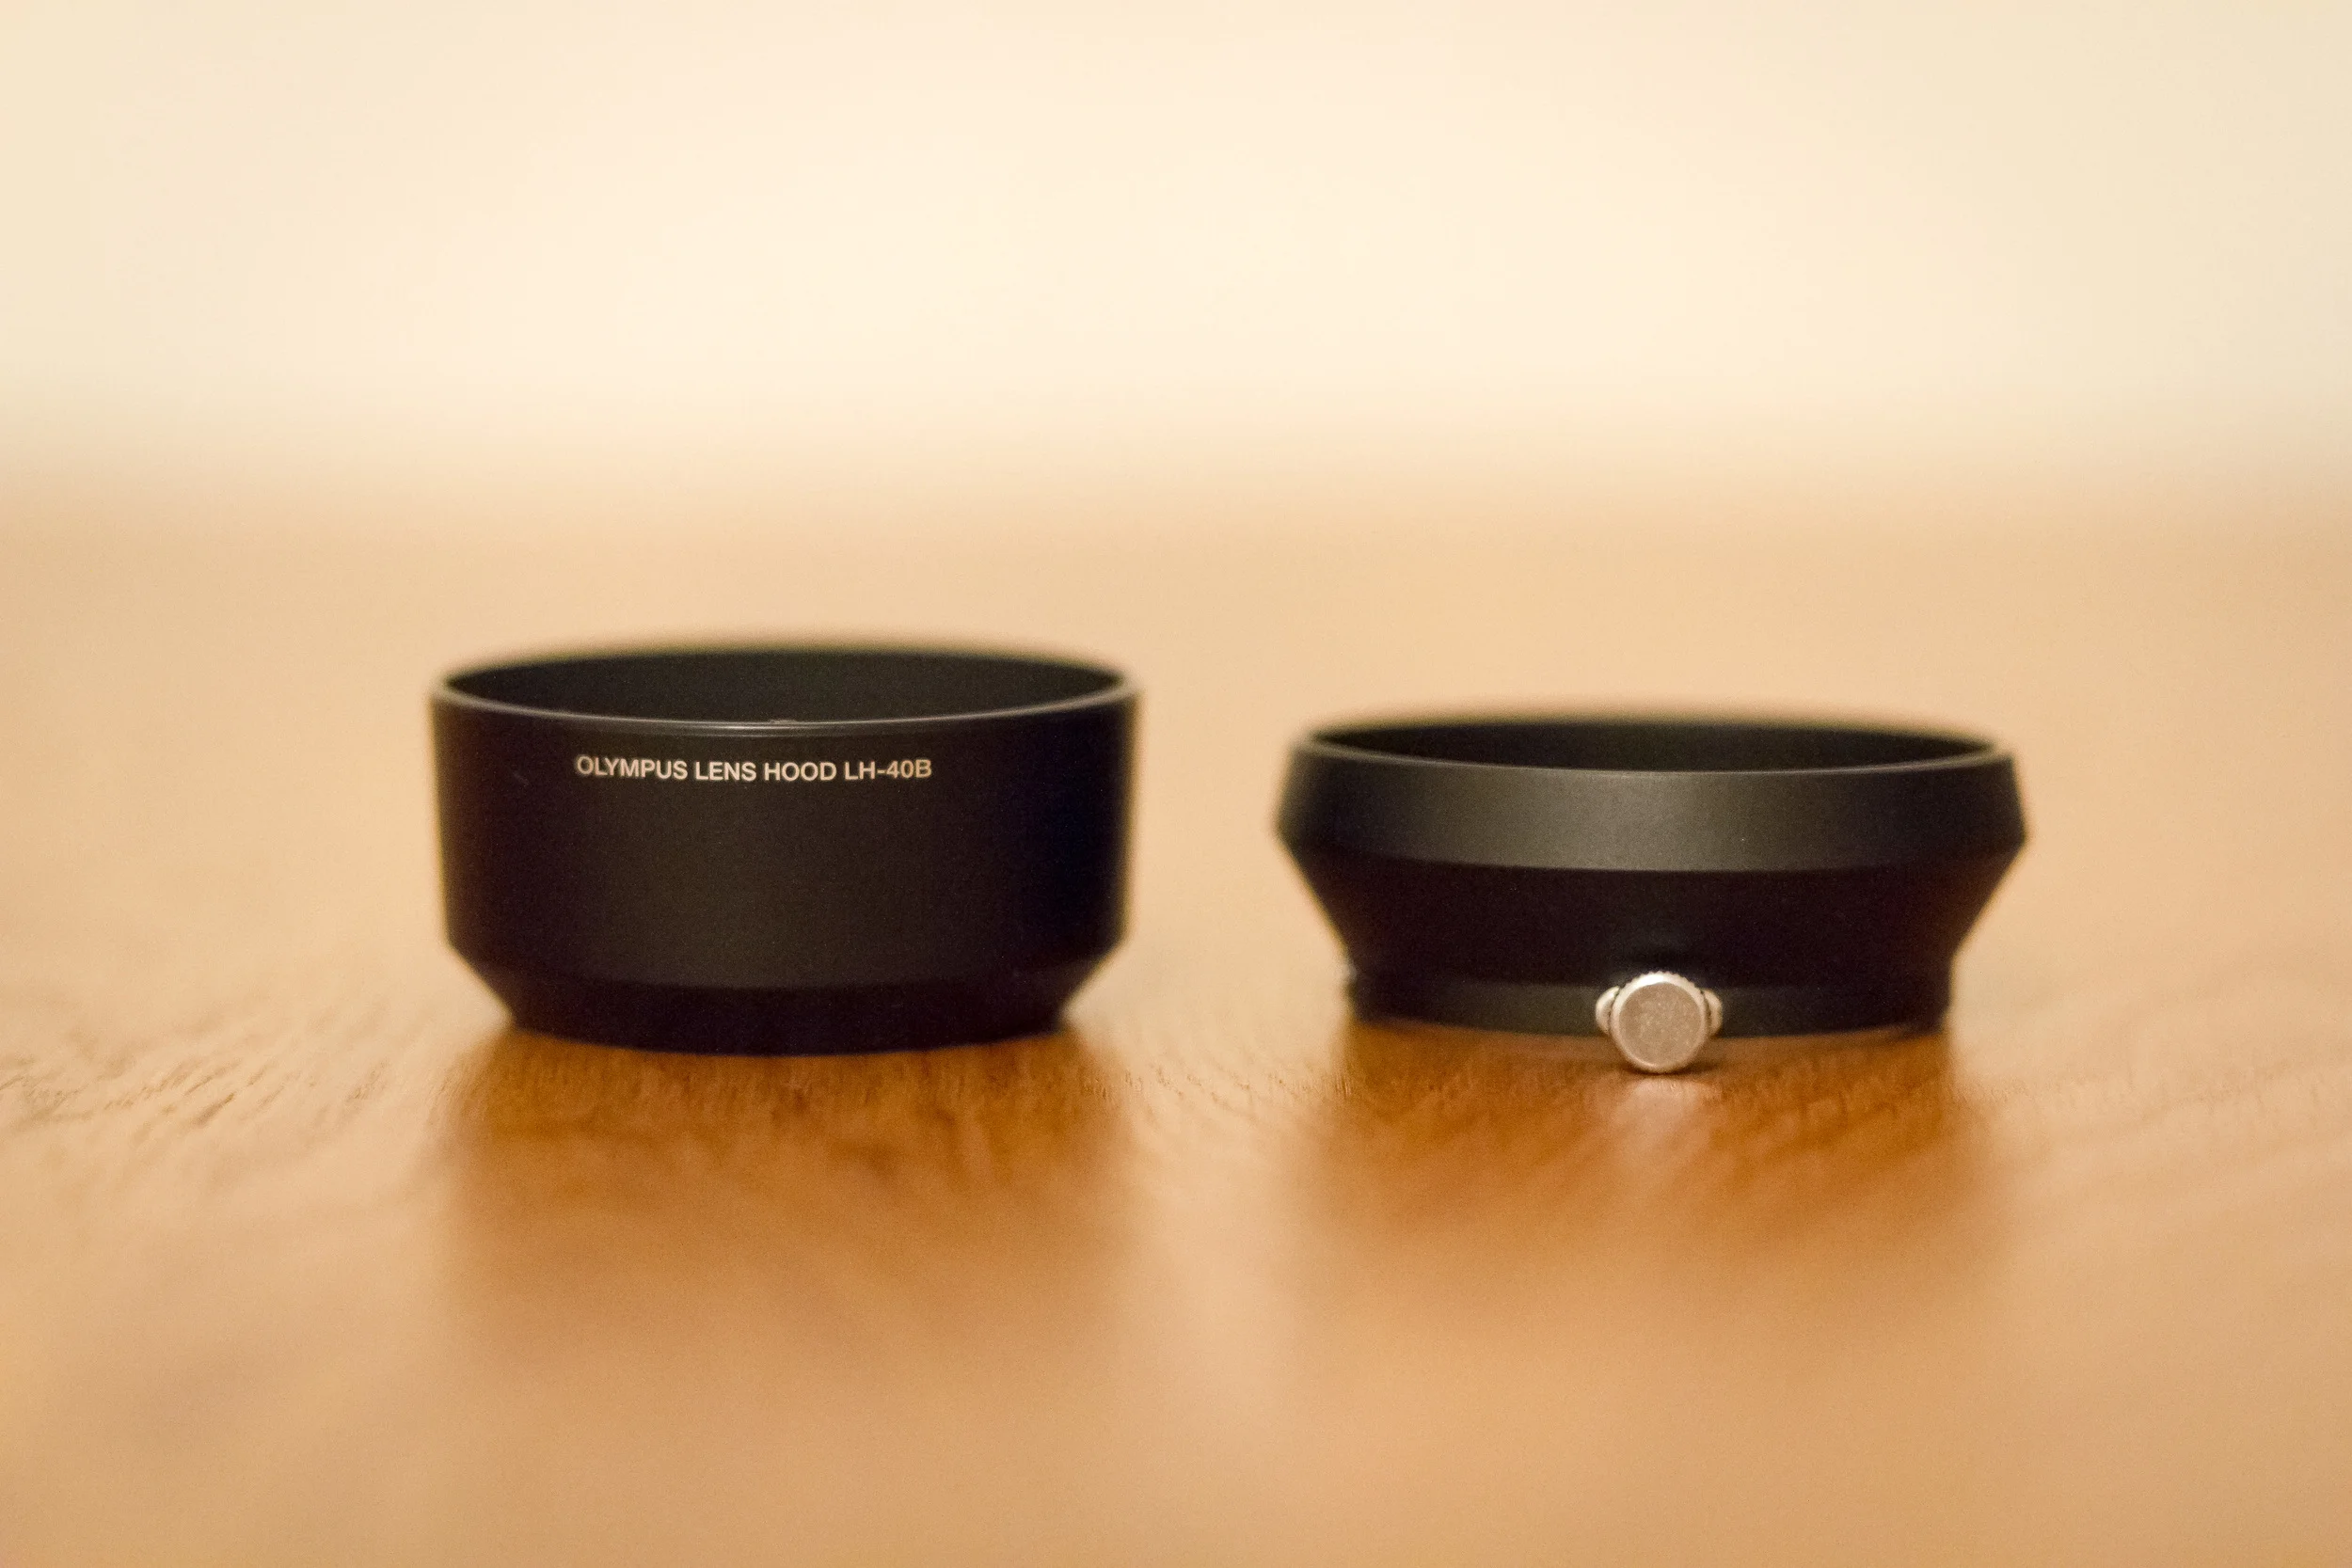
Okay, so this issue isn't actually an issue with the E-M5 as such, but it deserves a mention as I've spent a fair amount of money on lens hoods already, when really, given that the flange distance between the sensor and the rear element of the lens is much shorter than a DSLR, the E-M5 is quite susceptible to sun flare if you're shooting towards the sun. The official Olympus LH-40B Lens hood for the 45mm f/1.8 for example costs £29.99! (it's only a 7th of the price of the 45mm lens itself!) Again, like a fool in need I did actually purchase that official Olympus lens hood on the same day I picked up the replacement eyecup from Park Cameras.

For my 17mm f/1.8 however I picked up a lens hood from Amazon from popular cheap replica camera accessory maker JJC. I was a little reluctant as I genuinely didn't want to ruin the actual aesthetics of the E-M5. Call me vein, but it is a marvellous looking camera and I didn't want to put something nasty and tacky on the end of the lens. However, I was pleasantly surprised: the JJC lens hood that I purchased for a grand total of £6 is actually all-metal and has a brilliant screw mechanism that you hand tighten onto the end of the 17mm f/1.8. It actually looks better than the official Olympus lens hood. It's superb!
My plea here to Olympus would be to suggest that lens hoods are either included with the lenses (given that on an MFT camera they actually are more necessary than on most other cameras) or, alternatively at very least make them reasonably priced thus encouraging us to at least purchase a genuine Olympus Hood instead of looking to other companies. Lowering the price of the lens hoods may actually make Olympus more money.
I understand that the Pro lenses coming out (following the splendid 12-40 f/2.8 Pro) will have lens hoods included. Smart move Olympus, but please extend the same courtesy to the rest of the M.Zuiko lenses!
Button Size, Feel and Position
Generally speaking I'm happy with the number of buttons, their positioning and the quality of them, however, a couple of the buttons could have been more intelligently thought about to make them easier to use.
I've turned off the review photograph option meaning that I don't get to see the photograph I just made automatically appear on the back of the LCD for a few seconds just after I've pressed the shutter. It stops me chimping and lets me continue shooting (it also saves battery). However, when I'm leading a photo walk of 5 - 15 people at one time it's often handy to press that play button to then show others the back of my camera to demonstrate what I have just photographed. However, I find the pressing of the play button to be an adventure all in itself. It's in the correct position - I'm happy with that - but actually pushing the button can be a challenge as the screen and the play button are so close together and the button is in a sort of crease if you like, meaning you really have to give the button a poke to get it to work. I am often found pressing it a few times before my photographs actually appear on screen.
Looking at the new EM-10 that Olympus released this year it looks as though Olympus have spotted this (or received feedback from their groups) and made amends with the release of their entry-level OM-D offering. That's a good thing. A great thing in fact! But it would be nice for the play button to easier to press on the EM-5. It's not a deal breaker, just a minor inconvenience. I would imagine it would be a nightmare when wearing thick gloves!
The next buttons I would pick fault with on the E-M5 are the directional buttons. Again, for me personally their positioning is fine. However, they're a bit spongy. A bit soft. Rather than 'clicky' buttons they seem too soft under the finger to me. I'm being very pedantic here and I'll be honest the only reason I realised I was harbouring a little frustration with these buttons was after using an E-M1 for a short while on a photo shoot. Which I'll talk about shortly. I'm sometimes not sure if I've pressed it as I don't get a reassuring click when I press it. Again, I'm being very, very picky here.
The mode dial does not feature a dial lock, meaning it's easily knocked from Manual to Bulb or something different. This has been a frustration for me. The E-M1 fixes this. The E-M5 should have it too. Lets lock that mode dial into Manual mode!
The Battery Life
A problem not just with the EM-5, but with mirrorless cameras from other brands too. The battery life is like that of an iPhone: if you don't use it it's not awful. However, like me if you're out all day making photographs you're going to need some spare batteries. A few weeks back I was in London for the day only for the camera to flash the horrid 'Camera Low On Battery' warning sign after about 450 frames. (again, pretty much not looking at the screen). Having used DSLR's for so long the low battery indicator is something I've only really ever seen a handful of times in the past few years! However, because mirrorless cameras have the EVF you need to remember that it is effectively a tiny LCD screen, so with a DSLR you're looking through a mirror, which requires no power. This is not the case with the E-M5 and other mirrorless cameras.
One of the things I've done to preserve battery even more is to have the EVF auto-switch off and the live-view LCD off at all times, meaning my LCD doesn't display anything at all unless I press play, an option button or go into a menu. The EVF is also switched off until the moment I bring the camera up to my eye. The EVF is responsive enough so that by the time it's up at my eye it's on and showing me the screen (I love that about the E-M5). The idea with all of this is that unless I have the camera up to my face to make a photograph it's not doing anything.
In summary the battery life is just not good enough yet. Again, Olympus batteries are expensive, but unlike with the lens hood and the eyecup I have gone elsewhere in the market to source my spares. With the Olympus official battery being in the region of £50 and other brands being £10 it made sense to me to go for something else, particularly seeing how often I would need to change batteries.
I would reiterate though that other manufacturers mirrorless offerings are also failing on this as well. DSLR's solved their battery issues a long time ago: I can make 1,500 shots on my Canon before needing to change batteries.
Also, the more you use the camera the better you'll get at preserving battery: you'll spend less time in the menus and reviewing photographs and more time shooting.
The Electronic Viewfinder
The EVF is wonderful. There is no doubt. It's refresh rate is sublime so you simply do not get any of that lag that you had with some of the earlier mirrorless cameras from other manufacturers. What I particularly love about the viewfinder is the information overlay you can have - the live histogram, live shadow and highlight clipping and more. And of course the what you see is what you get feel. It just makes sense. Going back to a DSLR pentaprism viewfinder now feels odd to me! But, again, having seen the viewfinder in the X-T1 from Fuji and the Olympus EM-1 I am left with EVFE - Electronic View Finder Envy! I do love the EVF on the EM-5, it's excellent, but compared to the E-M1 I feel very much like that's how it should be. It's perhaps a little unfair of me to say that I prefer the EVF of another camera and mention that in this review, but the reason I have to mention this is because the EVF in the E-M5 just isn't quite as good as those others. That doesn't mean it's bad, in fact it's excellent. But this is reason I am going against what I said in my initial review of the E-M5 and will be upgrading to the E-M1 in a few weeks time from now. (Again, we'll come to the E-M1 in the summary)
The In-Body 5-axis Stabilisation
The stabilisation in the Olympus was what sealed the deal for me. It pushed me from 'Mmmmm' to 'Oh Wow'. Nothing has changed. The stabilisation in this camera is immense. You may have heard others mentioning the stabilisation before, but you have to feel it and see it to believe it.
DSLR manufacturers have in the past tried to implement in-body stabilisation, but without any great degree of success. Olympus have however worked their magic and put together a stabilisation system that doesn't just work, I'd say it's as effective as the IS in my Canon 70-200 f/2.8 IS USM II (£1,600 worth of lens!).
But the benefits of in-body stabilisation don't stop there. Of course, having this feature built into the body, rather than into the lens, means that the lenses themselves need only contain glass and any focussing motors. Which means they can be tiny (really tiny!) light weight and left to do just one job: let light through the glass with as little distortion and refraction as possible. Olympus lenses win here time and time again. Thanks largely in part to the stabilisation. I can't fault Olympus at all when it comes to lenses for the O-MD's. Wonderful.
Lack of Focus Peaking
Again, another feature that I wish the E-M5 had is focus peaking. It may seem odd to some to need focus peaking with auto focussing lenses (that also happen to focus rocket-fast!) But, there are so many incredible lenses available for Micro Four Thirds and not all of them from Panasonic or Olympus. You can also use a wonderful series of mounts and adaptors, but as is often the case with these things you can often lose the auto focus feature. With a DSLR and someone not so seasoned in auto focussing this may be an issue, but if there was focus peaking on the EM-5 you would be able to attach a stellar piece of glass and use manual focus to ensure perfect, tac-sharp crispness.
I spent some time with Neil Buchan-Grant in early June and Neil uses a selection of older lenses (including some amazing Leica lenses) that do not feature auto focus. With focus peaking on his E-M1 that just isn't an issue though. In fact, it revolutionises manual focus entirely! It's a shame it doesn't feature on the E-M5.
I'm very hopeful it will be delivered in a Firmware update.
Focus Tracking
Focus tracking is average at best, but fine in good light. As I mentioned in my initial review the E-M5 contains only contrast detect, not phase detect, meaning it looks for the contrast in a scene. Maybe I'm asking for too much from this little camera, but I would love it if the focus tracking were just that little bit better, whether that means the inclusion of phase detect I don't know, but it would certainly go someway to plugging that now awkward gap between the E-M10 and E-M5. The E-M10 seems a capable camera, featuring many things the E-M5 does not, almost diminishing the value of the E-M5 somewhat. Then again, the E-M5 features some things that a photographer such as myself is more concerned about (weather resistance, 5 axis stabilisation). The 3 models of camera do sit nicely in a podium formation (1st: E-M1. 2nd E-M5 and 3rd: EM-10) but there are some blurring of the lines between the three cameras.
Enough of the negatives
Okay, so I've been pretty harsh on Olympus and the E-M5 so far, but don't get me wrong I still adore this camera. It's still my go to camera for most of what I shoot. That's probably why I've been so critical of it. I want it to be better.
As you may have realised I haven't really said much about the ability of the camera to make photographs in terms of the quality it's capable of producing, but that's mainly because I can't fault it. Sure, the ISO is fine up to 3200 and beyond that it's a bit of a stretch in low light conditions, but really, the files I am getting out of my E-M5 are wonderful. It's often why I prefer to pick it up instead of the Canon. When it comes to post-processing at the end of a shoot I enjoy looking at the Olympus files much more!
Let's talk about the technical side of things in more detail:
White Balance
With my Canon DSLR it was pretty decent at picking the correct white balance if set to auto. It's something I did occasionally. However, if I was shooting a wedding or a portrait the AWB on the Canon 7D would sometimes be a little off the mark and choose a balance that would make the scene either rather blue or a little too warm. Whilst this isn't really a massive issue as it can 'Just be fixed in Photoshop' as people like to say; it all adds time to the post processing work flow. With the E-M5 I've only had it off of Auto White Balance a a couple of times. It really does nail white balance 99% of the time. I don't know what voodoo Olympus have done here, but it works better than any other system I've used. If you're thinking of picking up an E-M5 rest assured white balance issues are basically a thing of the past.
Tolerant Files
I've said it before and I'll say it again: I don't know what it is about the files that come out of the Olympus Cameras, but they're superb! I've found that they can really take a beating in Lightroom. Not that I over-process (I don't think) but the files don't suffer from halo's, they can take the highlights being reduced dramatically and the shadows being given a little boost without much or any damage to the pixels at all. It seems to me that Olympus truly have found a balance between the quality of the pixels and the number of pixels with their MFT sensors.
Sharp As Hell
One thing I've also realised with the Olympus OM-D E-M5 is that I'm able to produce photographs sharper than I ever have from a DSLR. I know this is as much to do with the lenses, but with the 45mm and the 17mm (both f/1.8) they're incredibly sharp
Responsiveness
Again, something I was a bit concerned about when people started talking seriously about mirrorless cameras for the first time a couple of years back was how that you were forced to slow down with your shooting. With some of the Fuji's in particular. With the Olympus it's not a problem. The dials all spin and rotate to infinity (they'll keep spinning and spinning) and the auto focus is incredible. I don't feel limited, restricted or let down by how fast this camera responds at all. Now, that said slowing down can be a valuable reminder of what you're doing, but for me I'm more concerned about missing a shot.
The only negative to speak of here is that I have found if you're going from one extreme to the other, such as reducing shutter speed from 1/2000th to 1/80th (perhaps you've gone from outside to inside); rapidly rolling the dials is perfectly possible, but the on-screen reading of shutter speed is a step behind it seems. This sounds odd, so I'll try to explain: with a Canon DSLR you can spin the wheels and dials in any direction to change the settings: aperture, ISO & shutter etc. The moment that wheel or dial rotates and clicks into the next position the corresponding setting in the Viewfinder has changed - further more no matter how fast you change settings you can see them changing instantly.
With the Olympus, if you scroll quickly you'll find that you can go from 1/2000th to 1/500th and not see the shutter speeds in between as the camera doesn't seem to update as quickly.
This is a minor thing, but I would just like these settings to change a bit more promptly, in-time with the clicks of the dials I'm spinning. This is me being hyper critical.
Build Quality
Something I was really impressed with first time round when I first wrote a review of this camera was the build quality. Part of me worries a little that something may eventually start to wear or tear, but so far, after heavy use in different conditions I can honestly say it is still built incredibly well.
If you've read my first review, or even part of it, you'll notice that the first thing I mentioned was the build quality and that was because I was so impressed with it. Olympus have done a marvellous job of making the E-M5 feel solid and well built.
Even today, after extensive use the camera doesn't feel like something is about to fall off and non of the colour is wearing from any part of the camera. To give you an idea of the use I'm getting from the E-M5: I take it everywhere with me: every day to work in my bag everywhere at weekends in the camera bag or in the kids changing bag, 2 trips to Boston and back, and a number of times on the beach - sometimes hot, sometimes cold, wet and windy.
The build quality scores a full 10 out of 10. Well done Olymus.
Black and Whites
One thing I'd like to give a special mention to is the black and white photographs I'm producing with the E-M5. I've already spoken about how tolerant the files are in post processing, but the files go to a whole new level in black and white. This somewhat is a repeat of the comment about the tolerance of the files, but I find the range between the blacks and the whites to be greater than what I have been used to with the Canon DSLR's. LightRoom in particular really allows me to push and pull the files to the extremes of the blacks and whites without the subtle shades and tones in between suffering. 'Silky' is probably the most appropriate word that comes to mind to describe the black and whites you can produce from the E-M5.
Low Light Focussing
This has been an absolutely amazing surprise for me. Since owning the E-M5 I've had it with me at each and every wedding I've photographed. At first I would only pick it up for the odd shot here and there, but as I realised more and more just how capable a camera it was, it started filling in for the Canon at certain parts of the day. For example I find it far better for the preparation shots: it's quieter, less intimidating and fast auto focus isn't always required. Further more, balancing the internal ambient room lighting with bright and natural window light is all done as it happens through the Electronic Viewfinder. I find I have a higher keeper rate but more importantly I am am able to achieve the look I want quicker. However, I wouldn't say at the moment that it is a contender for the church, owing to the fact I may have to stand far back, shoot in awkward and changing light conditions: the constant aperture tele focal lenses (constant f/2.8 for example) just aren't here yet. Long story short the E-M5 and Canon DSLR formed a wonderful tag team. One of the things it excels at and beats the Canon DSLR at is achieving focus in low and awkward light conditions, specifically during the first dance; if the couple have booked a DJ with strobes and coloured lights, or the venue is very poorly lit, I found that the E-M5 was somehow able to achieve focus more promptly than the Canon. I used the 17mm and the 45mm f/1.8 primes, so there was no hunting back and forth at all, unlike with the Canon.
Again, the prep shots in the morning in good light - that was something I truly expected the E-M5 to excel at. I knew what it was all about in those conditions, but to find it actually solved a long-standing problem (for me anyway) with focussing when the guests were throwing their shapes was a real bonus.
Street Photography
Finally, I can't review the E-M5 without talking about it as a street photography camera, after all that's what i do mostly. Again it scores full marks here. It's not intimidating, it's not obvious and I don't look like a photographer. So, when it comes to making street portraits I genuinely believe there are shots and situations I can capture that perhaps I wouldn't if I were carrying a DSLR around with me.
Having said that, Mirrorless cameras like this haven't always been the order of the day among street photographers. It's not to suggest that a DSLR is not capable of street photography, because clearly it is. It's all about preference really.
Secondly though, the practical element is of course the size and weight. I'm still carrying around a big bag (the Think Tank Retrospective 30) filled with all sort of stuff, but really the E-M5 and Lenses take up hardly any of that space.
Summary
I'm still loving the E-M5. As I said at the top of this blog I love it more now I've had it for some time. I've become very used to it. It's so customisable that it really isn't much different from what I was used to with Canon DSLR's in terms of button and dial layout etc. Sure, it has it's limitations: It's not amazing at tracking moving subjects, but is an improvement on a DSLR when used in low and challenging light conditions because it achieves focus faster and more accurately.
One of the biggest advantages though that the E-M5 and the Olympus range of cameras has though is two-fold: the in-body image stabilisation is simply amazing. It means that any lens you mount to the E-M5 is stabilised, which is a feature not to be overlooked.
In addition, because of the stabilisation being built into the body of the camera it removes the need to have all those motors and complex bearings inside the lenses themselves, meaning they truly can be tiny. So when people talk about moving over to Mirrorless, or picking up a mirrorless as their travel and lightweight option, really Olympus is the brand to go for on that front. There are other Mirrorless cameras available of course from the likes of Fuji, Sony and Panasonic, but the lenses for those cameras are huge, (comparatively) so it really does undermine the idea that they are tiny little cameras. The Olympus wins on size for sure.
I hear it so often that the Olympus is a 'Solid Little Camera'. Whilst that is 100% true, that phrase makes you think it's not a serious camera, because it's 'Little'. Well, I'll tell you right now that the Olympus is most definitely serious. It isn't small, it's tidy, neat and compact. The technology of this camera and it's ability to make amazing still photographs totally defies it's size.
For now, I still have my Canon DSLR and as Tony Northrup has recently talked about, the only reason I can't really drop it at the moment is because of my beloved 70-200mm f/2.8 II IS USM. But that's more about the lens than the camera body. The DSLR still wins for action and wildlife or subjects of a fast moving nature. But, Olympus have (at the time of writing this) just released the long-awaited 40-150 f/2.8 (effectively an 80-300mm). If that's as good as it's supposed to be then an E-M1 and one of those bad boys may well be on the Christmas list as a replacement for the DSLR. I have written to Olympus and asked for that combination of camera and lens on loan. We'll see what happens.
The only question then would be "What to do with all these CF cards?"