


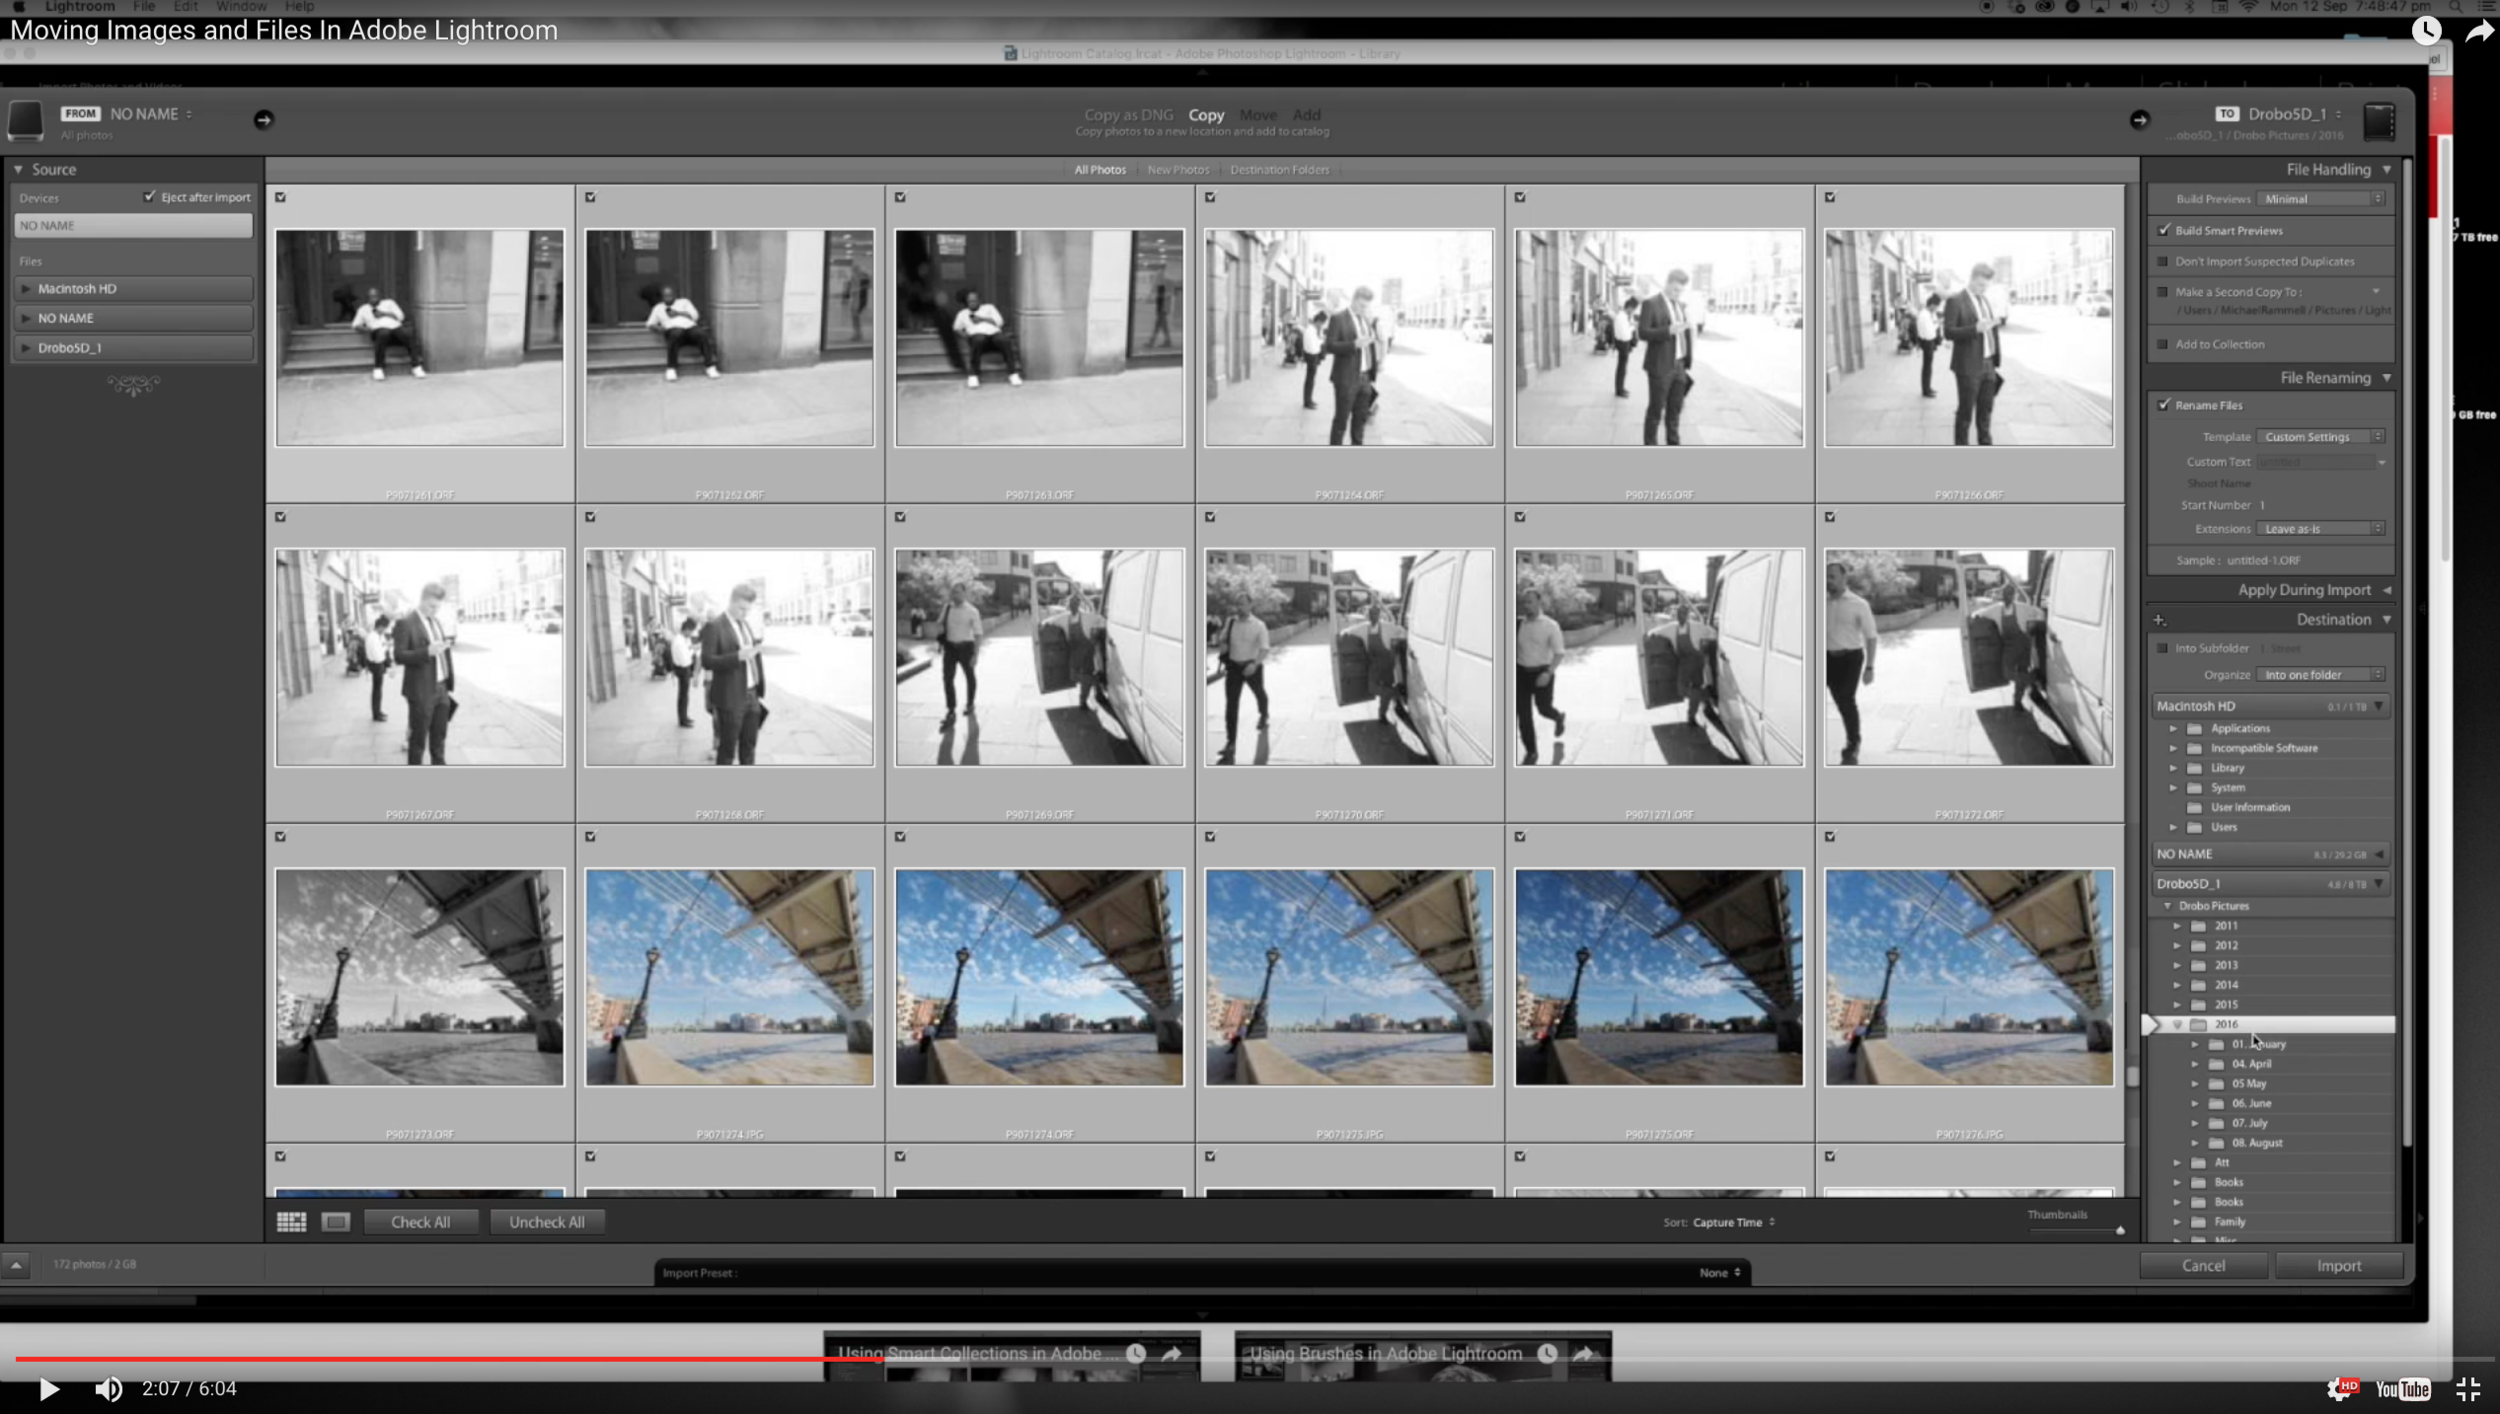
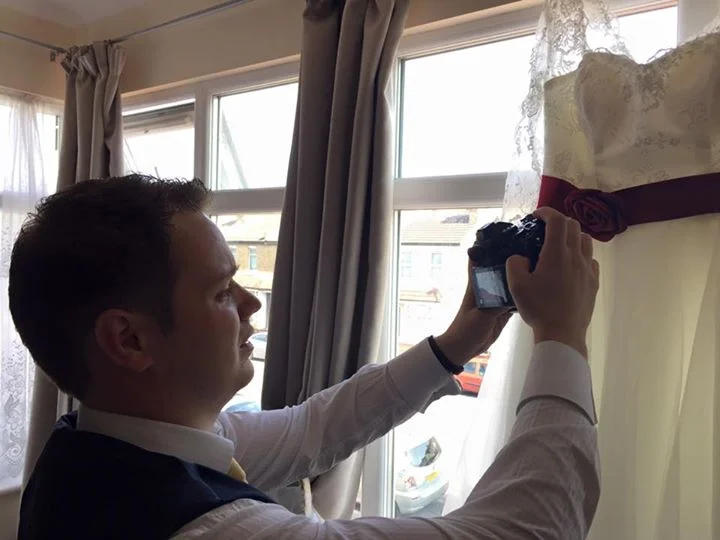
Moving Images and Folders inside of Lightroom
Lightroom has become such a popular post-processing tool; helping to really lower the barrier to entry to post-processing. No longer do we all need to know about layer masks. Global changes are made easier in Lightroom and the management and processing of large batches of photographs has been made easier!
But, as many of us have adopted Lightroom as our go-to tool it's also fair to say that many of us have not yet adopted what Adobe consider to be the 'best practise' way of doing things and we often eschew the tools and methods available to us in Lightroom and find a way to 'bodge' things instead. One such thing I hear about all too often is the way in which people move their files and folders around.
It's been a while since I put together a Lightroom video and so this week, following a discussion I was having with a good friend of mine, I've put together a short video to explain the quickest and easiest way to move files and folders inside of lightroom - the way Adobe intended and designed!
This is appropriate for Mac and PC users, so, whichever you use click the link to watch the video and learn how to do one of the most simple things ever in Lightroom.

Let me know if you found this video useful by dropping a comment below. Remember, if you have a question about Lightroom or want to know about my work flow in anyway - just get in touch!
Next week on the blog I take a question from a subscriber about using an OM-D to shoot Football (Soccer). Keep an eye out for that one!
Olympus OM-D E-M1 and Motorsport
Hi All,
Only me! I haven't written for a about a month now due to wedding season being in full flow: Shooting, ordering and designing products, post processing and life in between has been keeping me away from this blog more than I'd have liked, but whilst I was away on a short family holiday I had an email from someone who tried their hand at shooting motor sports with the Olympus OM-D E-M1 and wasn't totally pleased with the results.
Gavin Hall subsequently found my post on the subject, right here and got in touch with me via email to ask a few questions. I thought it would be a good idea to reply to Gavin's email here on the blog so you can see my thoughts on this and also for you to add your own comments below as well.
So, this blog post is for everyone, but written in response to Gavin:
In Gavin's email, he wrote:
Hi Michael,
Excellent blog - very well written. Just a quick question; Having come from a Nikon D90 (which bear in mind came out in 2008) I have to say that so far I’ve been rather frustrated with the EM-1’s auto focus when it comes to motor sport and airshows.
I’ve read all the advice I can find and am using what seems to be the recommended technique: Latest firmware, C-AF, 9 point block focus, continuous low speed continuous shooting etc. but the keeper rate is still very low. In many instances I’m getting better results with manual focus and focus peaking.
I’m more than happy to admit that this may be operator error but given a history of success with my old Nikon gear, I’d like to establish a couple of things. The lens I’ve been using for this type of thing is the Olympus 75-300 F4.8-6.7 II. (I have the 12-40 F2.8 Pro but haven’t tried it for action) Do you have any experience with this lens - is it known for being unsuited to fast moving subjects?
I know that you rave about the 40-150 F2.8 Pro - is this significantly better for AF tracking - and also initial lock on speed than other MFT lenses you’ve used? It is a very tempting piece of glass, but as my Dad pointed out the other day, for the same money as that lens alone, you could get a Canon EOS 70D and a 70-200 F4 L which would definitely track Motorsport well.
Another problem I had is whilst trying to focus on a distant aircraft, the lens hunted backwards and forwards, refusing to lock onto anything at all, including the clouds which were effectively at infinity.
I love many aspects of the E-M1 and in other respects have been entirely pleased with it. However, this is a hobby for me so I’m loathe to spend money on the 40-150, only to find that actually the problem lay elsewhere all along.
Any thoughts you could share would be greatly appreciated.
Many thanks
Kind regards
Gavin
Thanks Gavin for getting in touch with your questions. Today I want to try and touch on everything you mention in your email if I can and so I've broken it down to 4 main points:
- Settings
- Lens Choice and Investment
- Intended use with the photographs
- Comparisons to a DSLR and other cameras: In your email you talk about being able to pick up a 70D and a 70-200L f/4 for a cheaper price and that it would likely perform better, so I'm going to touch on some other reasonably priced alternatives too that would handle sports and action shooting.
Unfortunately I can't make any comparison's with Nikon cameras as I've only used a Nikon on two occasions and neither for motor sports. So for the sake of this article I'll write about my experience vs my old Canon equipment where needed.
1. Settings
Having the correct settings dialed in will only get you so far. You of course have to have a good technique as well. It's evident from your website that you've photographed motor sports before with some pretty successful panning photographs in your motor sports gallery. I would say that the images you have in your gallery don't have that critical sharpness that I would look for and that I have been able to achieve with my E-M1, so perhaps consider spending a day at the track panning and consider your shutter speed to perfect your technique. Working out what works for you as well as what doesn't is key. For example friends of mine are able to shoot down at 1/50th and still get sharp motor sports photographs! Mine are best at about 1/125th - 1/160th. I'm sure with some more practise though I'd be able to improve and shoot at 1/80th and maintain sharp photographs.
1/125th - f/10 - ISO100
My settings were simple but also differ from what you have said in your email:
- High Speed Continuous Shooting at 9fps
- Single, Center Focus Point manually selected
- Continuous Auto Focus mode
- Shutter Speed between 1/80th and 1/160th
- Aperture F/10 - f/13
- ISO was as low as I could possibly go with the given light (100 - 200)
- Image Stabilisation set for Horizontal panning
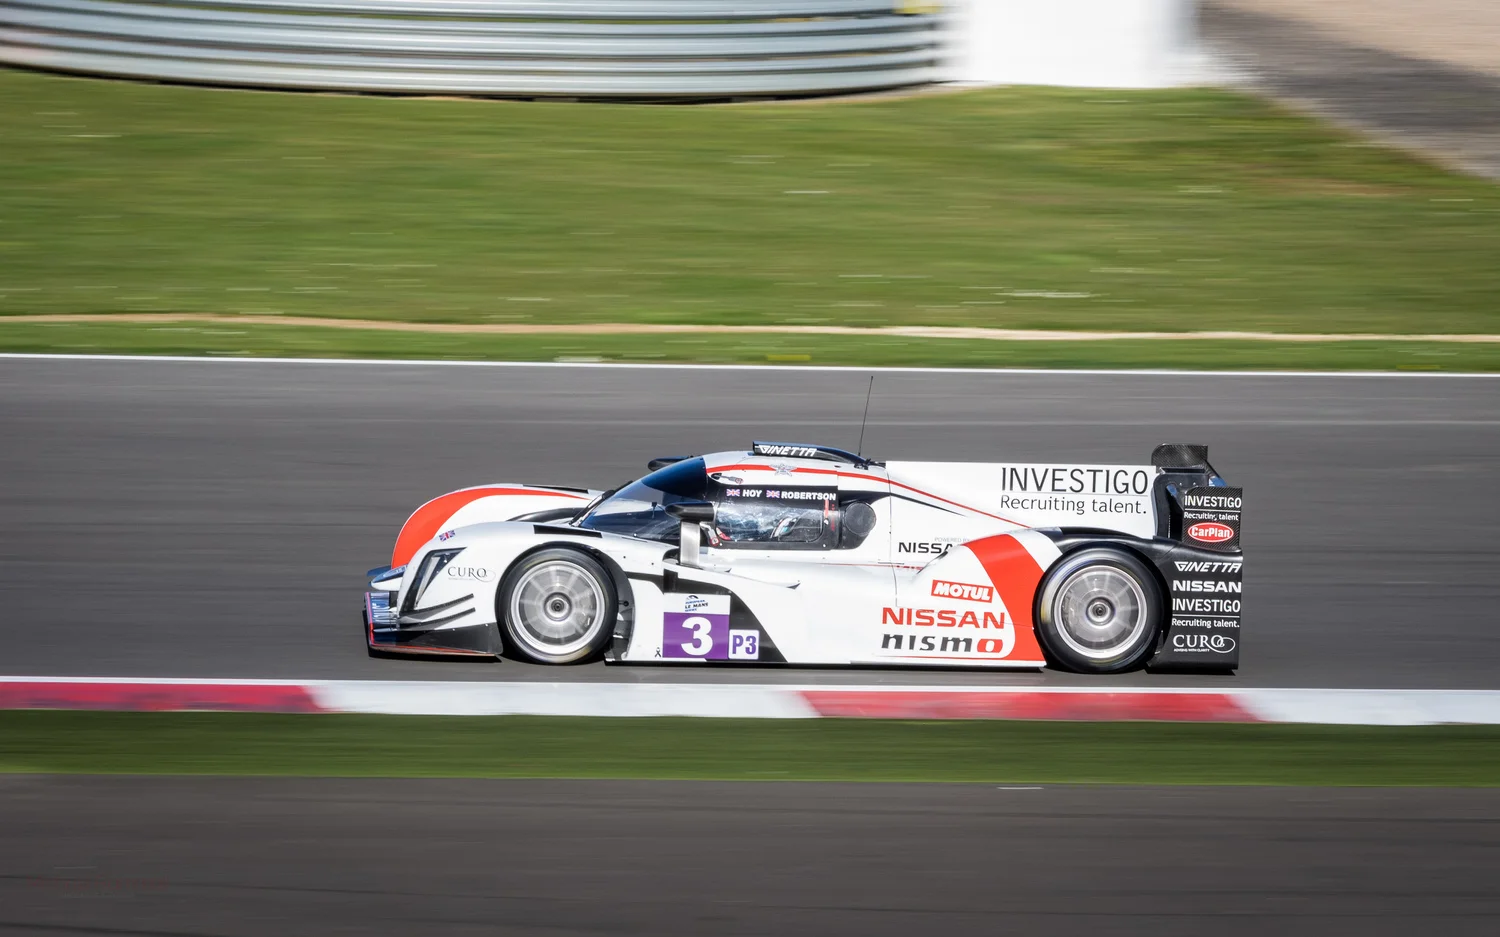
As I mention in my post 'A Day At The Race Track With The Olympus OM-D E-M1' my keeper rate was lower than I would have perhaps achieved with my sports-oriented and much-loved Canon 7D. I'm happy to acknowledge this. The 7D would have perhaps offered me 4 keepers out of a burst of 6 or 7, with the E-M1 only leaving me with 1 or 2 to choose from. But with motor sports (Particularly endurance racing!) The cars will be going around the track many, many times - You'll have plenty of chances to photograph them again. Besides, you only really need 1 keeper of each car, right?
Most importantly for me (and I'll talk about this further in below) is that I am still able to get tac-sharp, crisp, clean images using the E-M1. The keeper rate may matter more if I were a professional motor sports photographer.
The idea of using the center focus point only is not an Olympus-specific technique. This is something I did with my Canon 7D as well. By manually choosing the focus point and instead trying to keep the focus point on the car you're asking the camera to do less. I've found I've had better results with this technique.
One thing that was specific to the Olympus though was a change I had to make to my panning: I now found I could not pan when the car was further away giving me a reduced panning arc. The Olympus Micro Four Thirds System obviously, as I've shown, is able to track subjects moving parallel to you with little change in the distance between you and the subject, however I would agree that tracking subjects' who's distance to the camera changes suddenly is much harder. Football and field & team sports could possibly offer too much of a challenge for the current range of mirrorless cameras available and this is why you'll see any photographer in that arena only using the top DSLR camera bodies and lenses available. Unlike motor sports these other sports aren't as repetitive and so moments will only happen once. Margins are fine and so you need to be ready to capture everything. Rarely, if ever, do you get a second chance.
I've not photographed any aviation with the OM-D E-M1 and my 40-150mm f/2.8 PRO as yet, but I'm relatively confident they'd be fine. I may have to add the 1.4 teleconverter for a little more range, but the 40-150 performs superbly throughout it's entire focal range, as I'll mention in just a moment.
100% cropped screen grab from Lightroom - this is a little soft for me (see the edges of the numbers and decals on the car)
1/80th - f/13 - ISO100
One thing I have certainly learnt over the years though is that if there is that if there is a photographic niche where the margin between a successful photograph and an average photograph - it's sports and wildlife (moving subjects)
Perhaps this is where some of your frustration begins? Having said that however for the best results and to give yourself every chance of success you have to use the best glass on your camera...
2. Lens Choice and Investment
This part could easily warrant a blog post all of it's own...
I learned a long time ago that if you don't buy the top of the range lenses your photographs will only suffer for it (of course there are exceptions to this). Often, I believe that you can get by with a lesser-camera and better glass, but not necessarily the other way round.
I remember purchasing a handful or pre-owned EF-S Canon Lenses (for crop sensor bodies) with variable aperture and inevitably, after much frustration, went out and bought the lenses I should have bought in the first place anyway meaning I bought twice! Now I'm not suggesting that without the 40-150mm f/2.8 PRO you won't be able to get good photographs at all, but it will certainly help your cause, your keeper rate and in the long-run and your finances.
The Olympus 40-150mm f/2.8 PRO is a marvel of a lens when it comes to it's ability to resolve detail, even at it's longest focal length of 150mm.
Not since my very early Canon days (during my first foray in to photography) have I used anything less than top end glass and so it's hard for me to honestly quantify and compare how much better the 40-150mm f/2.8 PRO is than the lens you used, the Olympus 75-300 F4.8-6.7 II. My guess though is that the 40-150mm f/2.8 PRO is much, much better. From past experience low and middle-range lenses have issues with softness at the extreme ends of their focus (75 and 300 in this case) and they're also prone to hunting and tracking back and forth trying to achieve that focus. This is because the motors inside those lower-end lenses are constantly trying to arrange and manage the groups of glass (elements) inside the lens to maintain and achieve focus. Logic would dictate that a cheaper lens would use cheaper components and therefore it wouldn't be able to perform to the same standard as higher quality, pro-grade lens.
1/160th - f/11 - ISO100
In addition, the variable aperture nature of the 75-300mm 4.8 - 6.7 - for me at least - is such a hindrance when it comes to shooting sports. I remember that the Canon 24-70mm f/2.8 for example was sharper at f/4 than it was at f/2.8, so knowing that the aperture also affects the sharpness and then not being in full control of the aperture as the lens zooms simply doesn't sit well with me.
It used to be (particularly with Canon kit lenses) that they just weren't as sharp as the pro grade lenses. Whilst that isn't' the case necessarily with Olympus Lenses (they're all pretty sharp!) the difference is still that the pro grade lenses are high-performance tools that are sharper and work faster.
I've seen nothing but rave reviews about the 40-150mm f/2.8 PRO elsewhere and in my experience it just doesn't have an issue with keeping up with what the E-M1 asks it to focus on. It is after all a Professional grade lens. Perhaps see if you can get one from Olympus on loan using the 'Test & WOW' service and take it to a track?
Put it this way though - the 40-150mm f/2.8 PRO from Olympus was, in my mind, every bit as good as my old Canon 70-200mm f/2.8 L IS USM ii - a lens considered by many to be the best in class of lenses in that category available today for a DSLR. I owned them side by side for only a month before i decided to commit and I sold up the Canon gear and moved to Olympus. Not because I'm a fan boy, but because of the performance and experience.
Another thing to mention though, rather than me just saying 'Buy the best lens you can' is that you do have to take into account that a great lens will nearly always out-last any camera body you own.
Look at any sports photographer - they're likely to have a massive prime (such as the Canon 400mm f/2.8 or a 600mm f/4) that they've had for 5 years or more, whereas in that time they've probably had a handful of camera bodies. The same can be said of the Olympus 40-150mm f/2.8 PRO: yes it's a relatively expensive lens, but as long as I shoot with Olympus camera's it's a lens I'll own and use owing to it's versatility and it's quality. If you look at the cost of the lens in the same way you view the cost of a body, then often the costs won't stack up or be justifiable; Firstly - a good lens will hold it's value when you come to sell it, whereas a the value of a camera body simply plummets from the moment you own it. Secondly, A lens is easily worth twice as much as you'll often have a good one twice as long, not to mention it will do your images justice. It is after all the glass that makes the difference.
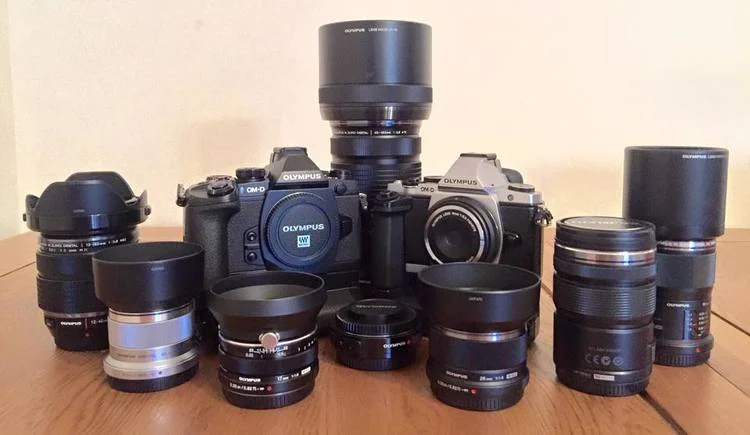
My tools and toys - The Olympus OM-D E-M5 and E-M1 surrounded by my favourite primes and pro zooms.
It is worth noting though that for me I also photograph weddings and portraits too, so my lenses are tools as much as they are toys and therefore I take this in to account when making my purchases. Which neatly leads to the next point from your email:
3. Intended use with the photographs
I make money from my photography and as a result my gear does, in my opinion, have to be of a professional standard. But because I have those requirements I can justify buying the PRO lenses.

If however, I wasn't making any income at all from photography I know that my wife would certainly not be as relaxed as she is about me spending what is (let's be honest) vast amounts of money on a camera for a hobby. If you're photographing motor sports as an enthusiast and for your own personal enjoyment and pleasure then this does put an entirely different light on this subject. Now, the only thing pushing you and motivating you to look at better lenses and equipment is you and your own desire for better photographs - not a client or customer requirement or need.
Be cautious - the internet and all the big name photographers will tell you that every new camera is a great investment and will make your photography infinitely better. My move to Olympus was, on paper at least, a downgrade in performance. Or at least that what's people told me: smaller sensor, not-professional, can't do big prints, can't shoot low light, doesn't track very well blah, blah, blah - that list went on. Which is why I wrote a post called 'Why Olympus'. If I am able to produce the same (or as I like to believe) a better standard of work with an apparently lesser camera, then surely that means I'm a better photographer than I was before, right?
Maybe that is true. But I also believe that the Olympus OM-D E-M1 is a better camera than many realise and it certainly performs well, well above the specs on the adverts.
My move was justified because I proved that the camera could perform in all of the circumstances I needed it too. I acknowledge it's differences and limitations vs my old Canon DLSR (note that keeper rate I mentioned at the start for example) and accepted that. But if you're a professional sports photographer and need a higher keeper rate - perhaps this isn't the camera for you.
For me, it was good enough at everything I did for pleasure and better at what made me money. As such - my requirement for a professional camera was met by the Olympus OM-D E-M1 and so it was a feasible and justifiable move. For you, as a motor sports photographer, this may not be the case.
Don't force yourself to use a camera just because you like it, or want to like it. What matters at the end of the day is the photographs, right? if you're making better images on the Nikon then stick with that. It's whatever works for you, in the same way that the Olympus just works for me.
4. Alternative Camera / Lens Setups
Invariably photographers shoot many things and so my desire for one system of cameras and lenses was neatly fulfilled by the OM-D E-M1 and the M.Zuiko lenses. I can now shoot everything from landscapes, portraits, motor sports, wildlife, weddings, engagement shoots and the kids around the house. I have a lens for all situations. But if you're looking for a setup as a motor sports thoroughbred then you have plenty of options. In fact, I'd probably still point you back towards a DSLR for motor sports:
- Pre-owned Canon 7D - circa £400
- Canon 70D - circa £7,00
- Pre-owned Canon 70-200 f/2.8 (mark 1) - circa £1,000
- Canon 70-200 f/4 - circa £1,000
(Please note that I have no affiliation with MBP Photographic, whose website I have linked to above for the reference pricing, it's just that they sell both new and pre-owned equipment).
For as little as £1,400 you could pick up a Canon Camera and Lens combo that is arguably more suited to motor sports, as per above. I would argue though that for the best images you should look for the best lens. Perhaps a New Canon 70-200mm f/2.8 L IS USM ii at around £1,500.
I'm sold on Olympus and know what it can do for me. But if you want the best motor sports bang for your buck I won't tell anyone that you absolutely have to go the Olympus route and that it's the best for motor sports. Because it's not. But I prefer it and I enjoy using it more. Yes, there is a huge element of preference involved here - we've not even mentioned Nikon! - but the fact is the Olympus is more than capable of being able to shoot great motor sports photographs; hopefully as I've demonstrated at Silverstone and Le Mans 2015.
But as a rule (not specific to Olympus) go for the best glass possible.
Other Photographers shooting great motor sports photography:
For years a good photographer friend of mine of mine, Neil Graham, shot 'only' on a Canon 60D (a crop-sensor Canon DSLR sporting only 9 focus points and shooting at up to 5 frames per second! The work that Neil was able to produce with that camera absolutely astounded me time after time. (check out Neil's work over at his website). For me Neil is a great example of a photographer who is able to get the most out of a camera through a practiced technique, despite any apparent lack of ability of the camera.
You may also want to check out John Rourke's Work - The Director and Photographer of Adrenal Media - The Official Photographic Agency for the FIA WEC (Le Mans Series Governing Body). John shoots with a number of cameras, but frequently talks about and shares some absolutely amazing photographs made with his Fuji mirrorless cameras! John is proving that these cameras are capable of performing in the professional arena. It's worth noting also that on paper (and it's somewhat acknowledged too) that the Fuji isn't quite as capable as the Olympus when it comes to Auto Focus
iPhoneography - Editing with Snapseed
I'm often asked how I get my iPhone photographs to look the way they do. It's a compliment for me and I love to share how I achieve my results. So today here on the blog I'm going to share which apps I use, how I shoot with the iPhone and also, I've put together a video showing you what I do within my chosen iPhone photo editing software: Snapseed.

Richmond Park, London UK.
iPhone 6Plus
I've used the iPhone since the 3Gs, then moved to the 4s, the 5s and now the 6Plus. With each model the camera has gained a little something and has gotten better and better (see my iPhone 6 Plus review), but the one thing that remains the same for anyone using the iPhone as a camera is the persons ability to spot a moment and to use the light to get a clean, sharp image as well.
As you can see in the Richmond Park photograph above: I was still up early at Golden Hour, I made the effort to be somewhere where there was the opportunity to make such a photograph with such great light.
The iPhone has a limited set of controls right out of the box, but there are camera apps available to help you make more of the iPhone as a camera and apps to allow you to edit your photographs:
My Apps
Personally, I stick with the out-of-the box standard Apple Camera App that comes with the phone. It's fast to load up, available with a swipe from the bottom of the screen, which is how I often access the camera app) and allows you to control focus points and brightness. It has all the settings I need to enable to me to make a better photograph.
On occasion I may use Camera+ or Camera Awesome, but typically for me it's the standard app.
My Technique
I've got a way of working now that I apply to every scene I shoot:
- Tap on a dark area of the scene to brighten it up (tell the sensor the scene is darker and that it needs to add brightness)
- Get in closer than you think you need to with your feet and by getting closer.
- Pinching to zoom and cropping kill the file's quality. It's not quite like with a RAW file where you have a lot of leverage and scope to recover photographs and heavily crop - the iPhone files do tend so suffer when you start cropping them.
- Take a small burst of images by holding down the button to take pictures. I like to have at least a couple just incase something flies into the scene, or I'm shaking etc.
Editing
I don't use VSCO or film filters. I find them gimmicky. I do upload to Instagram, but I don't apply any of their filters either. I'm not a photography snob or anything like that, it's just that Instagram has millions and millions of people using it and just a limited number of filters - the last thing I want to be doing is choosing from a pre-defined set of filters that the millions of of other users have, making my photograph not stand out among the others.
My choice of App for all my iPhone photograph editing is Google's Snapseed App:

9 out of 10 of my photographs are converted to black and white. If you look at my portfolio here on the website you'll see this is the case with nearly all of my photographs, no matter what camera I'm using. I just love the atmosphere that mono adds to a photograph. But, rather than explain here in writing how I achieve my look time and time again, here's a video to show what settings I apply within Snapseed to make my photographs look the way they do:

The Gallery
This website (and my wedding website too) are built using Squarespace. One of the great features about the galleries is that you can give them an email address and then email photographs, videos and content up into the gallery. For iPhoneography this is ideal as I can now shoot a picture, edit in Snapseed and then from inside the snapseed app I can send that directly into my iPhone gallery. The file never touches my iMac (until it's time to backup my iPhone using iPhoto of course).
So, there you have it. That's how I make all my photographs that you see in my iPhone gallery.
Here is the gallery, in case you wanted to take a look:

Using brushes in Lightroom
Don't you just love Adobe Lightroom? It's neat and simple: no need to worry about layers and all that jazz (If that's not your kinda thing). It contains most of the tools you'll need to really polish a good photograph and improve it.
Adobe Lightroom, more than anything, is really designed to help you batch process images quickly and If you ask me it does it very well, but if you're just looking at a small selection of images it can still be tempting to sometimes whizz through them and rely 100% on the sliders. Again, if that's your style that's fine. But Adobe Lightroom is more than just sliders and batch-processing...
Brushes
Adobe Lightroom's brush tools are effective! Please don't forget about them. There are often occasions where you don't want to apply a change to the entire photograph through a slider: for example clarity, sharpness or even exposure. But, at the same time taking that photograph over to Photoshop can feel like a real chore, so this is where Lightroom's brush tool is your friend: selectively lighten the eyes, selectively brush some clarity onto a face or even just brush a little vignette to two of the corners, instead of all 4. The brush tool unlocks a whole set of other possibilities for post processing to compliment the use of sliders.
In this video I talk about how I use brushes to further enhance a photograph that you wouldn't otherwise be able to do with sliders alone. I show you how to go from this, to this:
Please note that I know that brushes may not be to everyone's liking and the brush work demonstrated in this video is rough and fast, but for those who don't have Photoshop or prefer to stay within Lightroom - this may be just the thing you need to take your editing to the next level.
Enjoy!
