


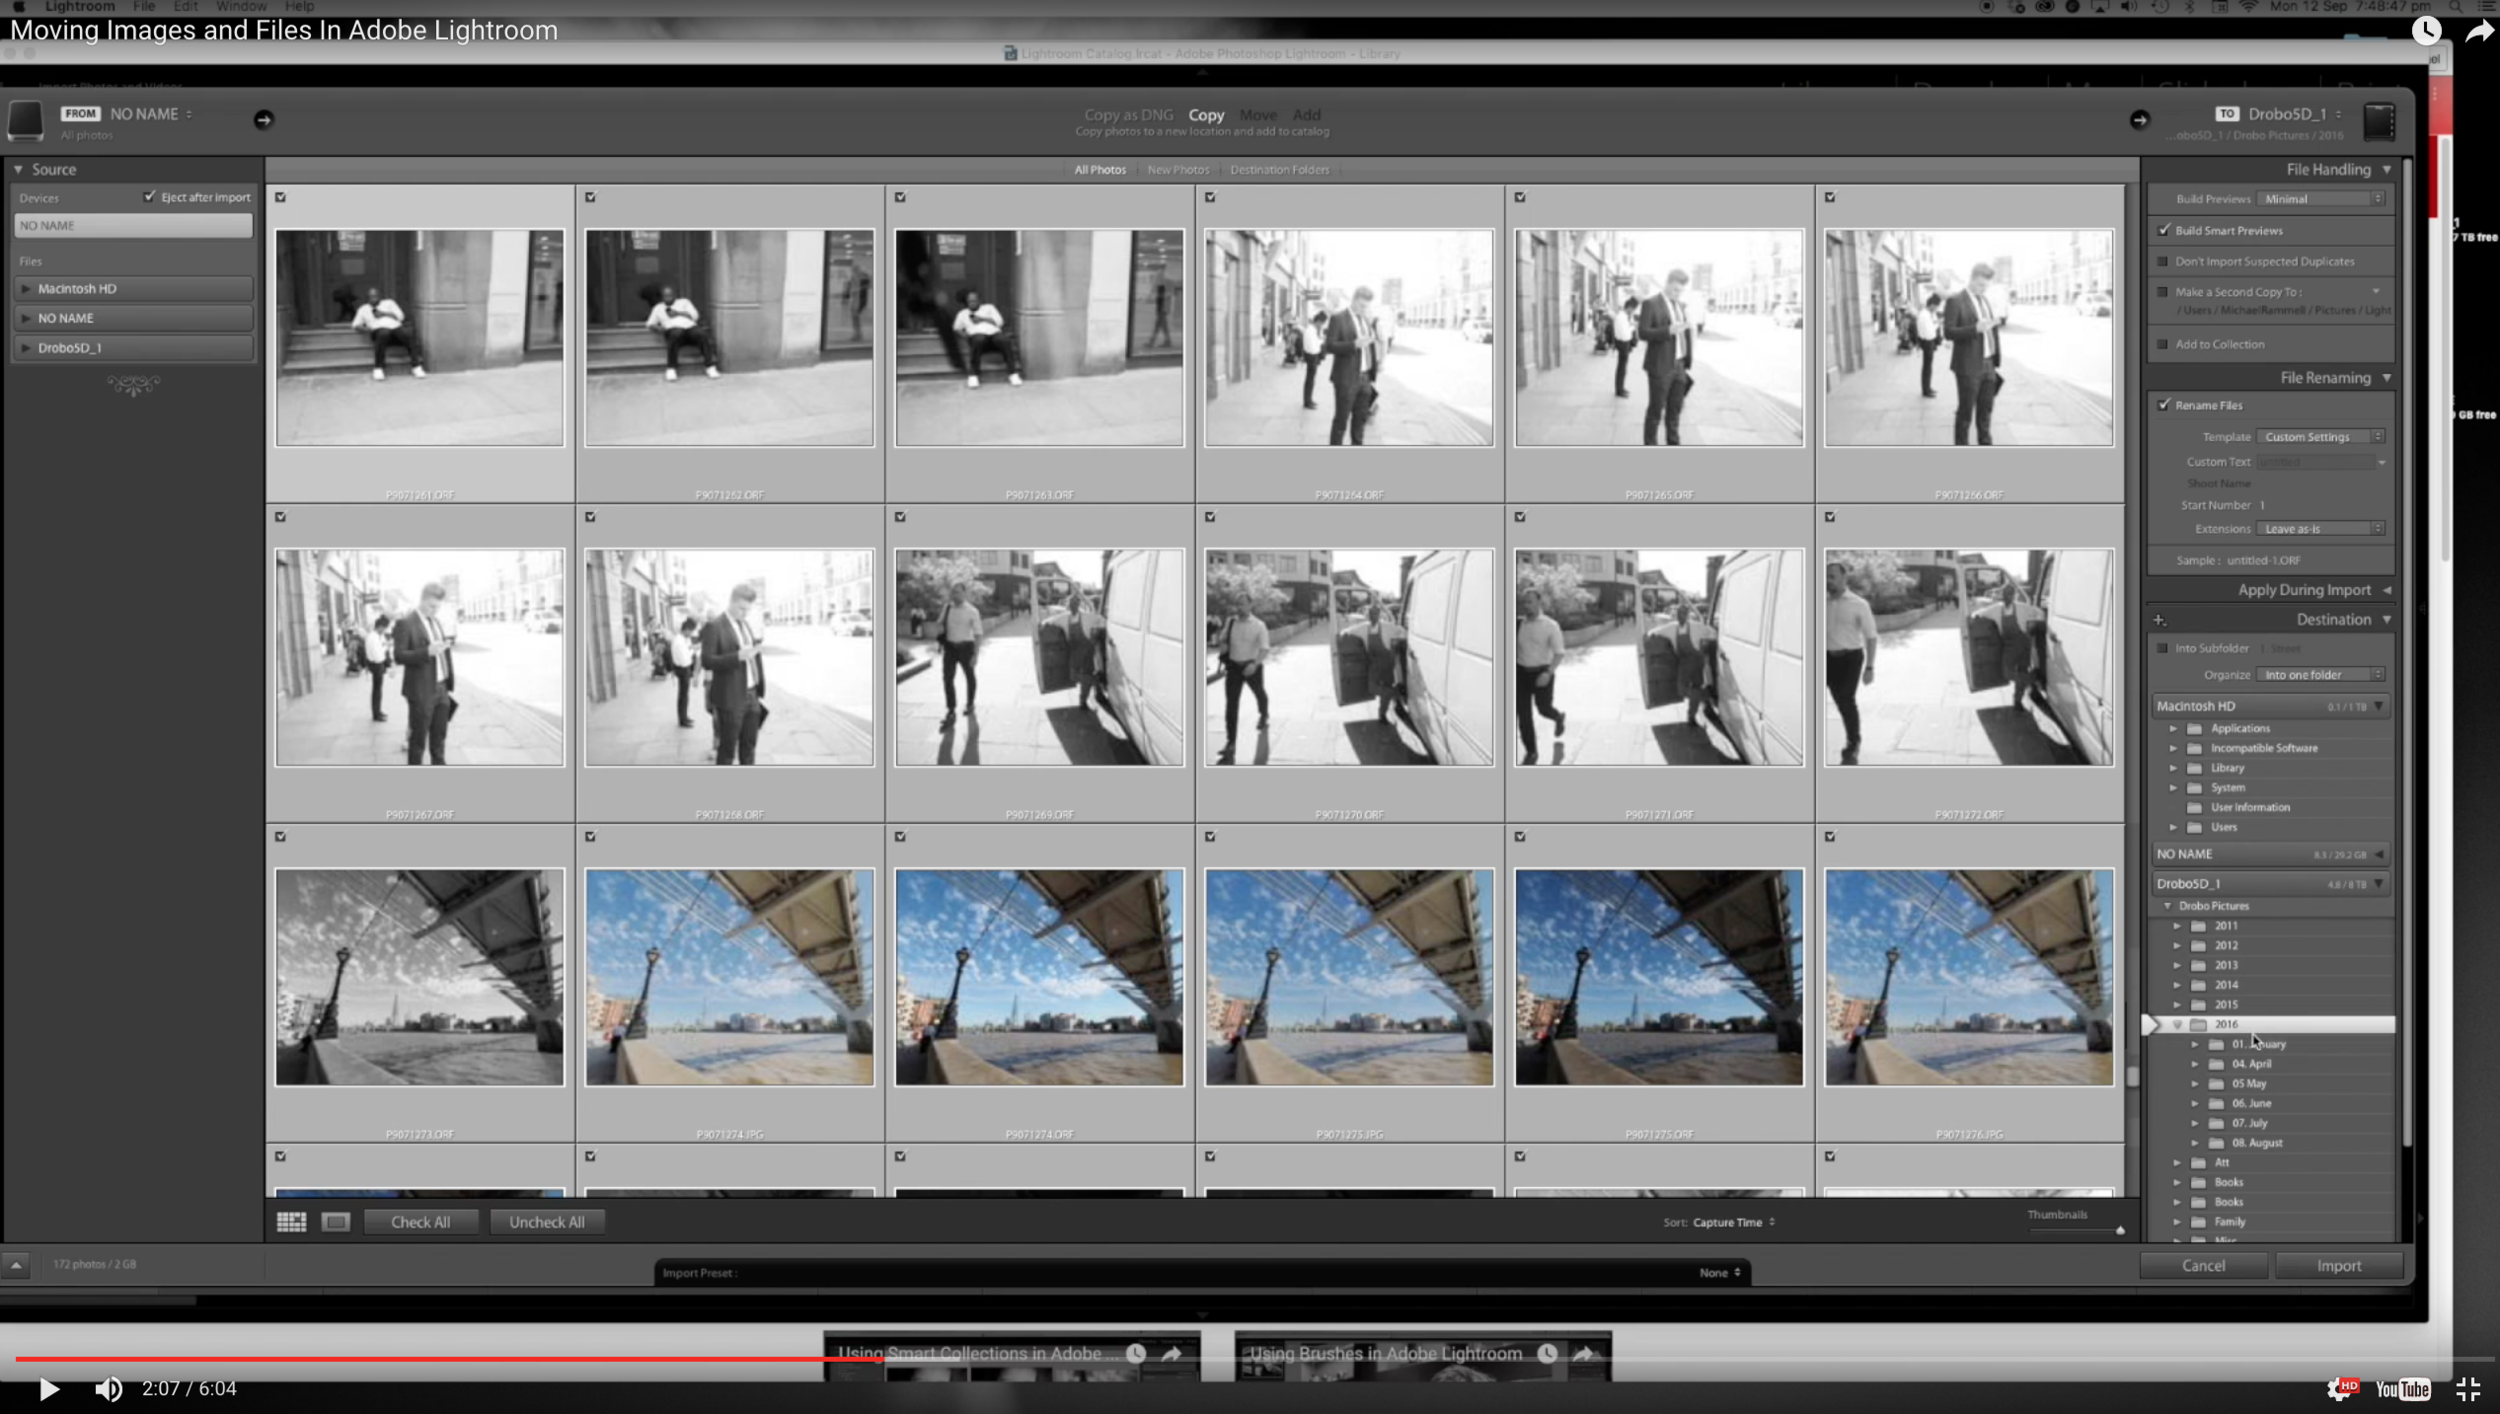
Moving Images and Folders inside of Lightroom
Lightroom has become such a popular post-processing tool; helping to really lower the barrier to entry to post-processing. No longer do we all need to know about layer masks. Global changes are made easier in Lightroom and the management and processing of large batches of photographs has been made easier!
But, as many of us have adopted Lightroom as our go-to tool it's also fair to say that many of us have not yet adopted what Adobe consider to be the 'best practise' way of doing things and we often eschew the tools and methods available to us in Lightroom and find a way to 'bodge' things instead. One such thing I hear about all too often is the way in which people move their files and folders around.
It's been a while since I put together a Lightroom video and so this week, following a discussion I was having with a good friend of mine, I've put together a short video to explain the quickest and easiest way to move files and folders inside of lightroom - the way Adobe intended and designed!
This is appropriate for Mac and PC users, so, whichever you use click the link to watch the video and learn how to do one of the most simple things ever in Lightroom.

Let me know if you found this video useful by dropping a comment below. Remember, if you have a question about Lightroom or want to know about my work flow in anyway - just get in touch!
Next week on the blog I take a question from a subscriber about using an OM-D to shoot Football (Soccer). Keep an eye out for that one!
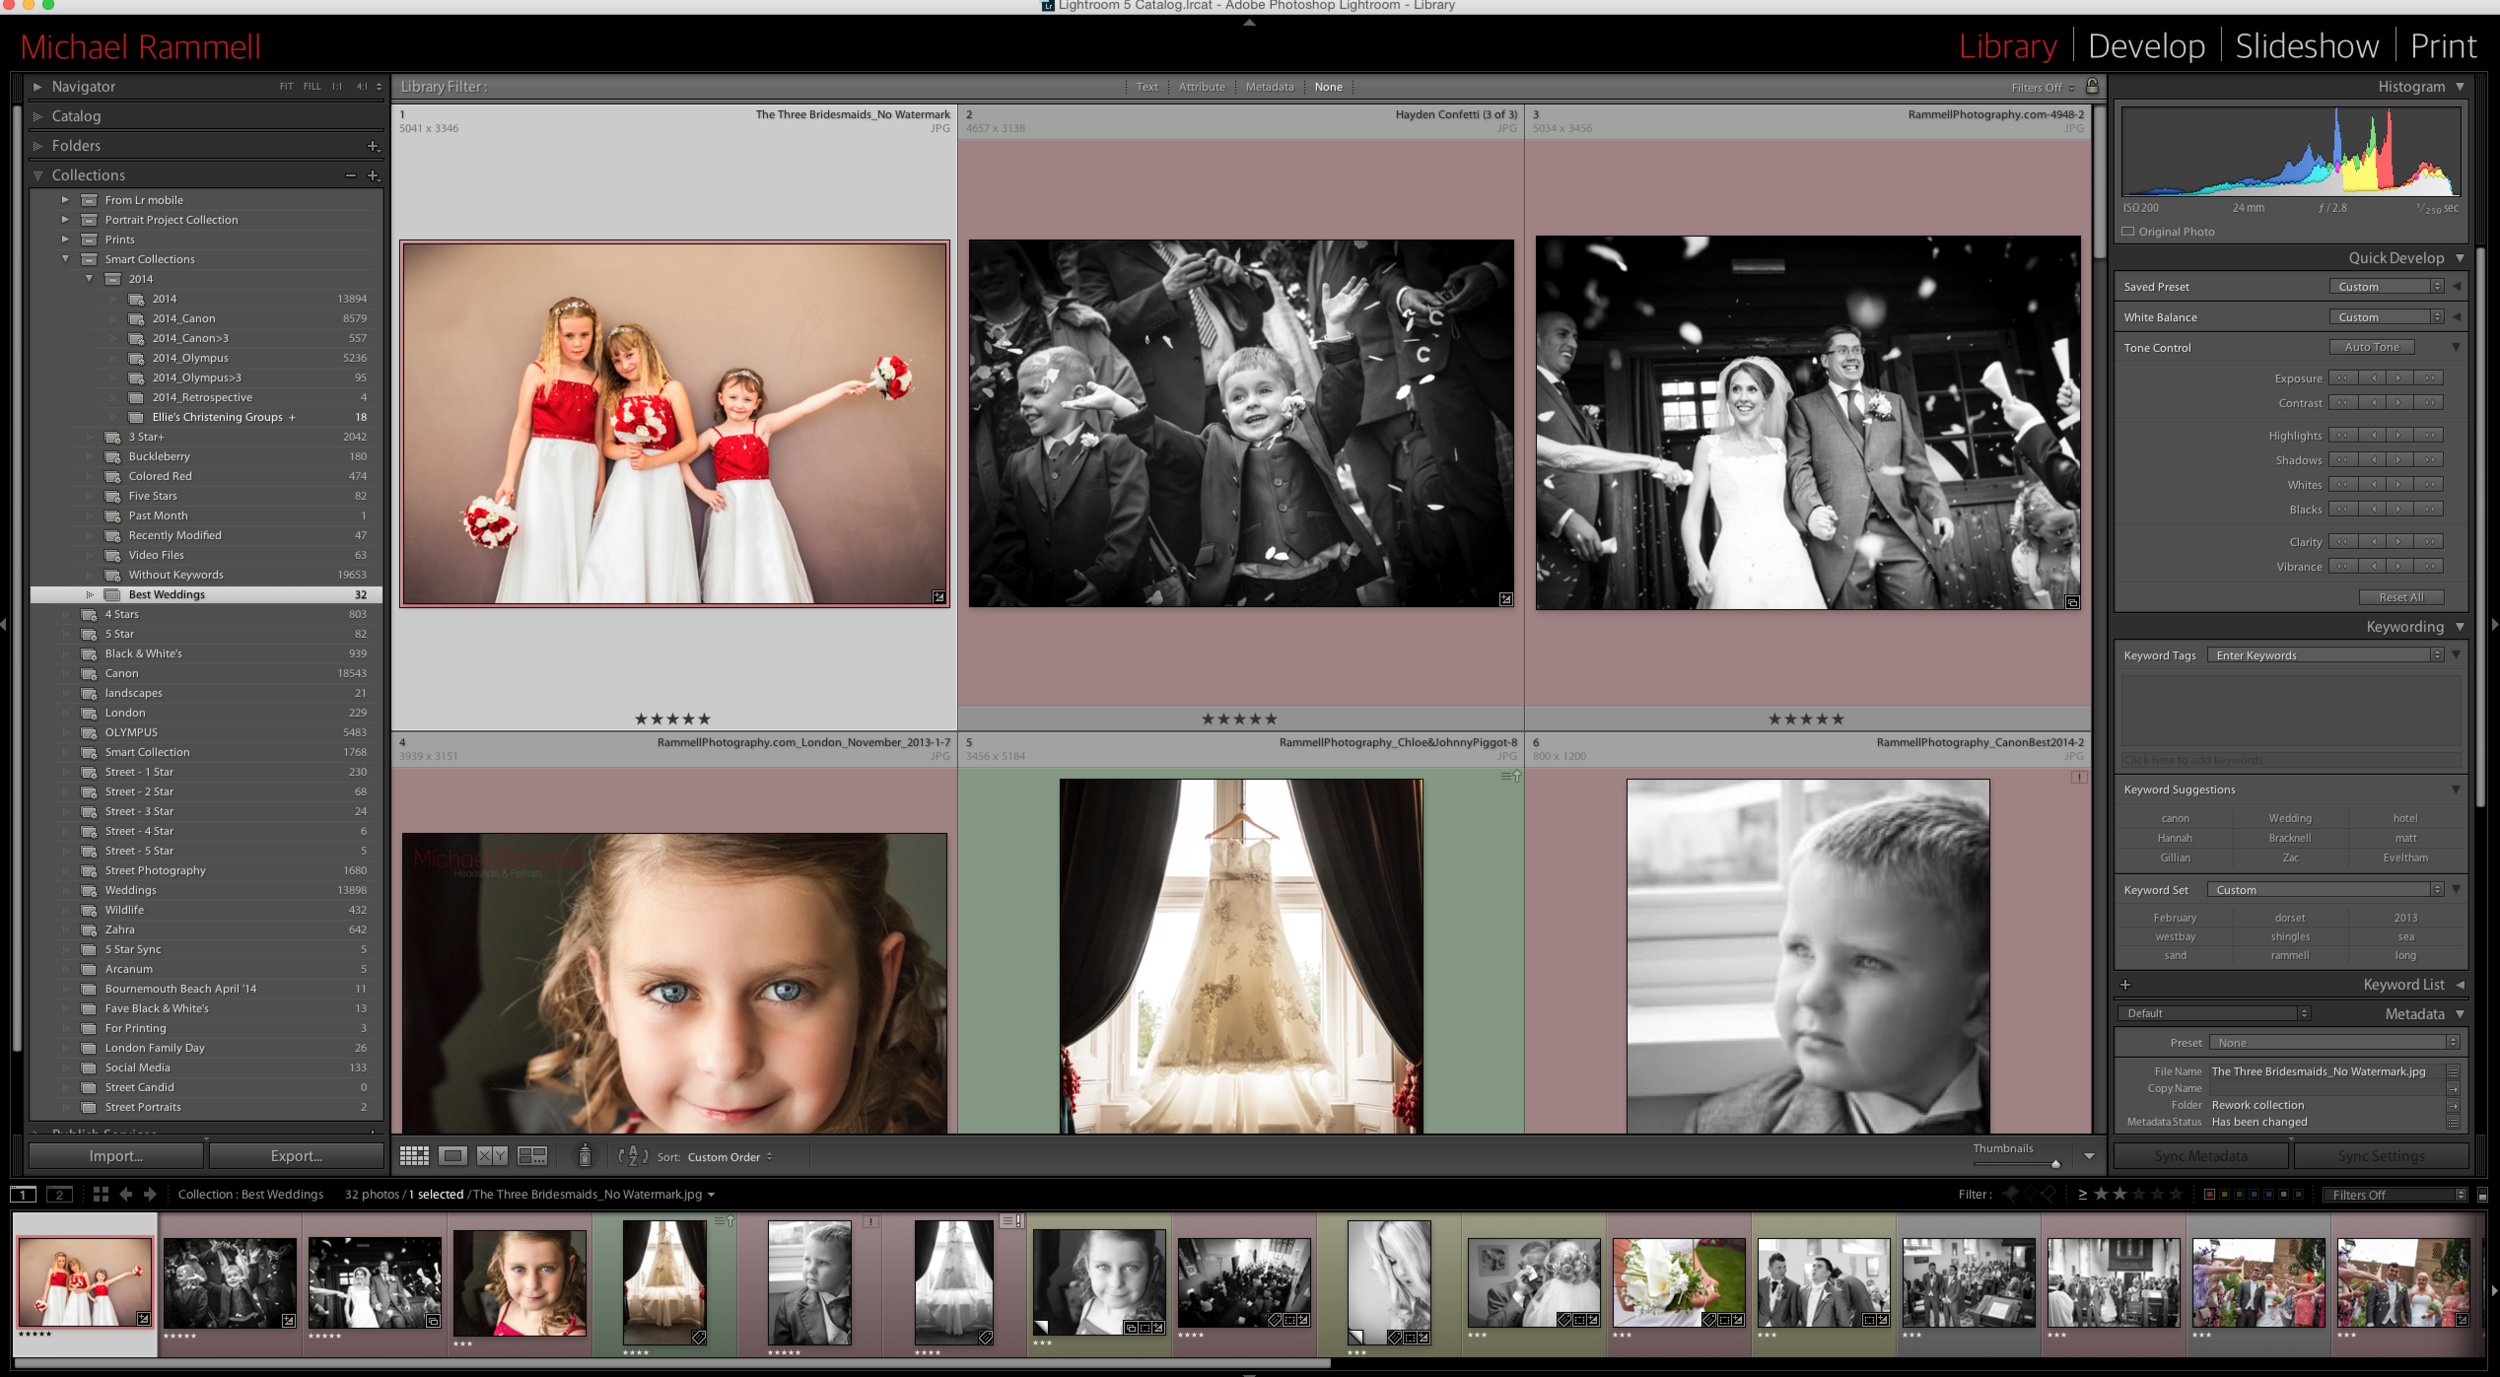
Using Smart Collections in Adobe Lightroom
At this time of year many photographers are looking back on the work they did in the previous 12 months. A retrospective view. A year in review. An assessment. Whatever you decide to call it, it can actually be a tedious enough process just finding your best 10 in amongst thousands and thousands of photographs. Don't get me wrong though, this exercise is worth it's weight in gold as you can really gain some perspective on where you were at the start of the year and where you are now, as a photographer. It can often be a real eye opener to see in what ways you've improved and in what ways you've changed your style. After all, we're always evolving and adapting as photographers and therefore the photographs we produce are inevitably going to change as we grow.
Luckily for us though, this deeply rewarding (yet tedious) process can be made much easier now that we're in the digital era. We're fortunate to have software that can stores tags and meta data. It can order and time stamp our photographs, making sorting and filtering through them all and finding the photographs we're most proud of that much easier.
That is...if you know how to use the software you have.
Many people see Adobe Lightroom as a simple piece of software with a couple of sliders. Trust me, it's much more than that. It has brushes, a simple cloning tool, it's amazing at organizing photographs and preparing photographs for printing. It does nearly all a photographer could ask for.
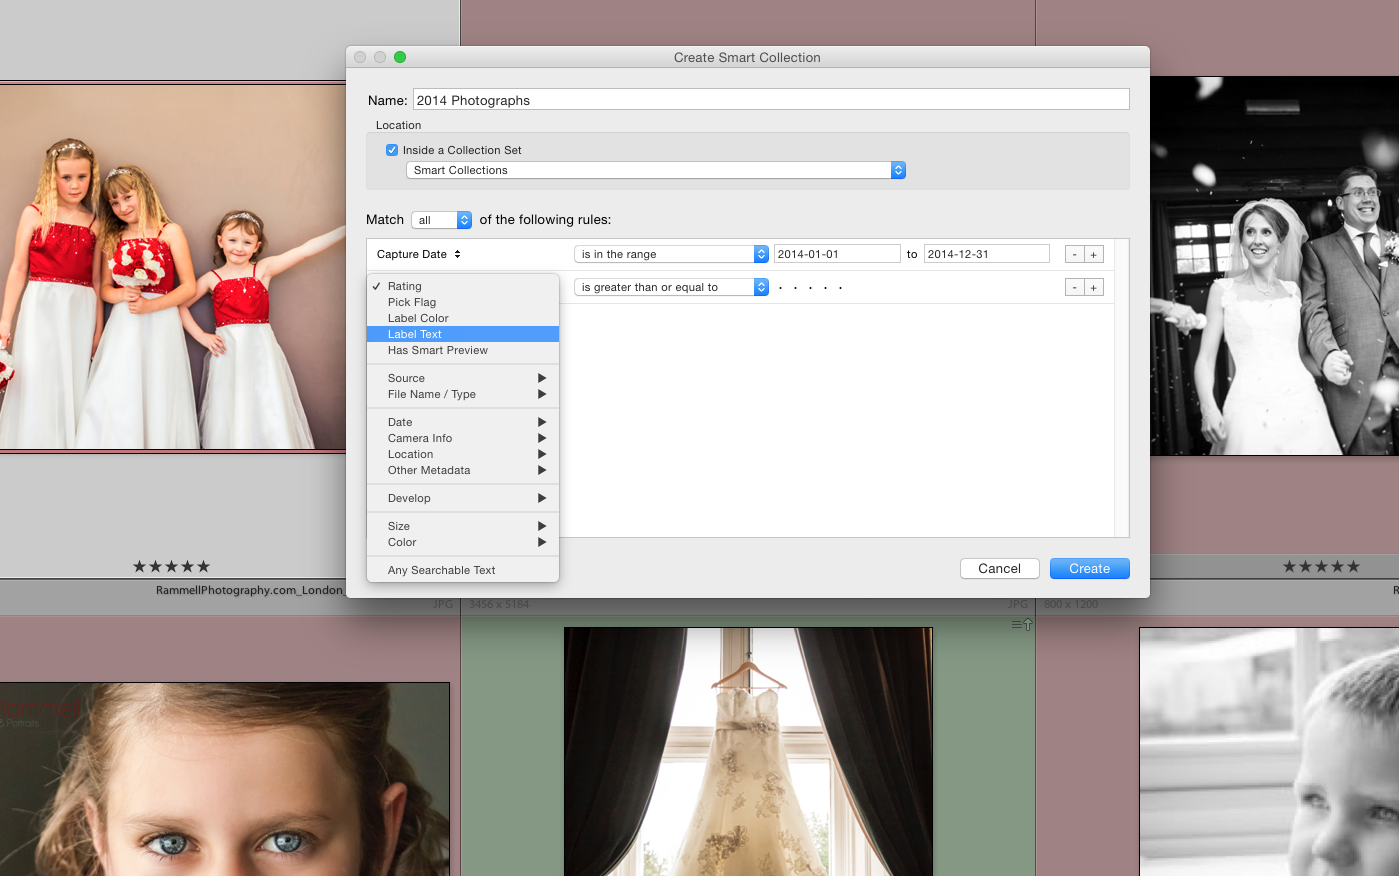
Today, I want to help you to find your top 10 photographs from the previous year. To do this we'll be taking a look at Adobe Lightroom's Smart Collection feature, Target Collections and a few basic rules to set these up.
So, if you've been putting off doing a review of the year that has just passed us by have a watch of this video and the re-assess whether you think you have the time or not.
Grab a coffee, press play on the video below and enjoy!

If you have a Lightroom tip you would like to share, or even a question about Lightroom please do post your comments below, or contact me at michae@rammellphotography.com
Thanks for watching.
Check out Other Lightroom VIdeos here
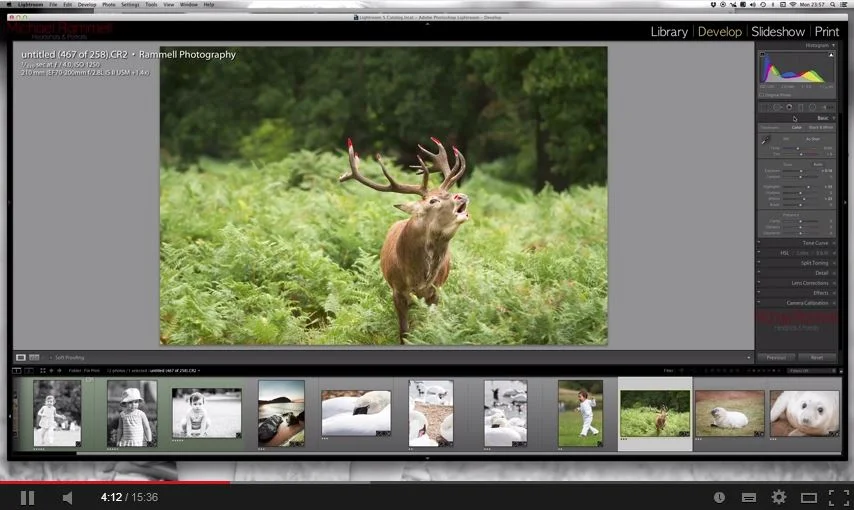
VIDEO: Preparing a Photograph for Print
Printing is considered by many to be the final step in making a photograph. It’s a sentiment I agree with.
The ‘problem’ with printing though is that people often think it’s expensive or that prints never come out quite right:
- Prints can sometimes come out too dark
- Prints are sometimes not as sharp as they were on screen
- The colours can be wrong -
- Too warm or too cool is a common issue
- Skin tones being innacurate and people appear either Orange or Pale
- I’ve also heard on many occasions that prints can appear ‘washed out’ with blacks appearing slightly grey.
Well today I want to share with you a short video to guide you through the basics of printing and to avoid these common issues. If you’re printing your photographs this is, in the most basic way, the very least you should be doing with your photographs in Lightroom to ensure they come out as bright as you intended them to be, to have rich blacks and brilliant whites and to be clean from spots. Take a look:
So, try applying the clipping method and adjusting your screen brightness before editing your photograph and see how different the results are.
If you have any questions please do get in touch with me via the contact form, or over in theFacebook community