Video & Free Downloads - Lightroom Smart Collection Settings
[To listen to the audio hit play and then give it a second to buffer. The audio is high quality]
I'm just in the midst of preparing my annual 'Looking Back' post, where I review the images I made during the past year. Its the annual retrospective exercise that we should all be doing as photographers. It helps one to gain some perspective as to where it was we were back in January compared to just how far we've come in those 12 months to December.
This year I plan on doing more than just sharing 10 my favourite images from 2016 though. I'm going to revisit the 5 most popular blog posts as visited by you guys and I'm also going to give a complete break down of the gear I used for the year, including how much use each lens actually got.
In order to achieve this, I'm using Adobe Lightroom's Smart Collection feature to sort my images into folders (effectively) based on an the attributes of an image.
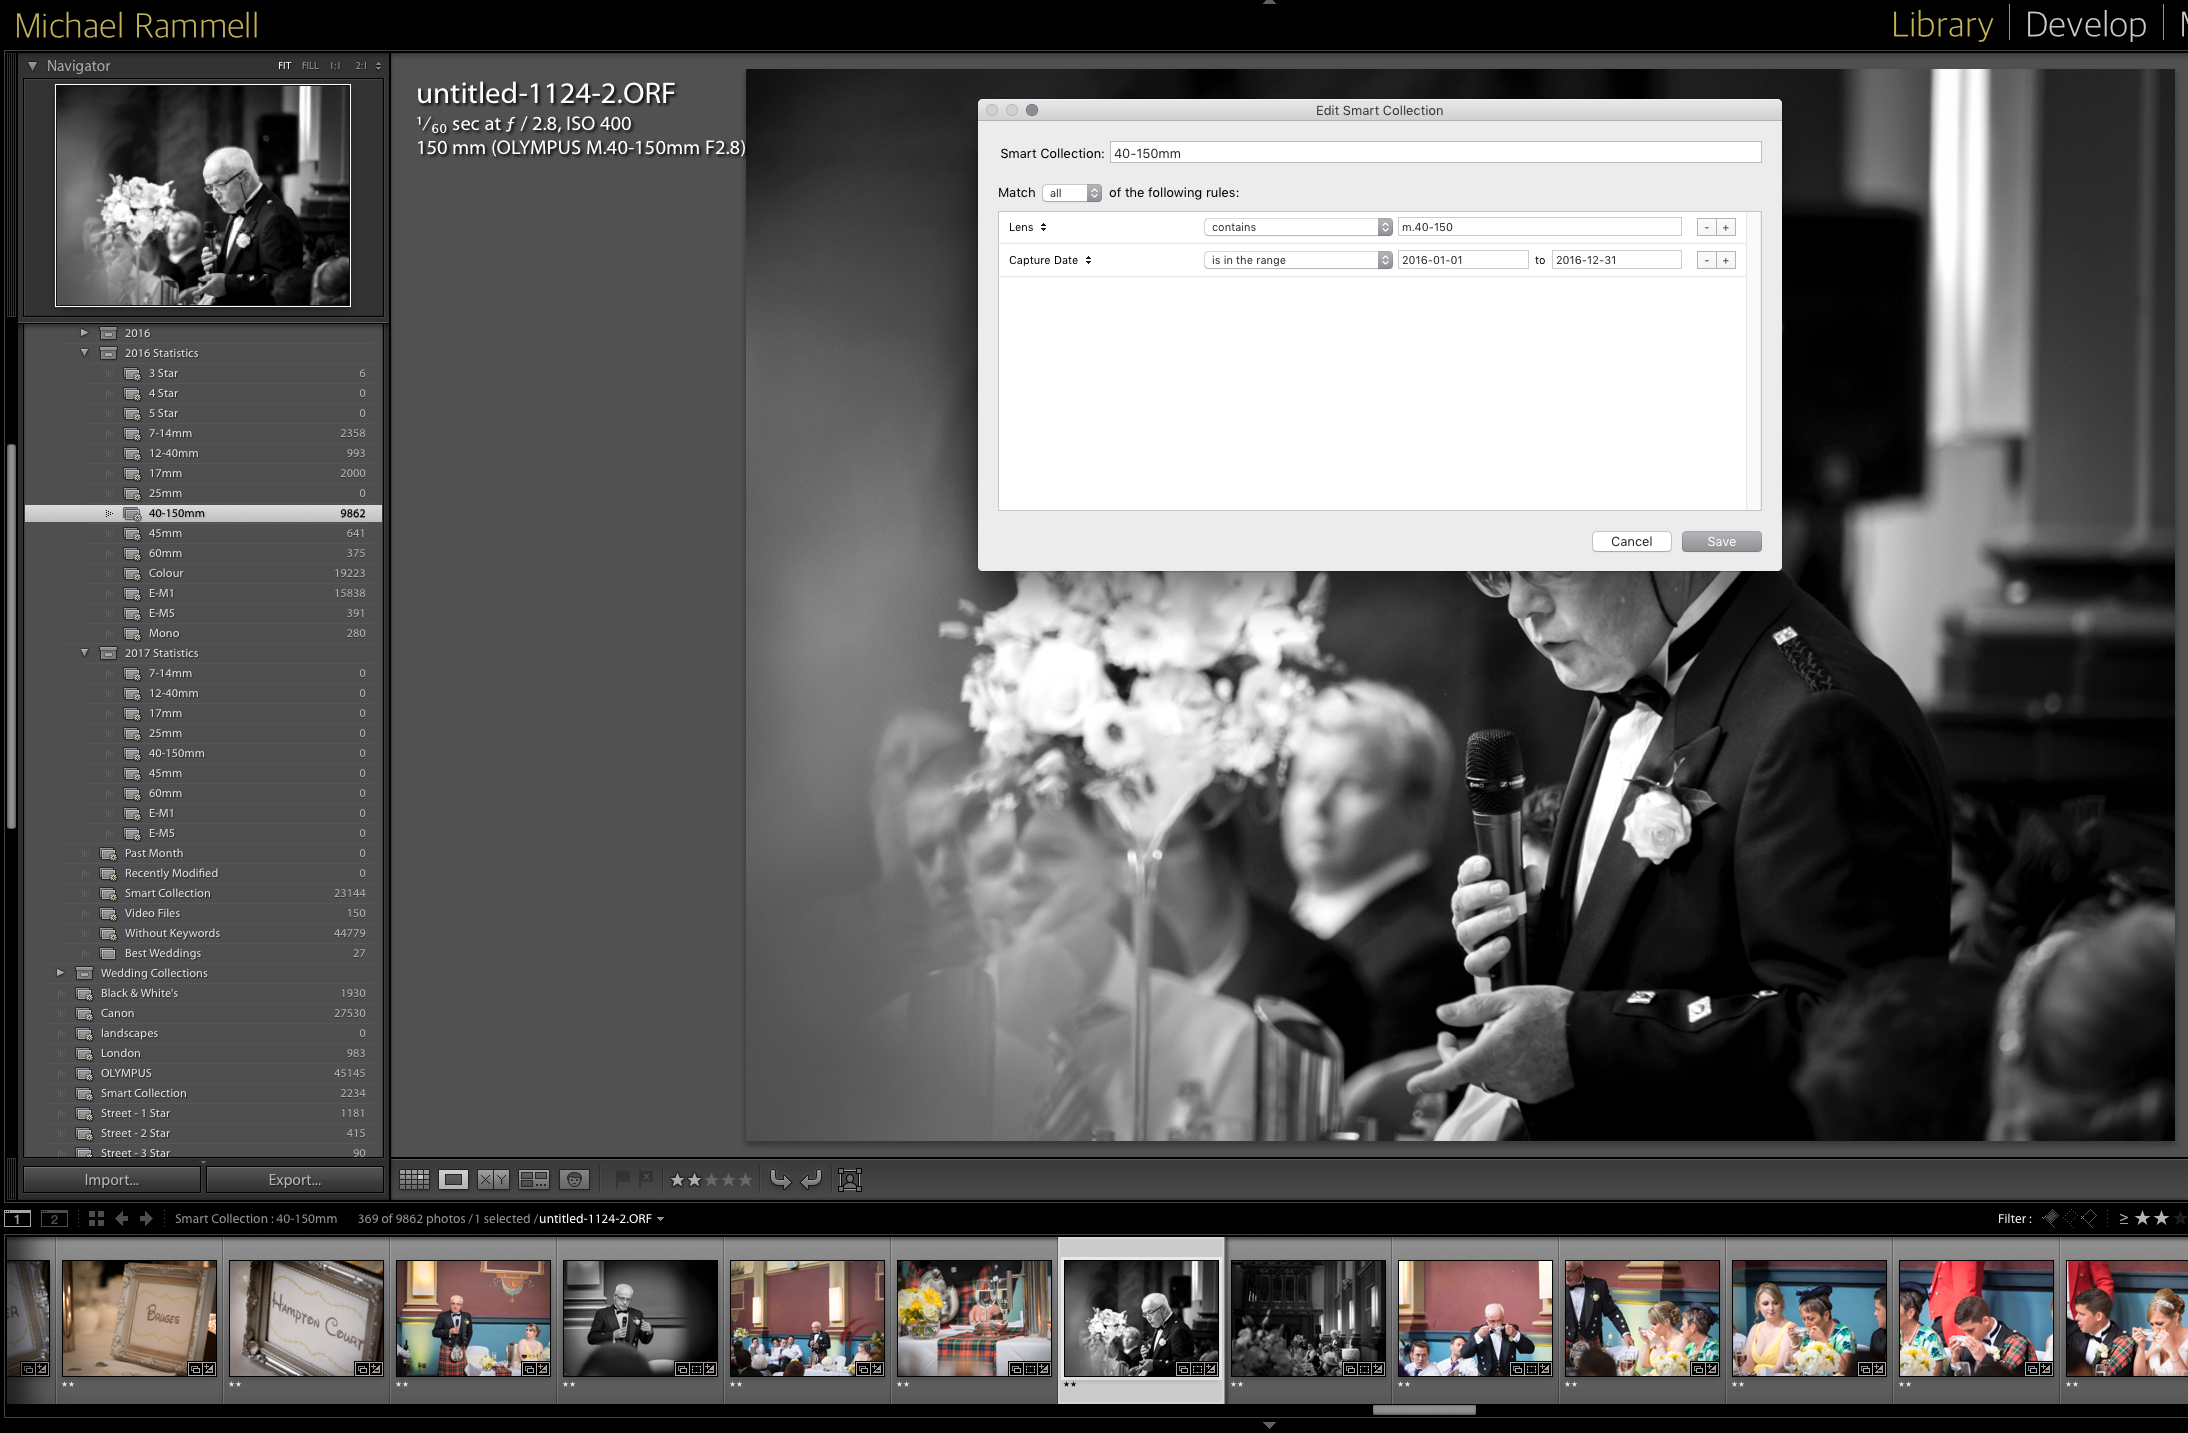
For example, I can set a smart collection to look through all of my images and pick out those that were shot with the 40-150mm f/2.8 PRO. I can repeat this for each lens and camera I own. This tells me just how I used each lens by simply showing me the number of images for each smart collection.
Whilst this isn't a hard thing to configure, it can be time consuming. So, I've saved all of my settings into files for you to download and import into your own instance of Lightroom.
This Smart Collection in Adobe Lightroom shows me how many images I shot with the 40-150mm f/2.8 PRO lens from Olympus during 2016
Given that the smart collections I have used look at images made between specific dates, I've gone ahead and made Smart Collections for both 2016 and 2017. Feel free to download them using the links below.
Various Adobe LIghtroom Smart Collection Settings Files available for download
For details on how to import the smart collections into lightroom, just watch the video below. In this I also go into a little detail as to how it is I made these smart collections (if you so wish to make your own for lenses I have not included). Alternatively, skip down past the video for the bulleted version of the instructions if you can't watch video where you are right now.
> Download Olympus 2016 Smart Collection Files here
> Download Olympus 2017 Smart Collection Files here
Importing Smart Collection Settings into Adobe Lightroom (Video)
Importing Smart Collection Settings Into Adobe Lightroom
- Download the Smart Collection Settings Files from this post
- Save somewhere on your computer
- Open Adobe Lightroom
- In the Library Module Expand 'Collections' in the left pane
- Create a new Collection Set
- Name the collection set '2016'
- Right Click on the 2016 Collection Set
- Choose 'Import Smart Collection Settings
- Browse to the files I have made available for you that you saved back in step 2.
- Choose the Smart Collection Settings you wish to use
- Ta Dah!
- (repeat for the Smart Collection Sets applicable to you)
I hope you find these Smart Collection settings useful. I would love to know what your most used lens and camera was for 2016! Please do share a link to your own 2016 Look Back post if you have made one, I'll be sure to stop by and leave a comment on your post!
If you found these Smart Collection Settings useful be sure to share this post and subscribe to the blog today. My own review of 2016 will be out in just a couple of days. Subscribing is the best way to be sure you see that post first!
Using brushes in Lightroom
Don't you just love Adobe Lightroom? It's neat and simple: no need to worry about layers and all that jazz (If that's not your kinda thing). It contains most of the tools you'll need to really polish a good photograph and improve it.
Adobe Lightroom, more than anything, is really designed to help you batch process images quickly and If you ask me it does it very well, but if you're just looking at a small selection of images it can still be tempting to sometimes whizz through them and rely 100% on the sliders. Again, if that's your style that's fine. But Adobe Lightroom is more than just sliders and batch-processing...
Brushes
Adobe Lightroom's brush tools are effective! Please don't forget about them. There are often occasions where you don't want to apply a change to the entire photograph through a slider: for example clarity, sharpness or even exposure. But, at the same time taking that photograph over to Photoshop can feel like a real chore, so this is where Lightroom's brush tool is your friend: selectively lighten the eyes, selectively brush some clarity onto a face or even just brush a little vignette to two of the corners, instead of all 4. The brush tool unlocks a whole set of other possibilities for post processing to compliment the use of sliders.
In this video I talk about how I use brushes to further enhance a photograph that you wouldn't otherwise be able to do with sliders alone. I show you how to go from this, to this:
Please note that I know that brushes may not be to everyone's liking and the brush work demonstrated in this video is rough and fast, but for those who don't have Photoshop or prefer to stay within Lightroom - this may be just the thing you need to take your editing to the next level.
Enjoy!


